Live Events
Overview
In this section, administrators are able to manage, monitor, and control live streaming activities on a channel. They can schedule and configure live streams, to ensure a seamless and engaging experience for both administrators and users.
Add Live
To create a new live event:
- In the channel strip on the left of the screen, select your channel.
- In the navigation panel, click Go Live > Live Events. The Live Events page opens.
- In the upper-right corner, click the Add Live button. The Add Live Event screen opens.
- Enter the live event details.
- Click Create in the upper-right corner. The new live event will appear on the Live Events page.
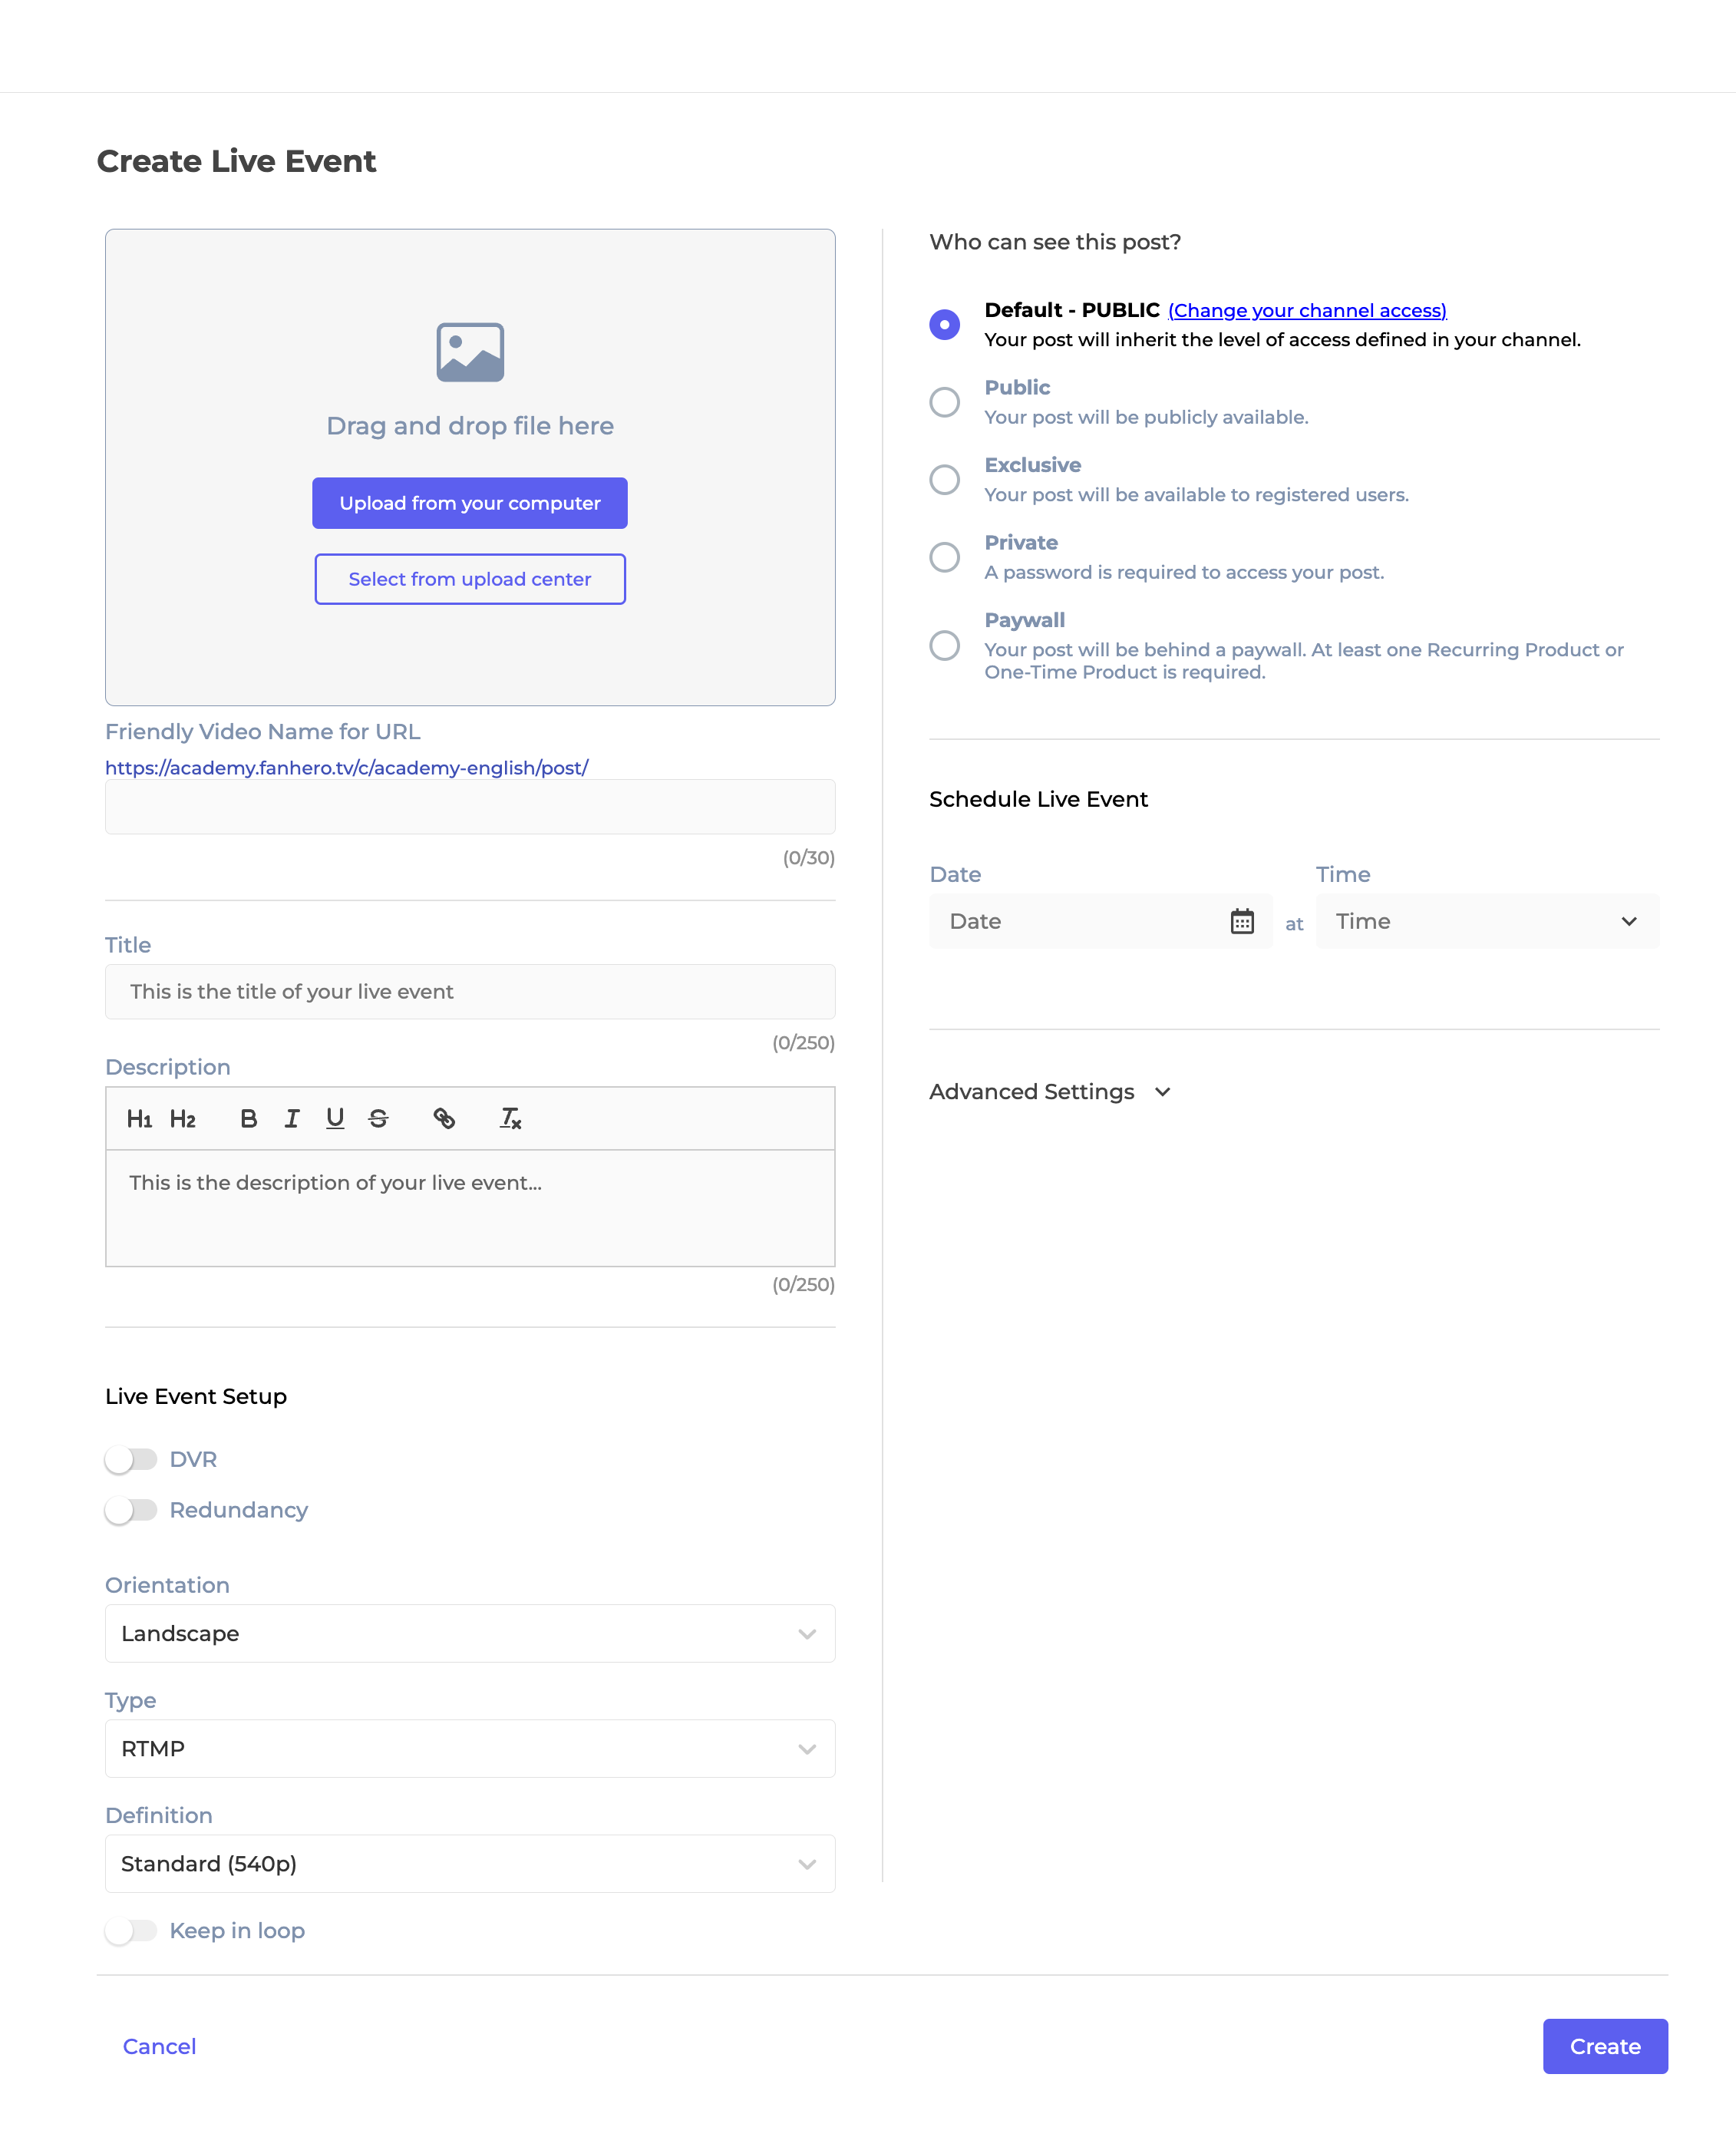
The Add Live Event Screen
Add Live Event screen elements
| Item | Description |
|---|---|
| Thumbnail | The thumbnail of a live event. A good thumbnail stands out and draws viewers’ attention. It is a required field and it can be uploaded from the computer or from the Upload Center. Supported format: png, jpg, jpeg, svg, webp. |
| Slug | Friendly name for URL (a component of a URL that follows the domain name and is used to uniquely identify a specific page). It is a text field that is derived from the post title by default but it can be edited. It is a required field and must be unique for that entity (live event) and channel. It does not accept special characters, only letters (lower case), numbers and dashes. |
| Title | The title of the live event. It is a required field: 1-250 characters. |
| Description | The description of the live event. It is a required field: max 500 characters. Some HTML tags are available, such as: heading tags (H1 and H2), bold, italic, underline, strikethrough and links. |
| Settings | - DVR: if enabled, this feature enables users to go back in time, keeping them engaged more time. The live event must be created at least 2 hours before the go live time.
|
| Orientation | - Landscape
|
| Type | - RTMP: the source attempts to deliver to an endpoint that is specified on Portal. There must be a handshake between the source and the FanHero Live Server so that the source has information about the status of the input.
|
| Definition | - Standard (default): 540p
|
| Keep in loop | This feature is only available for mp4. It is disabled by default. If enabled, a continuous repetition of the stream will happen until the stop button is clicked. |
| Share and Monetization | The level of access of a live event. It is a required field.
|
| Schedule | Ability to schedule a live event. Date and time. It is a required field. If DVR is enabled, then at least 2 hours from now is required to create a live stream. Otherwise, the minimum is 5 minutes. |
| Enable Chat | If enabled, users will be able to send and see messages during the live event. |
| Enable Reaction | If enabled, users will be able to send and see reactions sent during the live event. |
| Enable Presence | If enabled, users will be able to see the number of viewers during the live event. |
| Location | Similar to the Channel location, a video post can have specific geographical boundaries or restrictions. Include - a list of countries that will have access to the video post. Exclude - a list of countries that will not have access to the video post. It is an optional field. |
| Create | Create button. If all validation criteria is met, the new live event is created. |
| Cancel | Cancel button. Clicking on it will take you back to the Live Events screen. The live event will not be created. |
Live event types
RTMP : The source attempts to deliver to an endpoint that is specified on the Portal. There must be a handshake between the source and the FanHero Live Server so that the source has information about the status of the input.
- You need to set up the source content on the upstream system (using OBS Studio, for example).
- On the Live Events page, go to the Scheduled tab and click on the pencil icon next to the live event you created. You will have access to the Primary URL and Primary Key.
- In the upstream system, add the primary URL and key.
- Start streaming in the upstream system.
- In the Video Portal, when the live stream is ready, it will be displayed under the Live tab with status 'Ready'. Click on the pencil icon next to the live event and go to the Preview tab.
MP4 : Choose this type when you want to use an mp4 link.
- When you choose MP4, two new fields are displayed - Stream URL and Keep in Loop.
- If Keep in Loop toggle is enabled, it means the source content will be played in loop until you end the stream.
- If Keep in Loop toggle is disabled, it means the source content will have a beginning and an end. In this case, you can choose an Intro URL (a video that will be played before the actual live stream video).
The Intro URL is not a required field. If you don't add an intro URL, then one set as standard in our server will be played.
- Add your stream URL.
- Complete all the required fields and create the live event.
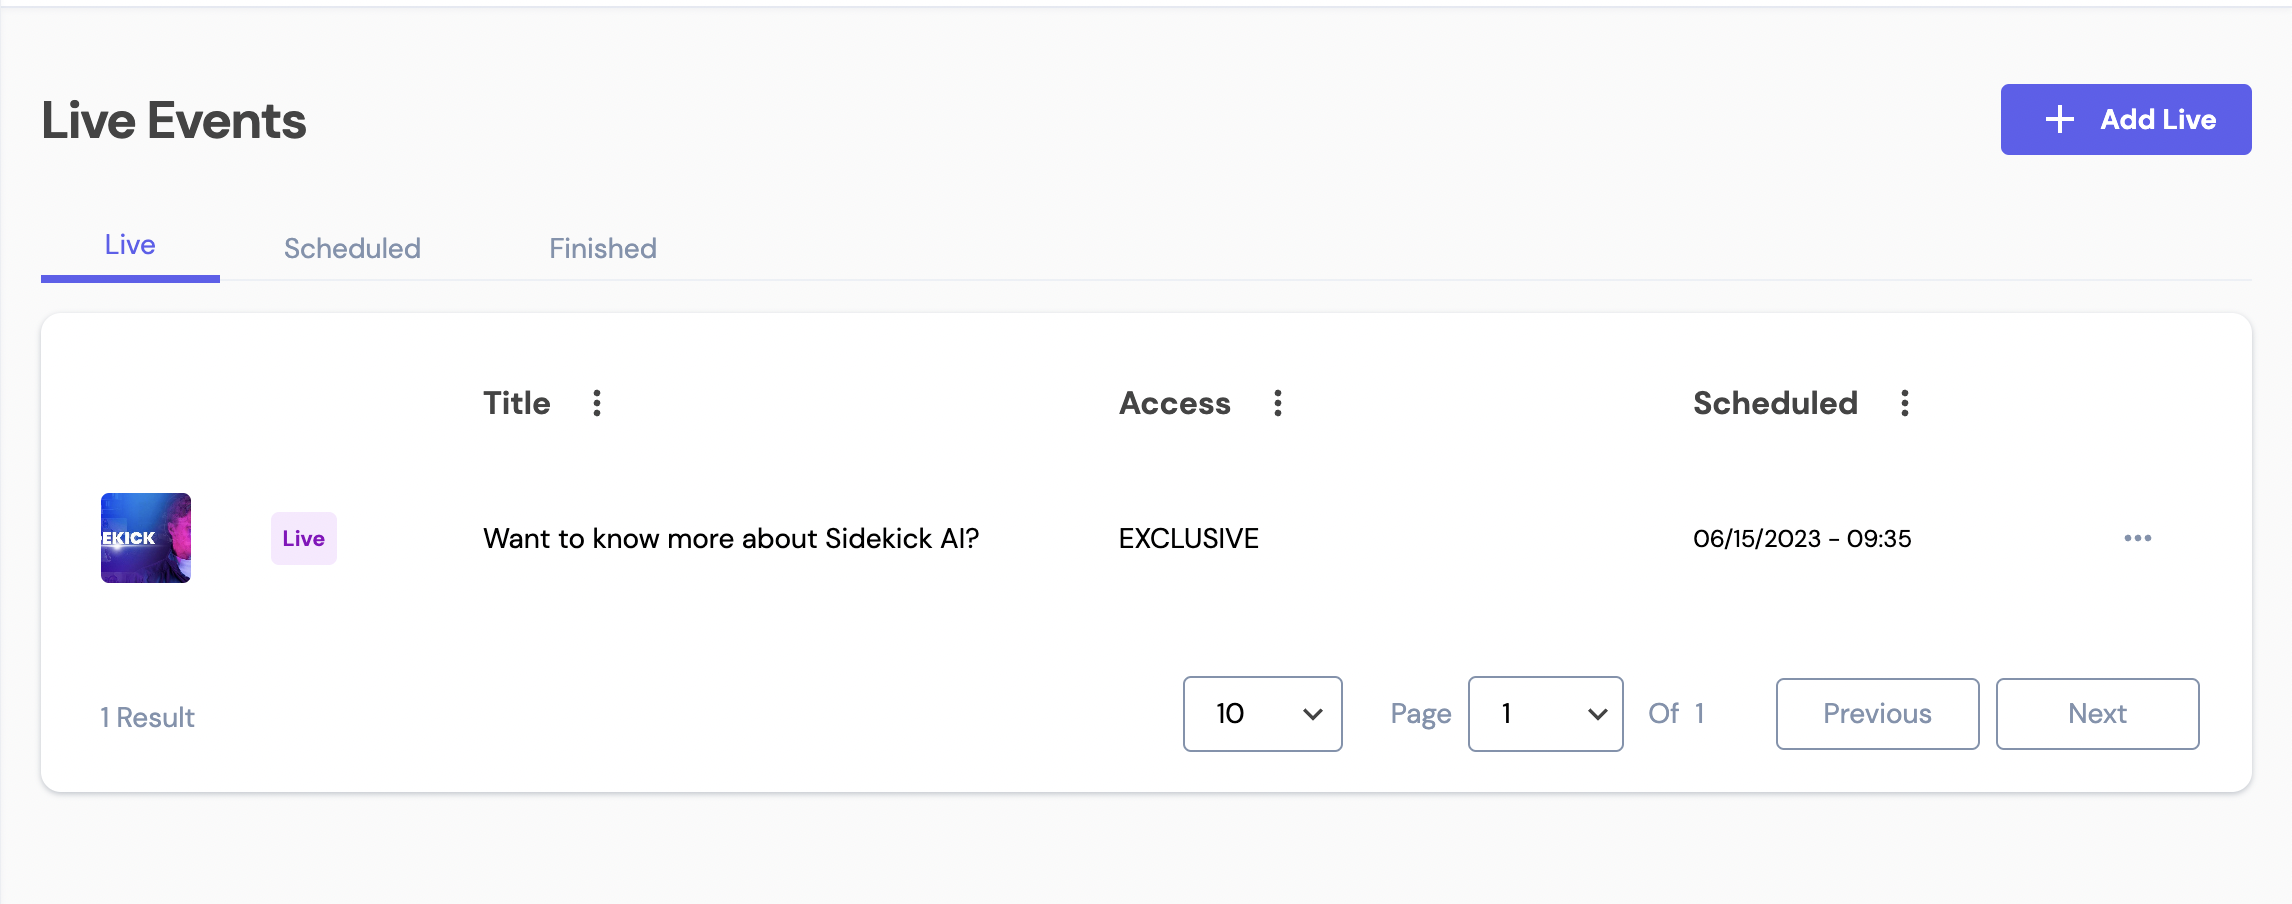
Live Tab
This table displays a list of live events that have status Live or Ready:
- Live status - the live event is happening right now.
- Ready status - the live event is ready to go live.
Administrators have the ability to sort the list by live event name, type of access or scheduled date. Clicking on the three dots icon on the right will display the available actions that can be taken on a specific live stream.
Ready status
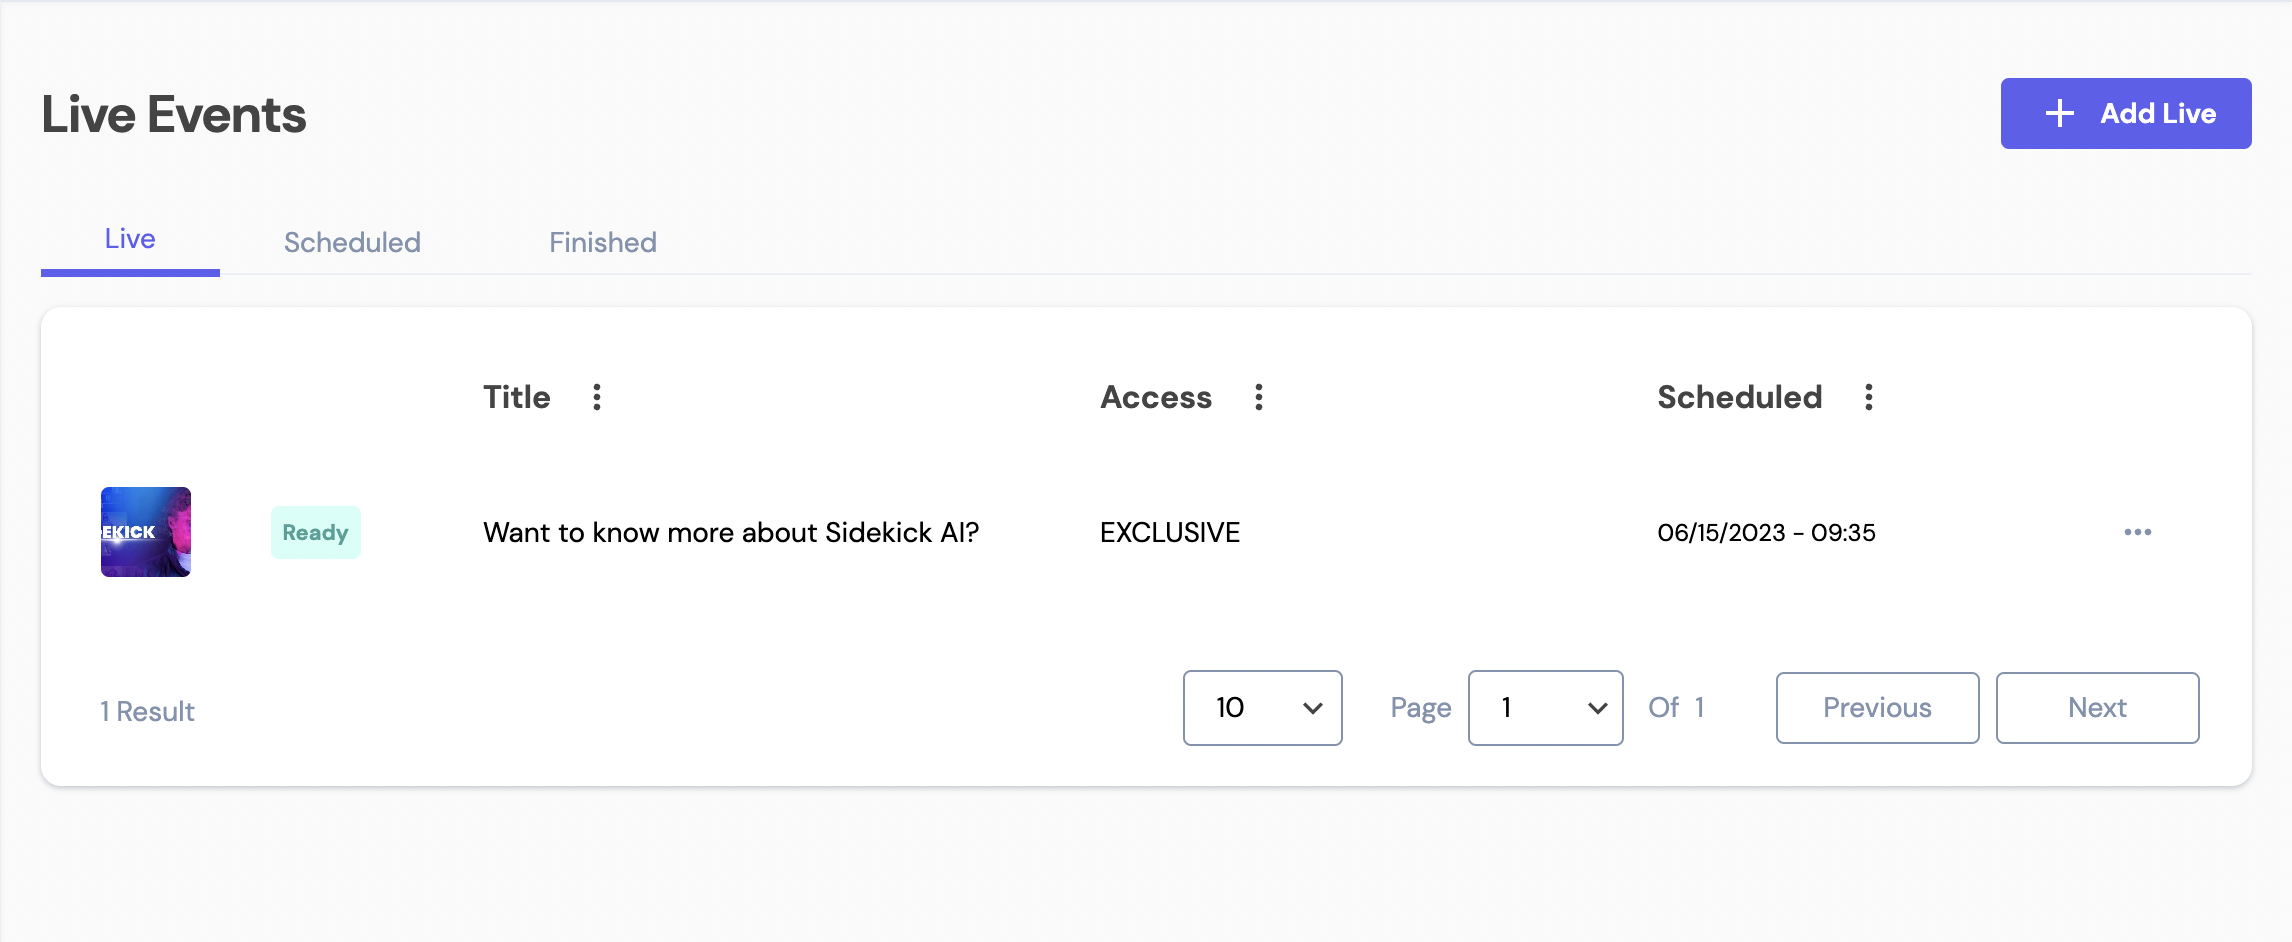
Actions:
- Edit:
- enable or disable chat;
- enable or disable reactions;
- enable or disable presence;
- go live;
- Delete
Go Live
Details
At this point, no changes can be made to the live event in the Details tab.
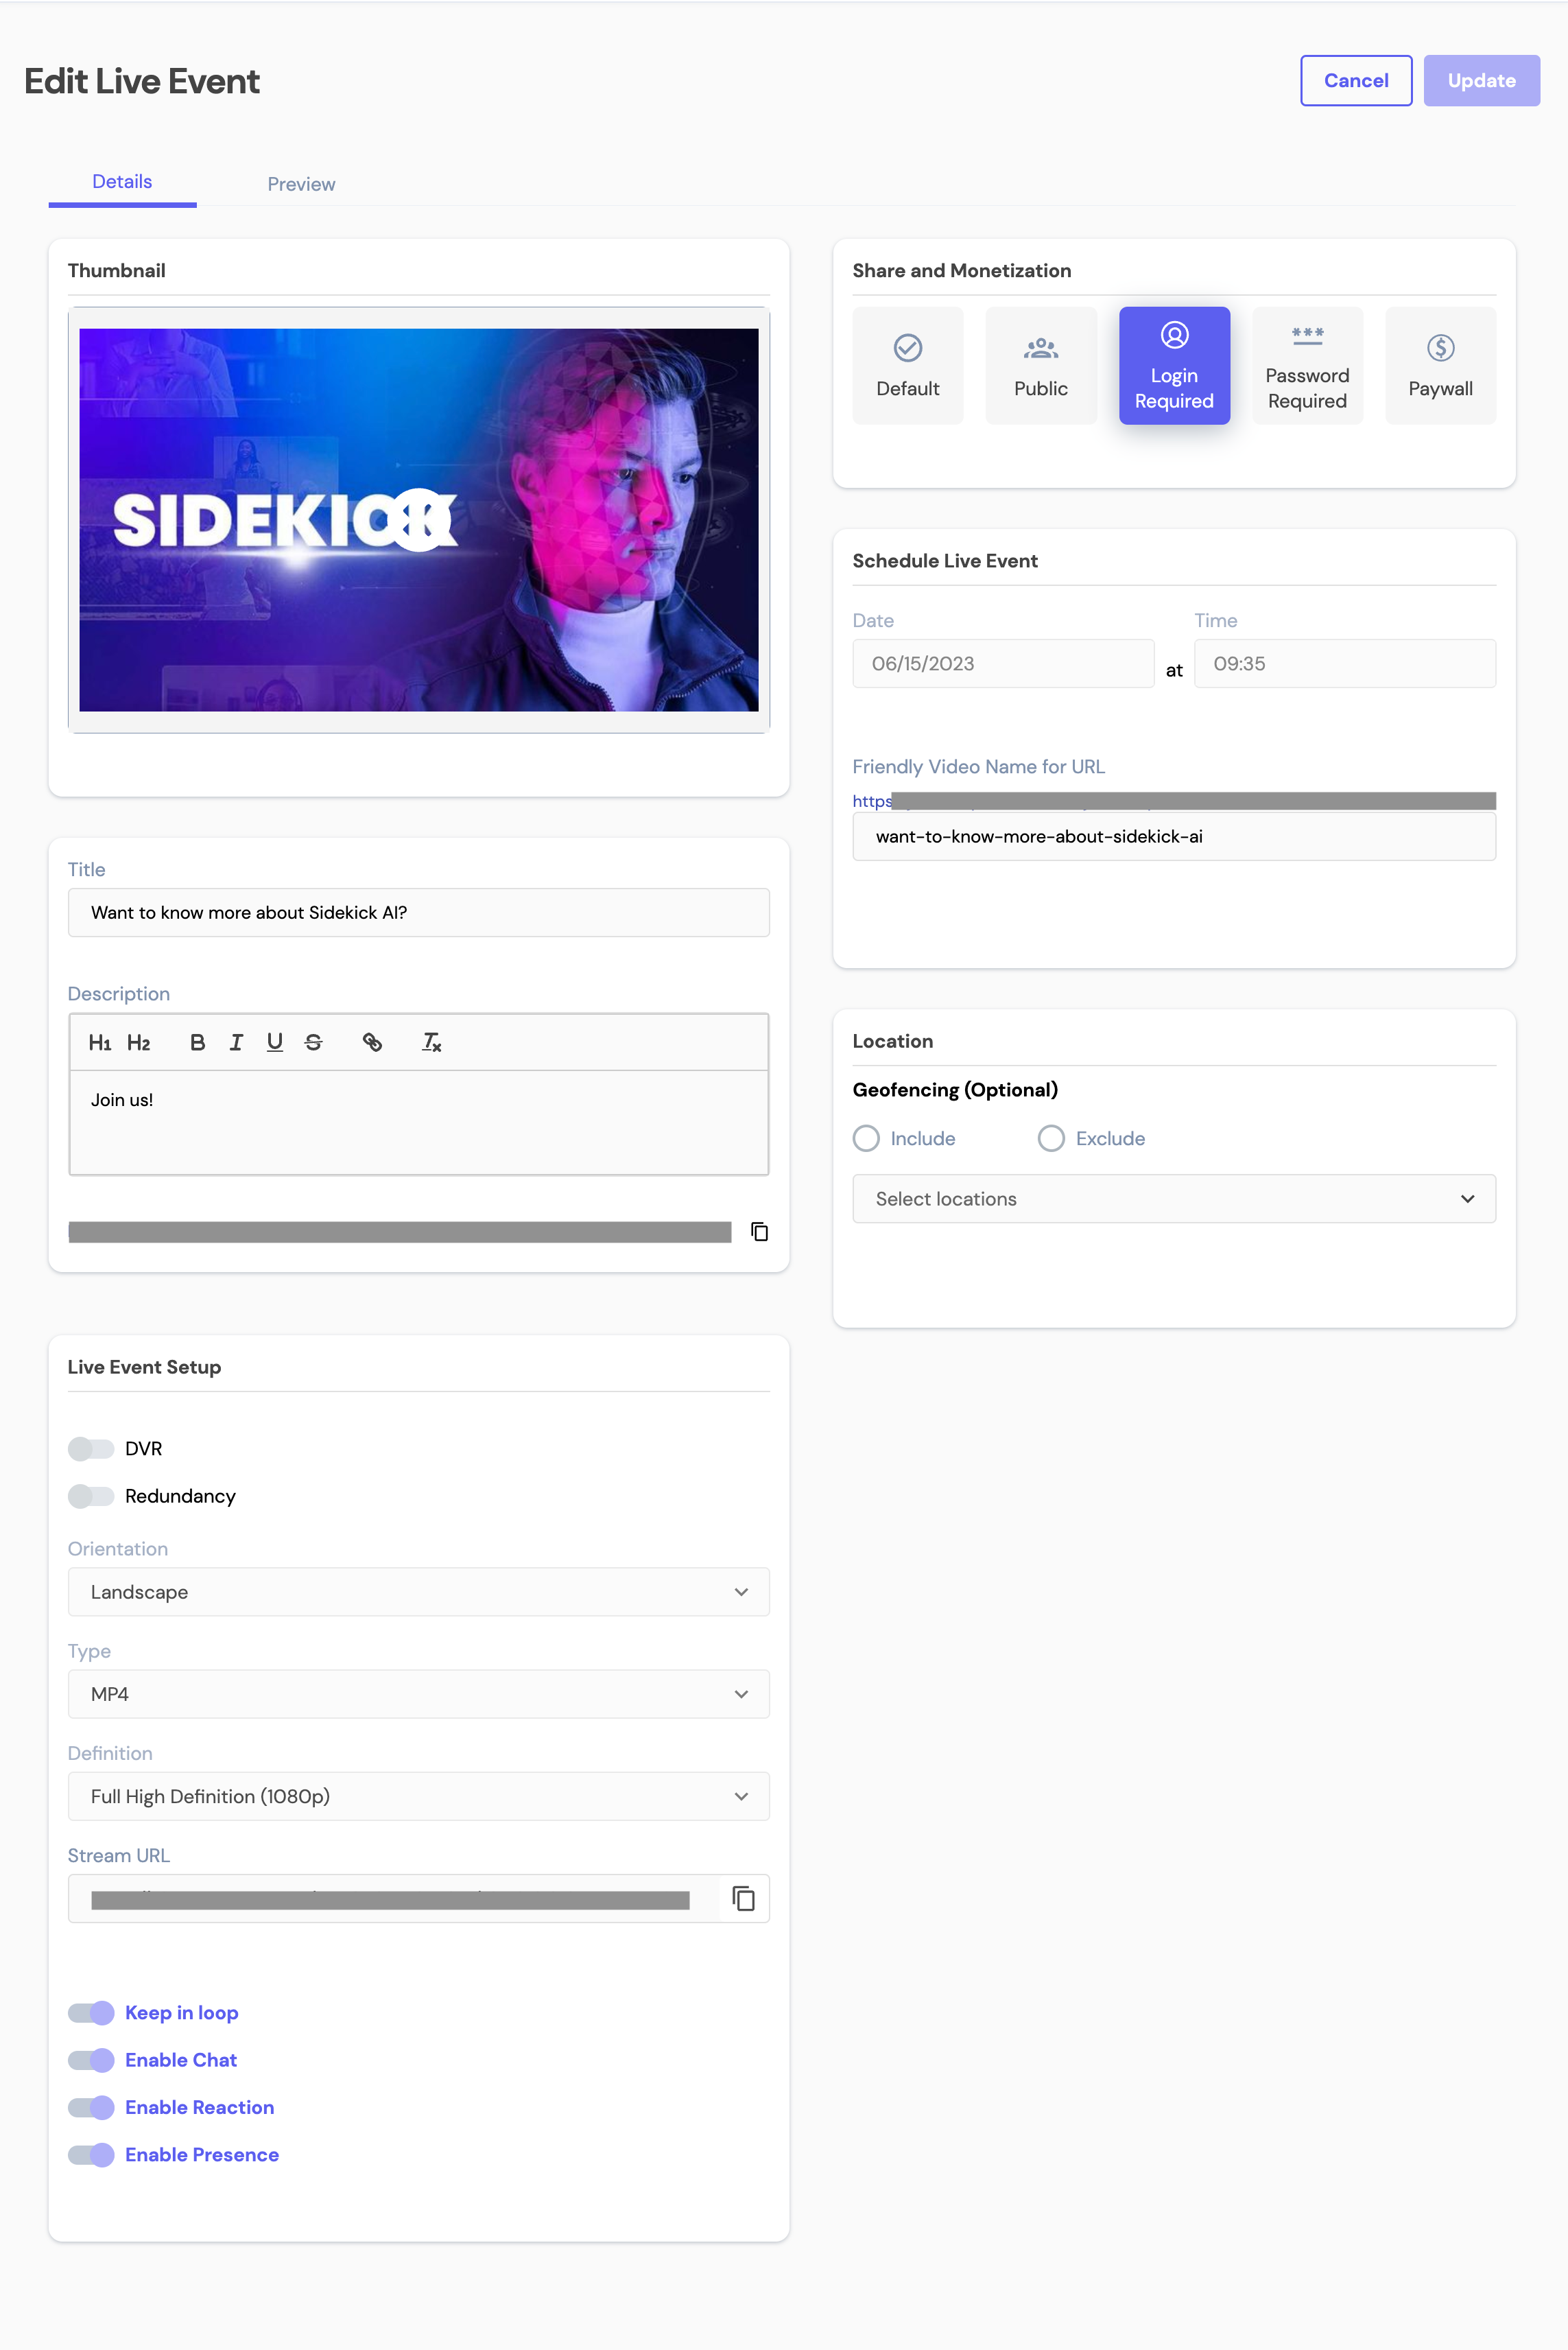
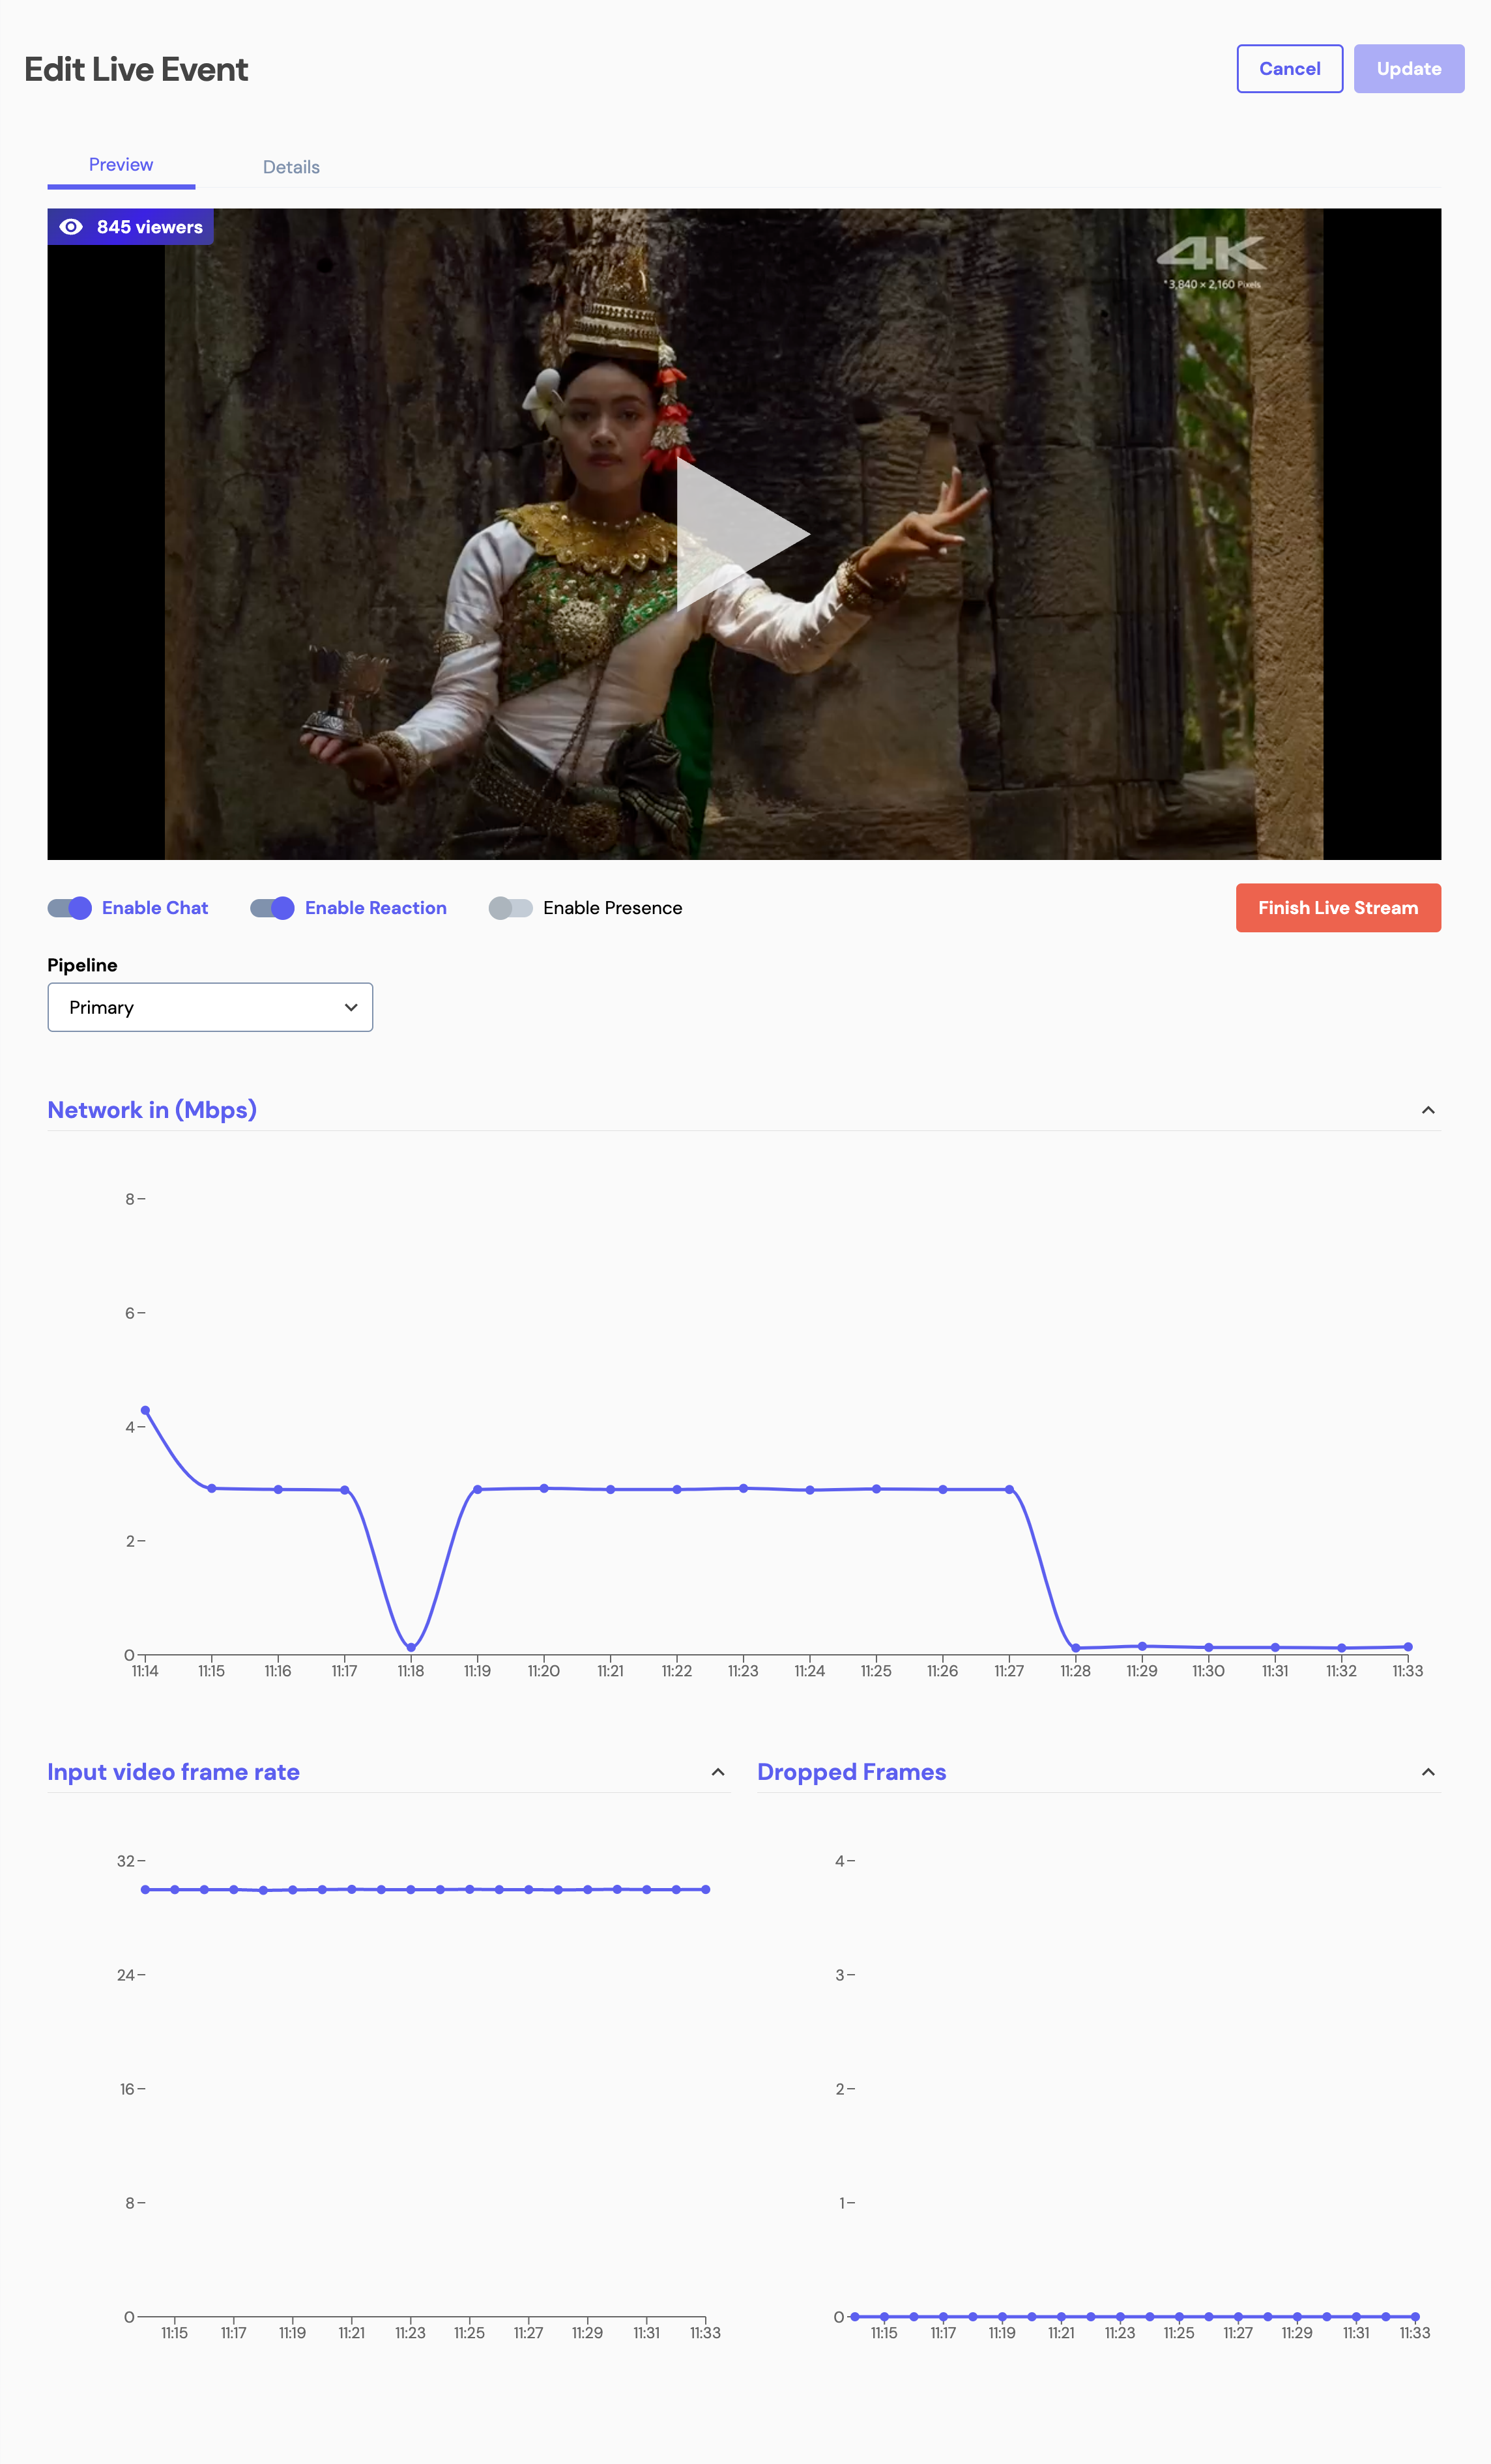
Preview
In this section, administrators can monitor important live stream metrics, such as network, input video frame rate, and dropped frames, for both pipelines (if applicable).
From the preview player section, you can watch a live feed of the upcoming event, ensuring the visual and audio quality of the live event.
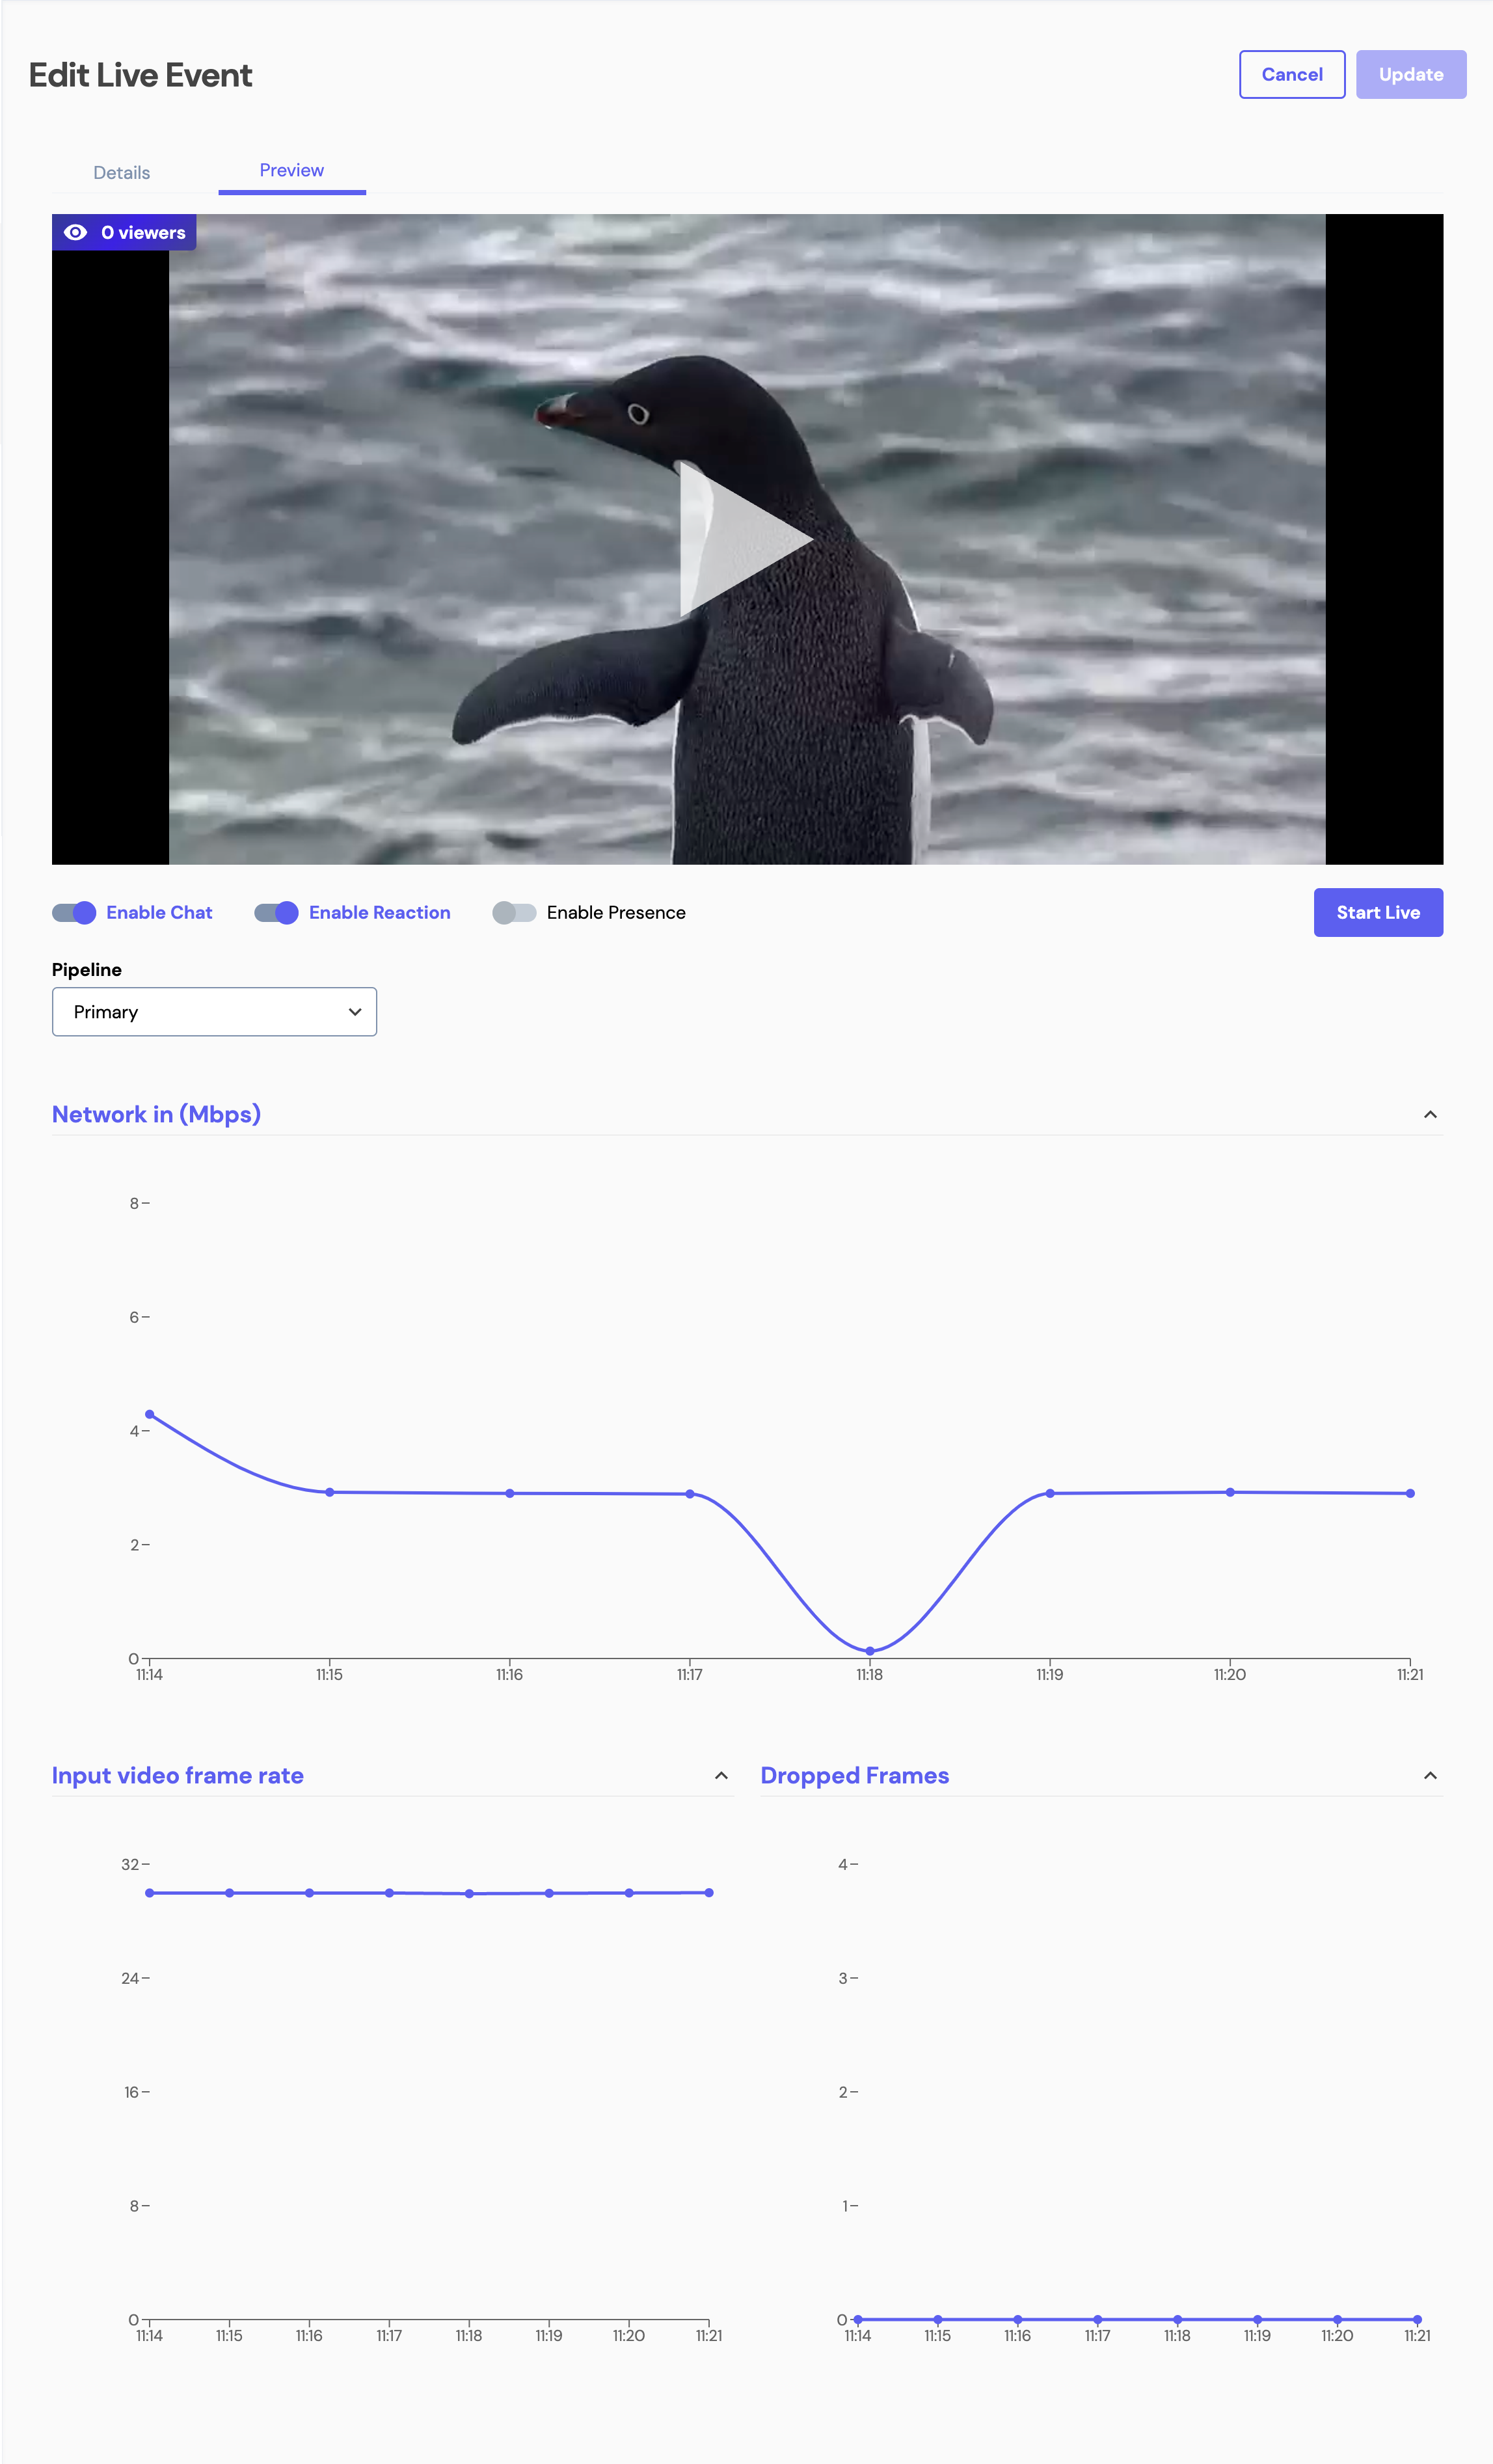
To start a live event (to go live), click the Start Live button. A pop up will be displayed asking you to confirm you want to "Go live".
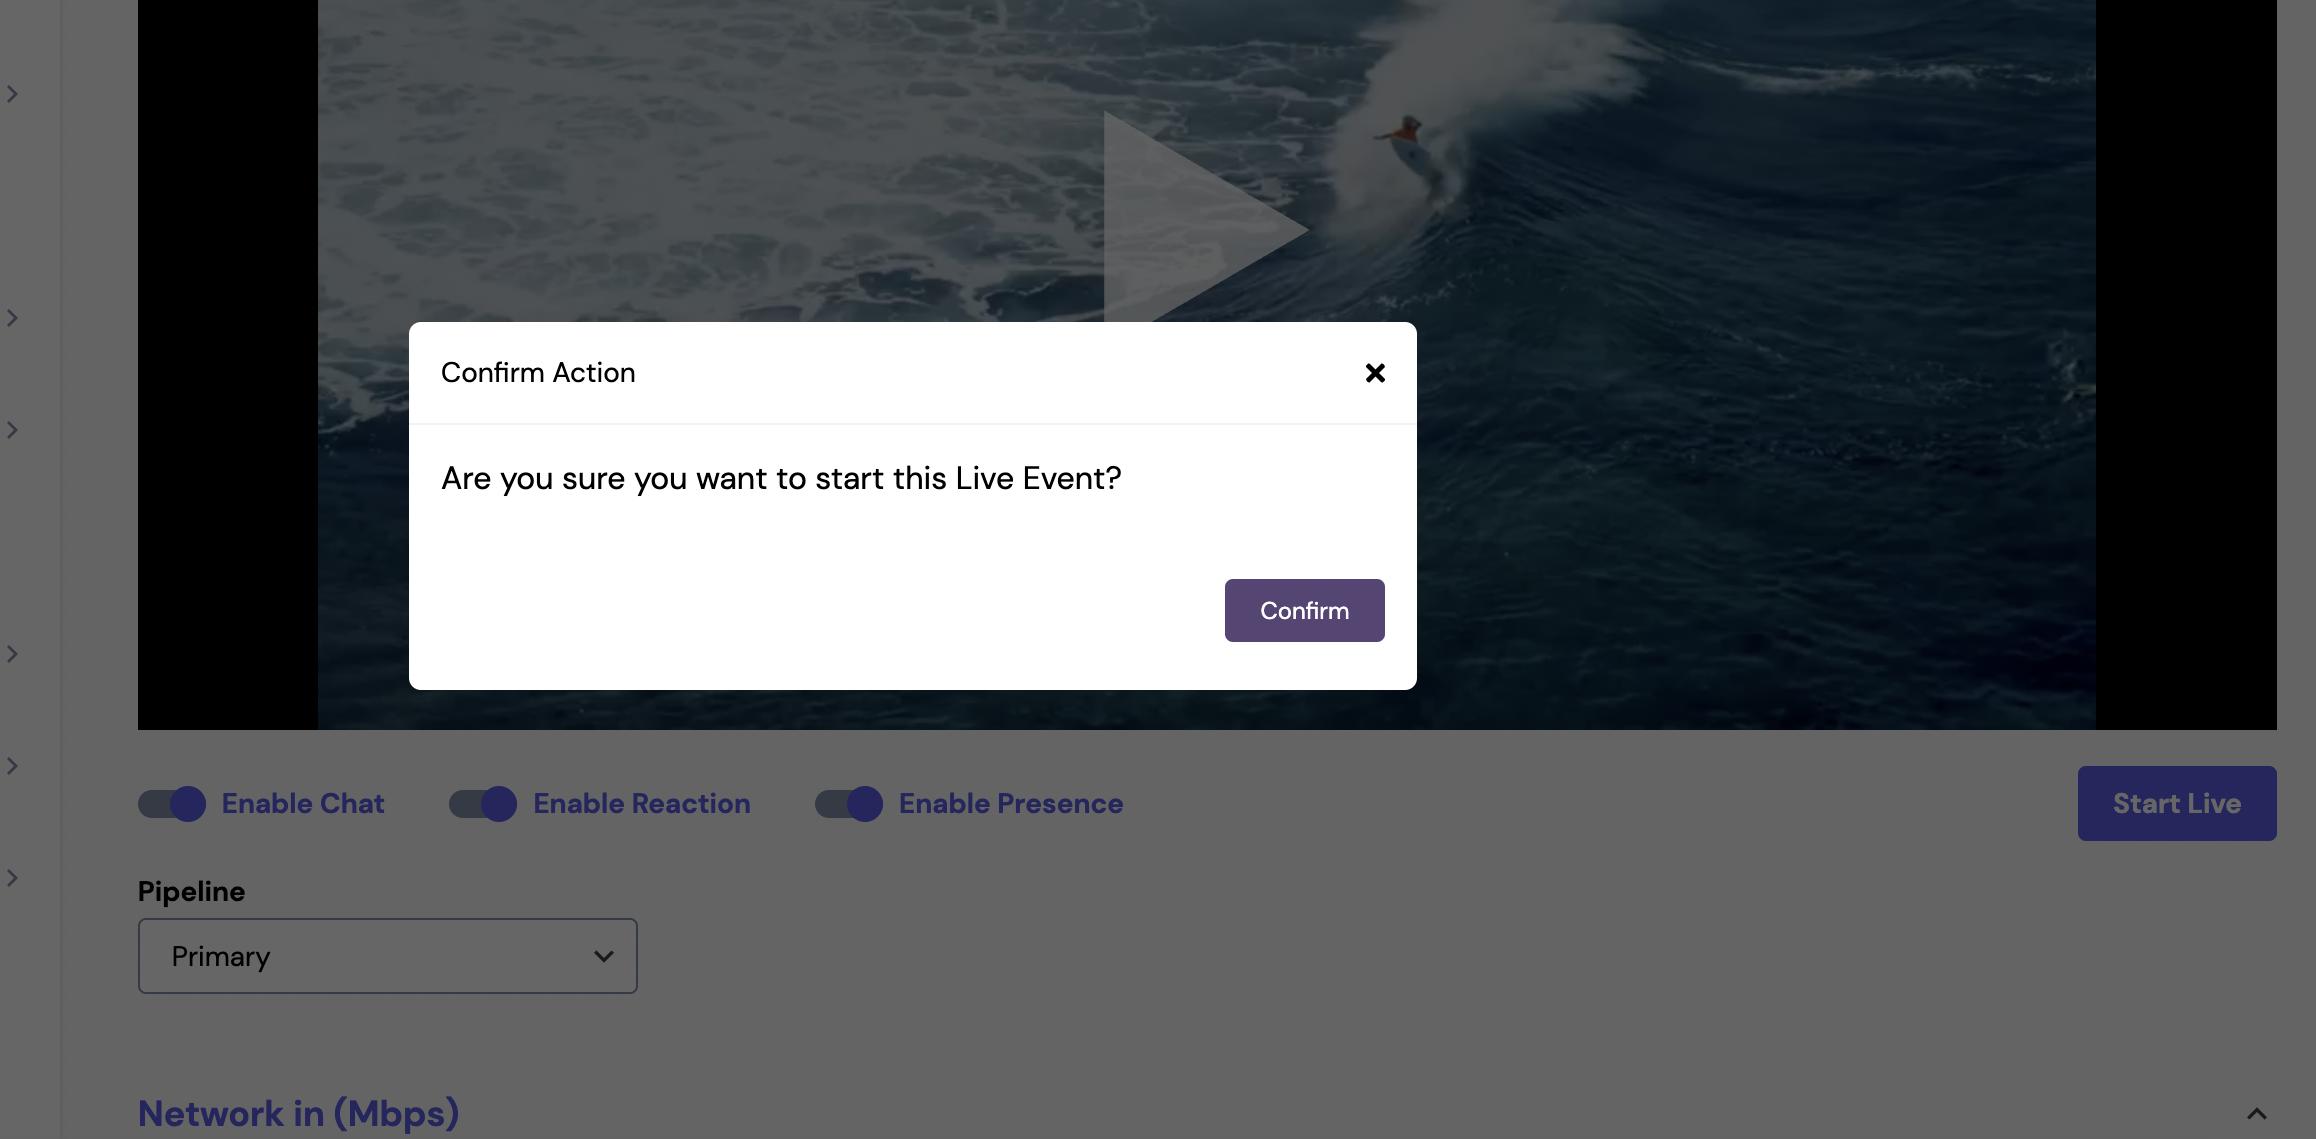
Clicking on Confirm will start the live event, making it available to all users. A push notification will be sent to users who have allowed push notification.
A visual confirmation will be displayed in the admin portal.

While a live event is live, an administrator can continue monitoring all the metrics. Chat, reactions and presence are features that can be enabled or disabled at any time, even during the live event. Simply click on the toggle you wish to enable or disable and click the button Save Changes. The changes will be immediately pushed to the users.
To end a live event, click the Finish Live Stream button. A pop up will be displayed asking you to confirm the action.
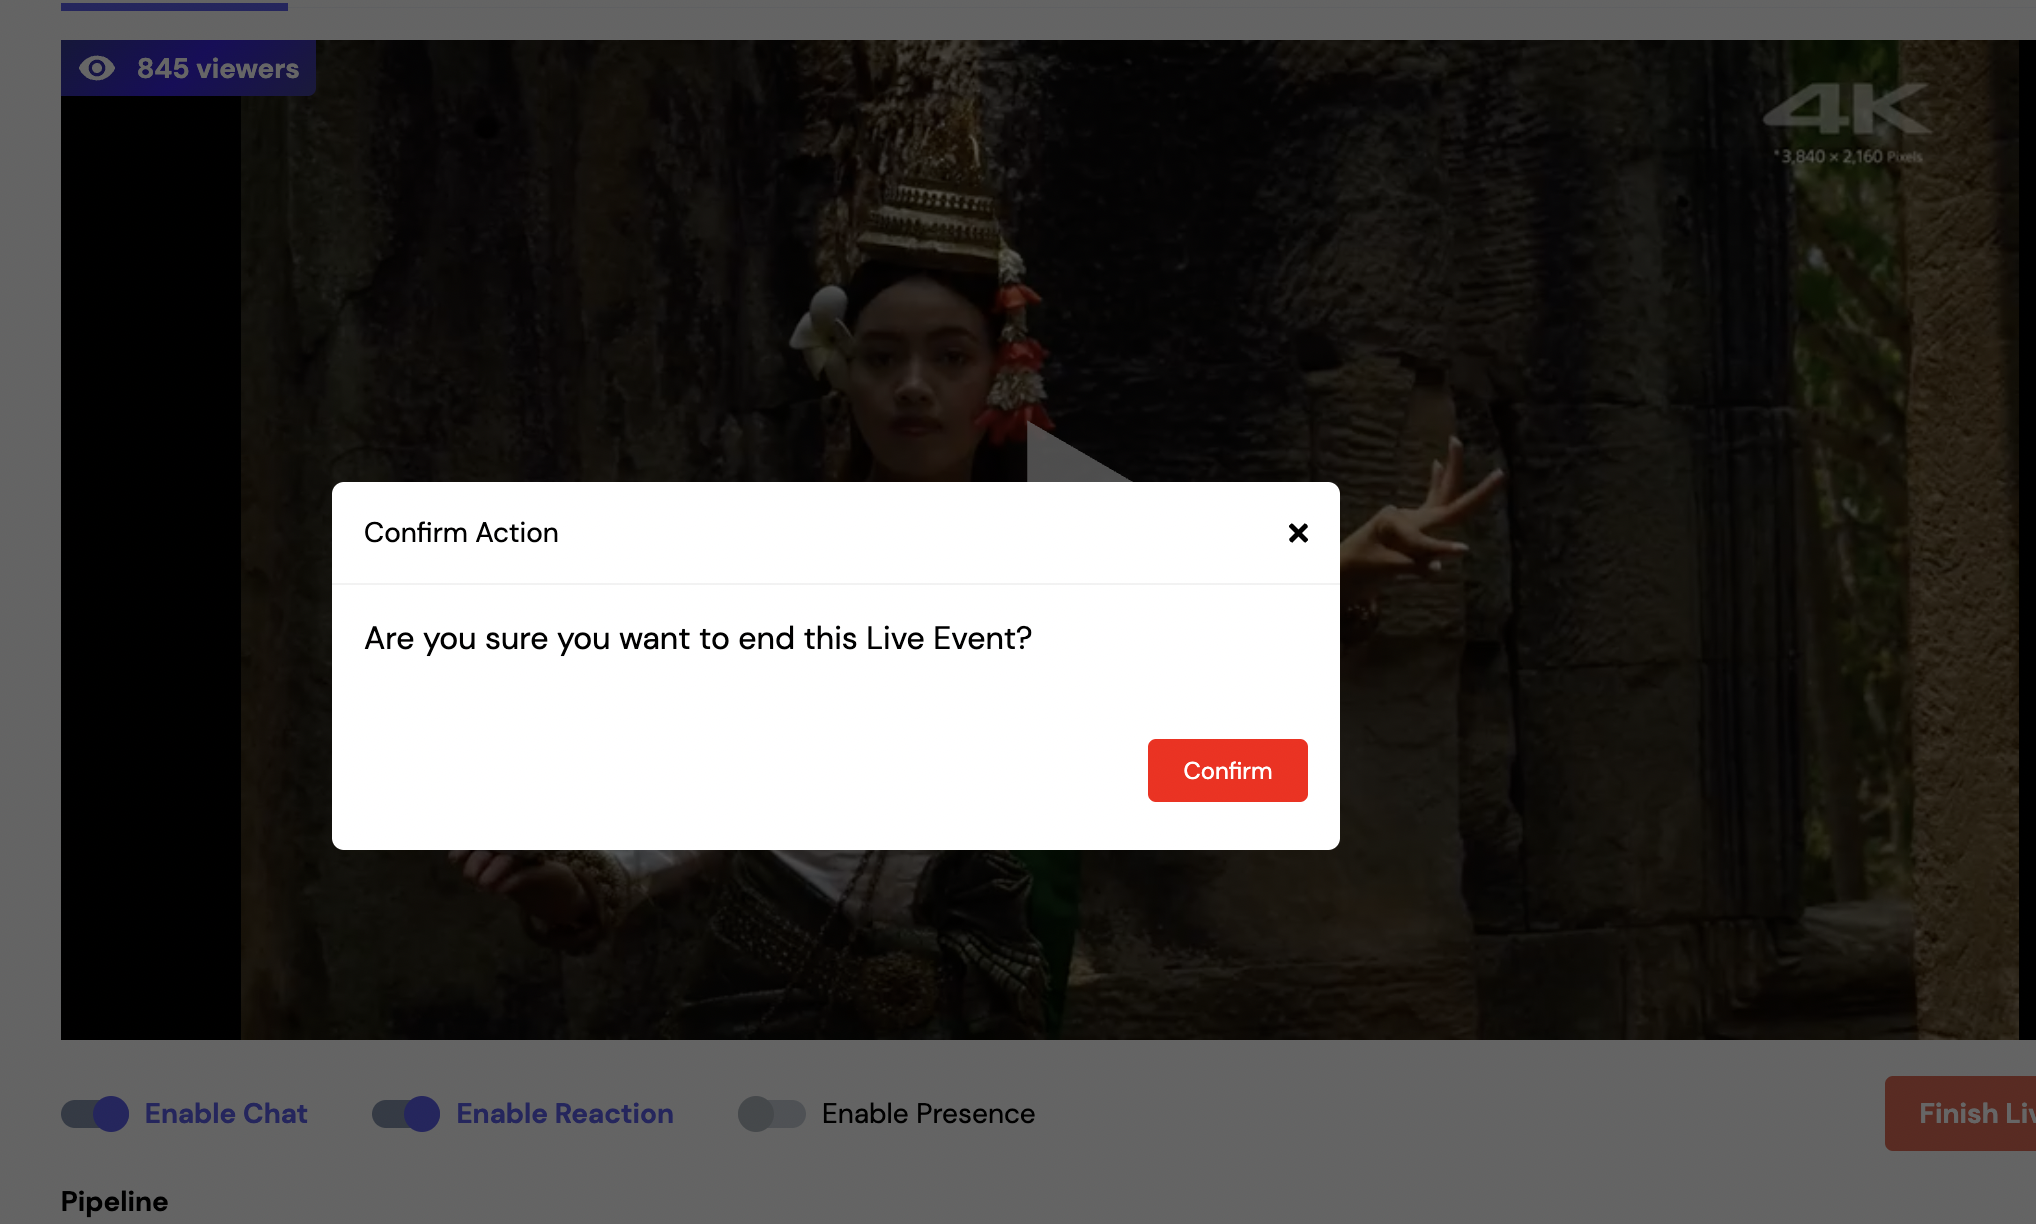
Clicking on Confirm will end the stream to users. The status of the live event will change to Finished.
Live status
In this section, administrators can easily see what live events are live (happening right now) and take any necessary actions, such as watch the live event, see the number of viewers in real time, enable/disable chat, reactions and/or presence, or end a live event.
Scheduled Tab
This table displays a list of upcoming live events (status Scheduled). Administrators have the ability to sort the list by live event name, type of access or scheduled date.
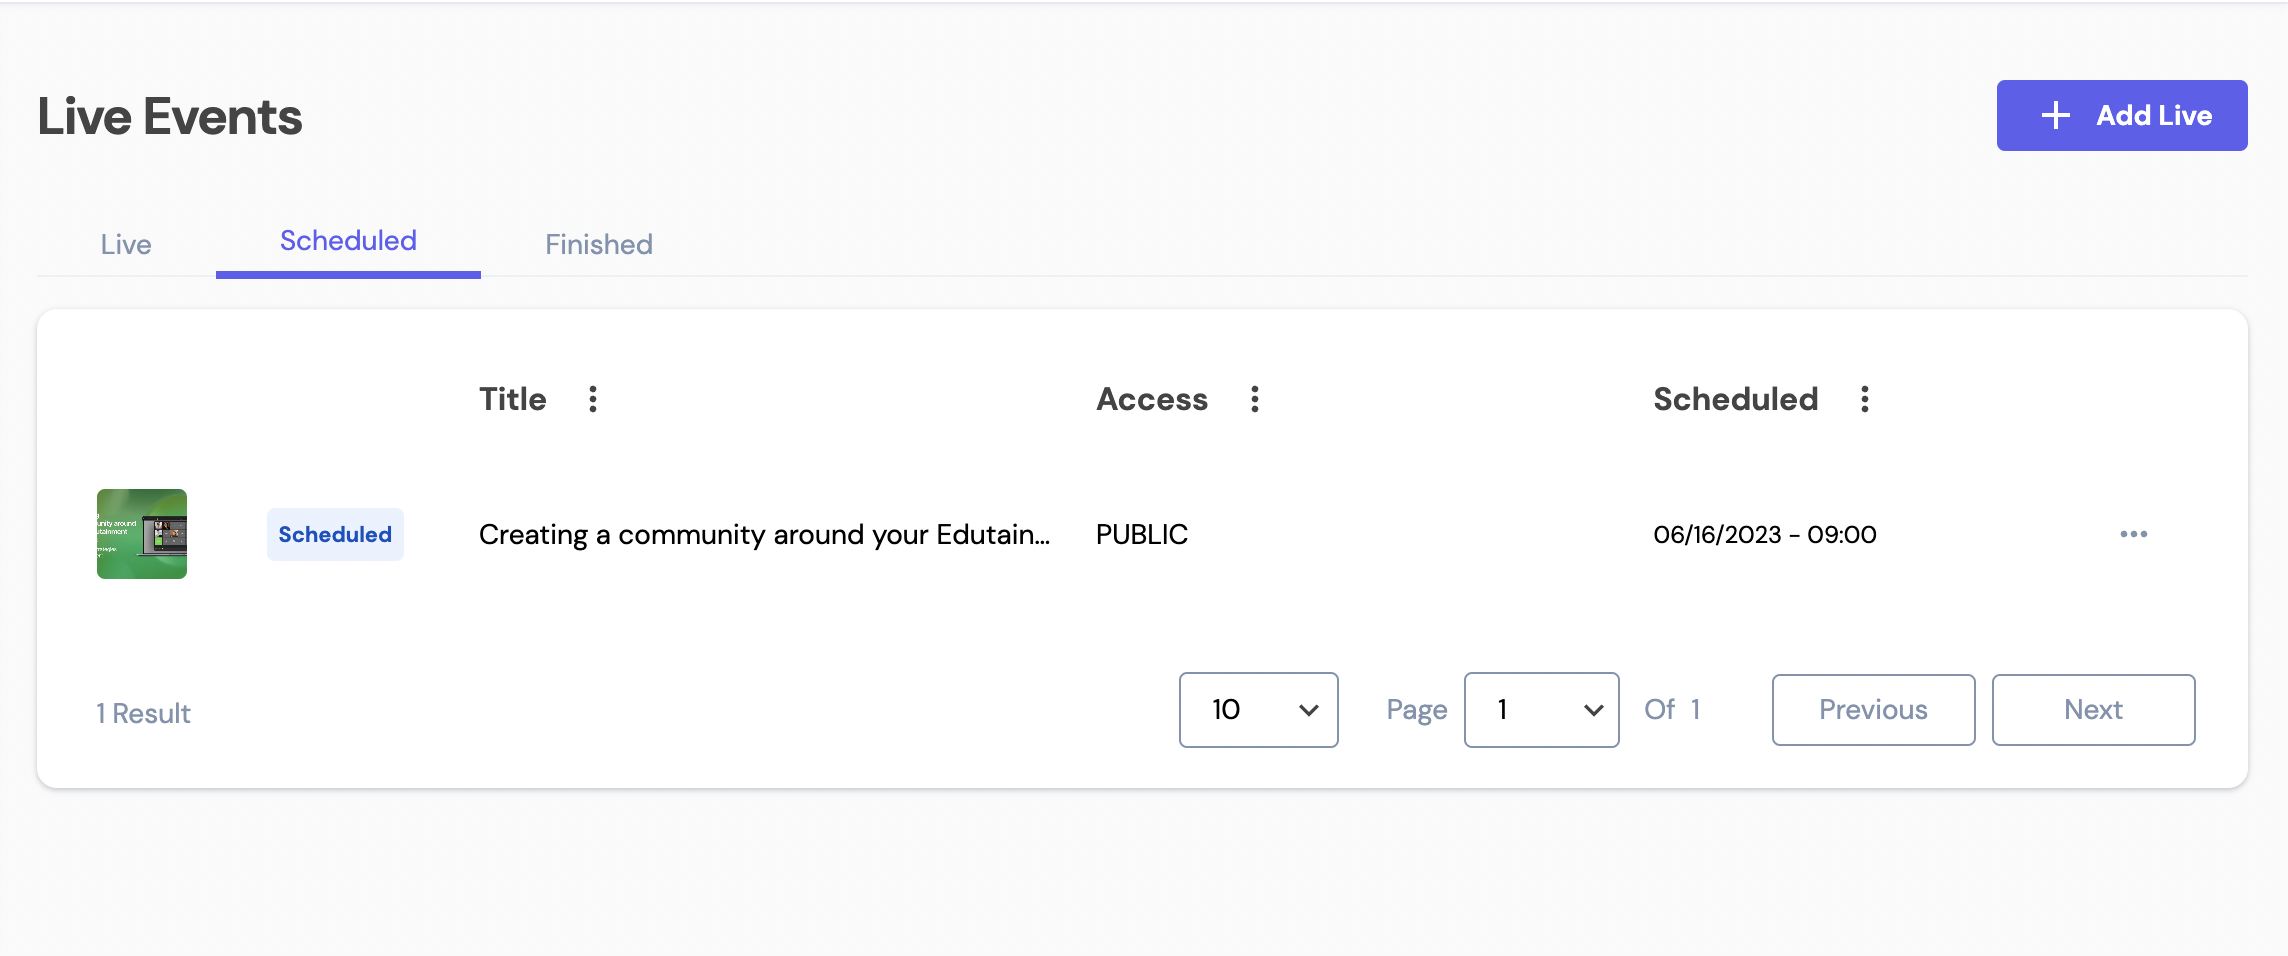
The Scheduled tab
Clicking on the 3 dots will display the available actions:
- Edit: to edit a scheduled live event, click on the Edit (pencil) icon.
- If more than 4 hours until the live event scheduled time: all fields can be edited except the live event settings (DVR, redundancy), orientation, type, definition, keep in loop toggle and stream URL (if type mp4).
- If less than 4 hours until the live event scheduled time: enable/disable chat, reactions and presence are the only fields that can be edited.
- Delete: to delete a scheduled live event, click on the Delete (trash) icon next to the live event you want to delete. This action requires a confirmation: clicking on the X button will dismiss the pop up and it will not be deleted. Clicking on Confirm will dismiss the pop up, the live event will be deleted and a confirmation message will be displayed.
Finished Tab
This table displays a list of finished live events. Administrators have the ability to sort the list by live event name or type of access.
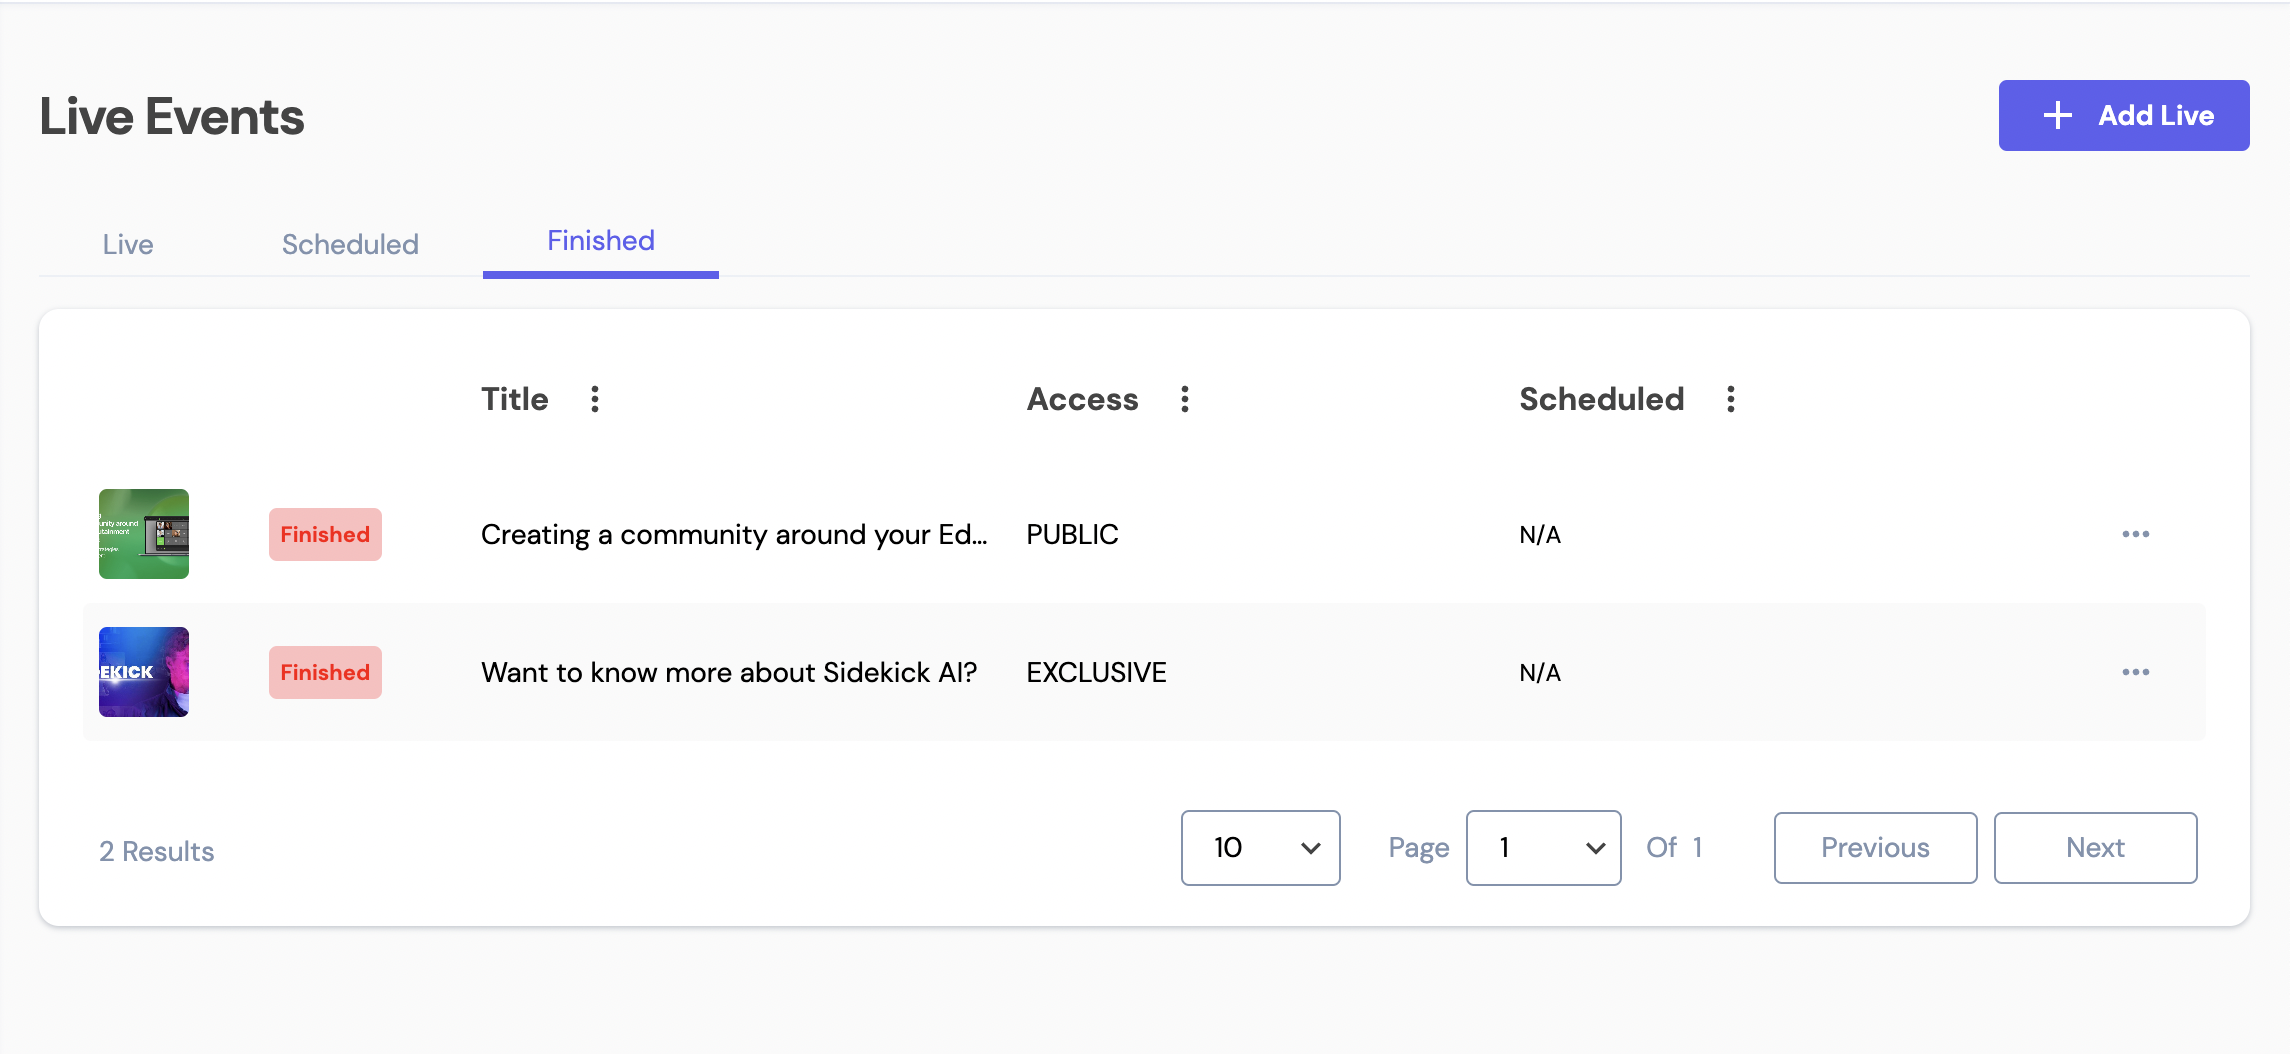
The Finished tab
Clicking on the 3 dots will display the available actions: edit, create post, download and delete.
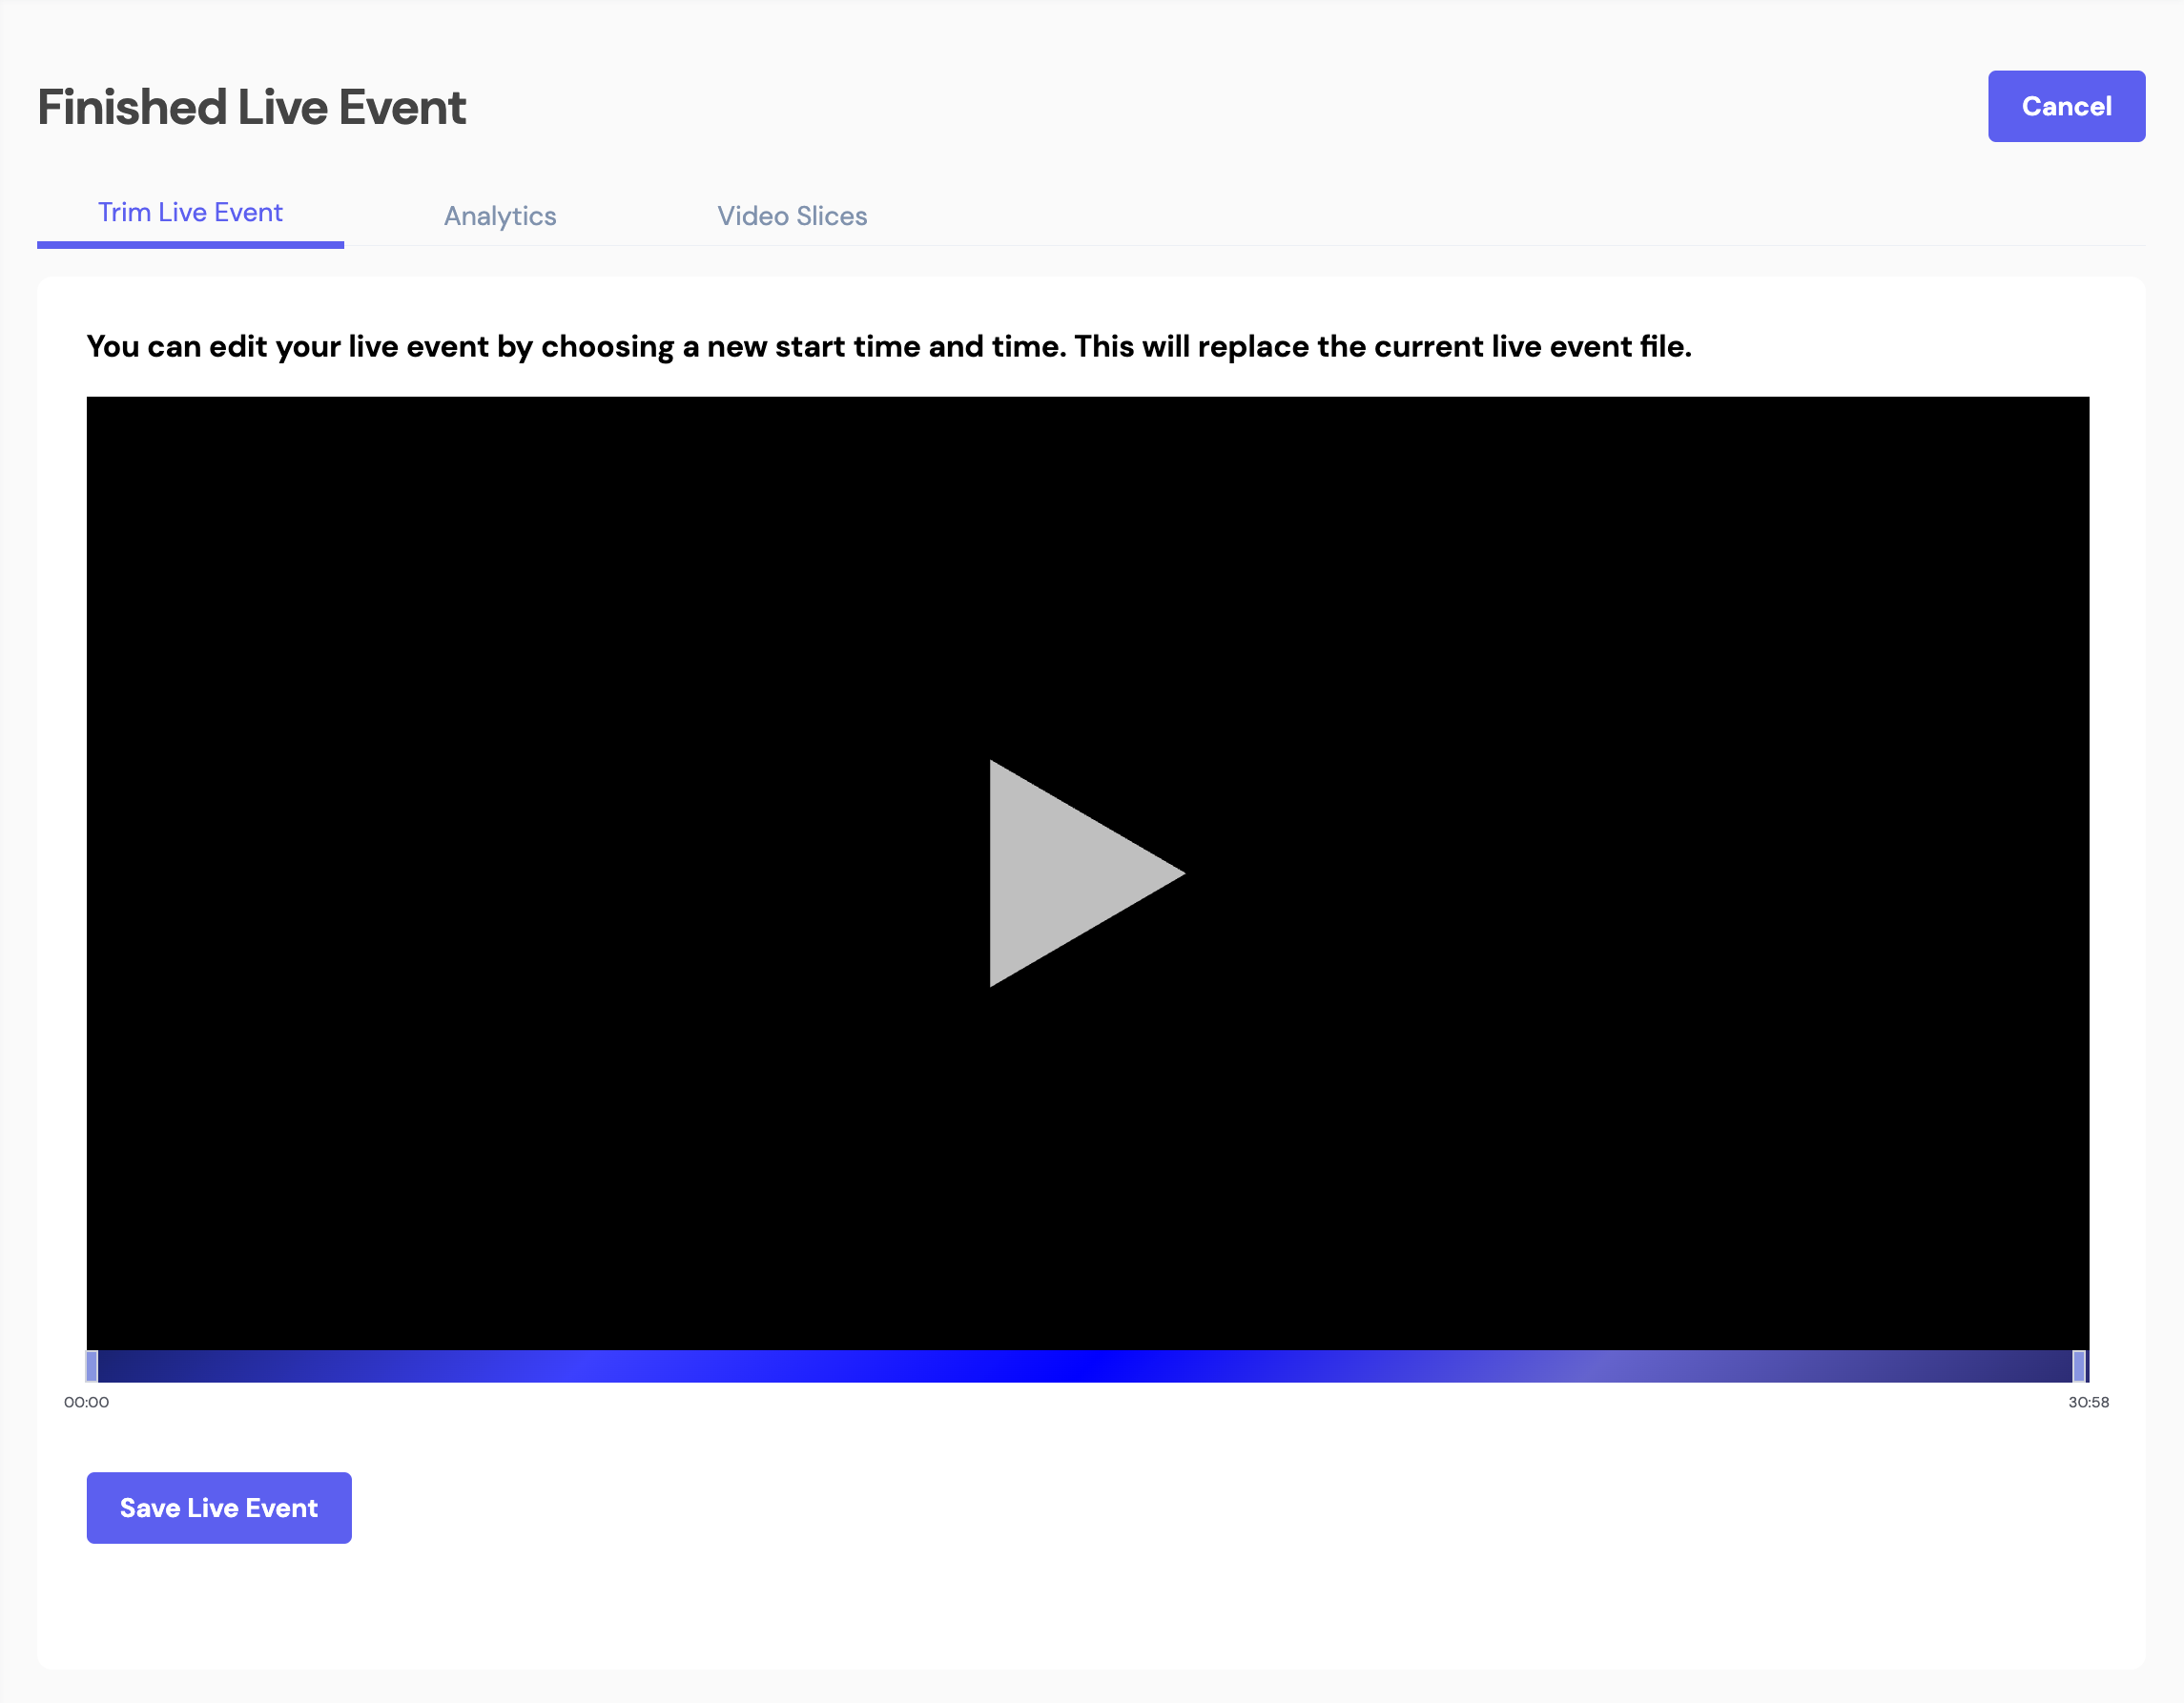
Edit Finished Live Event
To edit a finished live event, click on the Edit (pencil) icon.
Trim Live Event
This section provides the ability to trim a live event video by allowing administrators to select a new start and/or a new end time. Clicking on Save Live Event will save the new video and replace the current live event file.
Analytics
In this tab, administrators can view and export a list of users who watched a live event (username and email).

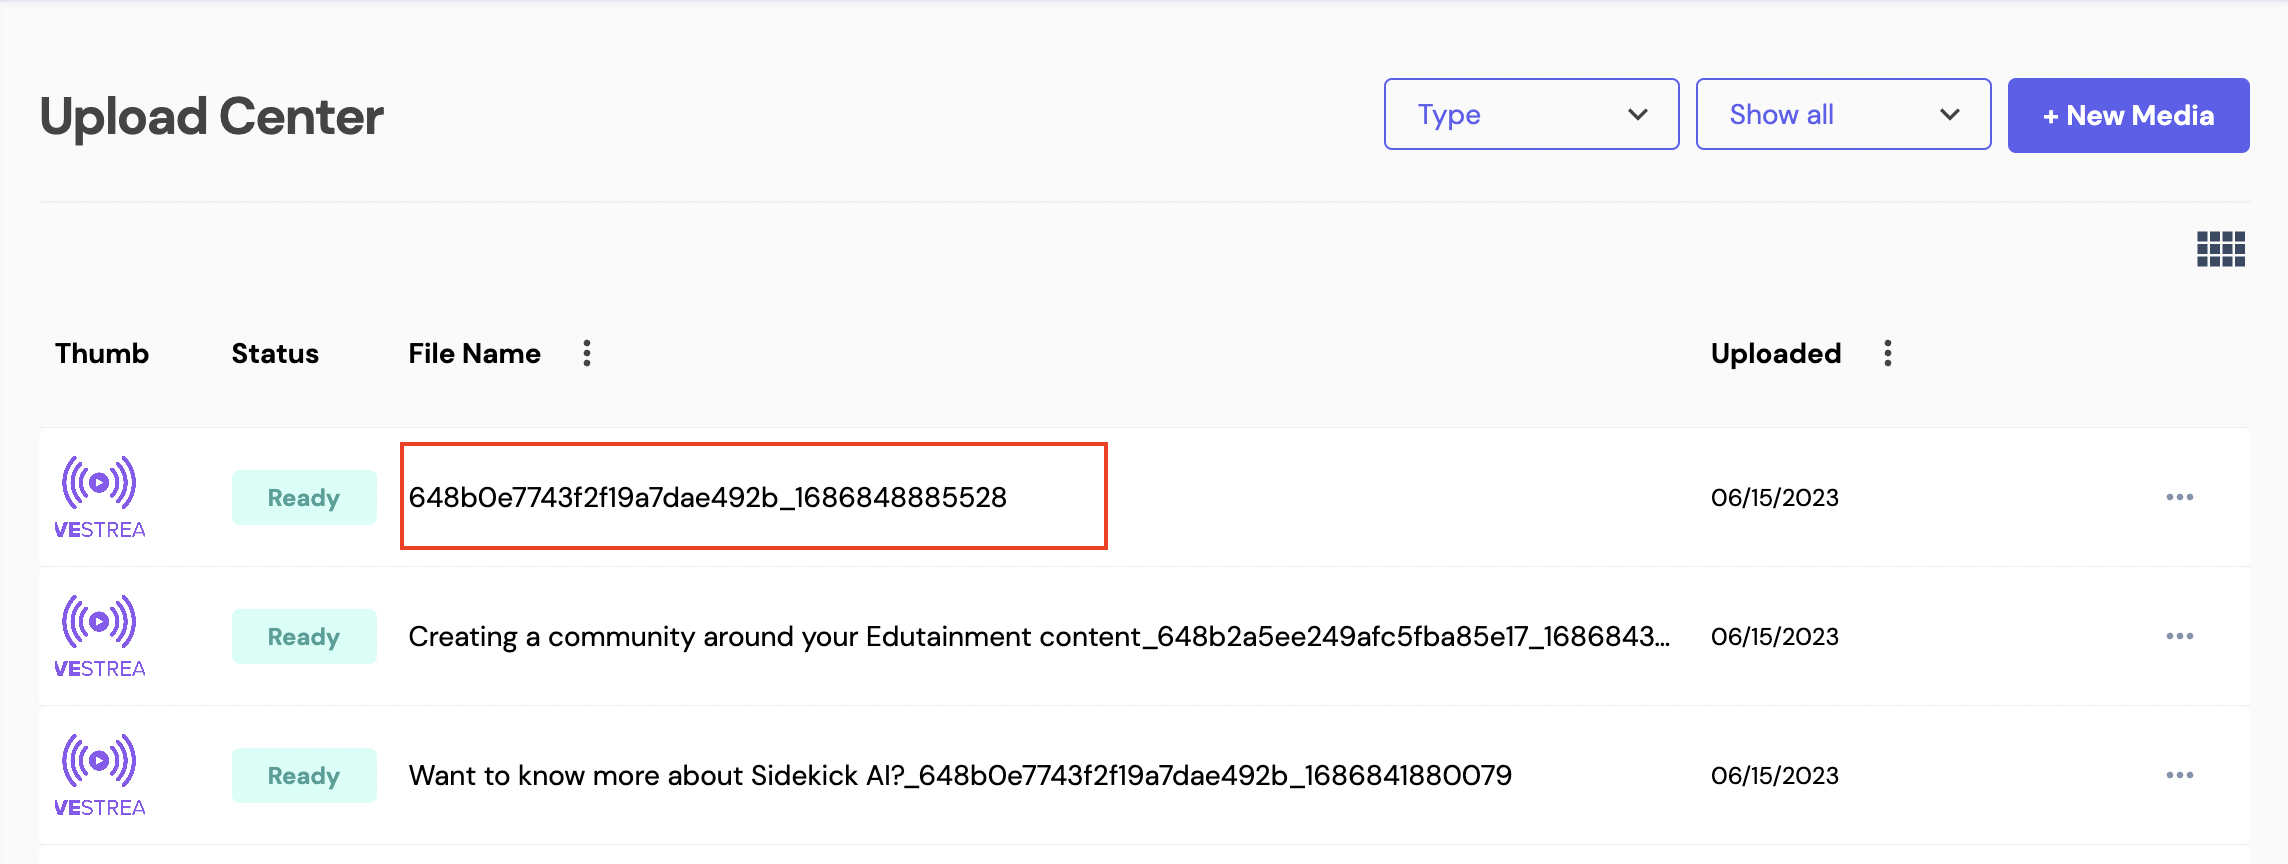
Video Slices
Video slices are segments or portions of a video (finished live event) that have been cut or divided into smaller parts. These smaller parts will be saved in the Upload Center and can be used later to create video posts.
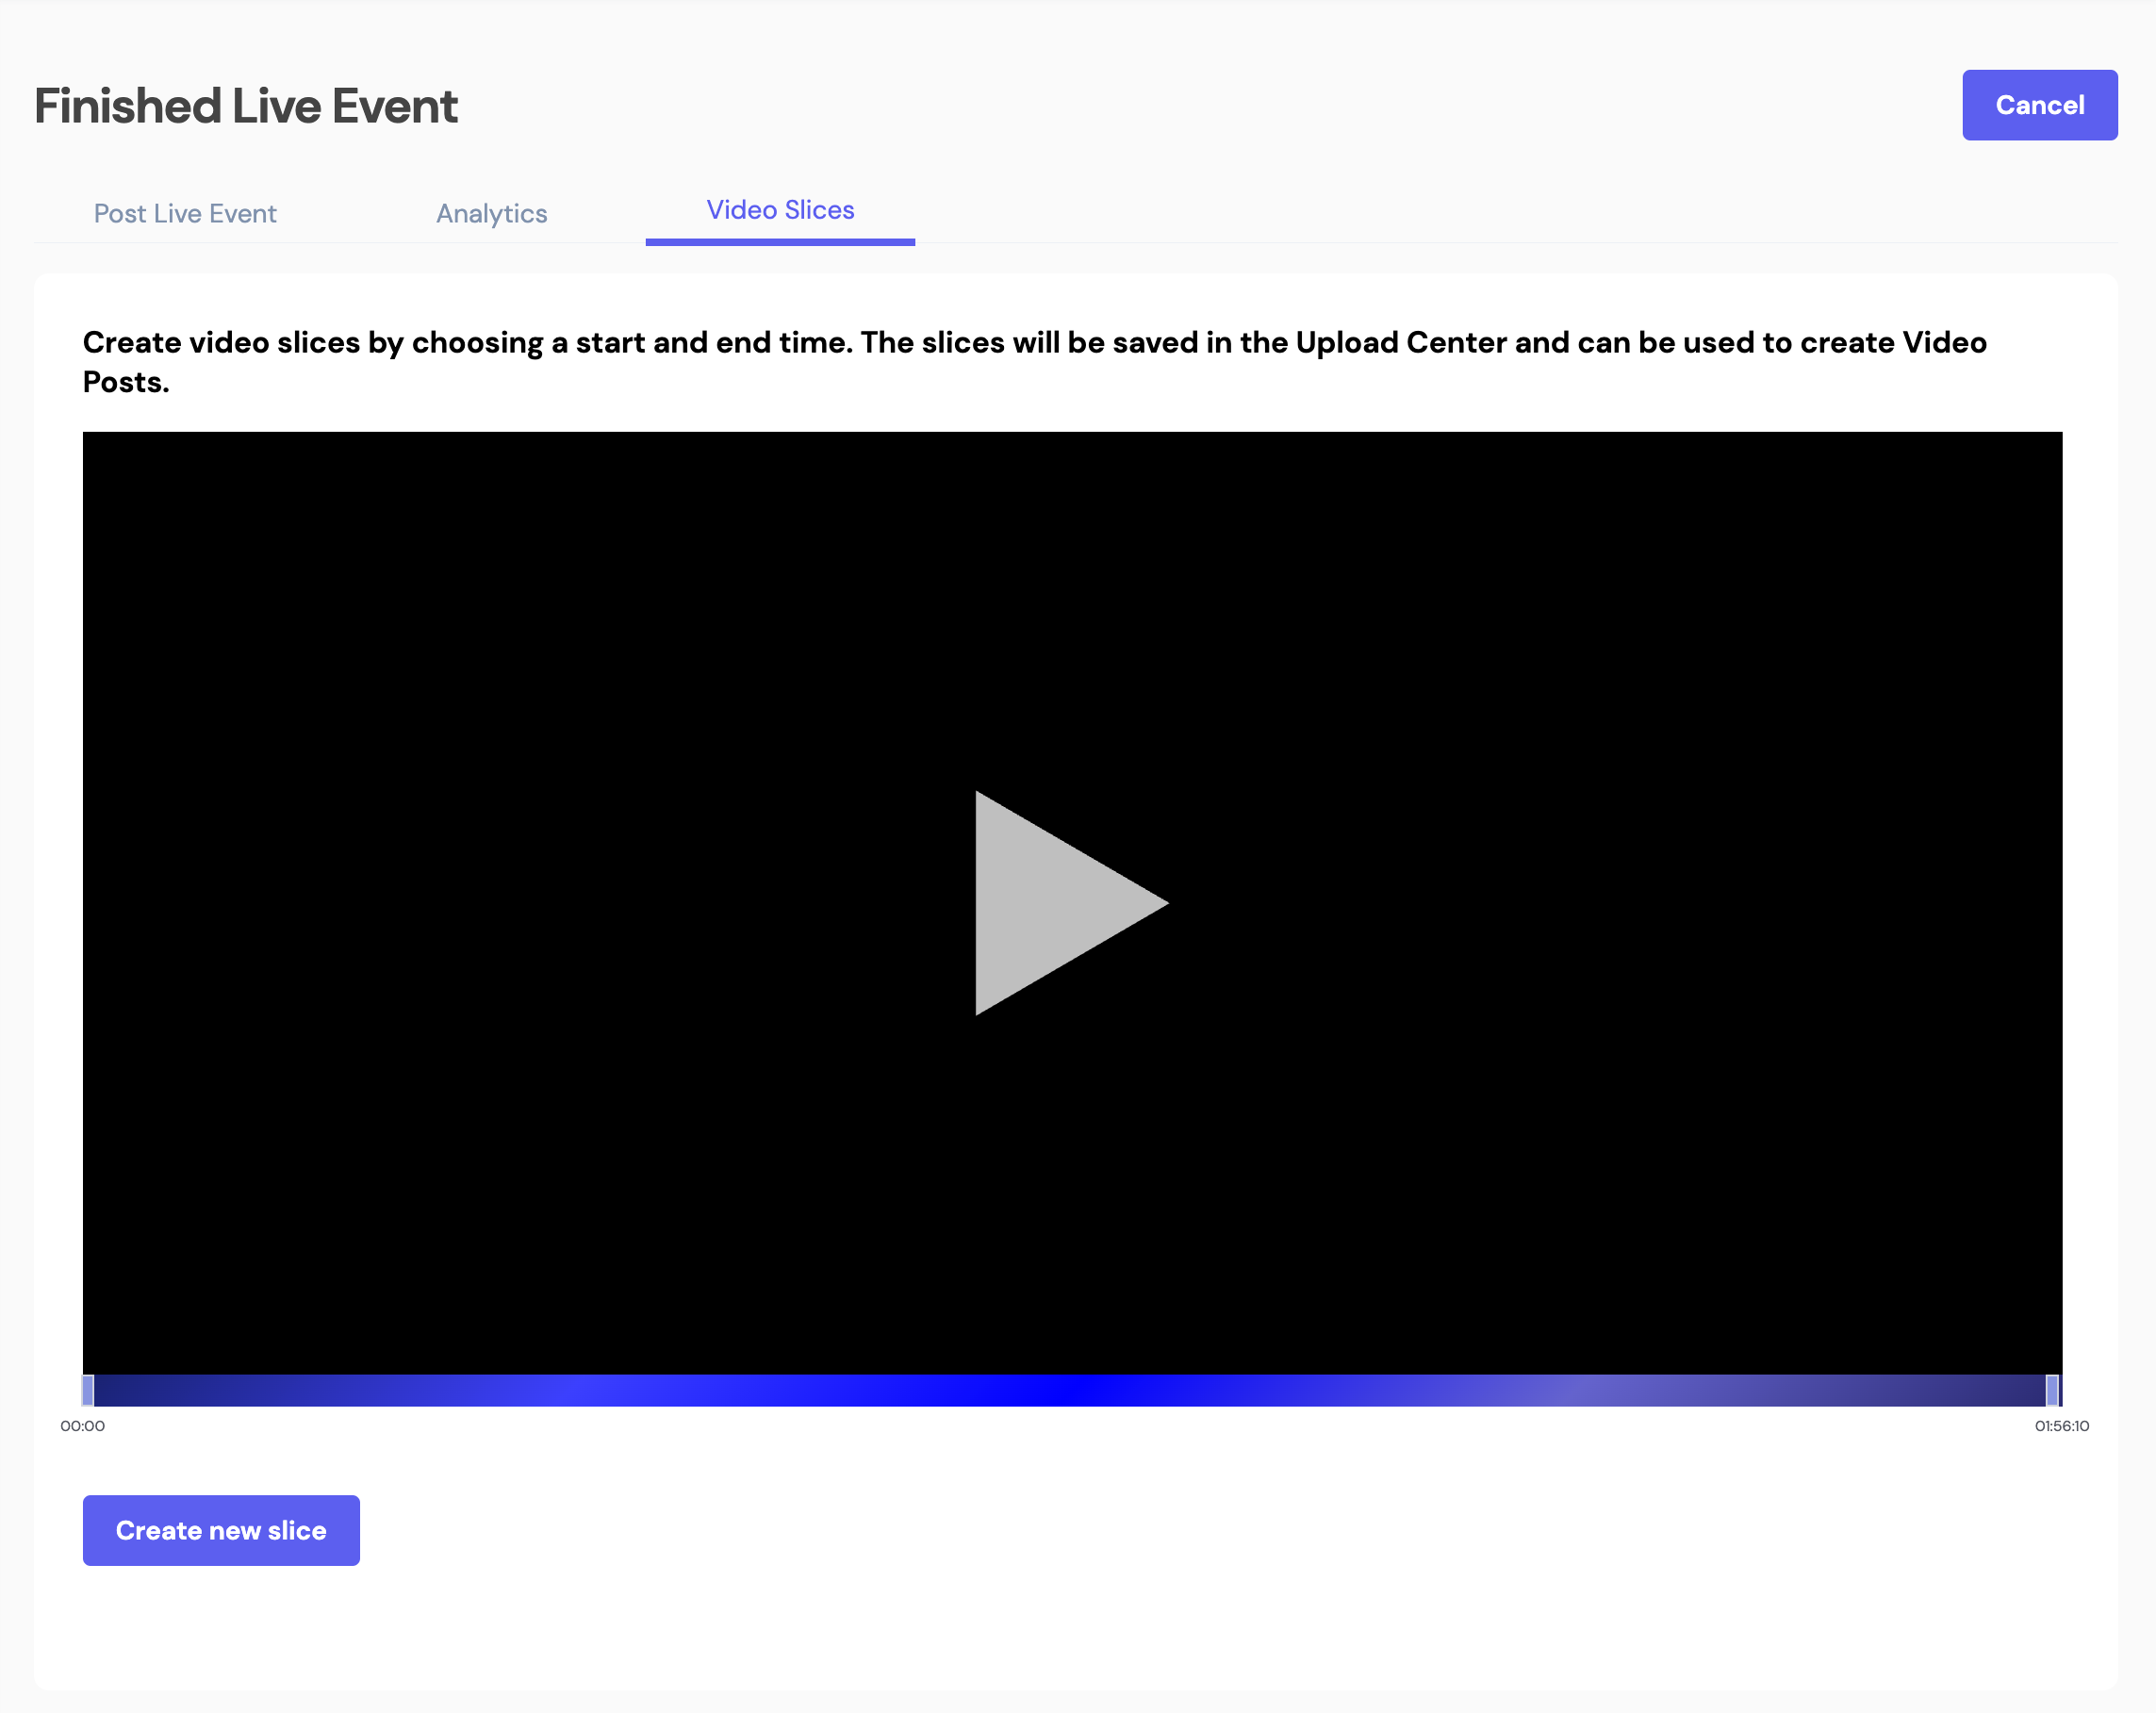
Note: Video slices are not considered Past Live Streams.
To create a new slice, click on the Create new slice button.
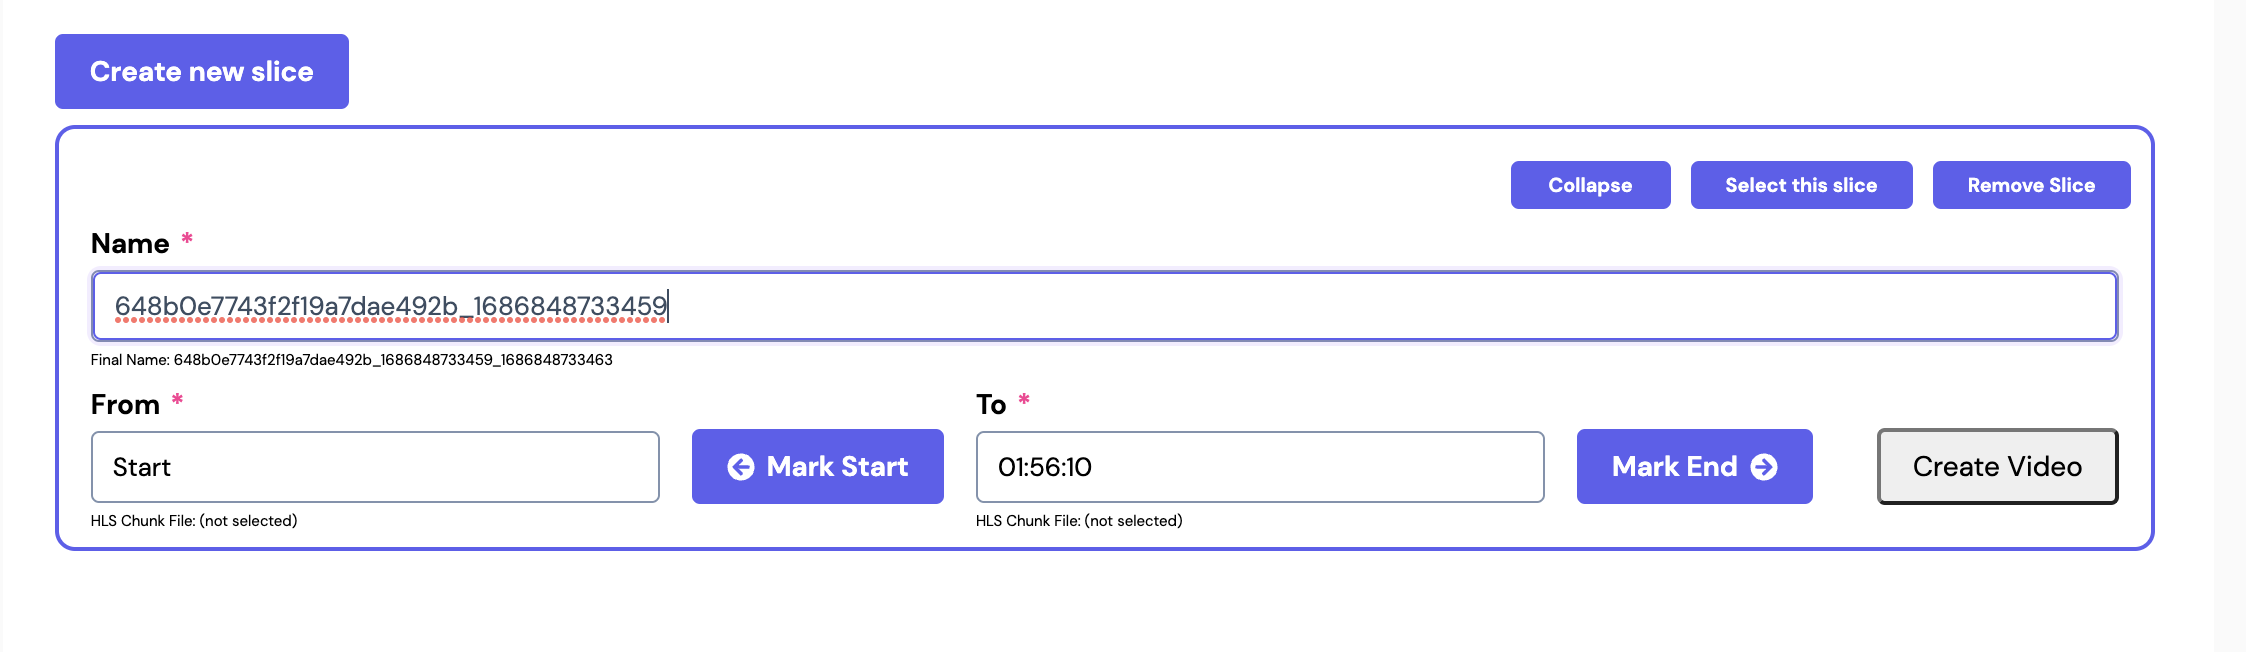
A new section will be displayed:
- Collapse: section will be collapsed. Click on open to expand it again.
- Select this slice: displays the new slice in the video player above (this feature is useful when you are creating more than 1 slice at a time).
- Remove slice: section will be removed.
- Name: the name of the file that will be created. It can be edited.
- From: the start time.
- To: the end time.
- Create Video: clicking on this button will create the video slice.
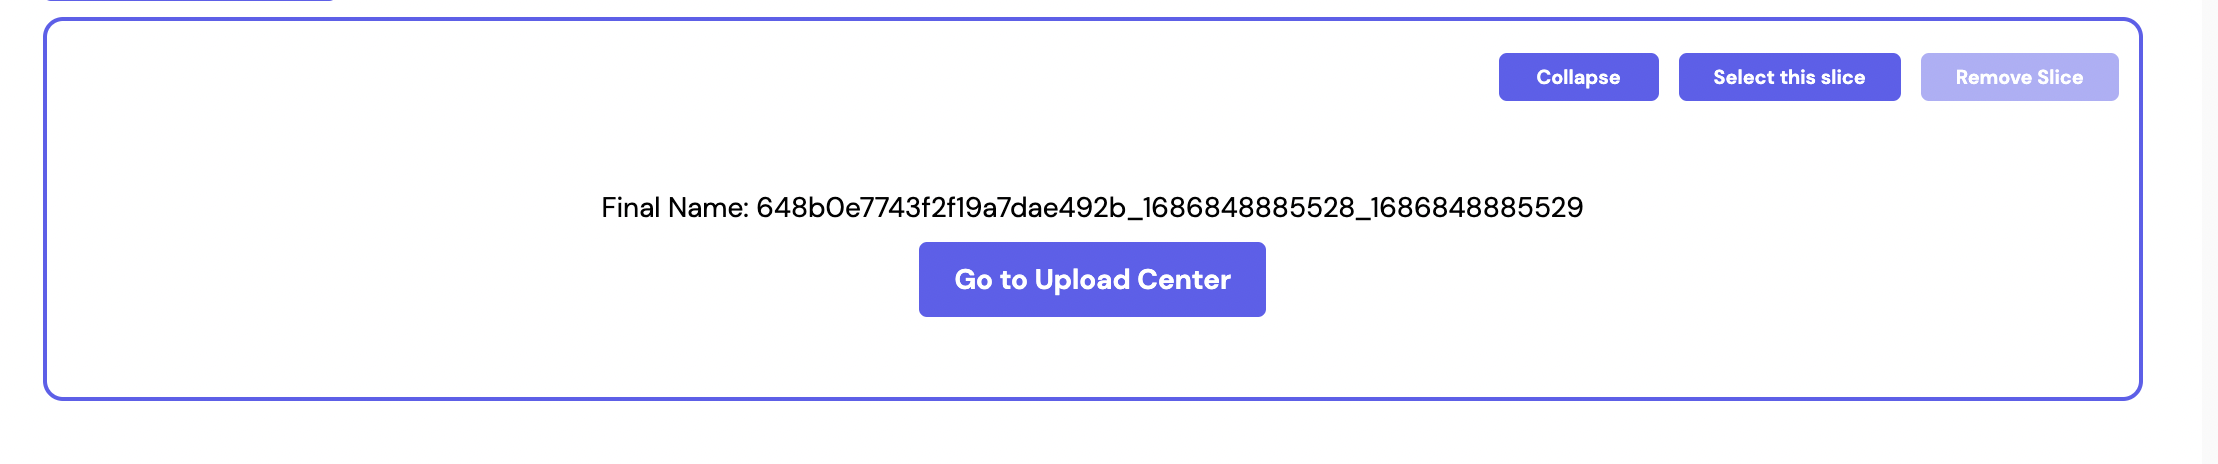
- Go to Upload Center: slice was created and it is available in the Upload Center.
Post Finished Live Event
To post a finished live event, click on the + icon. You will be redirected to the Add Video screen, with the following information already populated from the live event:
- Video
- Slug
- Title
- Description
- Thumbnail
- Level of Access
All fields can be edited. A posted live event will be displayed in the "past live event" carousel.
Download Finished Live Event
To download a finished live event video, click on the download icon. A new tab will open from where you have the ability to download the file.
Note: the unedited file will be downloaded.
Delete a Finished Live Event
Administrators have the ability to delete a finished live event by clicking on the Delete (trash) icon. A pop up will be displayed asking you to confirm this action.
Updated about 1 year ago