Tags
Overview
The Tags section refers to a dedicated area where administrators can manage and create tags for organizing and categorizing content within a channel. Tags can be assigned to multiple posts and categories, enabling cross-categorization of content.
While tags don't have the same level of structure and hierarchy as Categories, they are still effective tools for organizing and categorizing content. By using tags, administrators can provide users with a flexible and intuitive way to navigate and explore content within the channel.
Example:
- Category: Soccer
- Tags: Neymar Jr, Vasco, World Cup, etc.
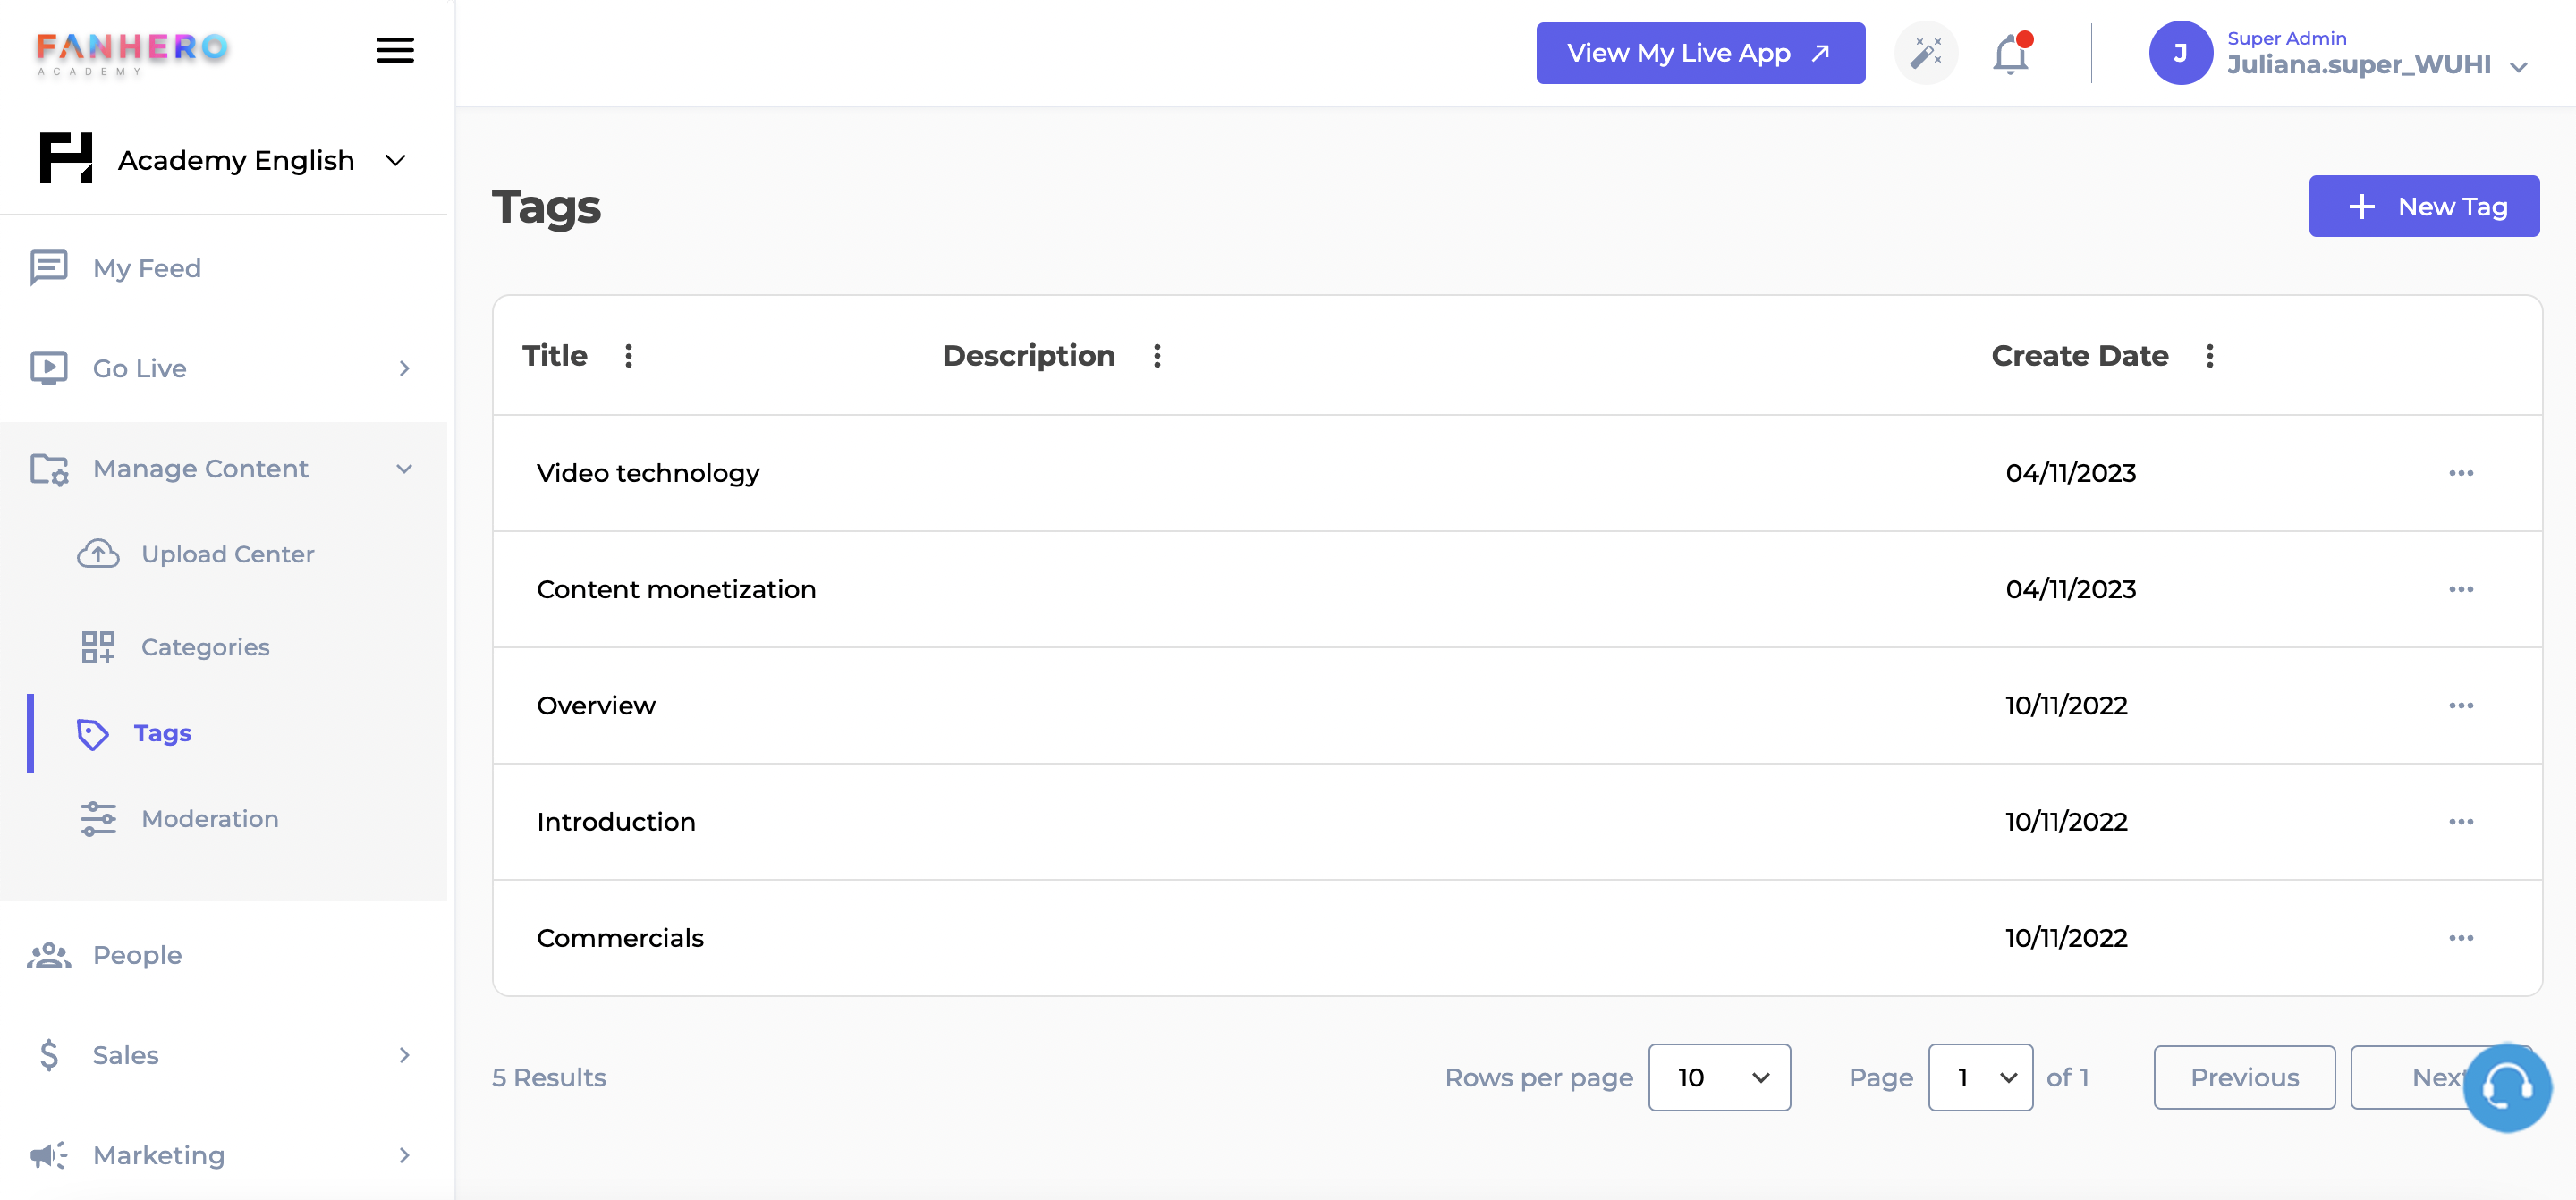
The Tags screen
The list of tags can be sorted by title, description or created date.
Add Tag
To create a new tag, click on the New Tag button.
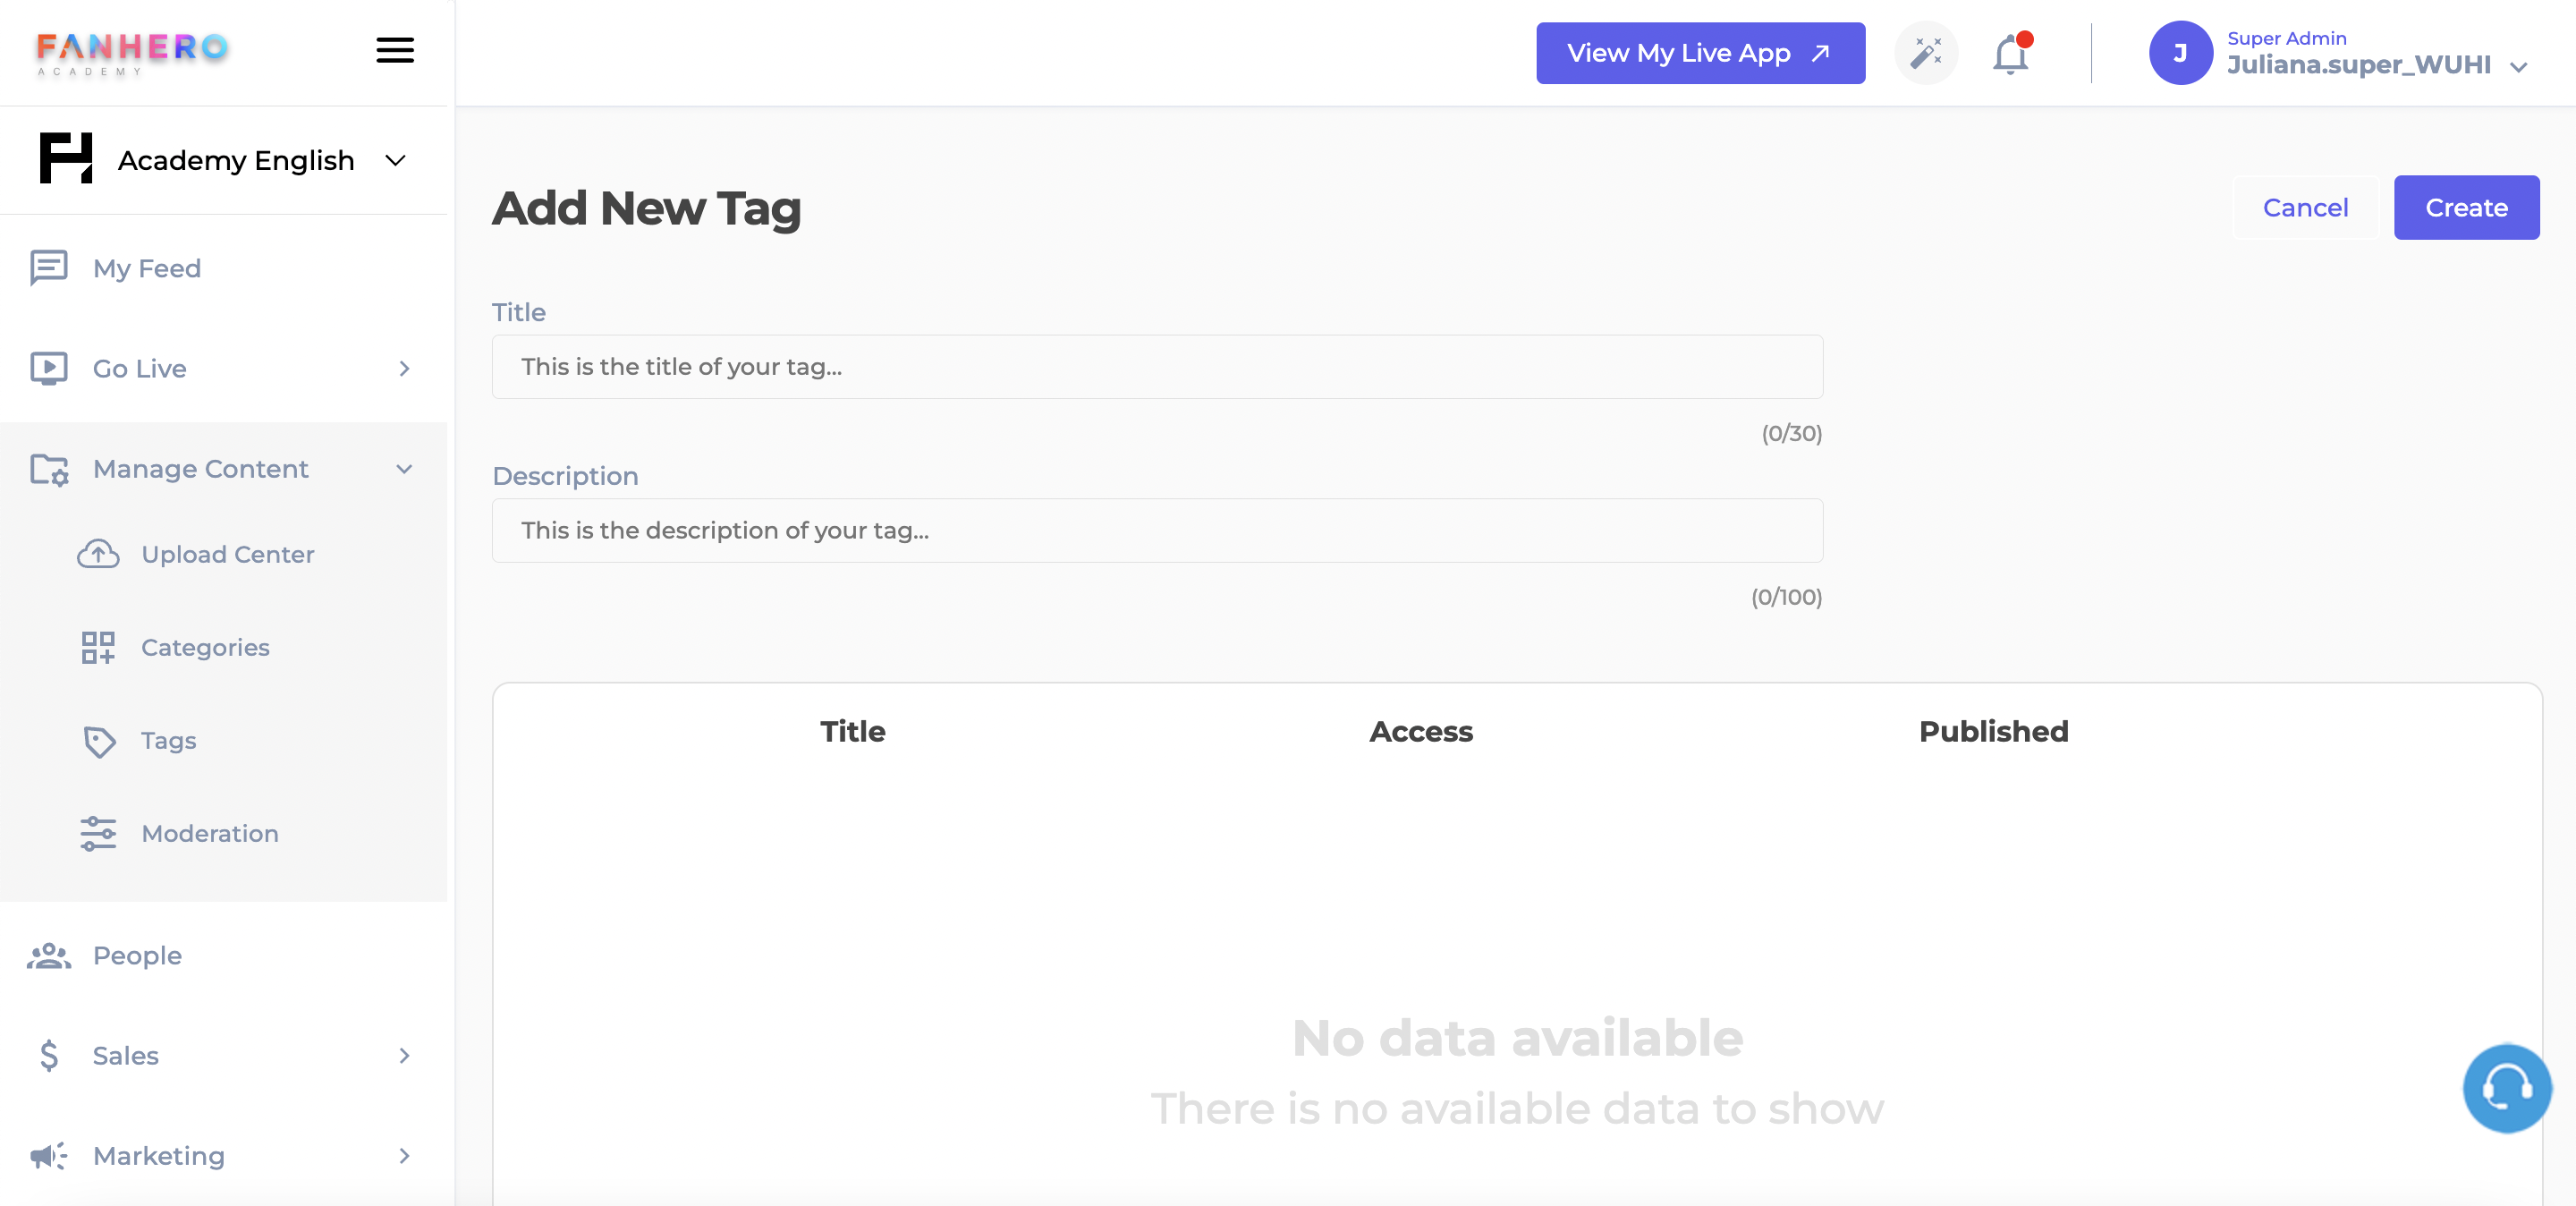
The Add New Tag screen
| Item | Description |
|---|---|
| Cancel | Cancel button. Clicking on it will take you back to the tags screen. The tag will not be created. |
| Create | Create button. If all validation criteria is met, the new tag is created. |
| Title | Title of the tag. It is a required field, max of 30 characters, and it must be a unique name. This is not displayed to users. |
| Description | Description of the tag. It is an optional field, max of 100 characters. |
| List | List of posts and categories associated with the tag. Since it is a new tag, there is no content assigned to it yet. |
Edit Tag
To edit a tag, click on the pencil icon next to the tag you want to edit.
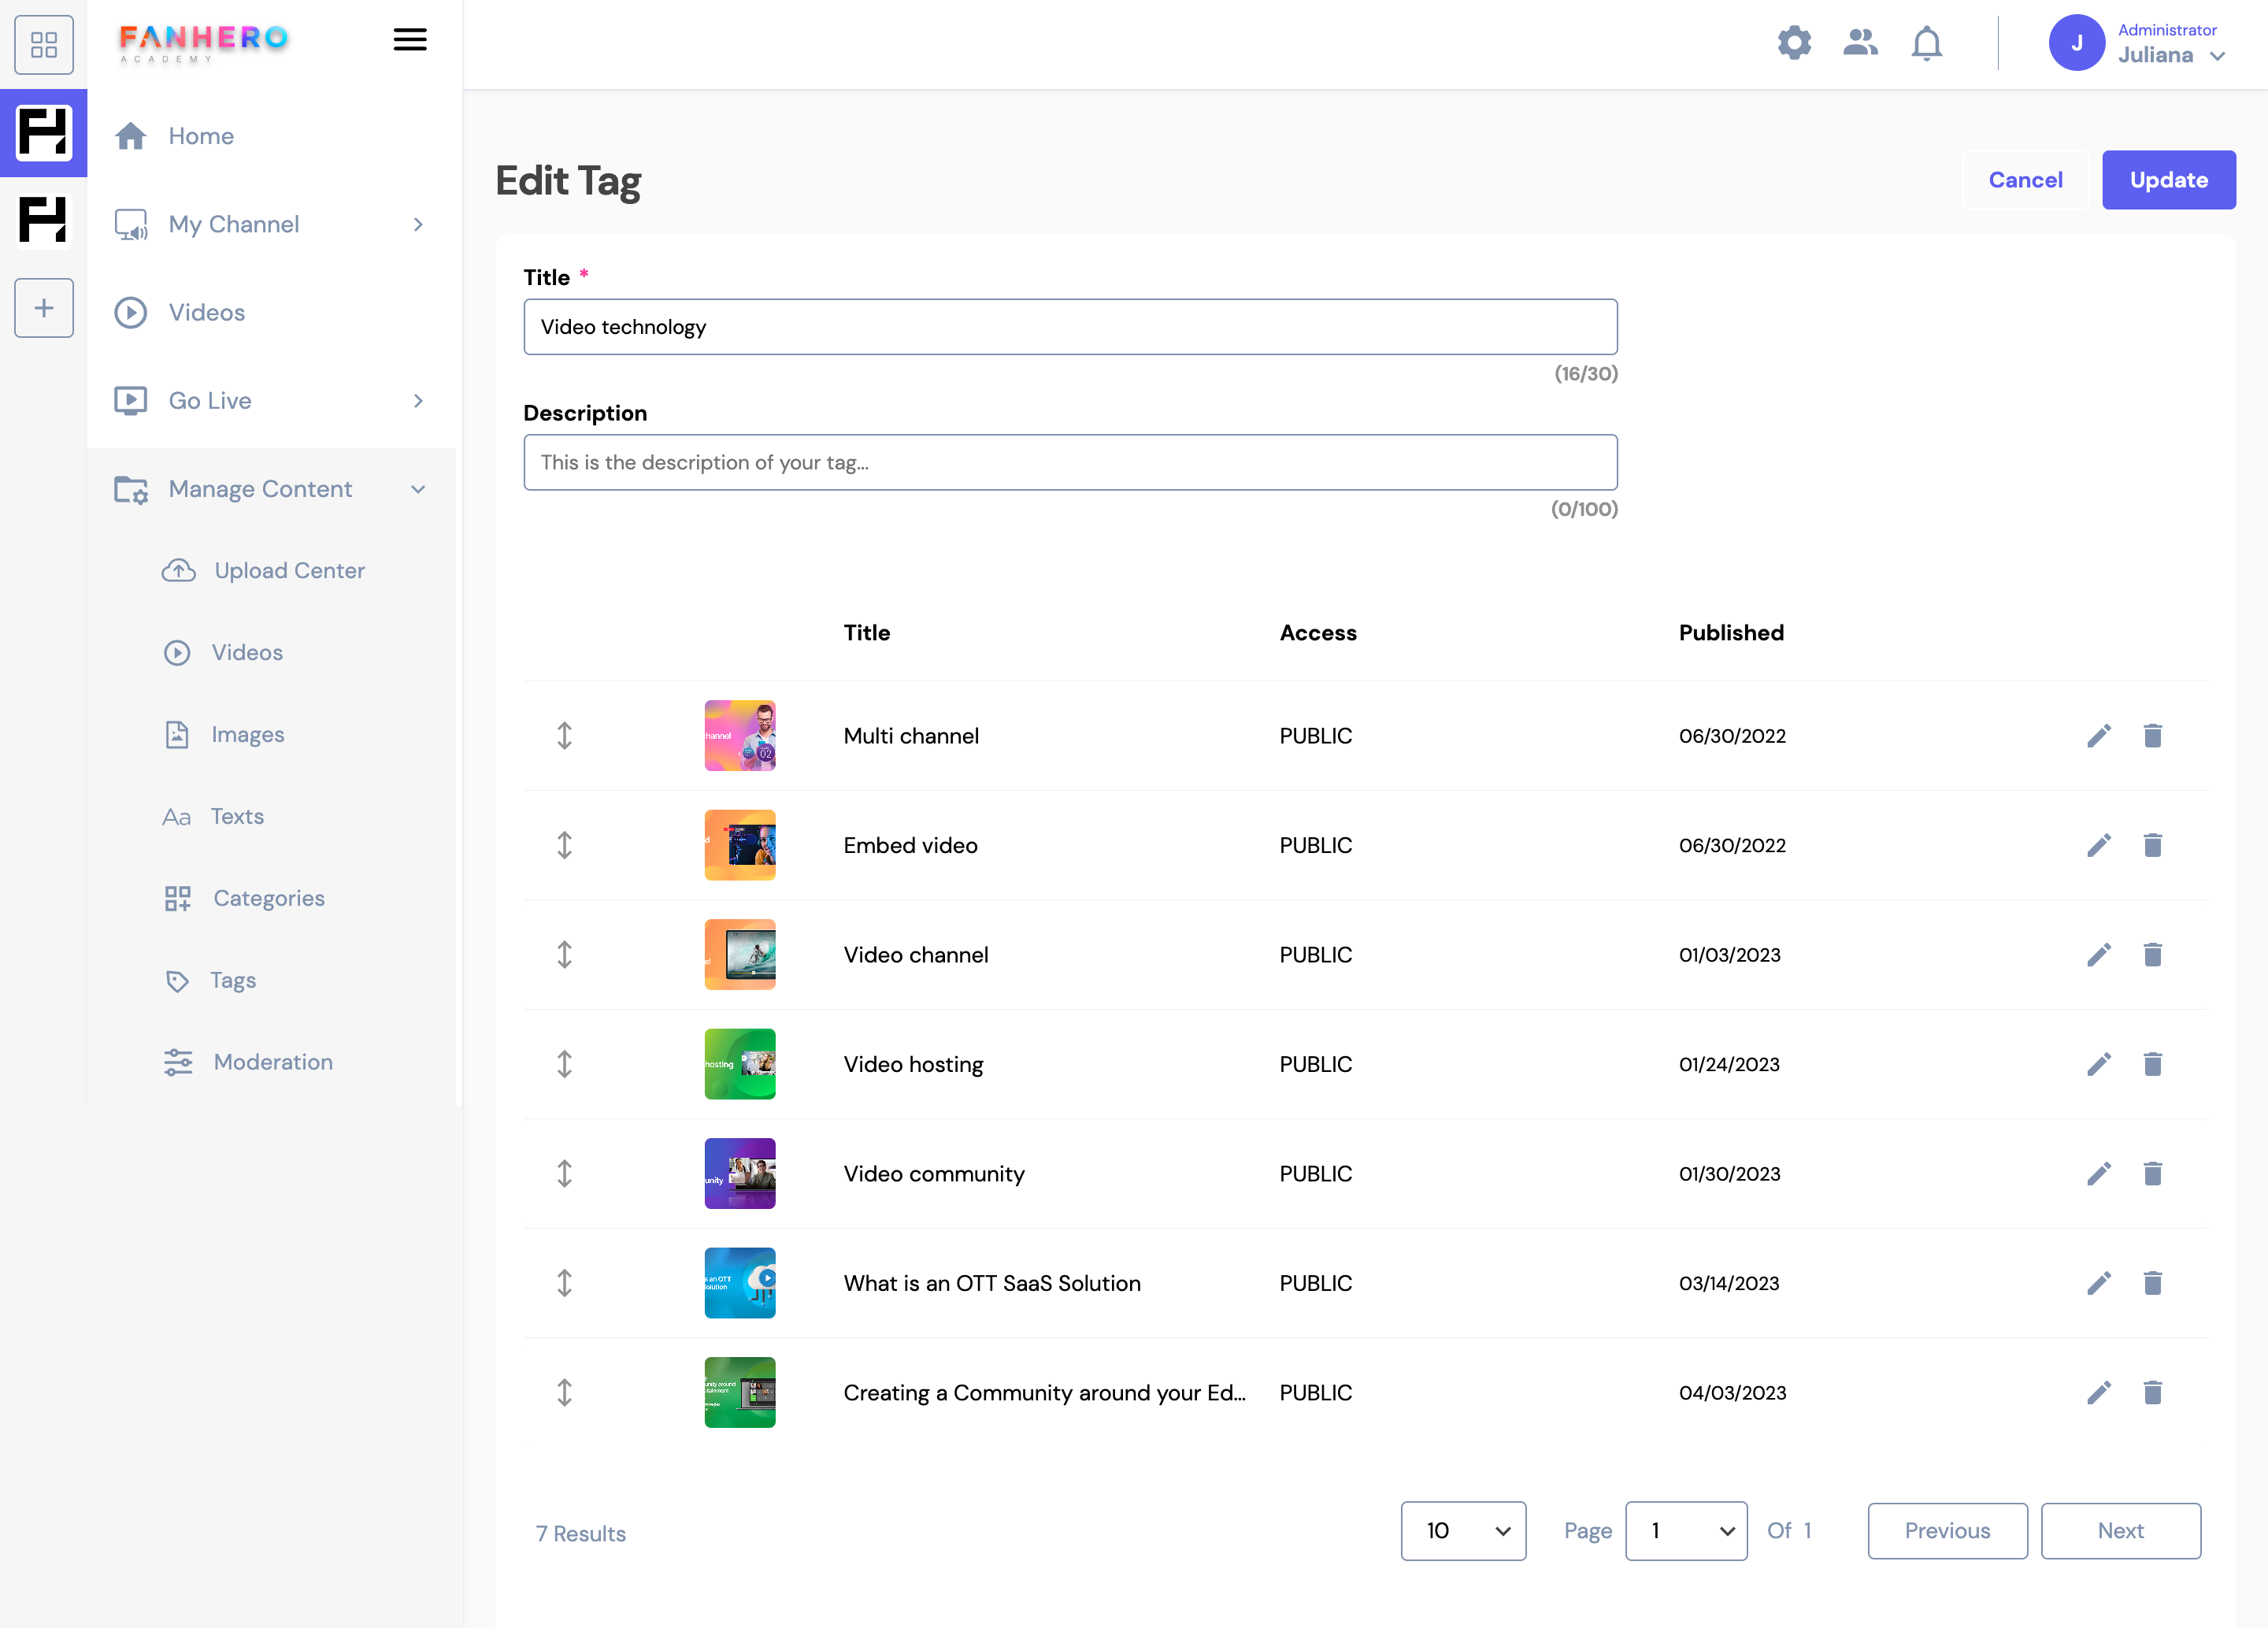
The Edit Tag screen
| Item | Description |
|---|---|
| Cancel | Cancel button. Clicking on it will take you back to the tags screen. The tag will not be created. |
| Update | Update button. If all validation criteria is met, the tag is updated. |
| Title | Title of the tag. It is a required field, max of 30 characters, and it must be a unique name. This is not displayed to users. |
| Description | Description of the tag. It is an optional field, max of 100 characters. |
| List | List of posts and categories associated with the tag. |
More Actions for Posts within a Category
- Edit: clicking on the pencil icon next to a post will take you to the Edit Post screen.
- Delete: clicking on the trash icon will display a message asking you to confirm if the post should be removed from the tag.
- Reorder: clicking on the up-down arrow allows you to enter the new position. Click on the green checkmark icon to confirm. To save your changes, click the Update button in the upper-right.
Delete Tag
To delete a tag, click on the trash can icon next to the tag you want to delete. This action requires a confirmation: clicking on the X button will dismiss the pop-up and the tag will not be deleted. Clicking Confirm will dismiss the pop-up, the tag will be deleted and a confirmation message will be displayed.
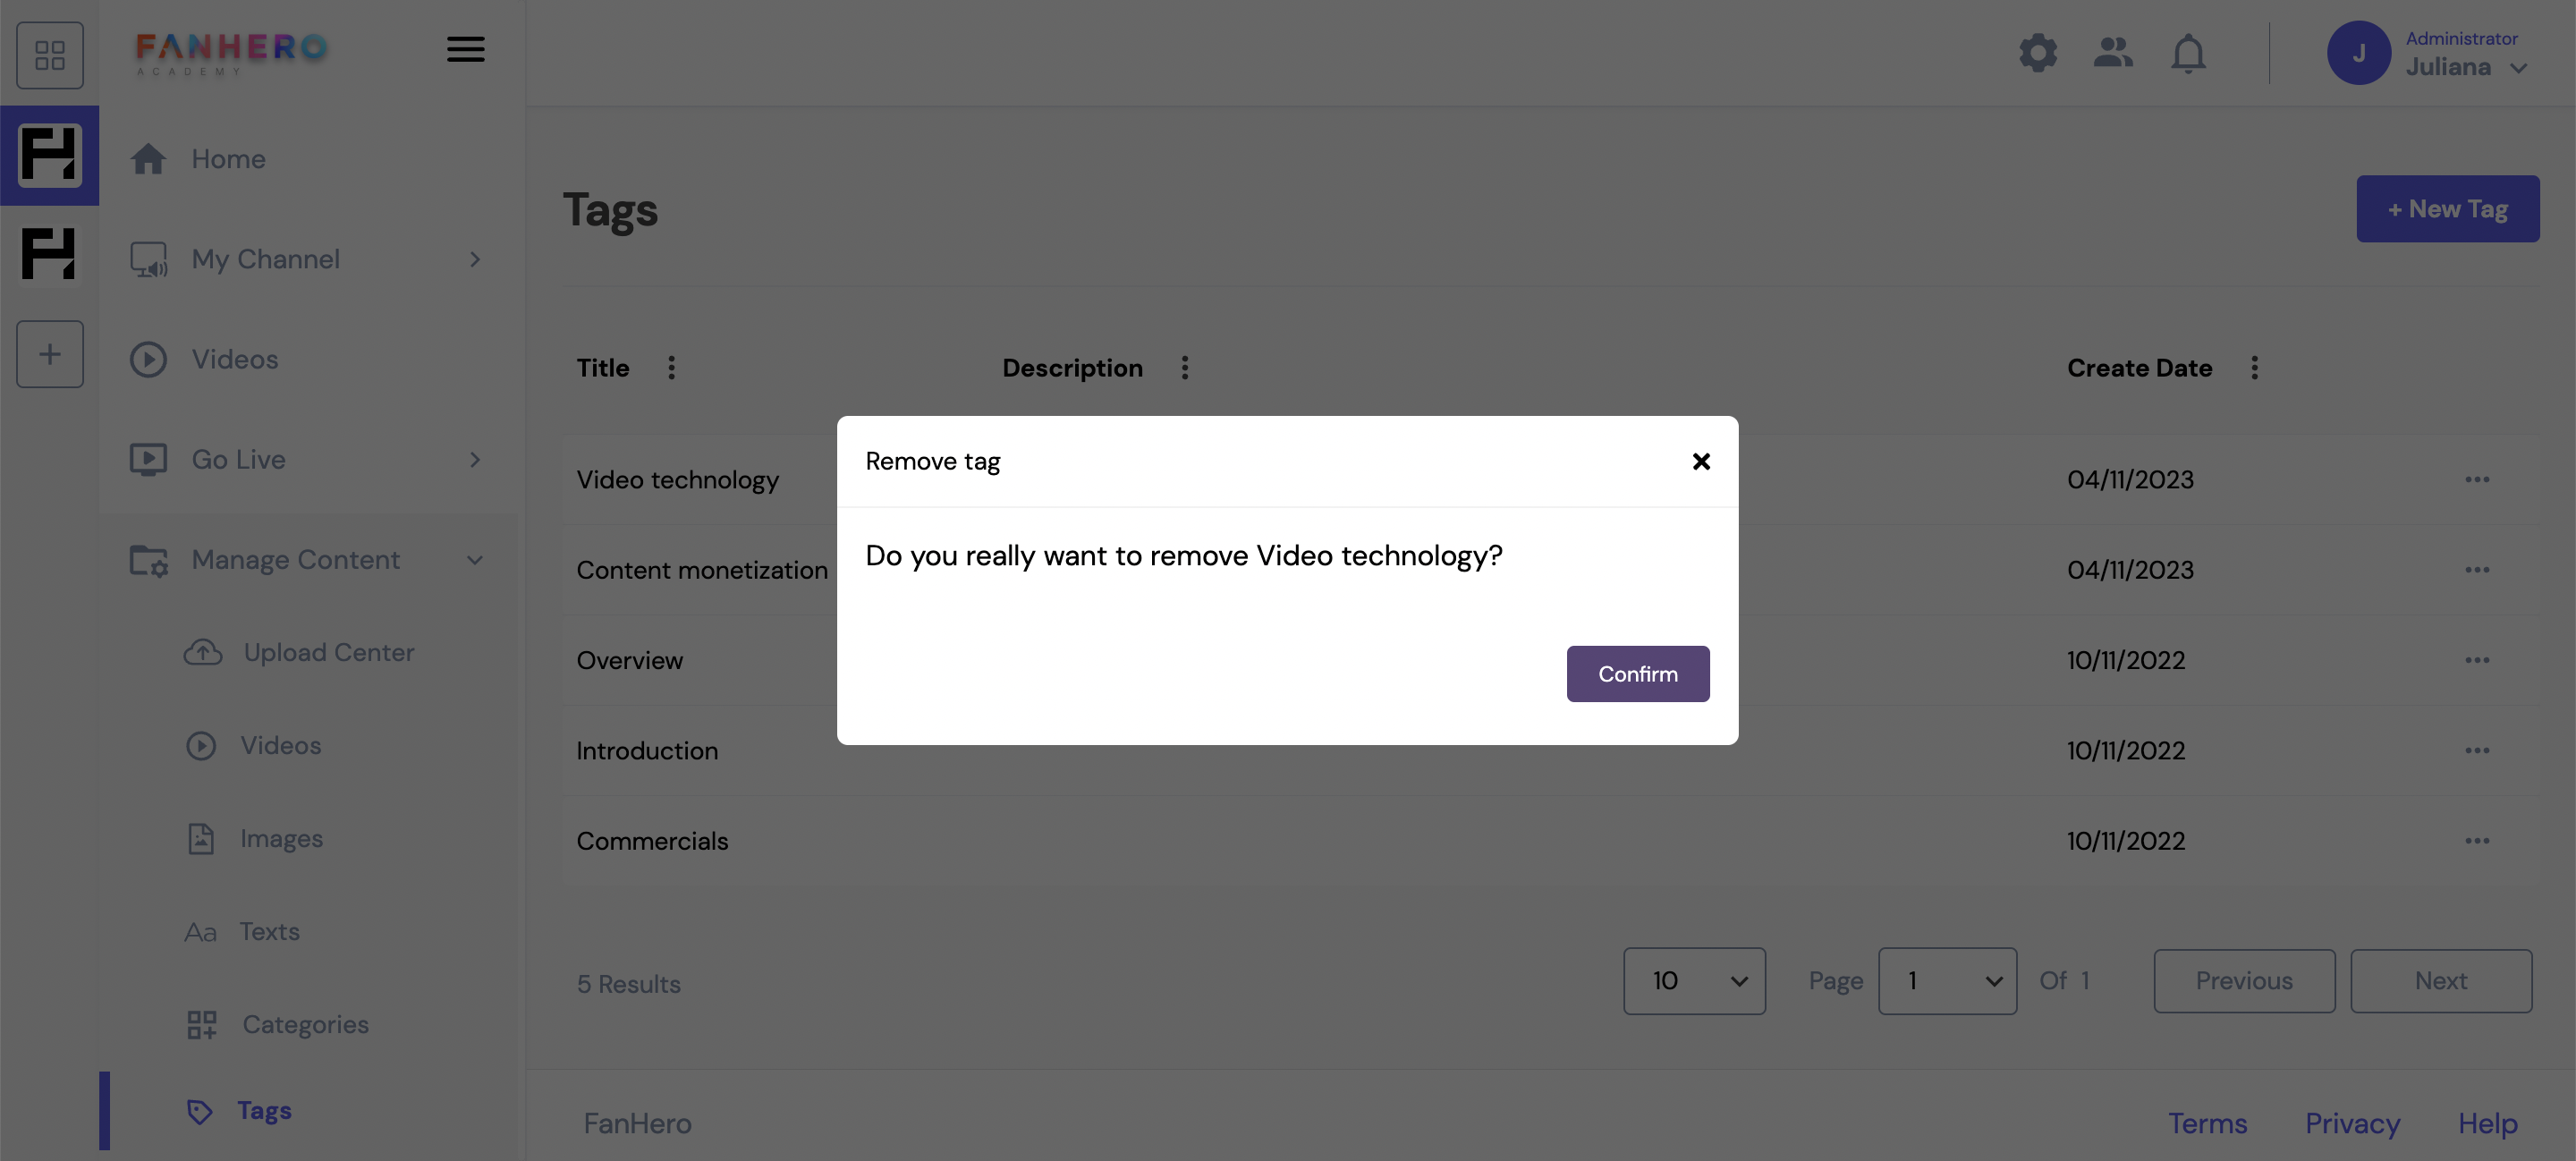
Remove tag confirmation pop-up
Updated about 1 year ago