Upload Center
Level of Permission (Roles)
Available to Tenant, Super Admin, Admin and Content Manager users.
Overview
This section refers to a place that allows administrators to upload and manage files or media assets within a Channel. It provides a centralized location for handling the upload process.
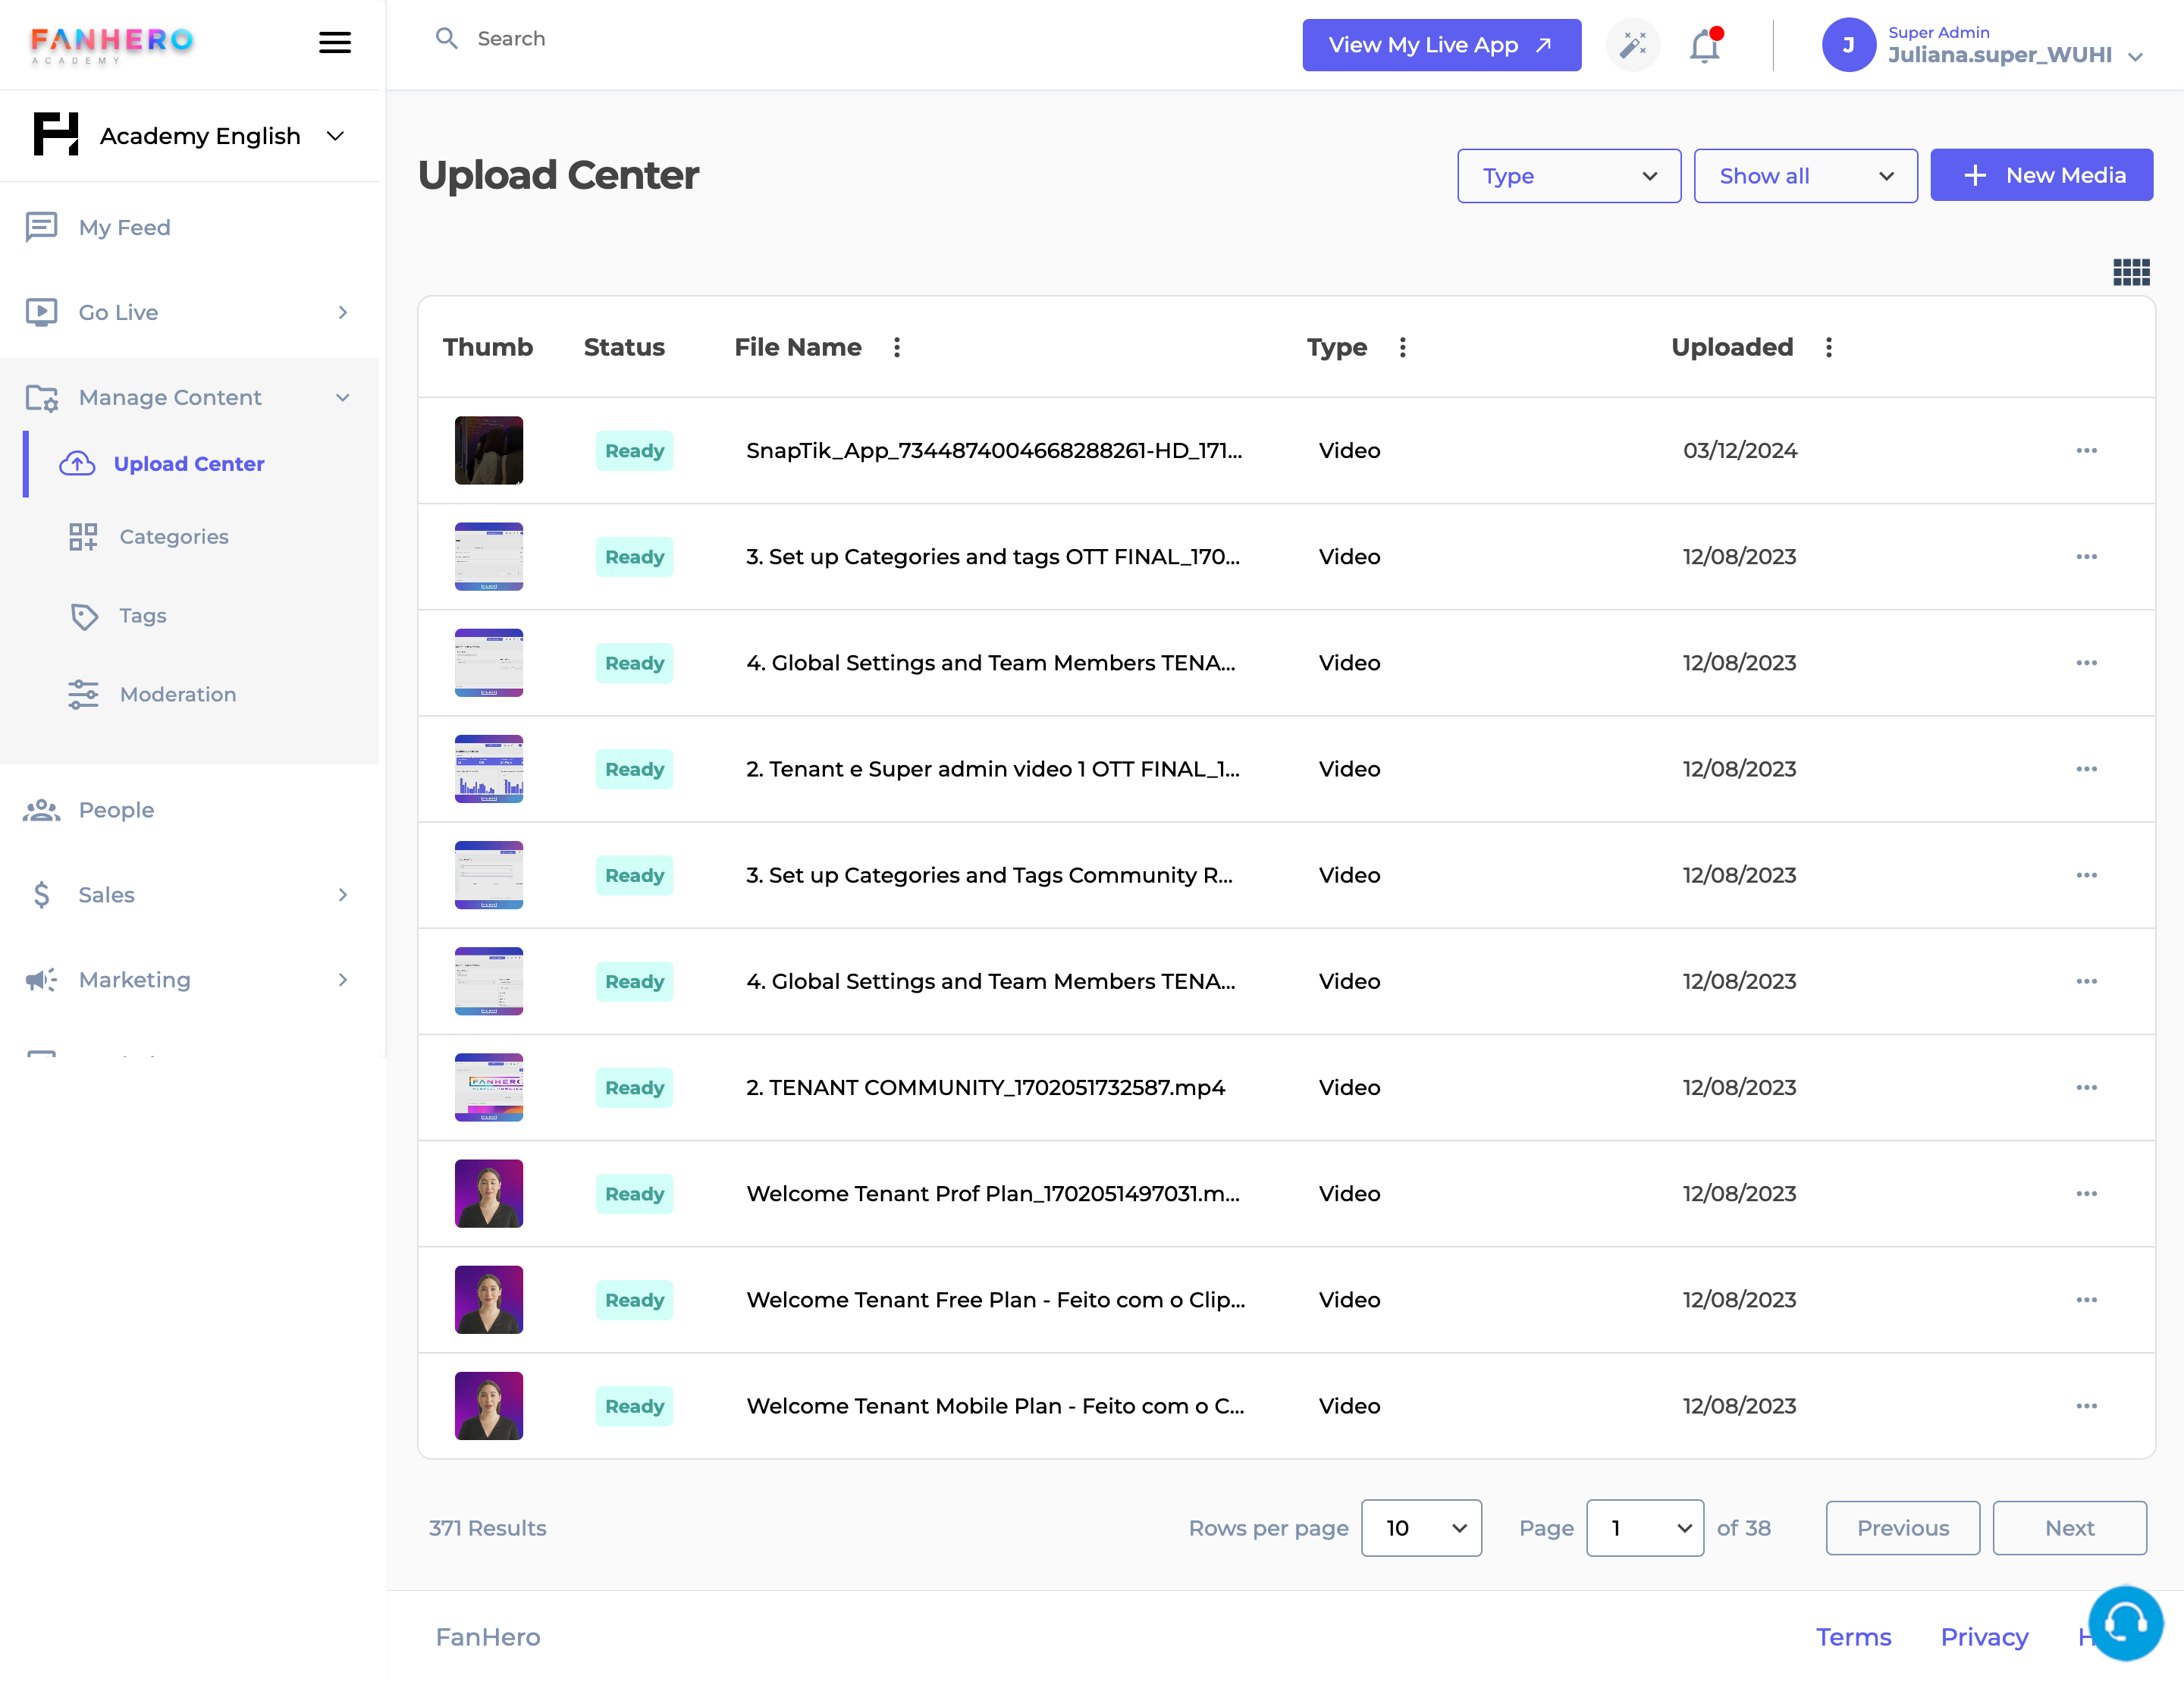
The Upload Center section
The default view is list, but it can switched to a grid view. The list can be sorted by file name or upload date. It can also be filtered based on the file type (images, videos, audios or live streams) or the upload status (ready, uploading, transcoding or error).
To play a video or an audio file, click on the thumbnail. A player will open and the media can be played.
Administrators can easily search for a file by using the search bar at the top of the screen.
Media Status
- Uploading: file is being uploaded to the platform;
- Transcoding: file is being transcoded, which is the process of decoding, reformatting, and re-encoding files. It is only applicable to audio and video;
- Ready: file is ready to be used;
- Error: there was an error and the file must be uploaded again.
Add Media
To add a new media, click on the Add Media button. A pop up will be displayed. You can either drag and drop your files to the upload area or you can click on it and select files from your computer to upload them to the platform.
Once the upload process starts, you can close the pop up. You must keep the Upload Center tab open while the upload is happening - if you navigate to a different section or close the tab, the upload will fail.
While the file is uploading, you can see the completed percentage. When it hits 100%, the transcode process will start (if the media type is video or audio).
More Actions
Depending on the type of file, a few different actions will be available.
Delete File
This action is available to all media types. Clicking on the More Actions (three dots) will display the trash icon. A pop up will be displayed requesting the user to confirm the action.
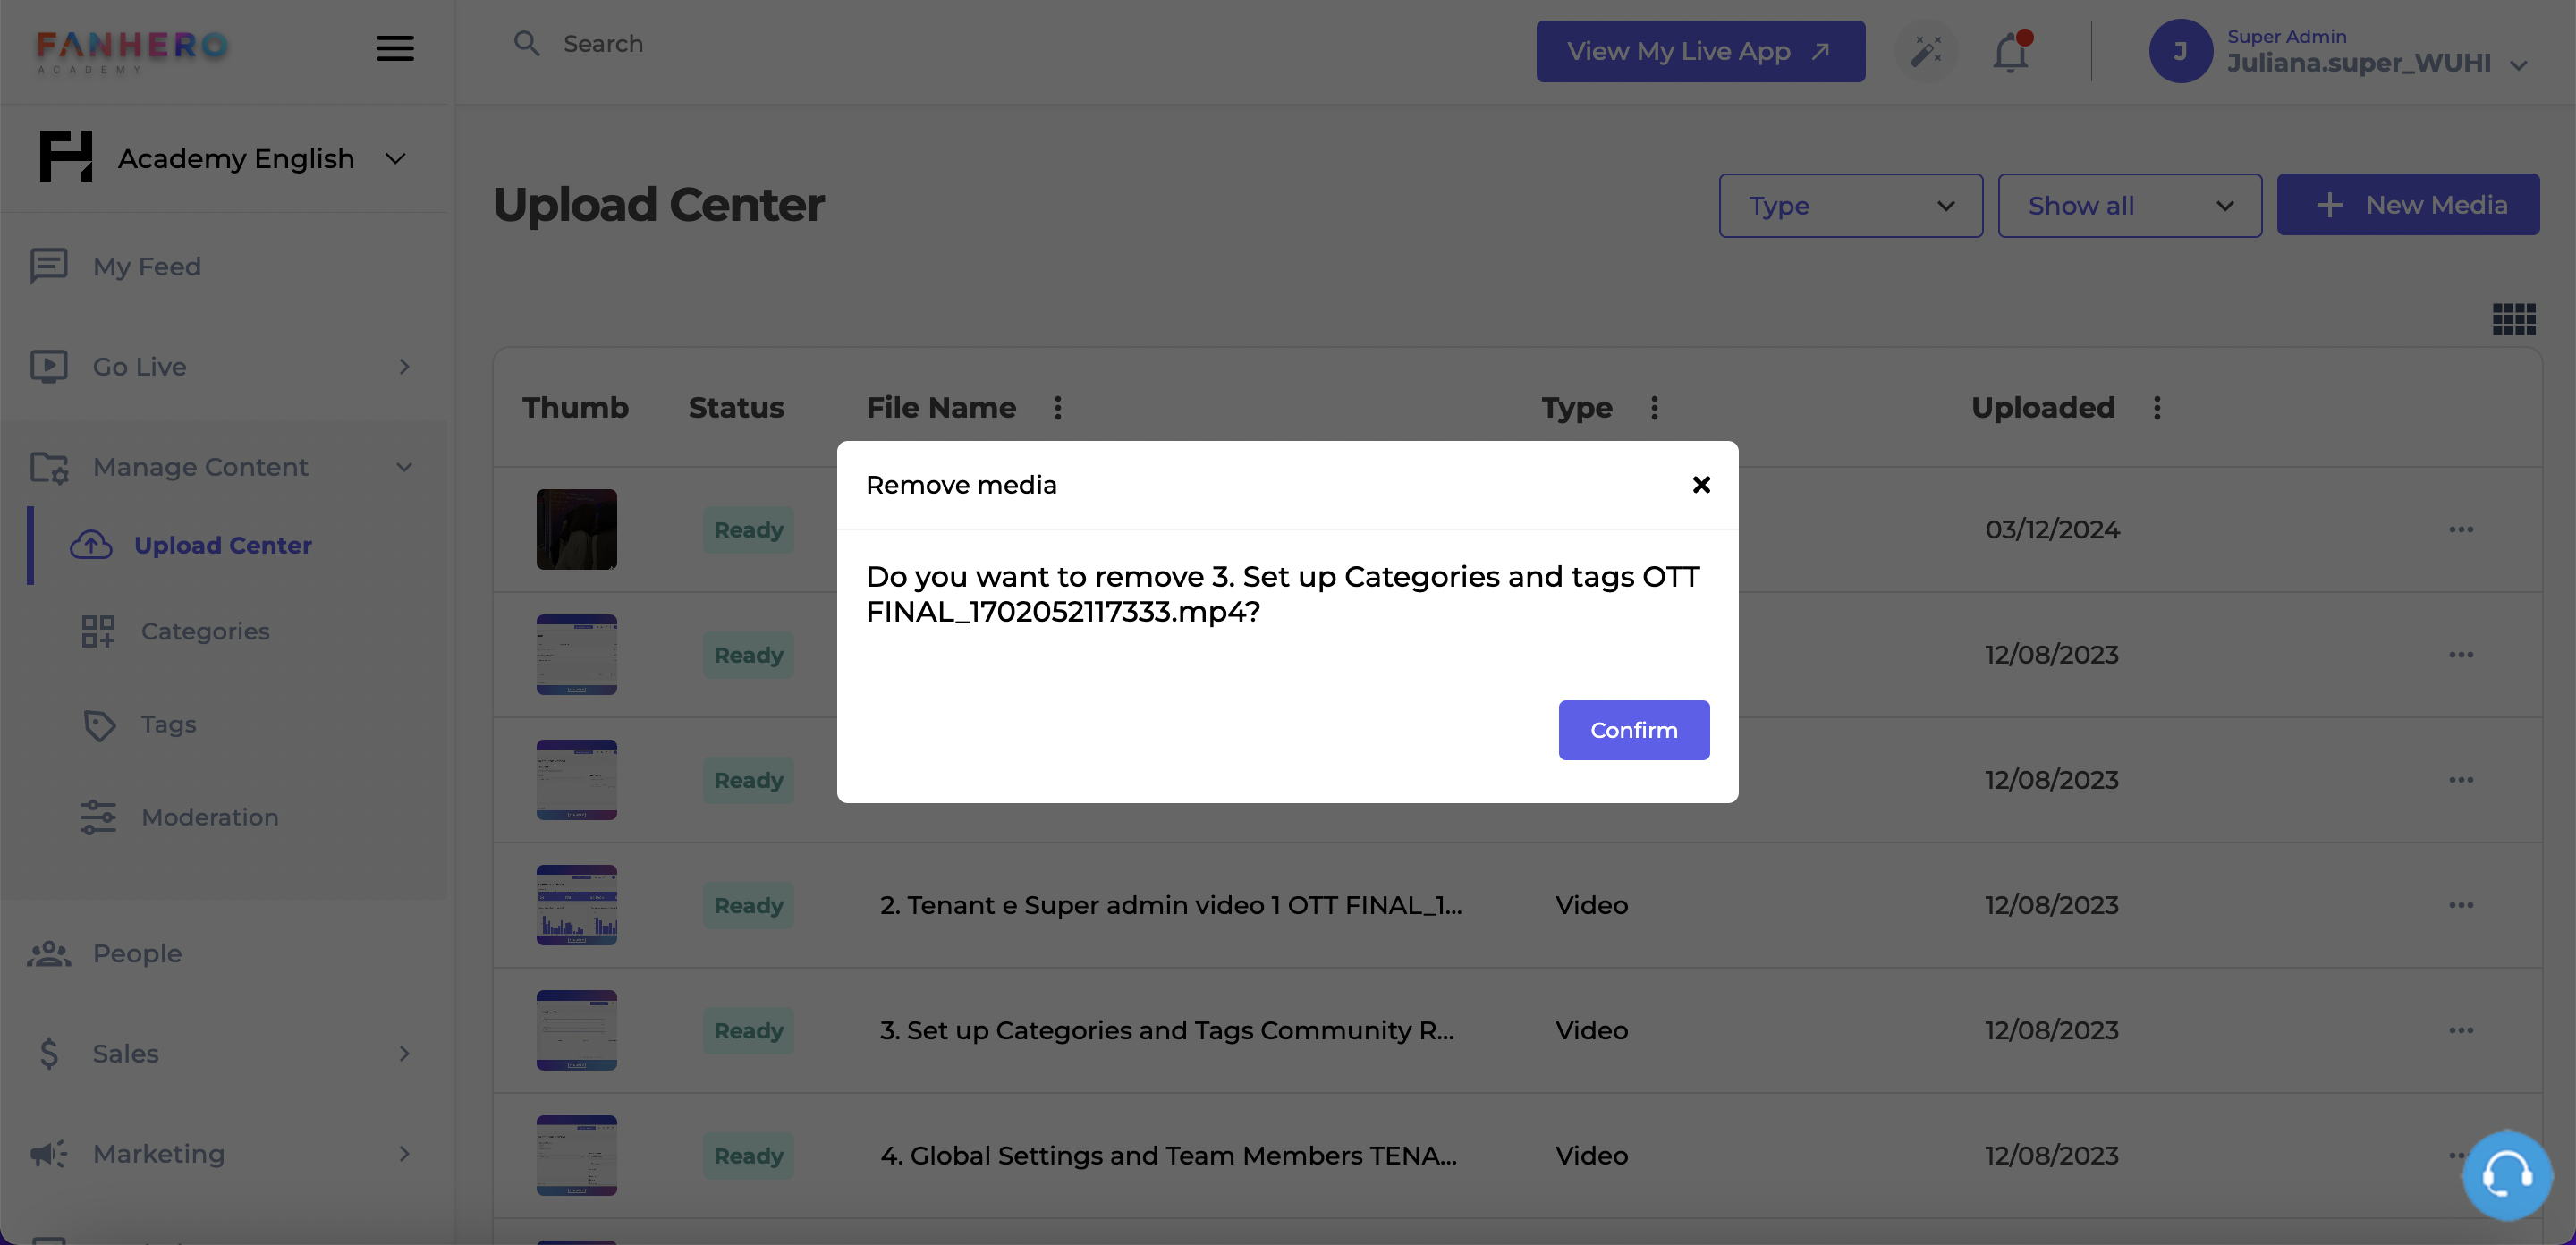
Remove media pop up confirmation
If confirmed, the media will be permanently removed. In the event the media is being used in any content, it will be removed from the content as well.
Copy link
This action is available for media type video and livestream. Clicking on the icon will copy the media URL.
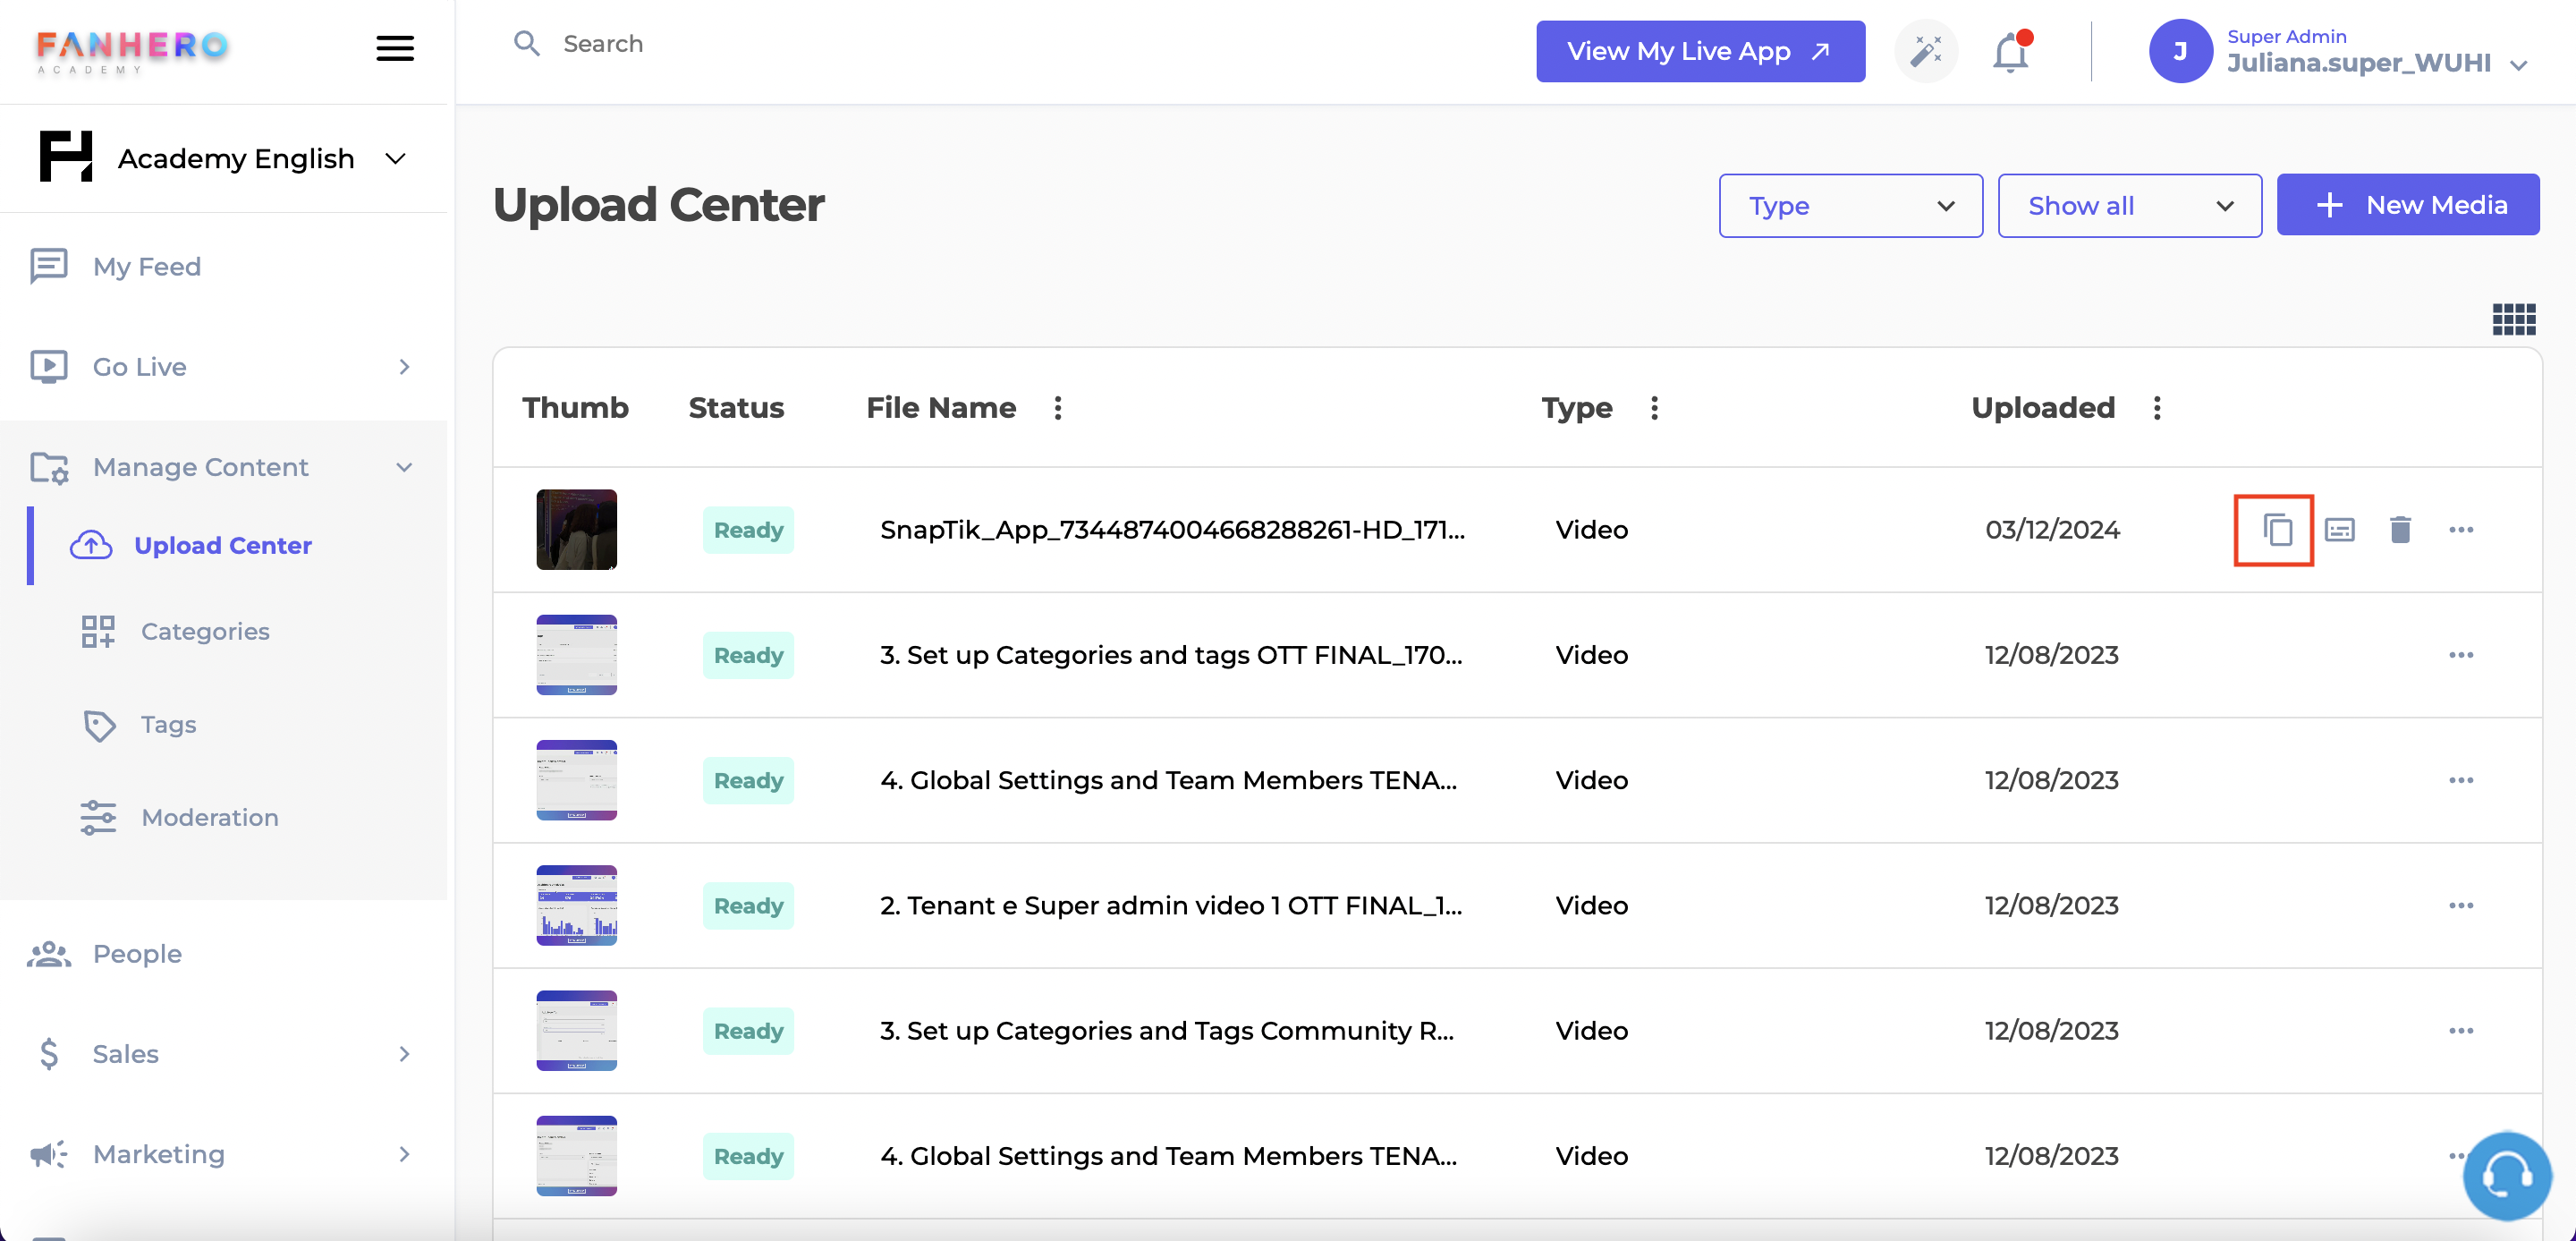
The copy URL icon
Subtitles
This feature is available only for Videos.
Video subtitles (or captions) are textual representations of the audio content in a video. They provide a written version of the audio content, allowing viewers to understand the dialogue.
To add a subtitle to a video, click on the subtitle icon.
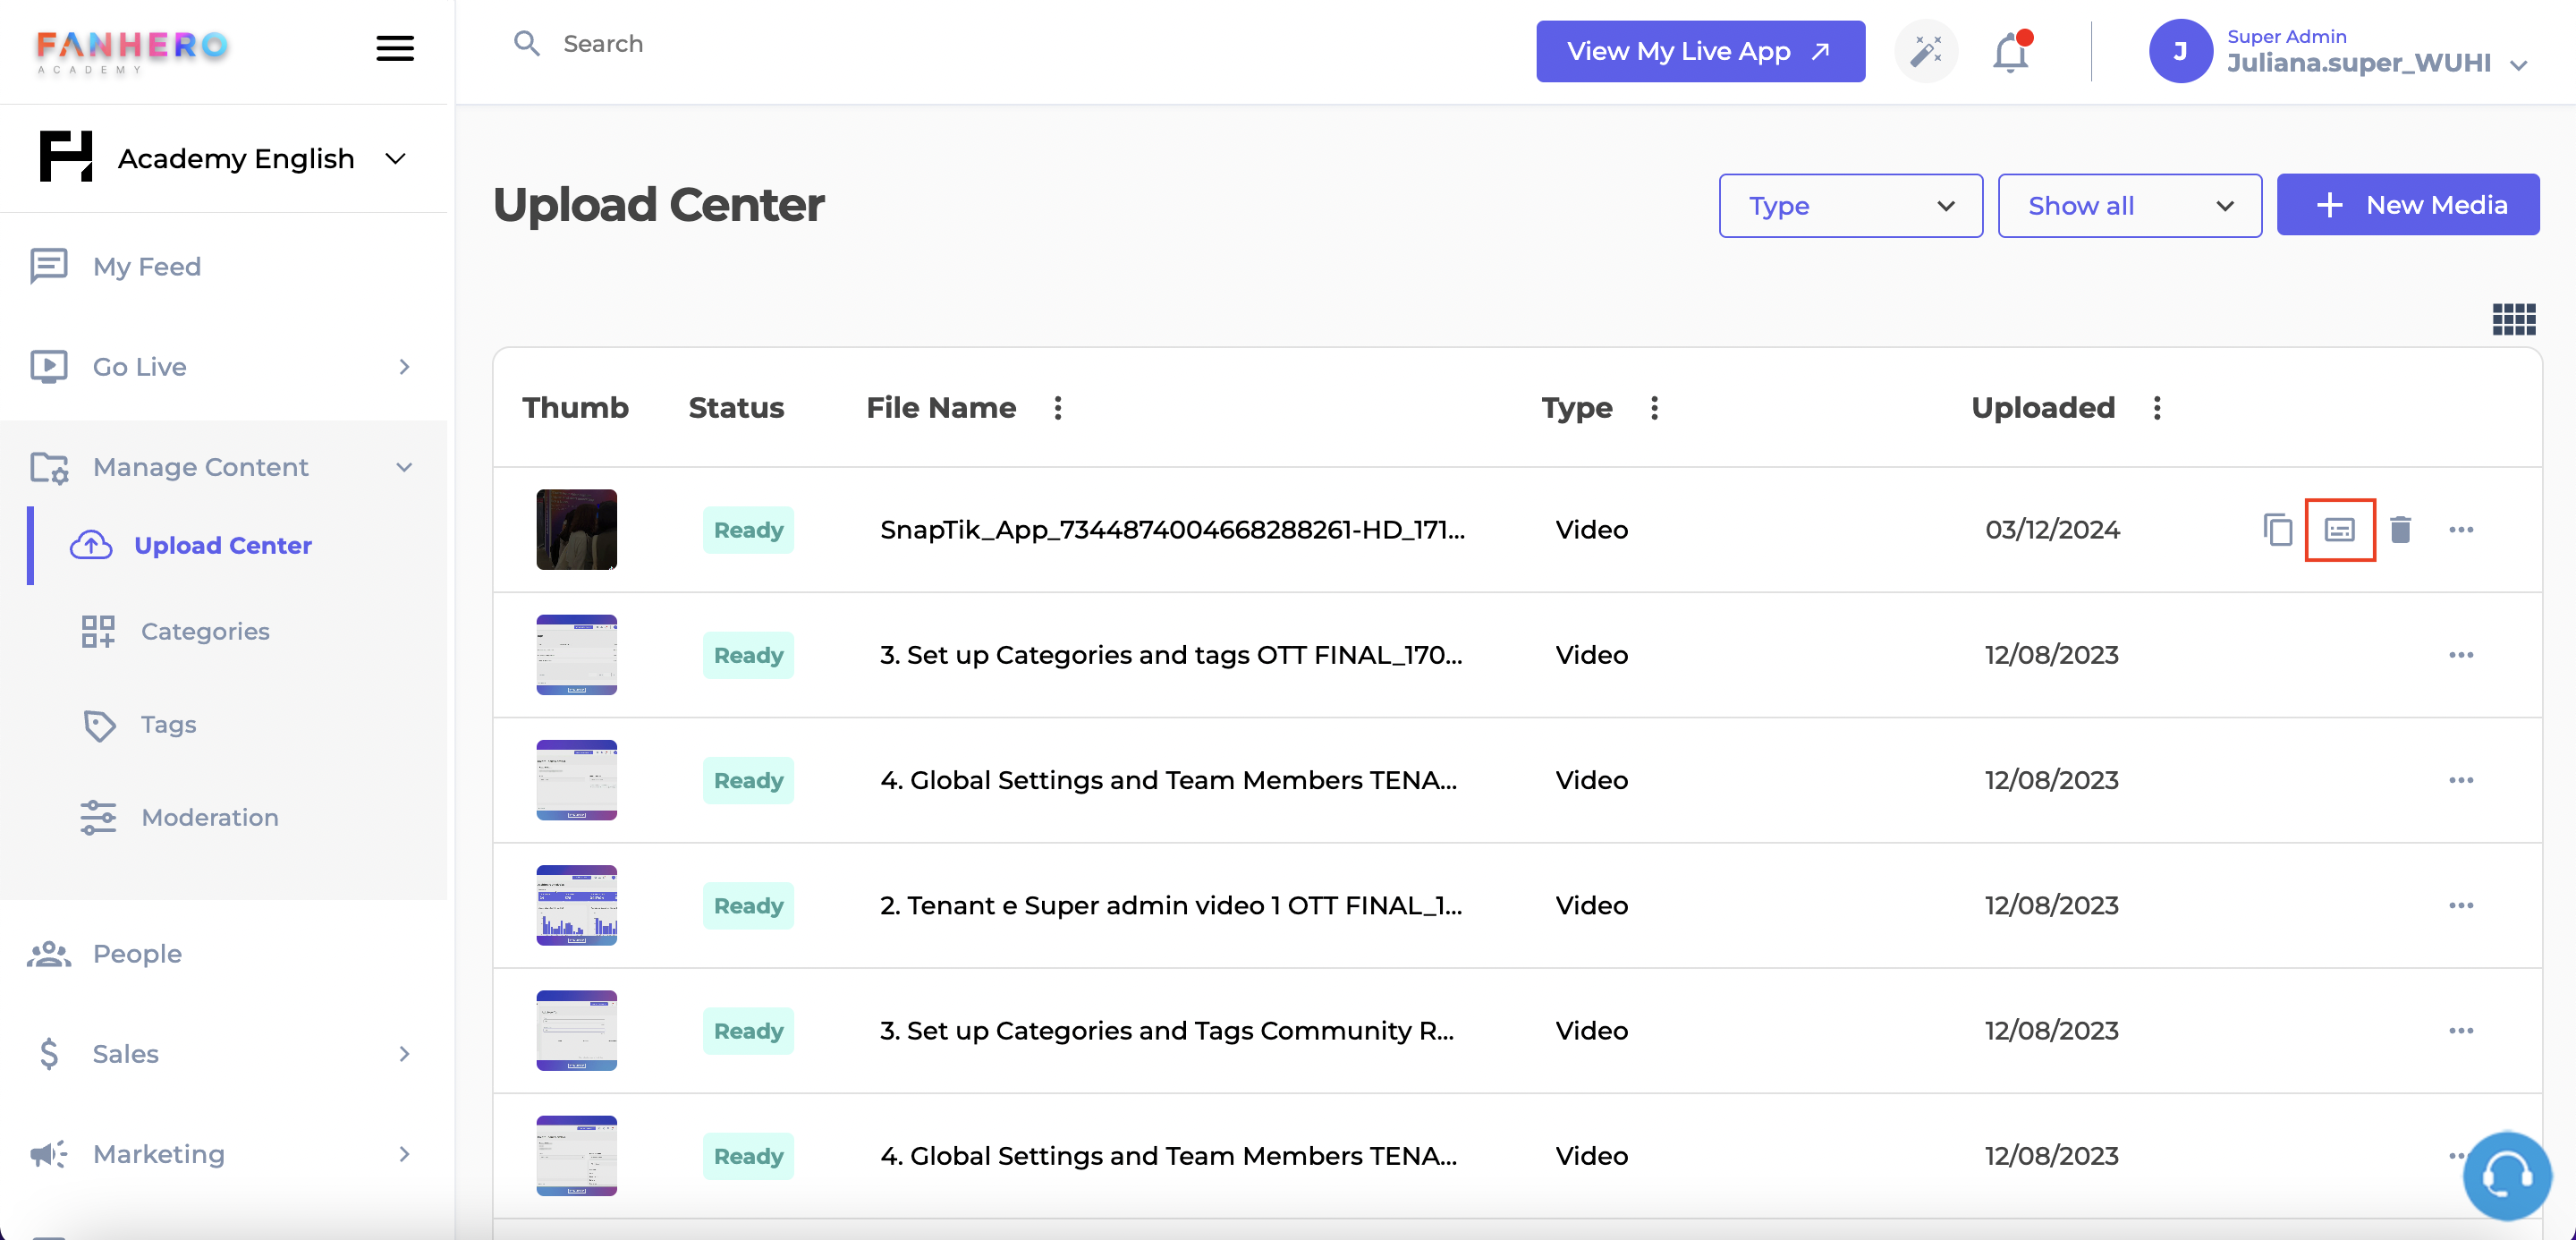
The subtitle icon
A new screen will be displayed, with the file name of the media and a list of all subtitles added to it.
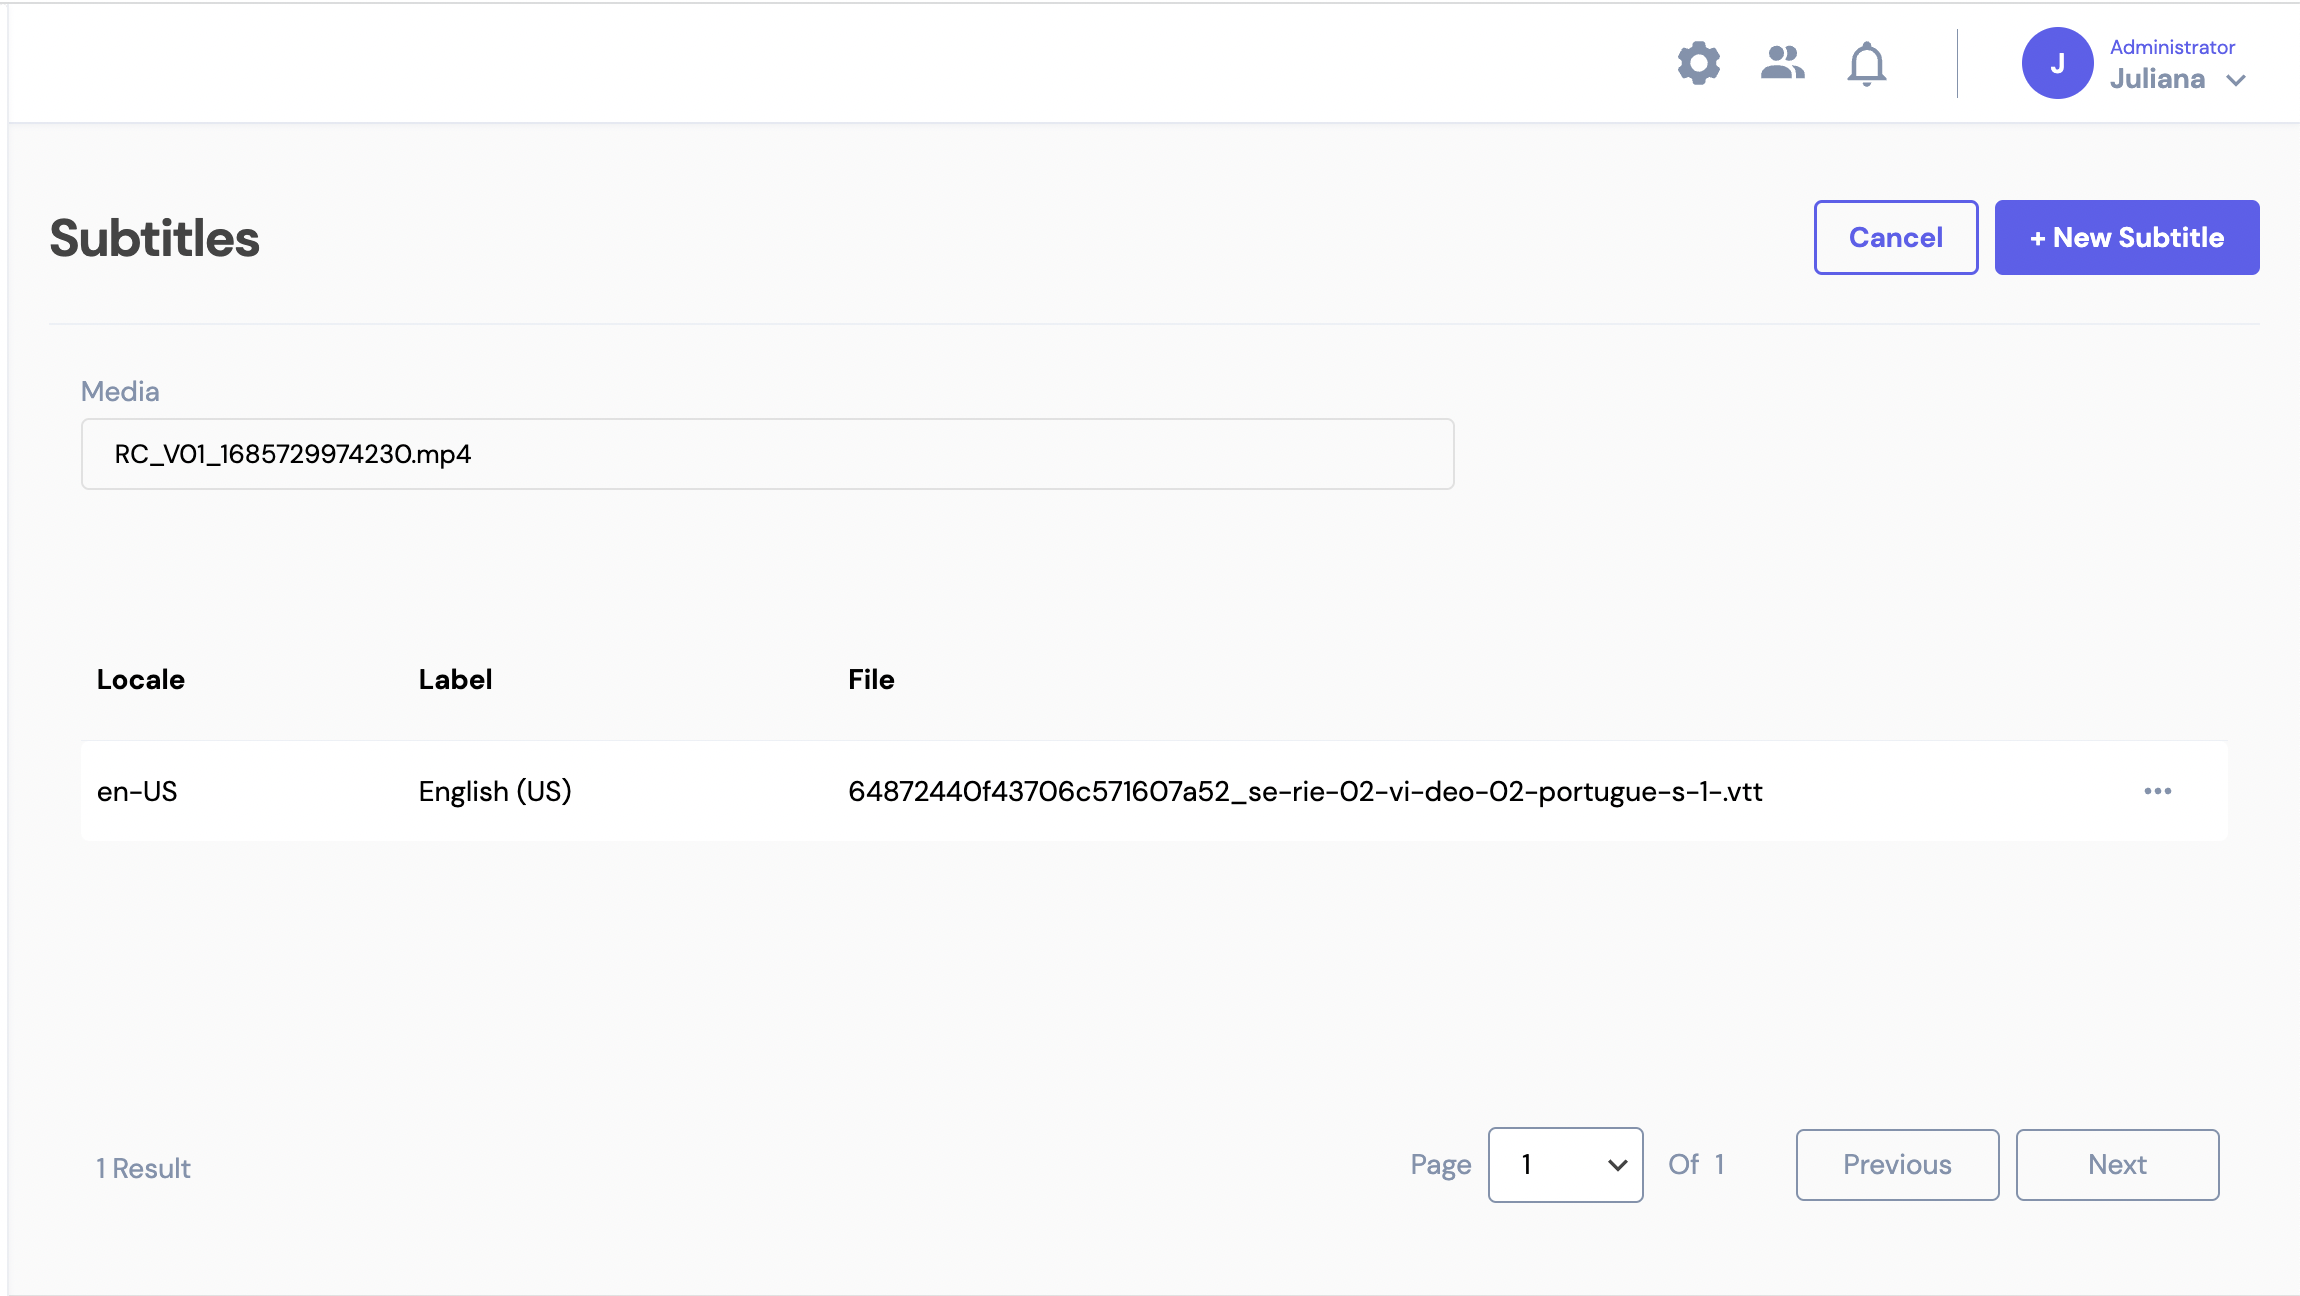
Subtitles screen
To add a new subtitle, click on the New Subtitle button.
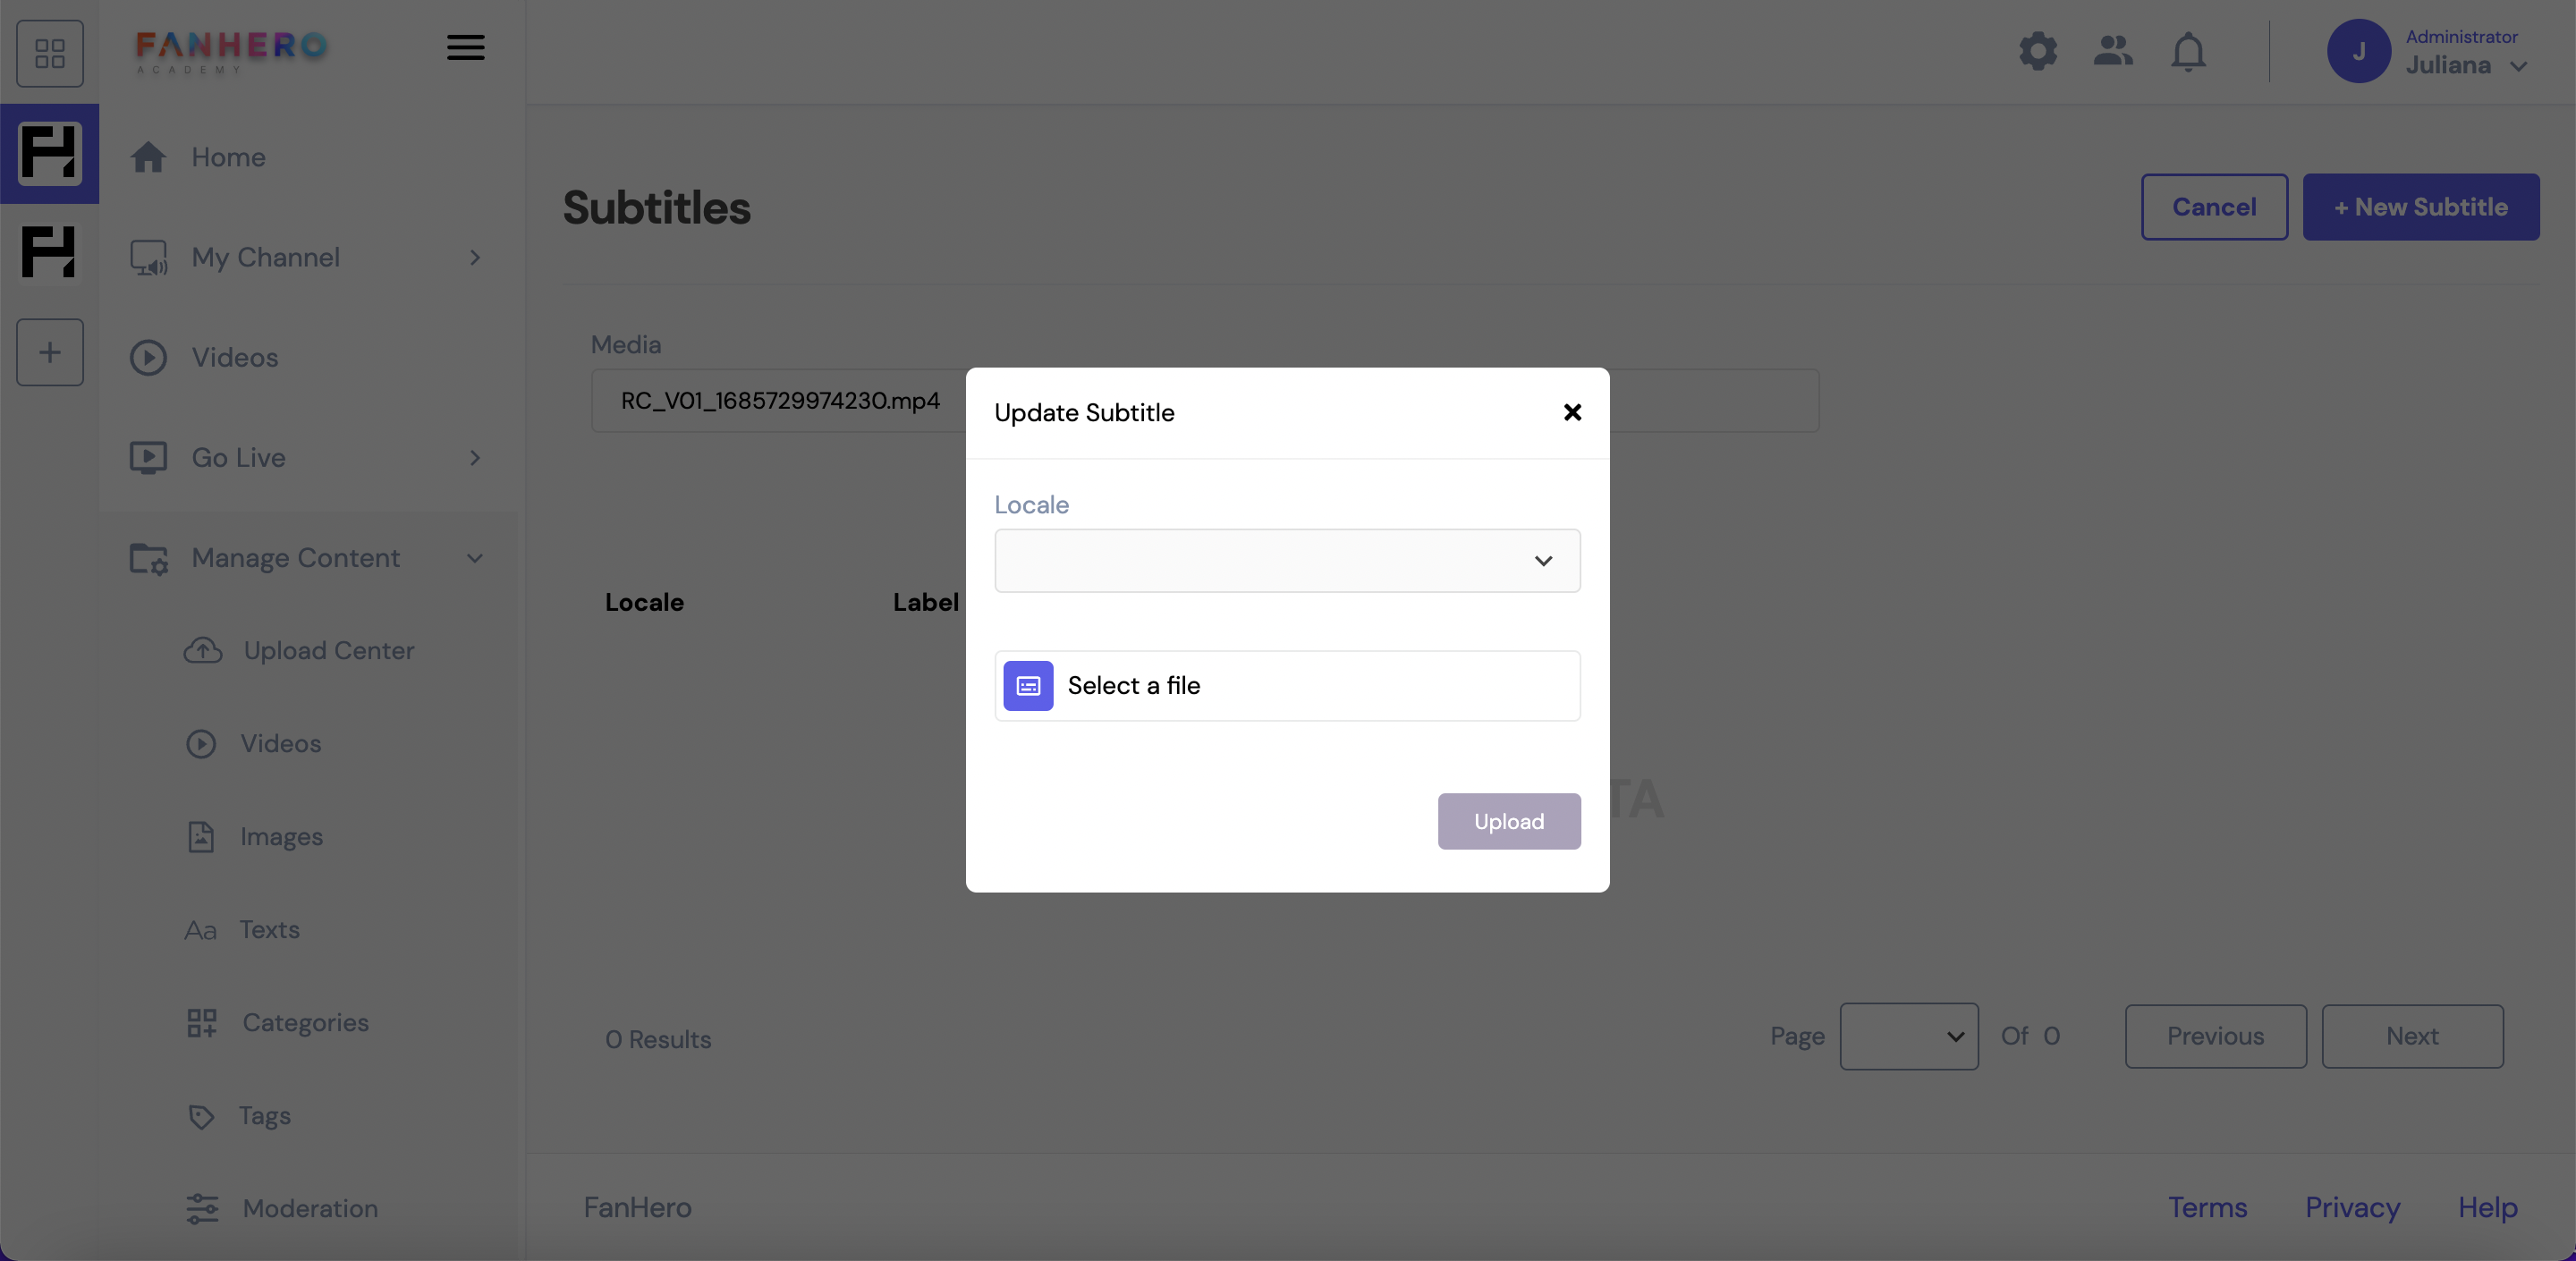
Update subtitle
Locale and file are both required fields. Each available locale can have 1 subtitle file associated with it.
Locale
- English US
- English GB
- Portuguese BR
- Portuguese PT
- French CA
- French FR
- Spanish ES
File
File format must be .vtt or .srt.
Once a subtitle file has been added, a few actions are available:

Clicking on the pencil icon will allow administrators to update the subtitle label. The label is the text that will be available to users in the video player so they can select the best option for them.
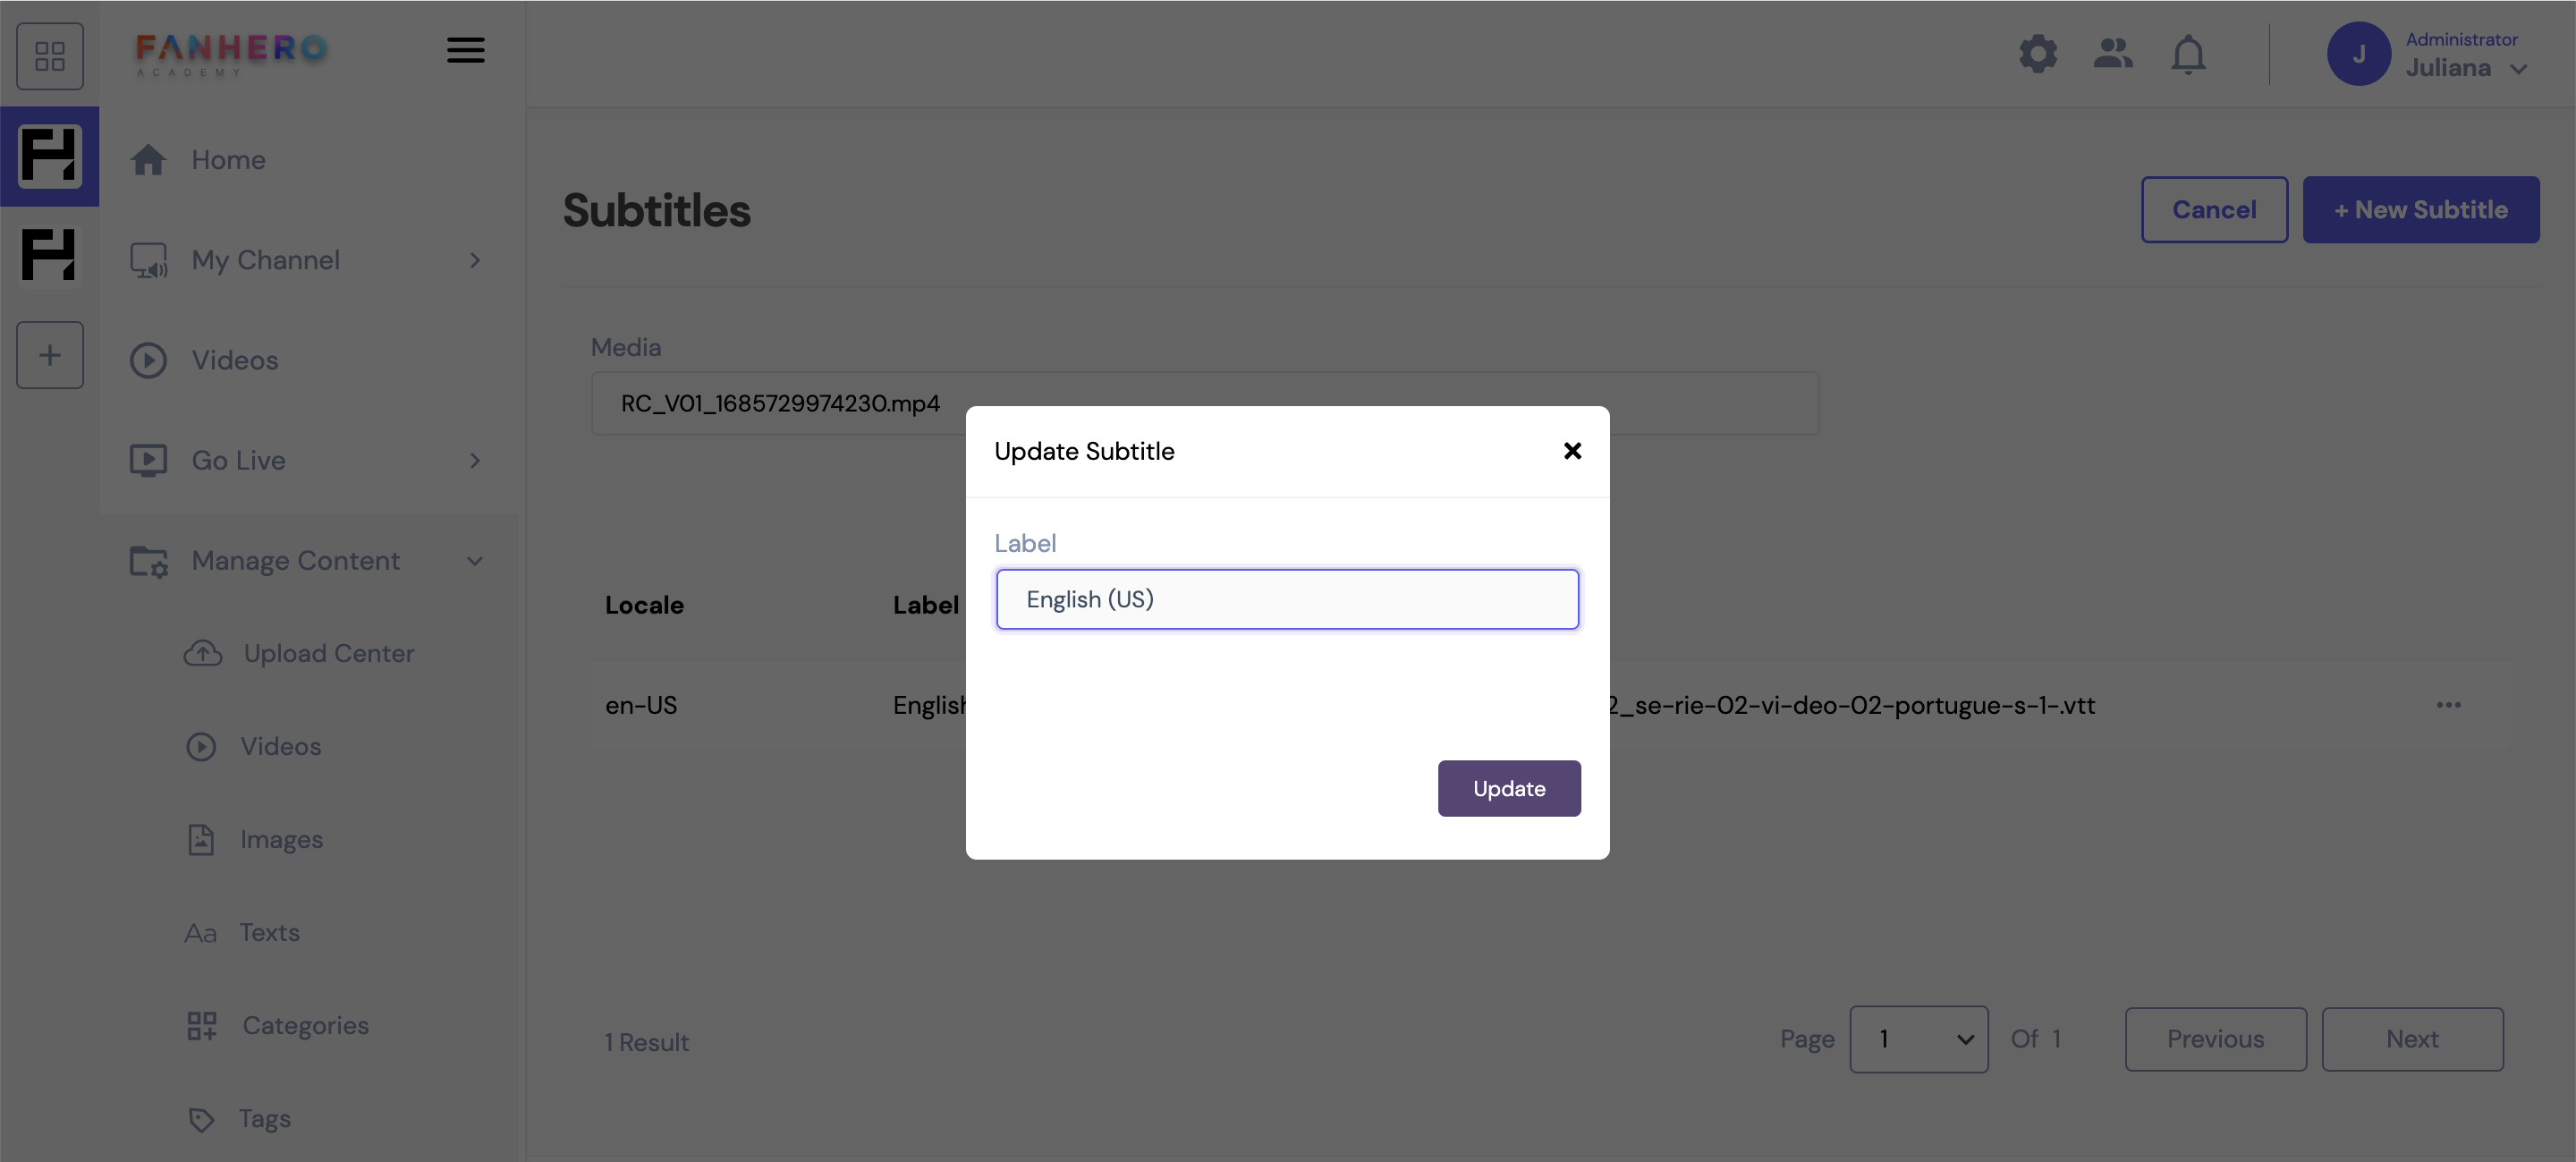
Update subtitle
Clicking on the trash icon allows you to remove a subtitle file. This action requires a confirmation: clicking on the X button will dismiss the pop up and the file will not be deleted. Clicking on Confirm will dismiss the pop up, the file will be deleted and a confirmation message will be displayed.
Updated about 1 year ago