Studio
Overview
Studio allows you to live stream to multiple channels including YouTube, Twitch, FanHero and Custom RTMP while enabling Hosts to invite people and participate in split screen sessions of up to 3 guests and to have that Live Event broadcasted.
Upcoming Stream
In this section, administrators have the ability to create live streams, enter a demo mode and/or view a list of upcoming streams with:
- Thumbnail;
- Title;
- Created date;
- Selected destinations;
- Enter Studio button: clicking on it will open the studio live;
- Actions button:
- Edit: ability to update the studio live information;
- Delete: ability to delete the studio live.
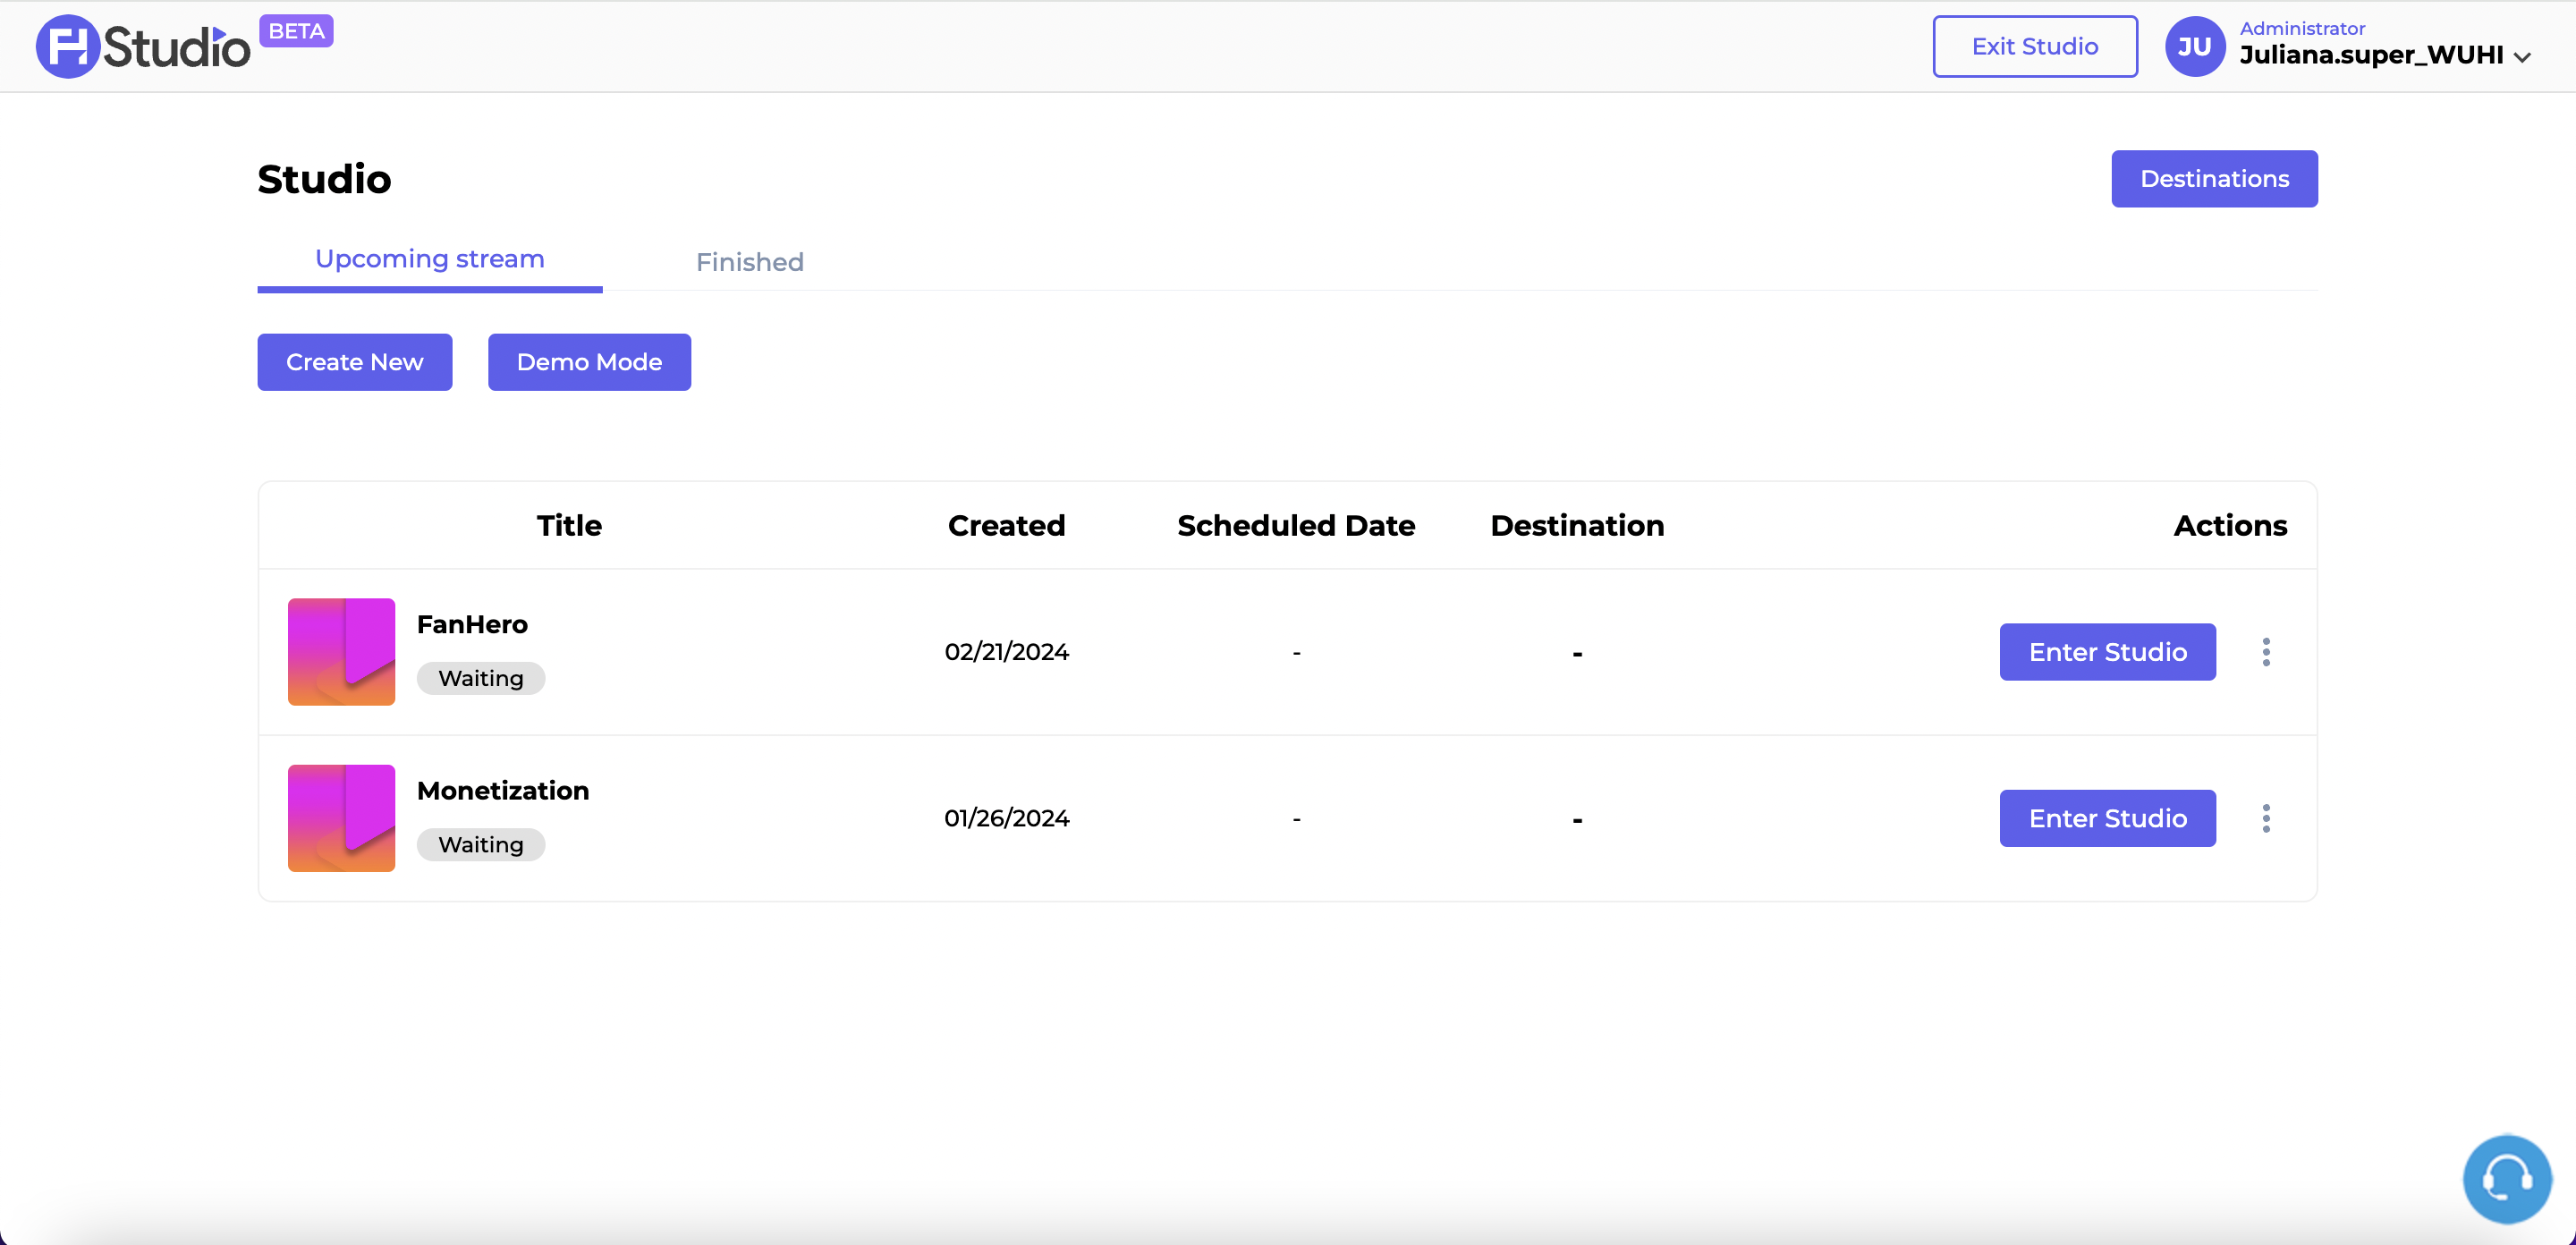
The Upcoming Stream Screen
Demo Mode
This feature allows hosts to demonstrate and test specific functionalities with guests before starting a live stream, ensuring a smooth and successful live streaming experience.
Host Flow
A live stream host is an individual who leads and facilitates a live stream broadcast. Clicking on Try Now will take the host to the "Set up your hardware" screen. This screen will help you set up crucial elements for a live stream.
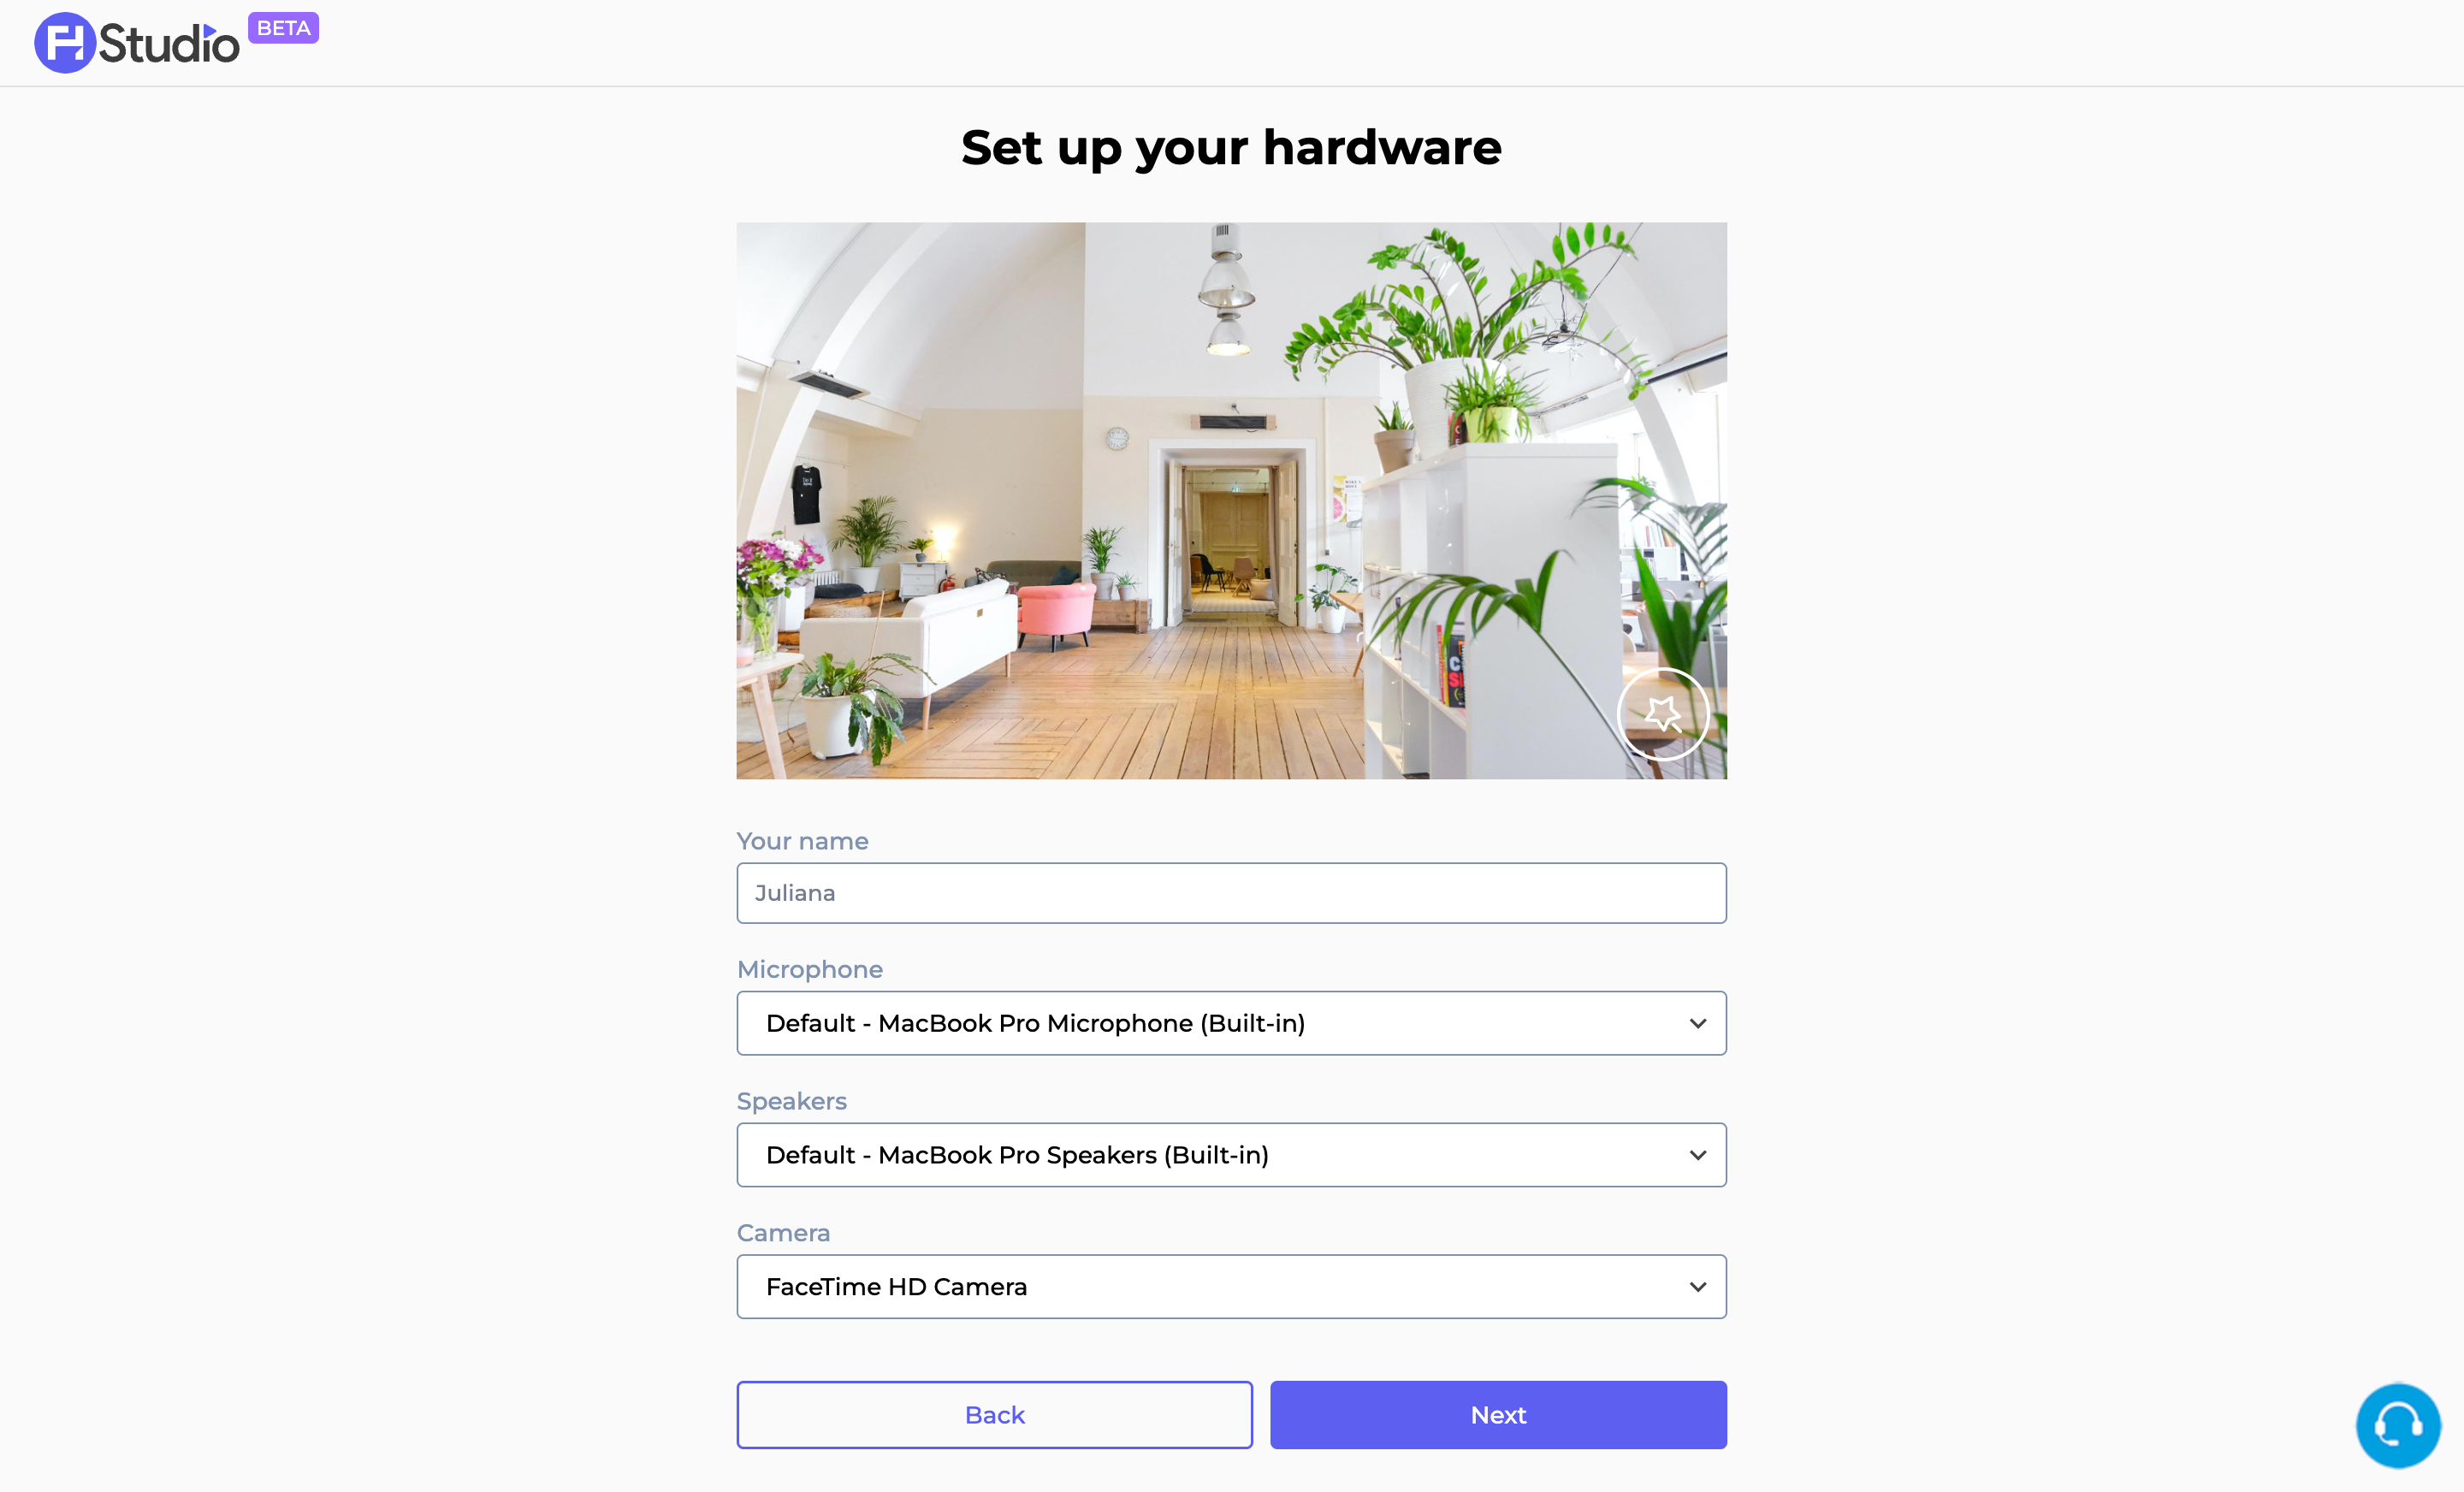
The Set up your Hardware Screen
- Your name: this is your display name. It is a required field, max of 20 characters;
- Microphone: your mic source;
- Speakers: your speaker source;
- Camera: your camera source.
Upon completing all the fields above, the Next button will be enabled.
Clicking on the Filter icon will open a pop up, where users can view and edit the same features above and/or choose a background effect.
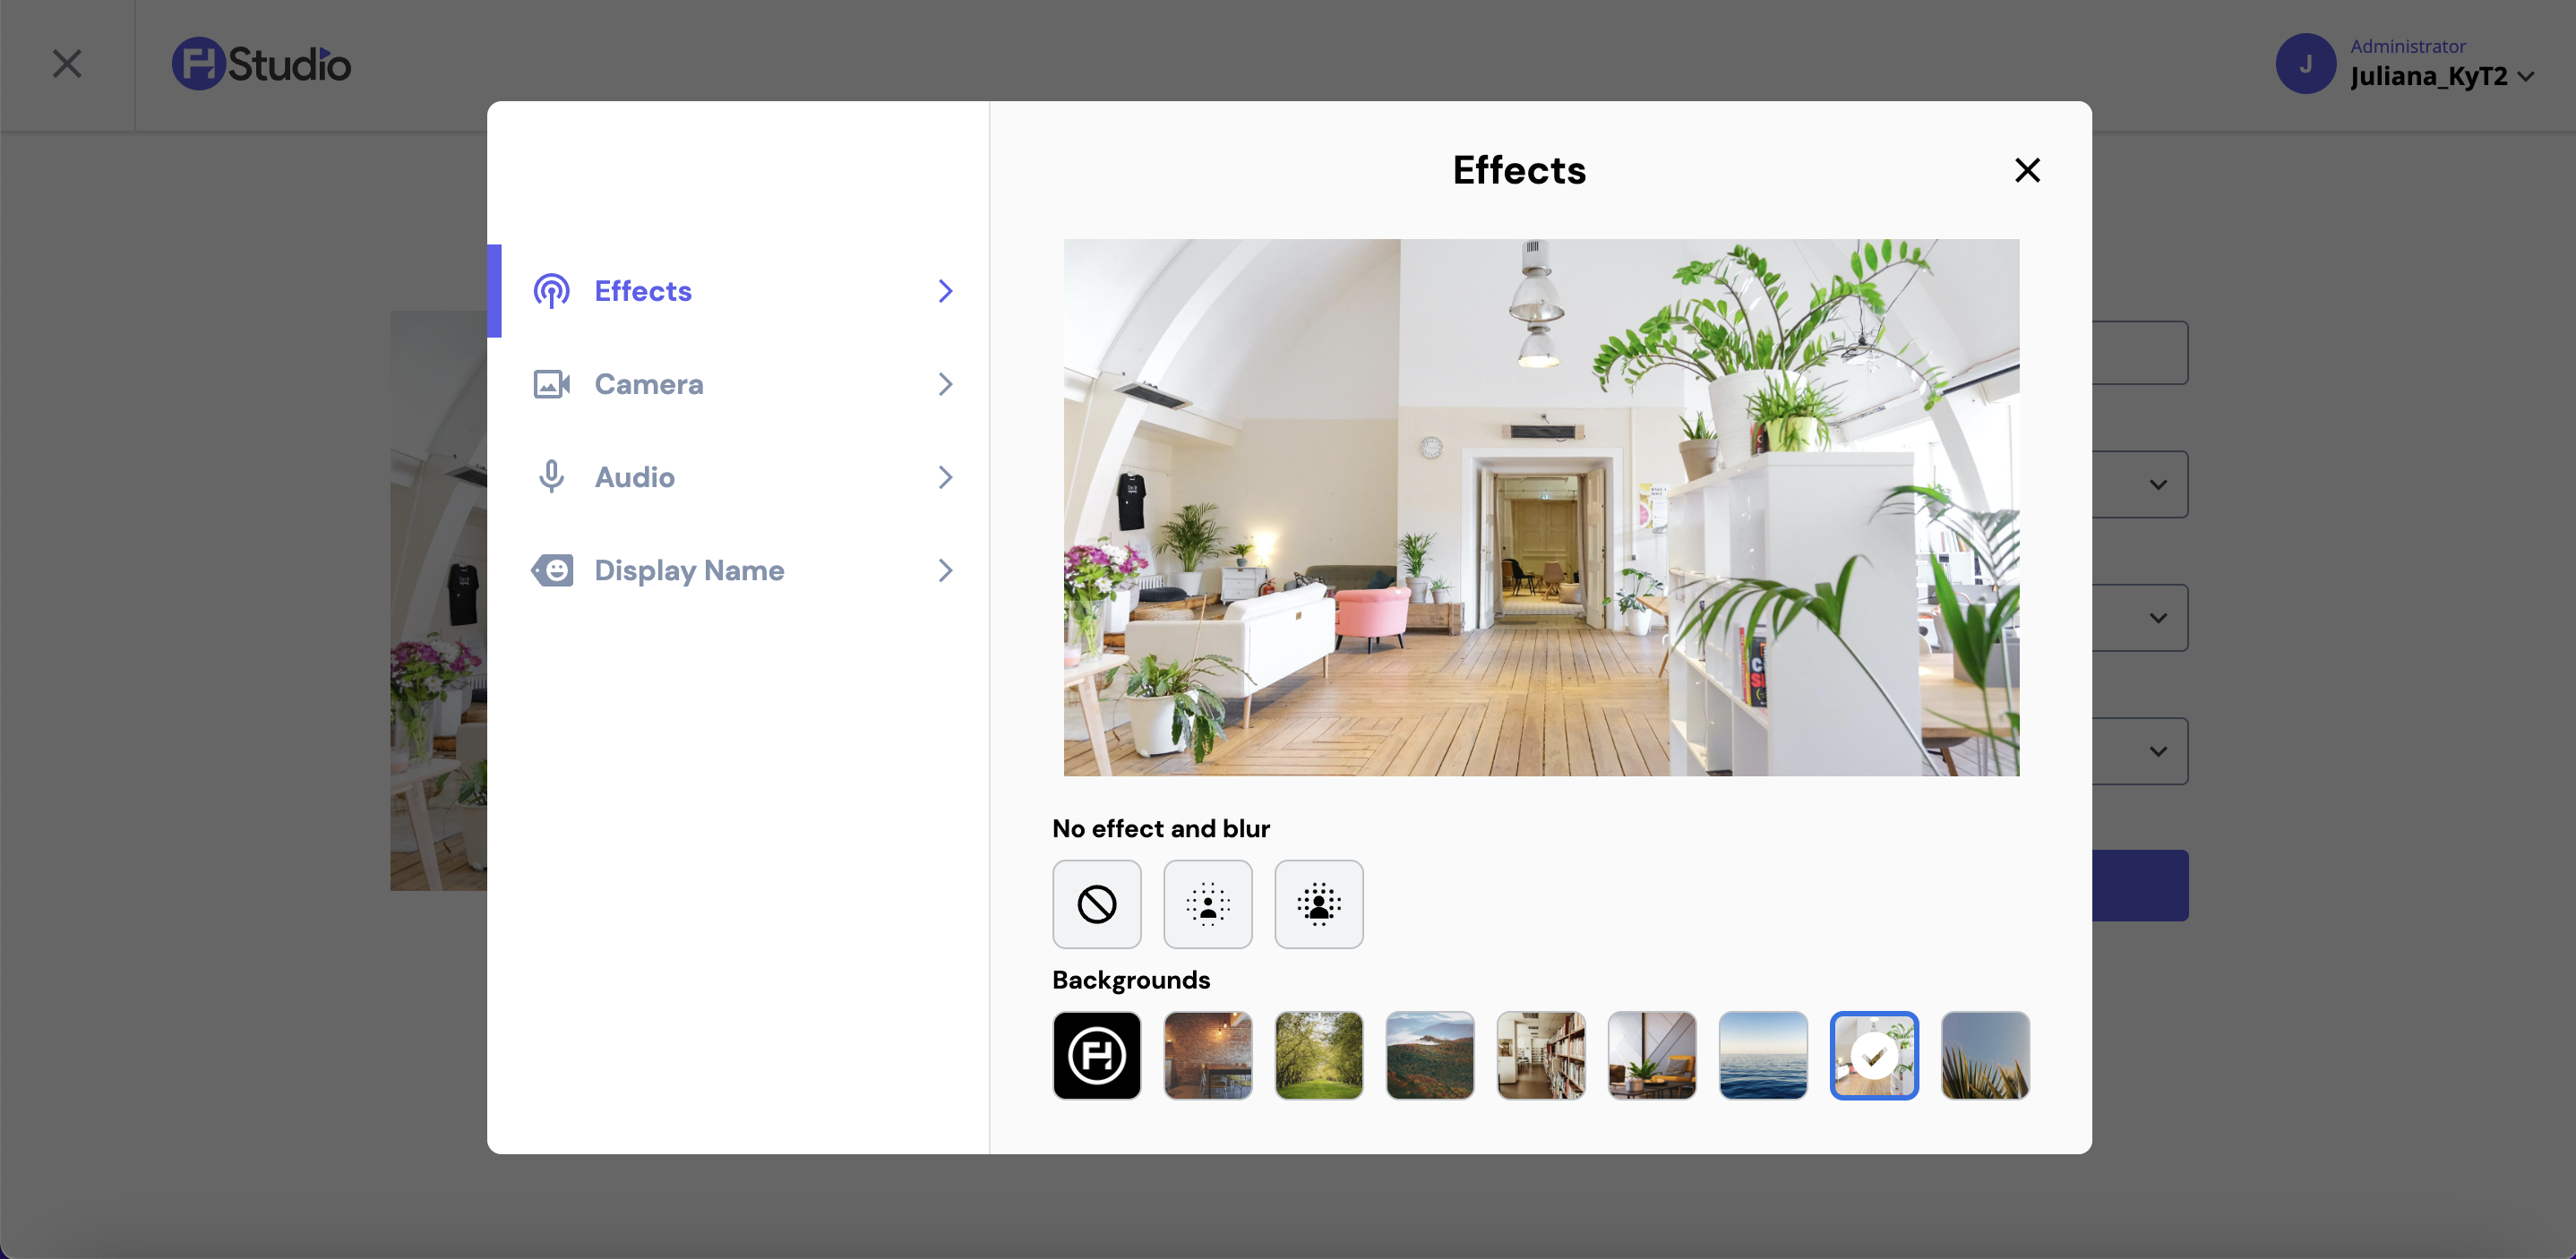
The Settings pop up
When all the settings are ready, the host can proceed to the Studio live.
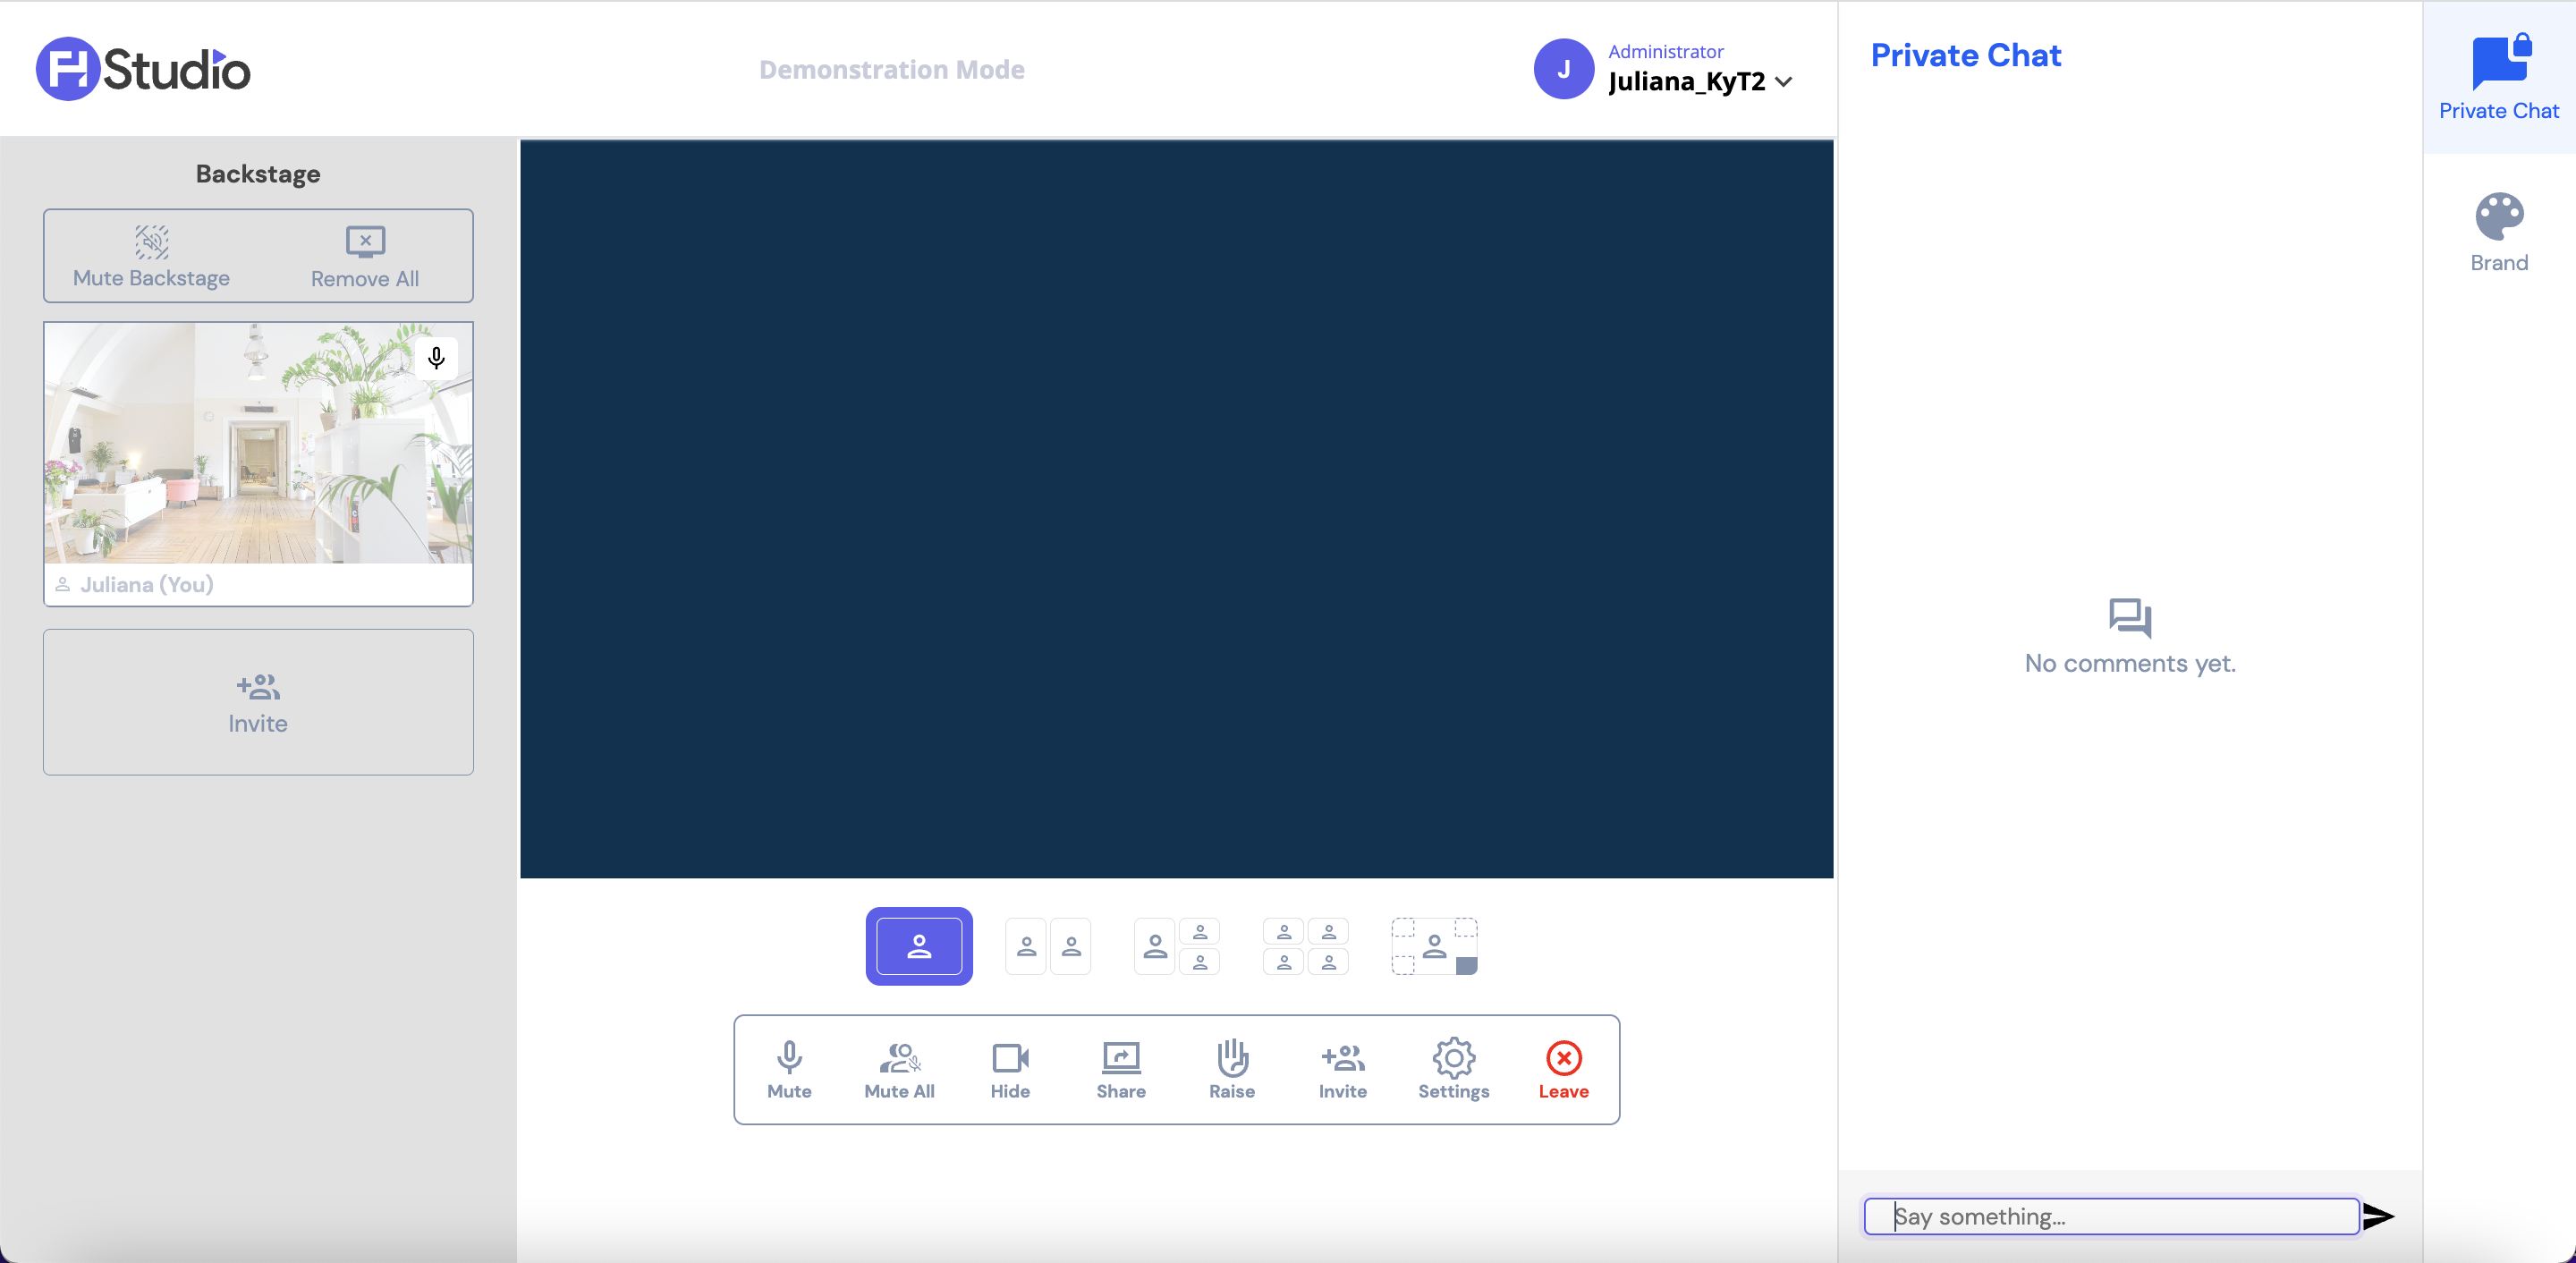
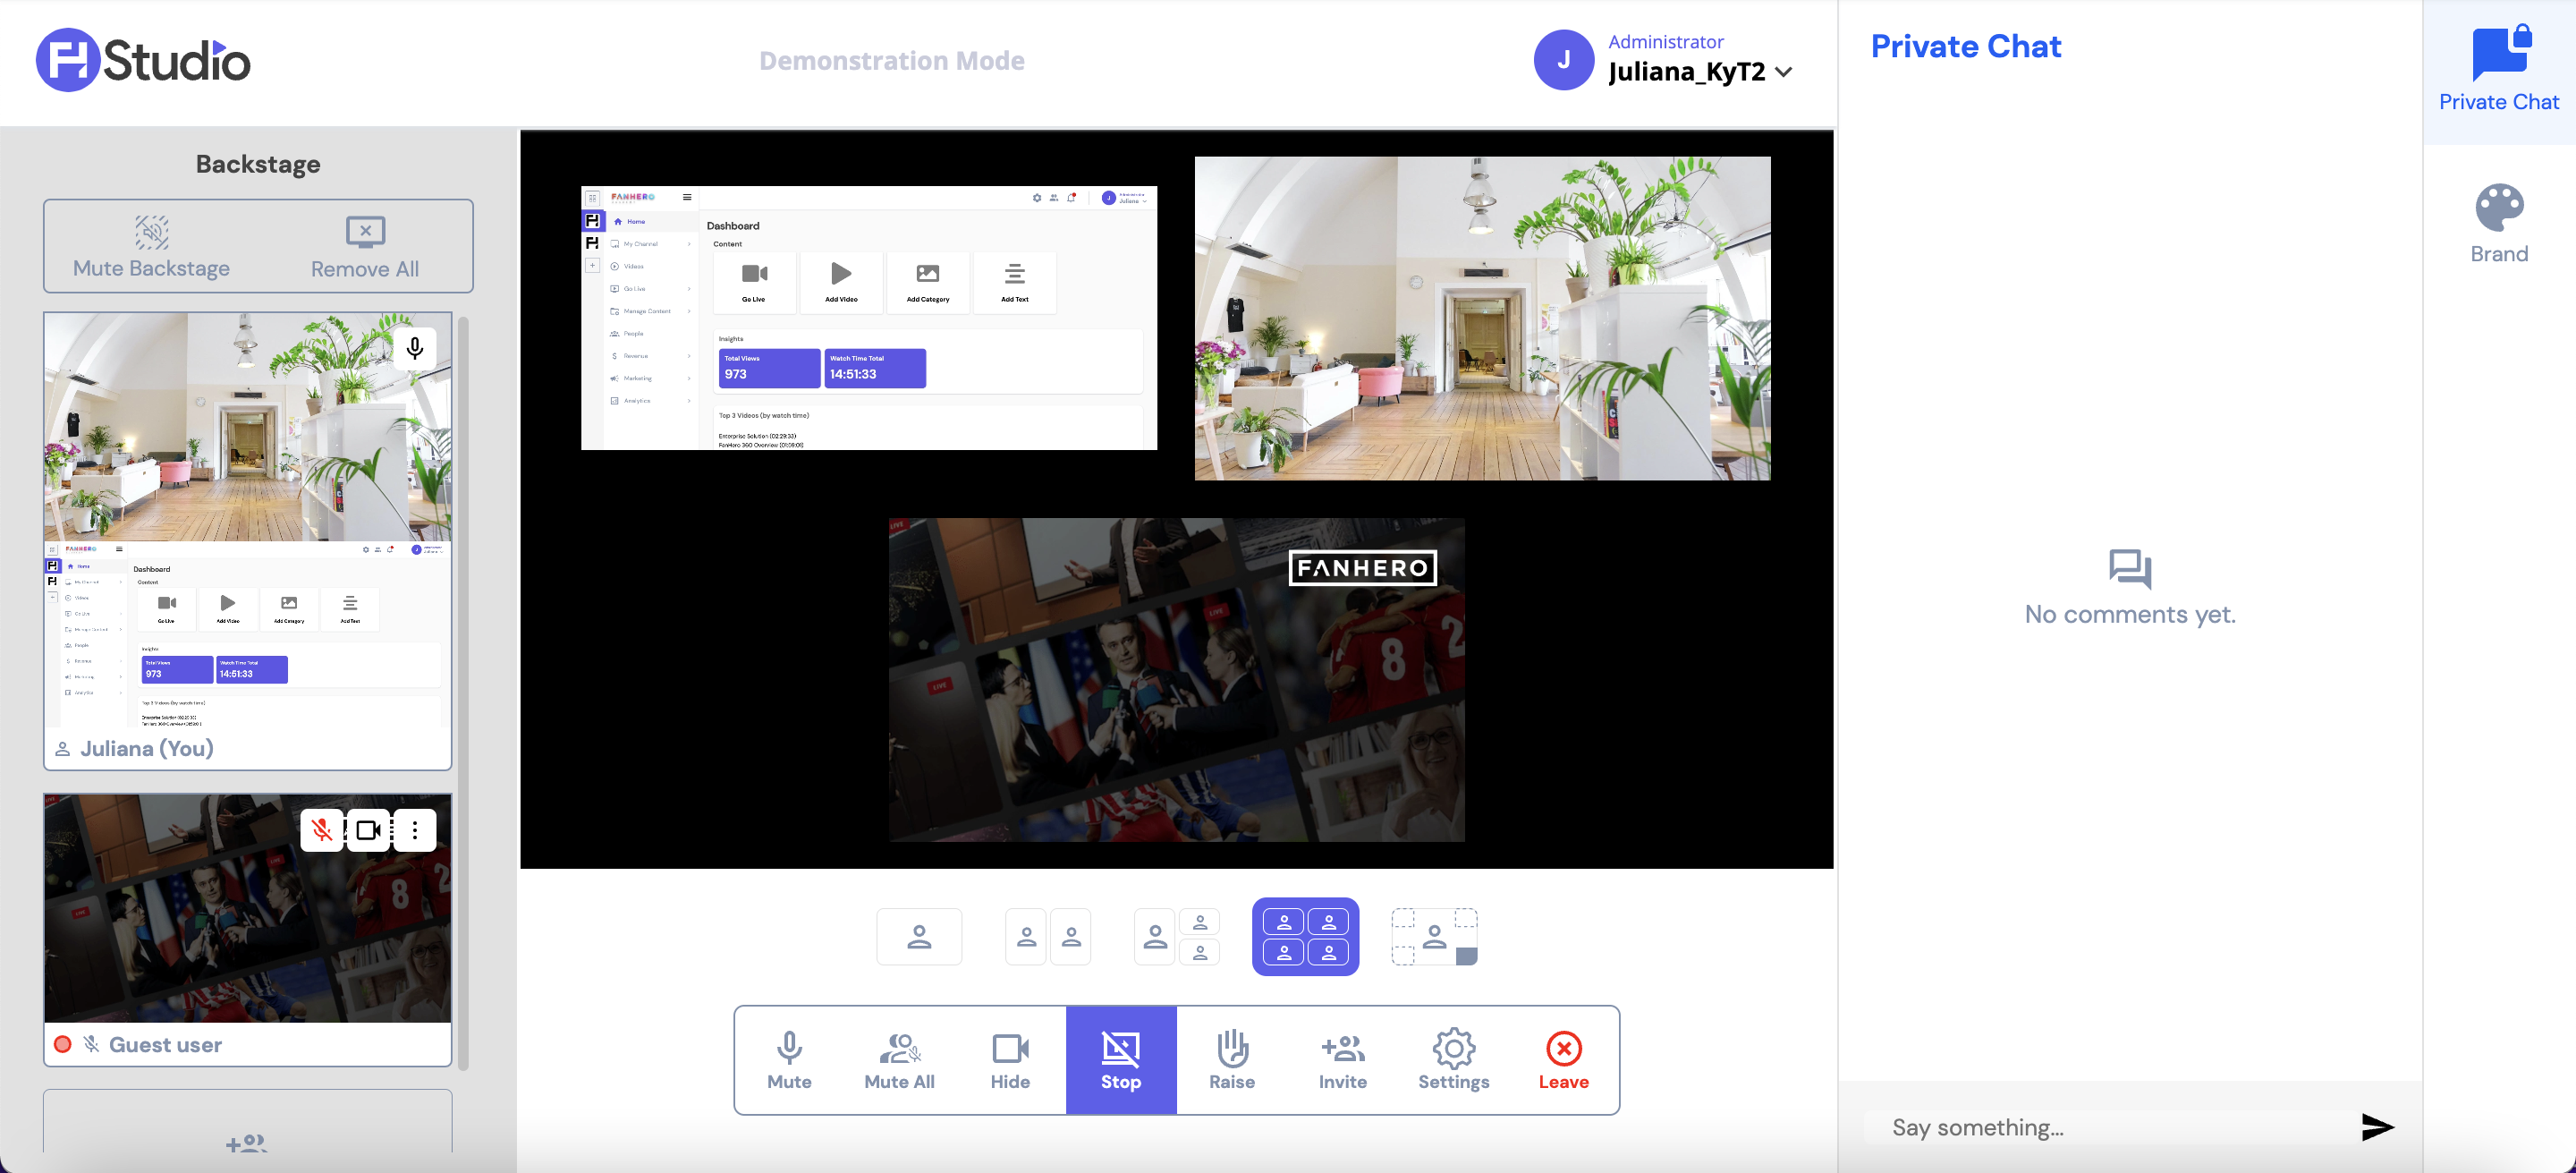
The Studio Room
The Studio live screen consists of 3 main parts:
- The backstage area (left);
- The stage area (center);
- The Communication area (right).
It is important to note that the host cannot go live in the Demonstration Mode even though all other features are available.
Backstage Area
The backstage area refers to a designated space where the host can prepare, coordinate, and manage various aspects of the live stream.
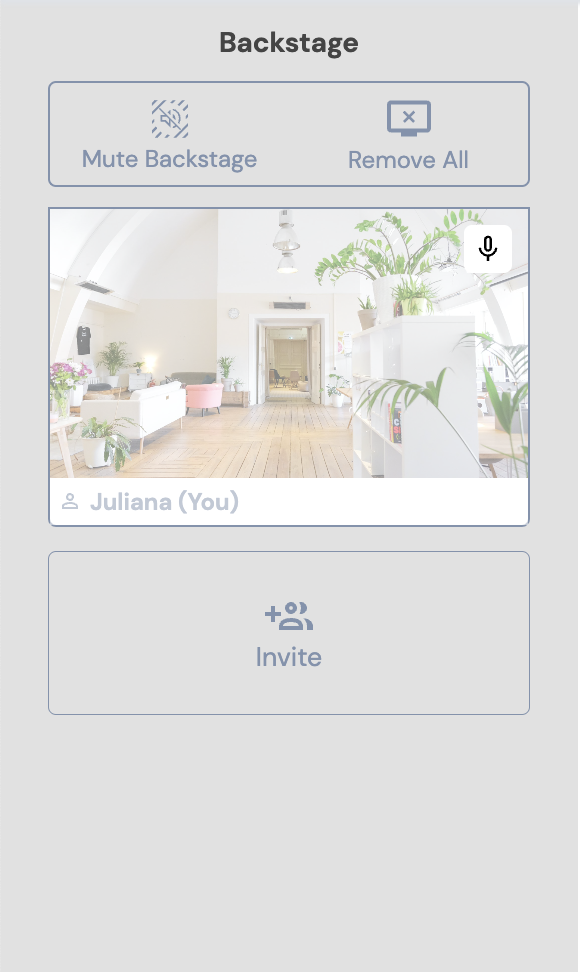
The Backstage Area
- Mute Backstage: this feature gives the host the ability to mute all guests in the backstage area at once. Even though a host can mute a guest, it is not possible to unmute a guest. This action will not mute participants that are in the stage area.
- Remove all: hosts have the ability to remove all guests from a Studio live at once;
- Video tiles: the first tile displayed is always your own tile (in this flow, the host). Hovering over the tiles will display specific actions, depending on whether the user has been added to the stage area or not, the type of account, etc.:
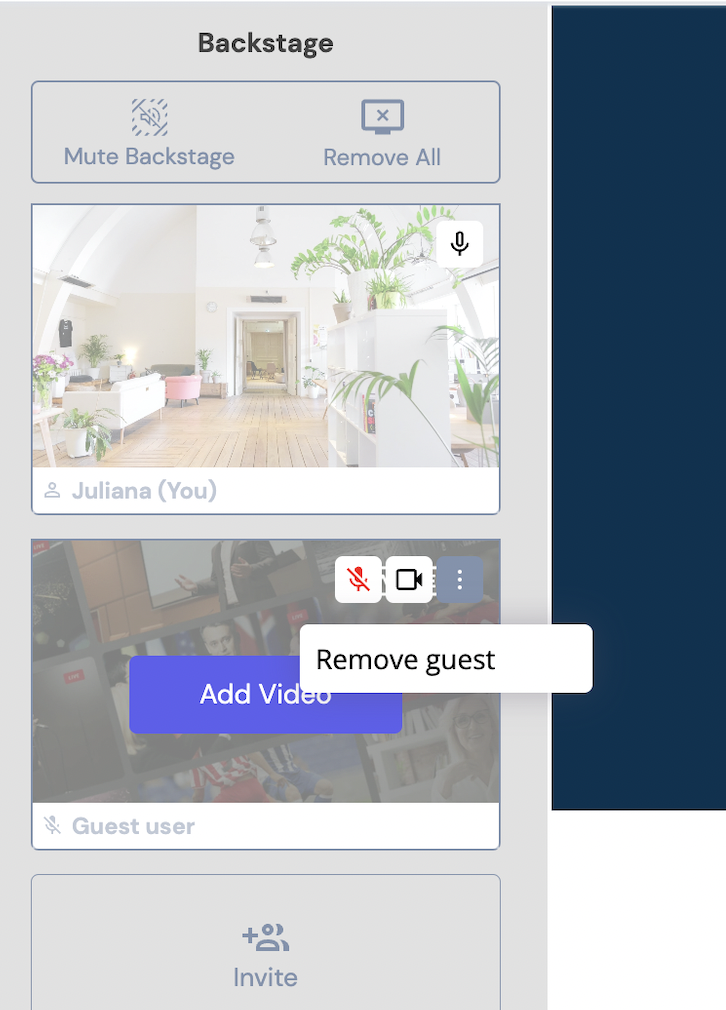
- Add Video button: if the user has not been added to the stage area yet. Clicking on it will add the participant to the stage area.
- Remove Video button: if the user is already in the stage area and should be removed. Clicking on it will remove the participant from the stage area.
- Mic: a host can mute and unmute himself at any time by clicking on the mic icon. A host can mute any participants at any time by clicking on the mic icon. A red mic icon means the mic is muted for that participant.
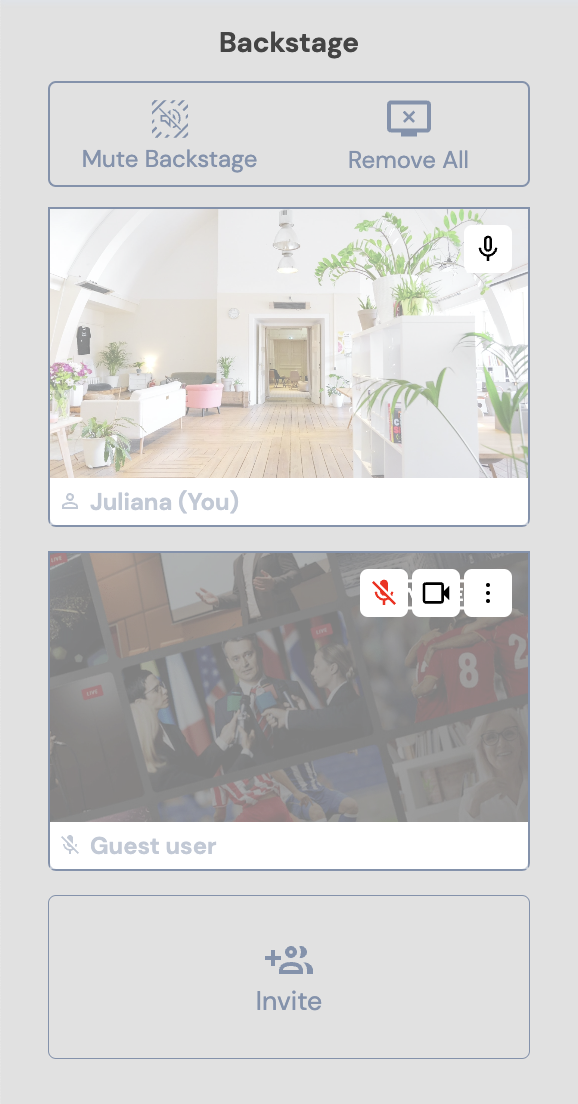
- Camera: a host can disable a guest's video camera by clicking on the camera icon, however a host does not have the ability to enable the video camera for any user other than himself (clicking on the red camera icon will not have any action).

Disabled Video Camera
- Remove guest: the host can remove a guest from the Studio live by clicking on the 3 dots and selecting the option "Remove guest". A pop up will be displayed asking the host to confirm the action.
- Invite: to invite a guest, the host can click on the Invite button (either on the backstage area or the one available in the stage area). A pop up will be displayed with a link to be shared to other participants (guests). Even though there is no limit on how many guests can be invited, only 4 participants can be in the stage area at the same time.
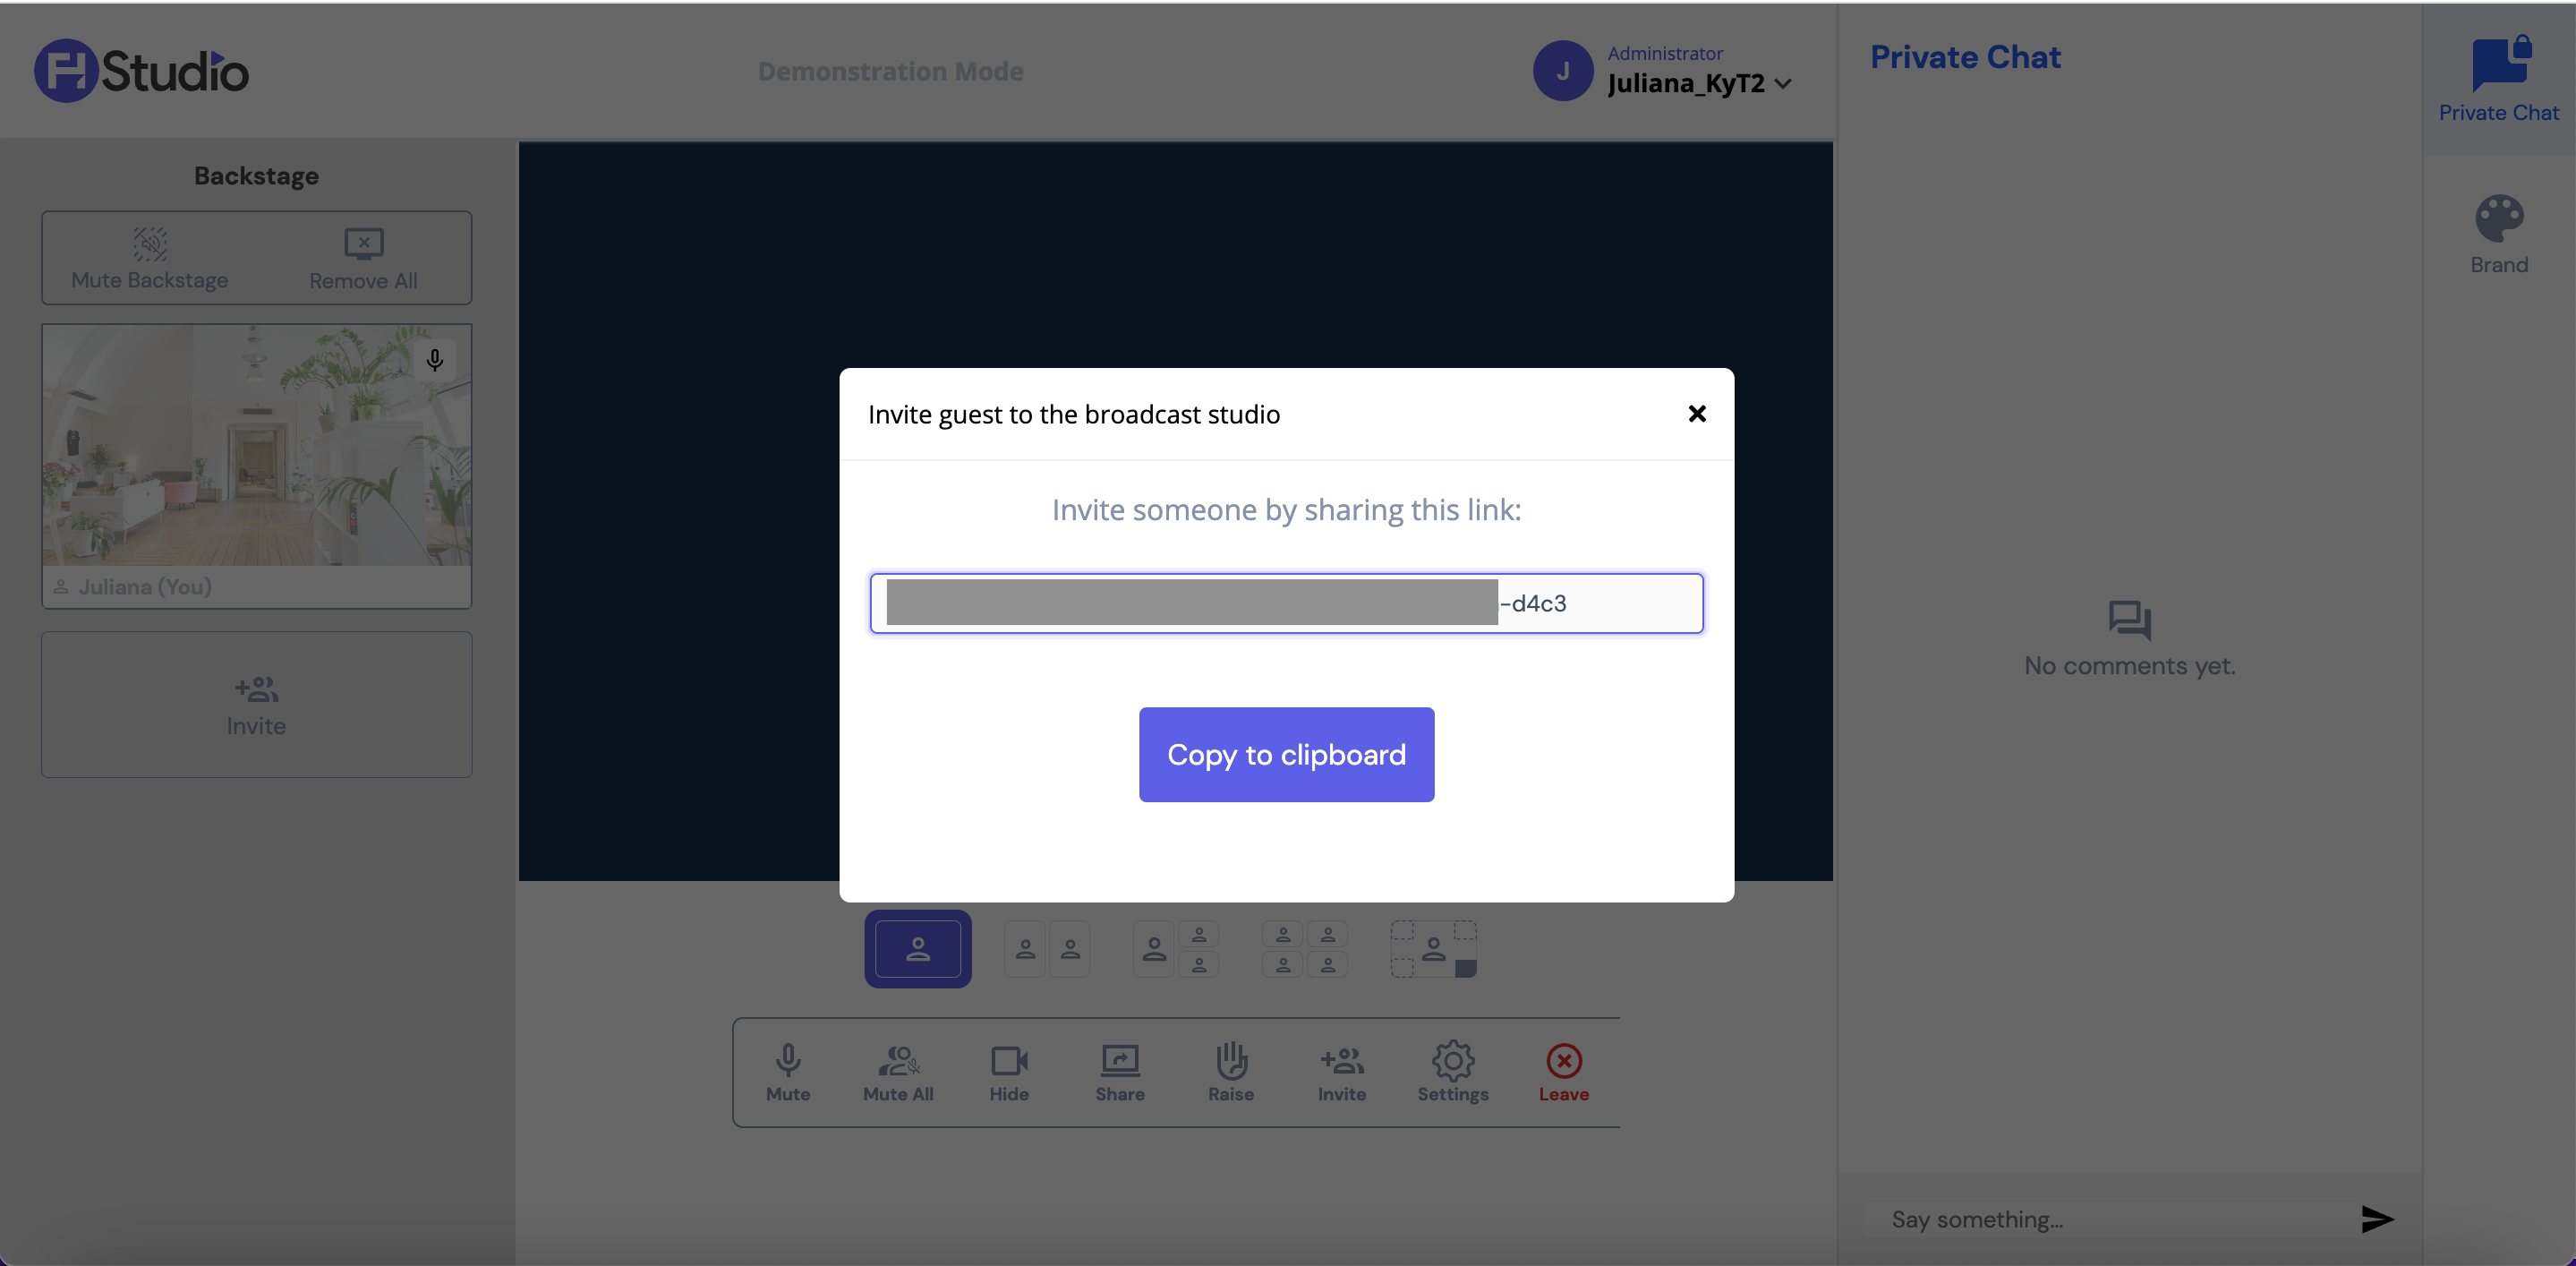
The Invite pop up
Stage Area
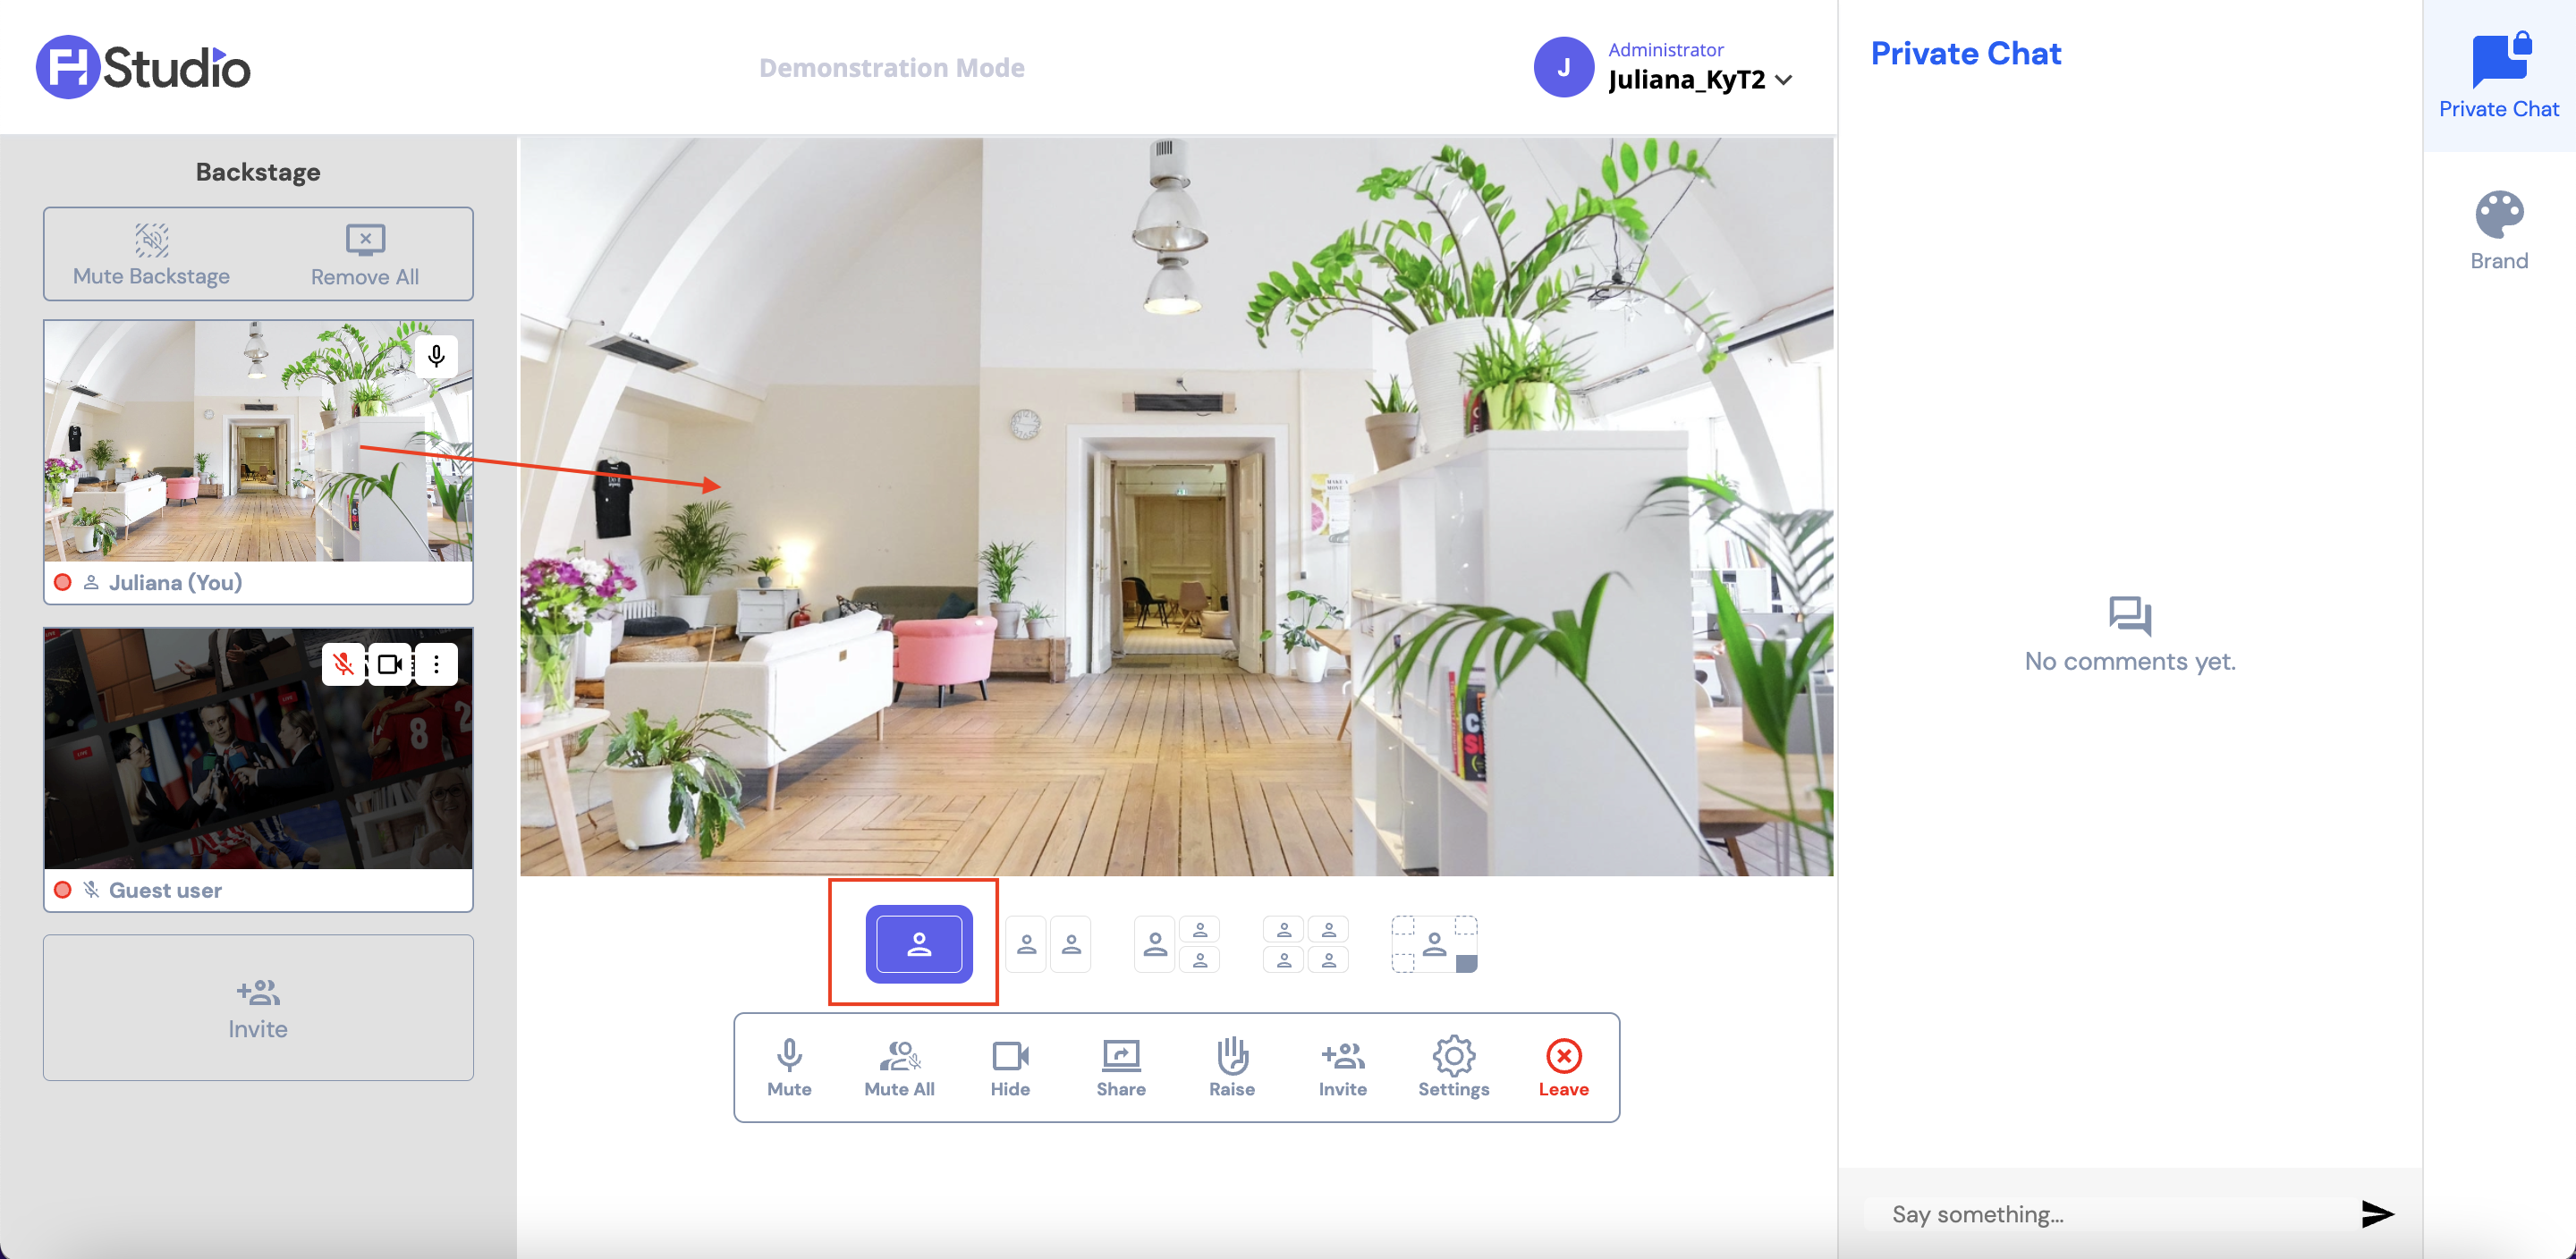
The Stage Area is the most important section of a Studio live, as it shows exactly what will be or it is being broadcasted to users.
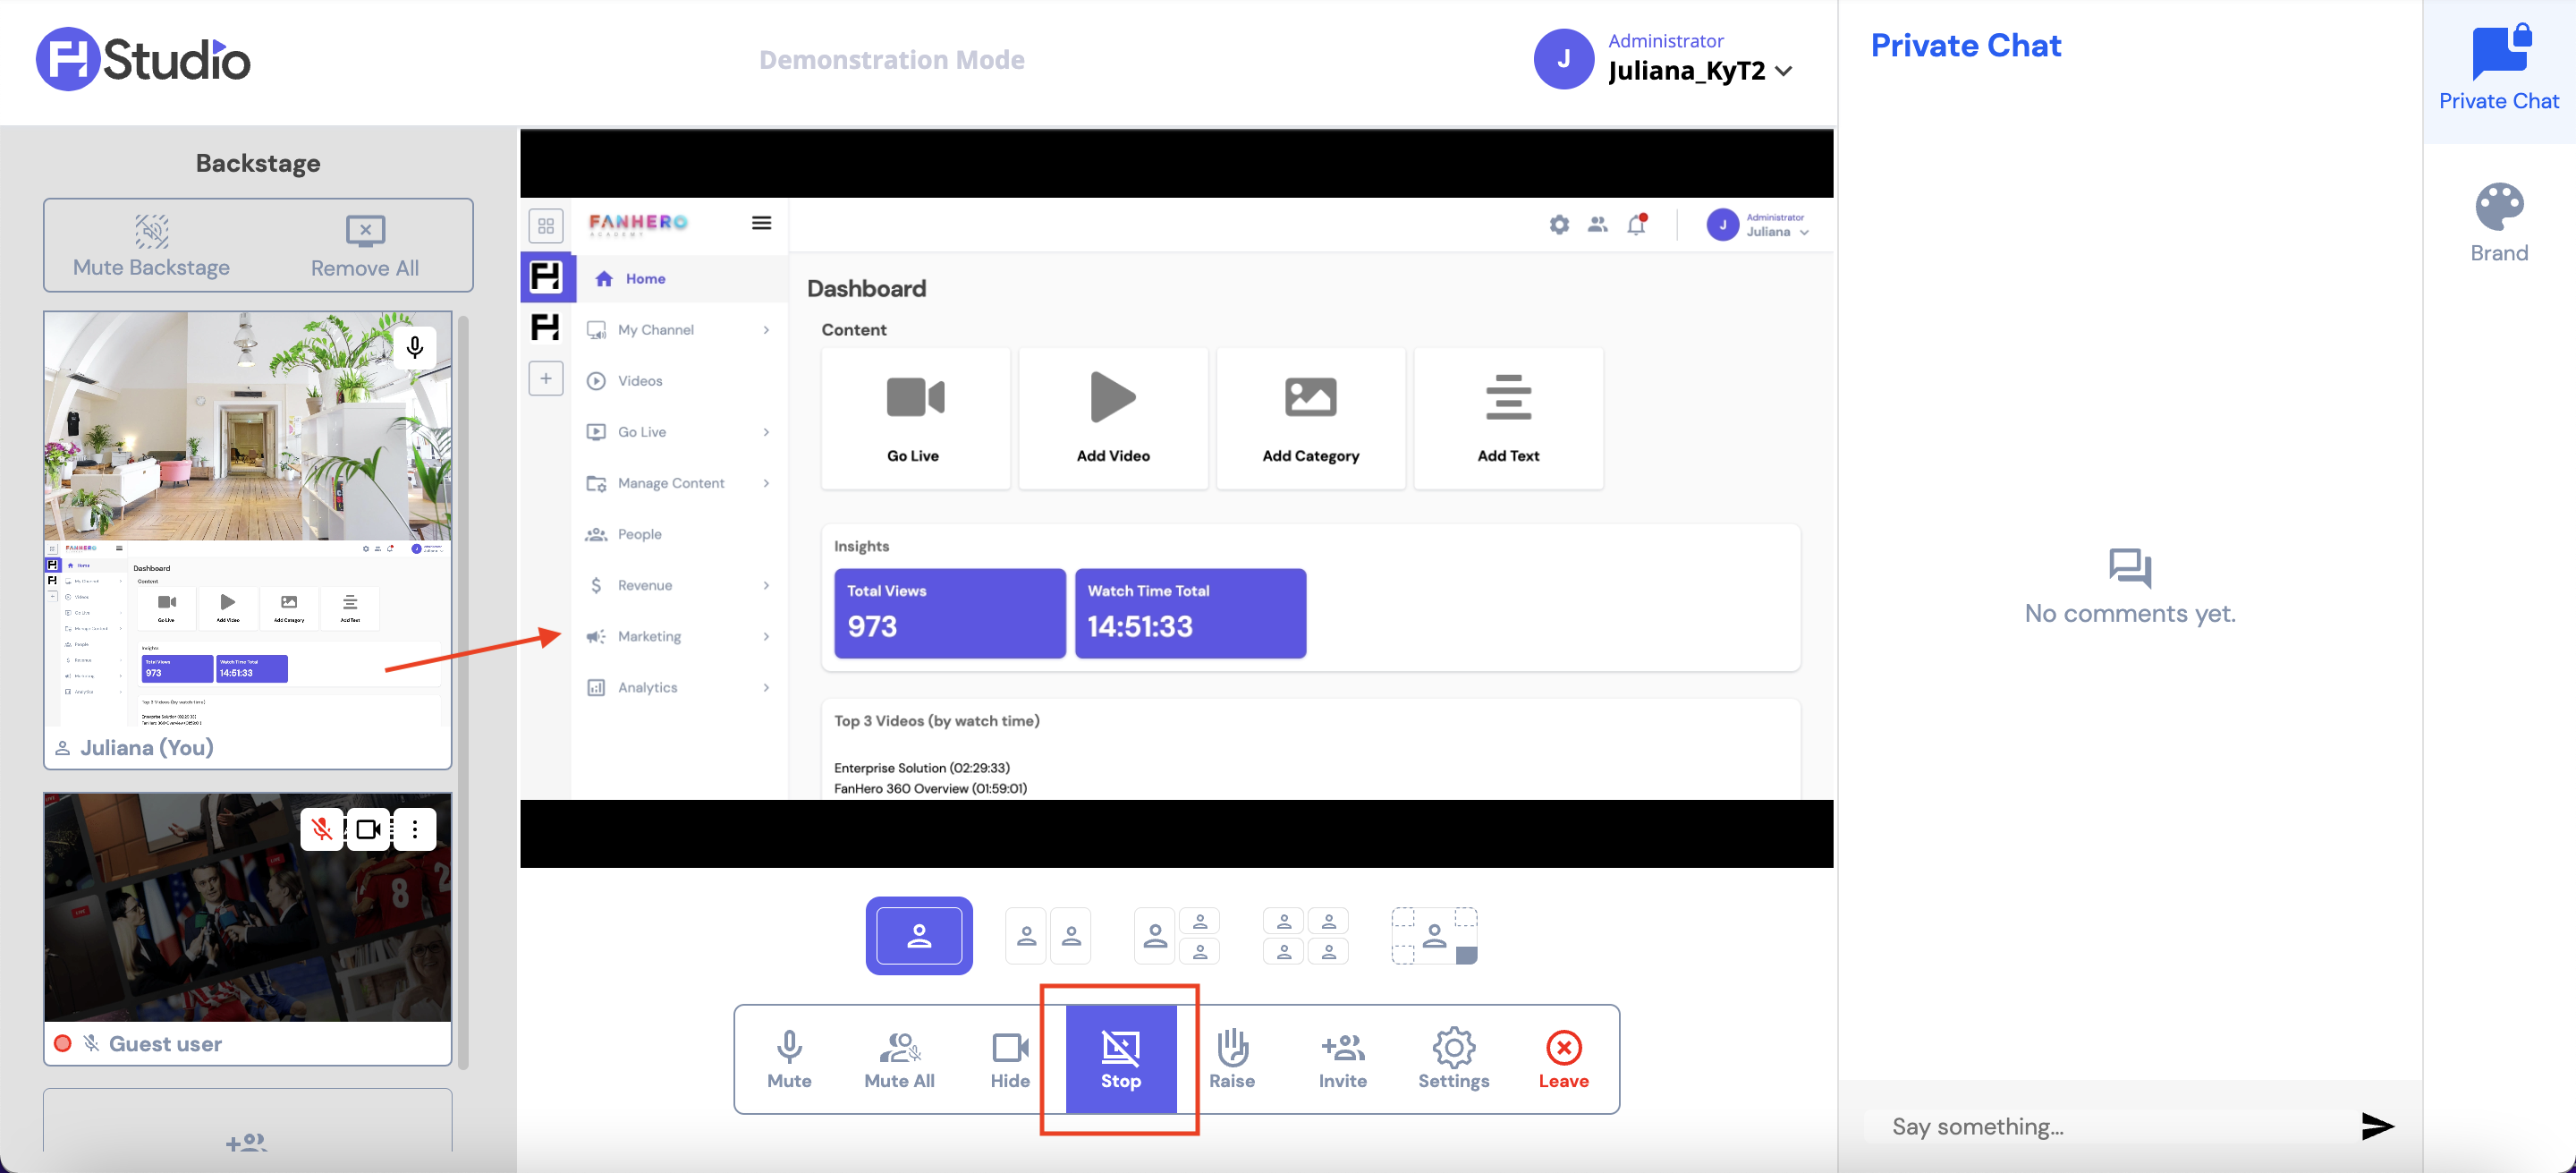
Depending on the number of participants in the stage area, the host can select from a range of different templates:
- Single User Template: displays only 1 participant.
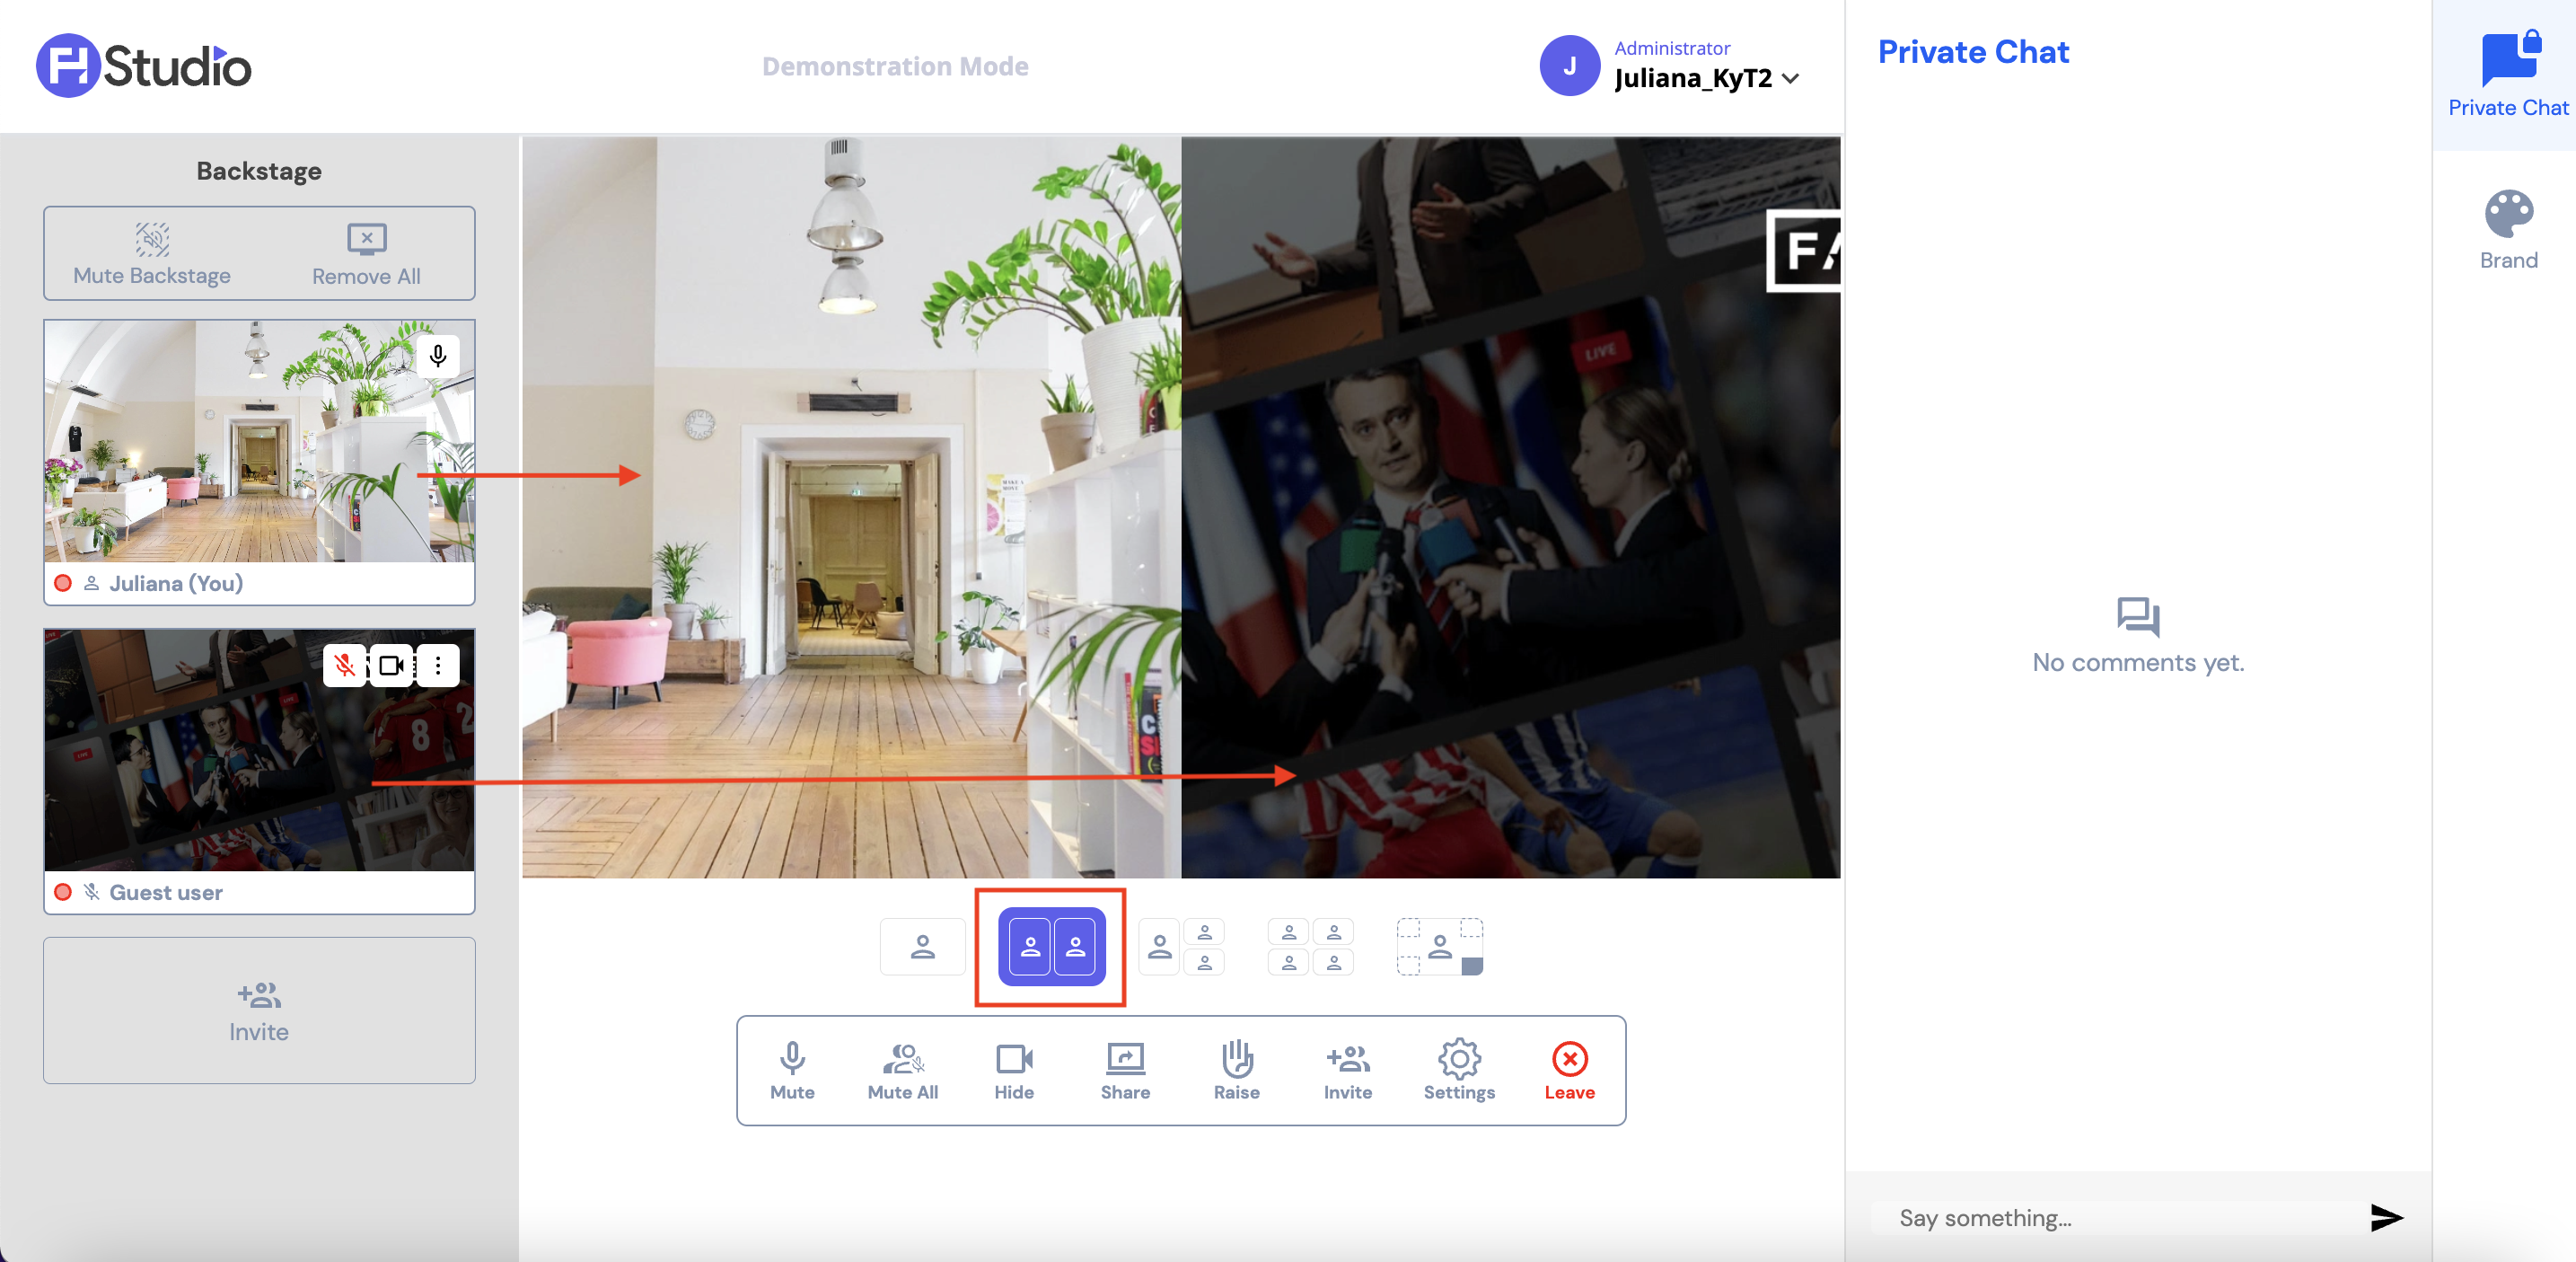
- Duo Template: displays 2 participants, side by side.
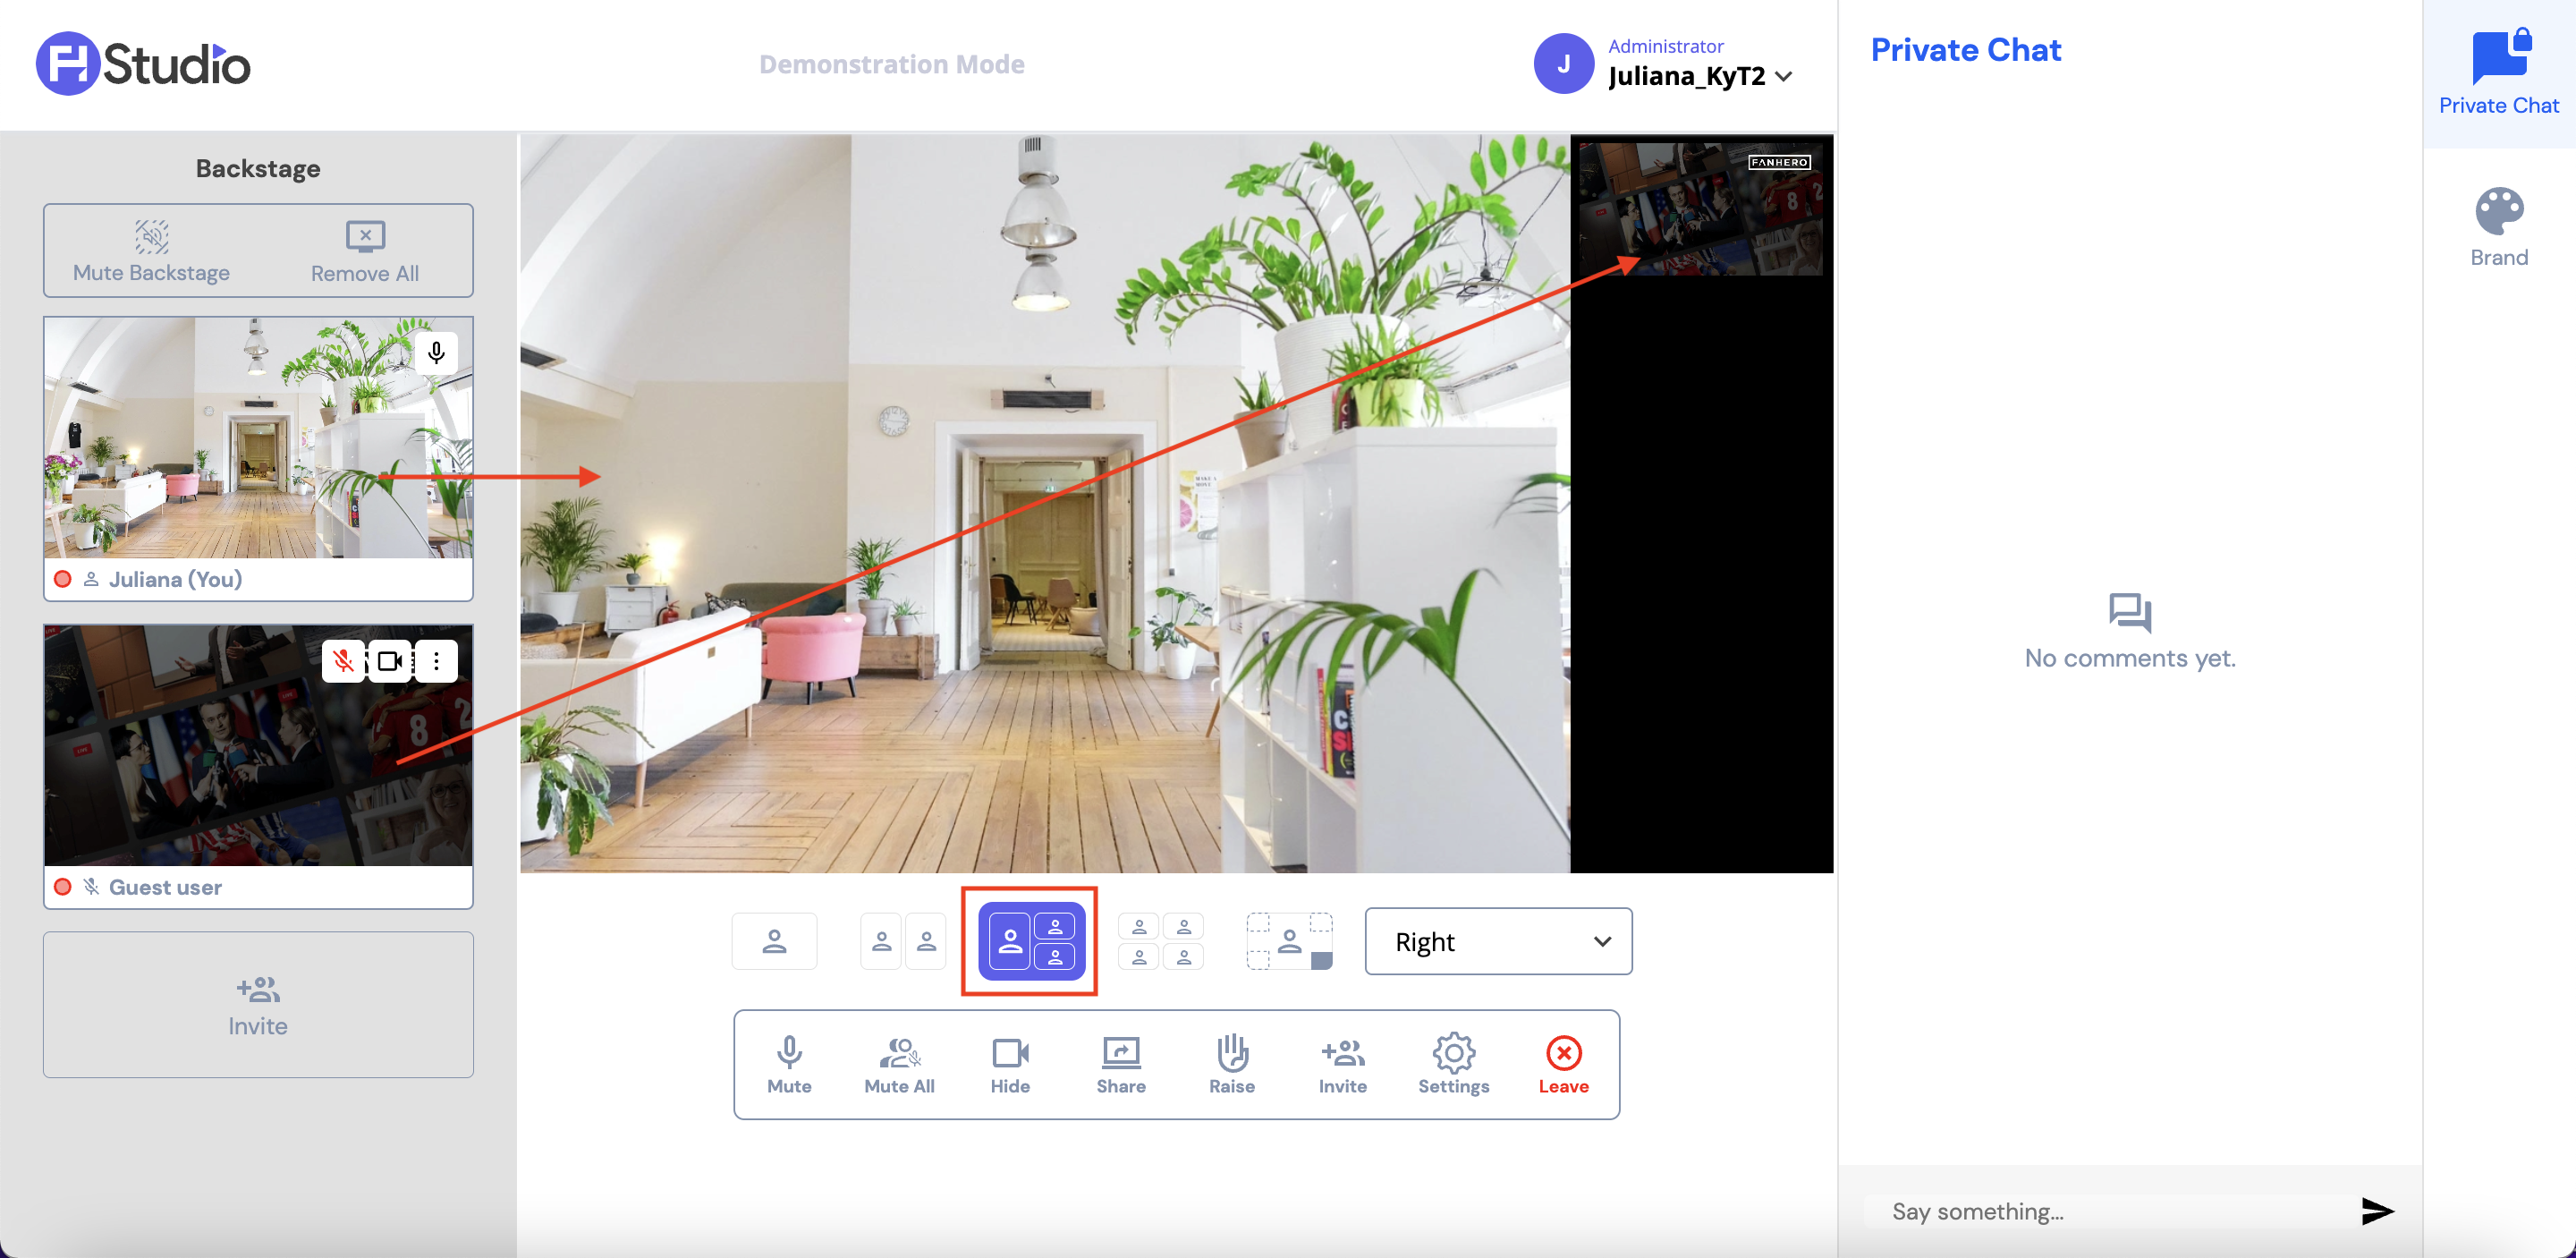
- Focus Template: displays up to 4 participants (host + 3 guests), with one in focus area (spotlight).
- Group Template: displays up to 4 participants (hosts + 3 guests), side by side. The layout will be adjusted if less tiles are available, as represented in the image below.
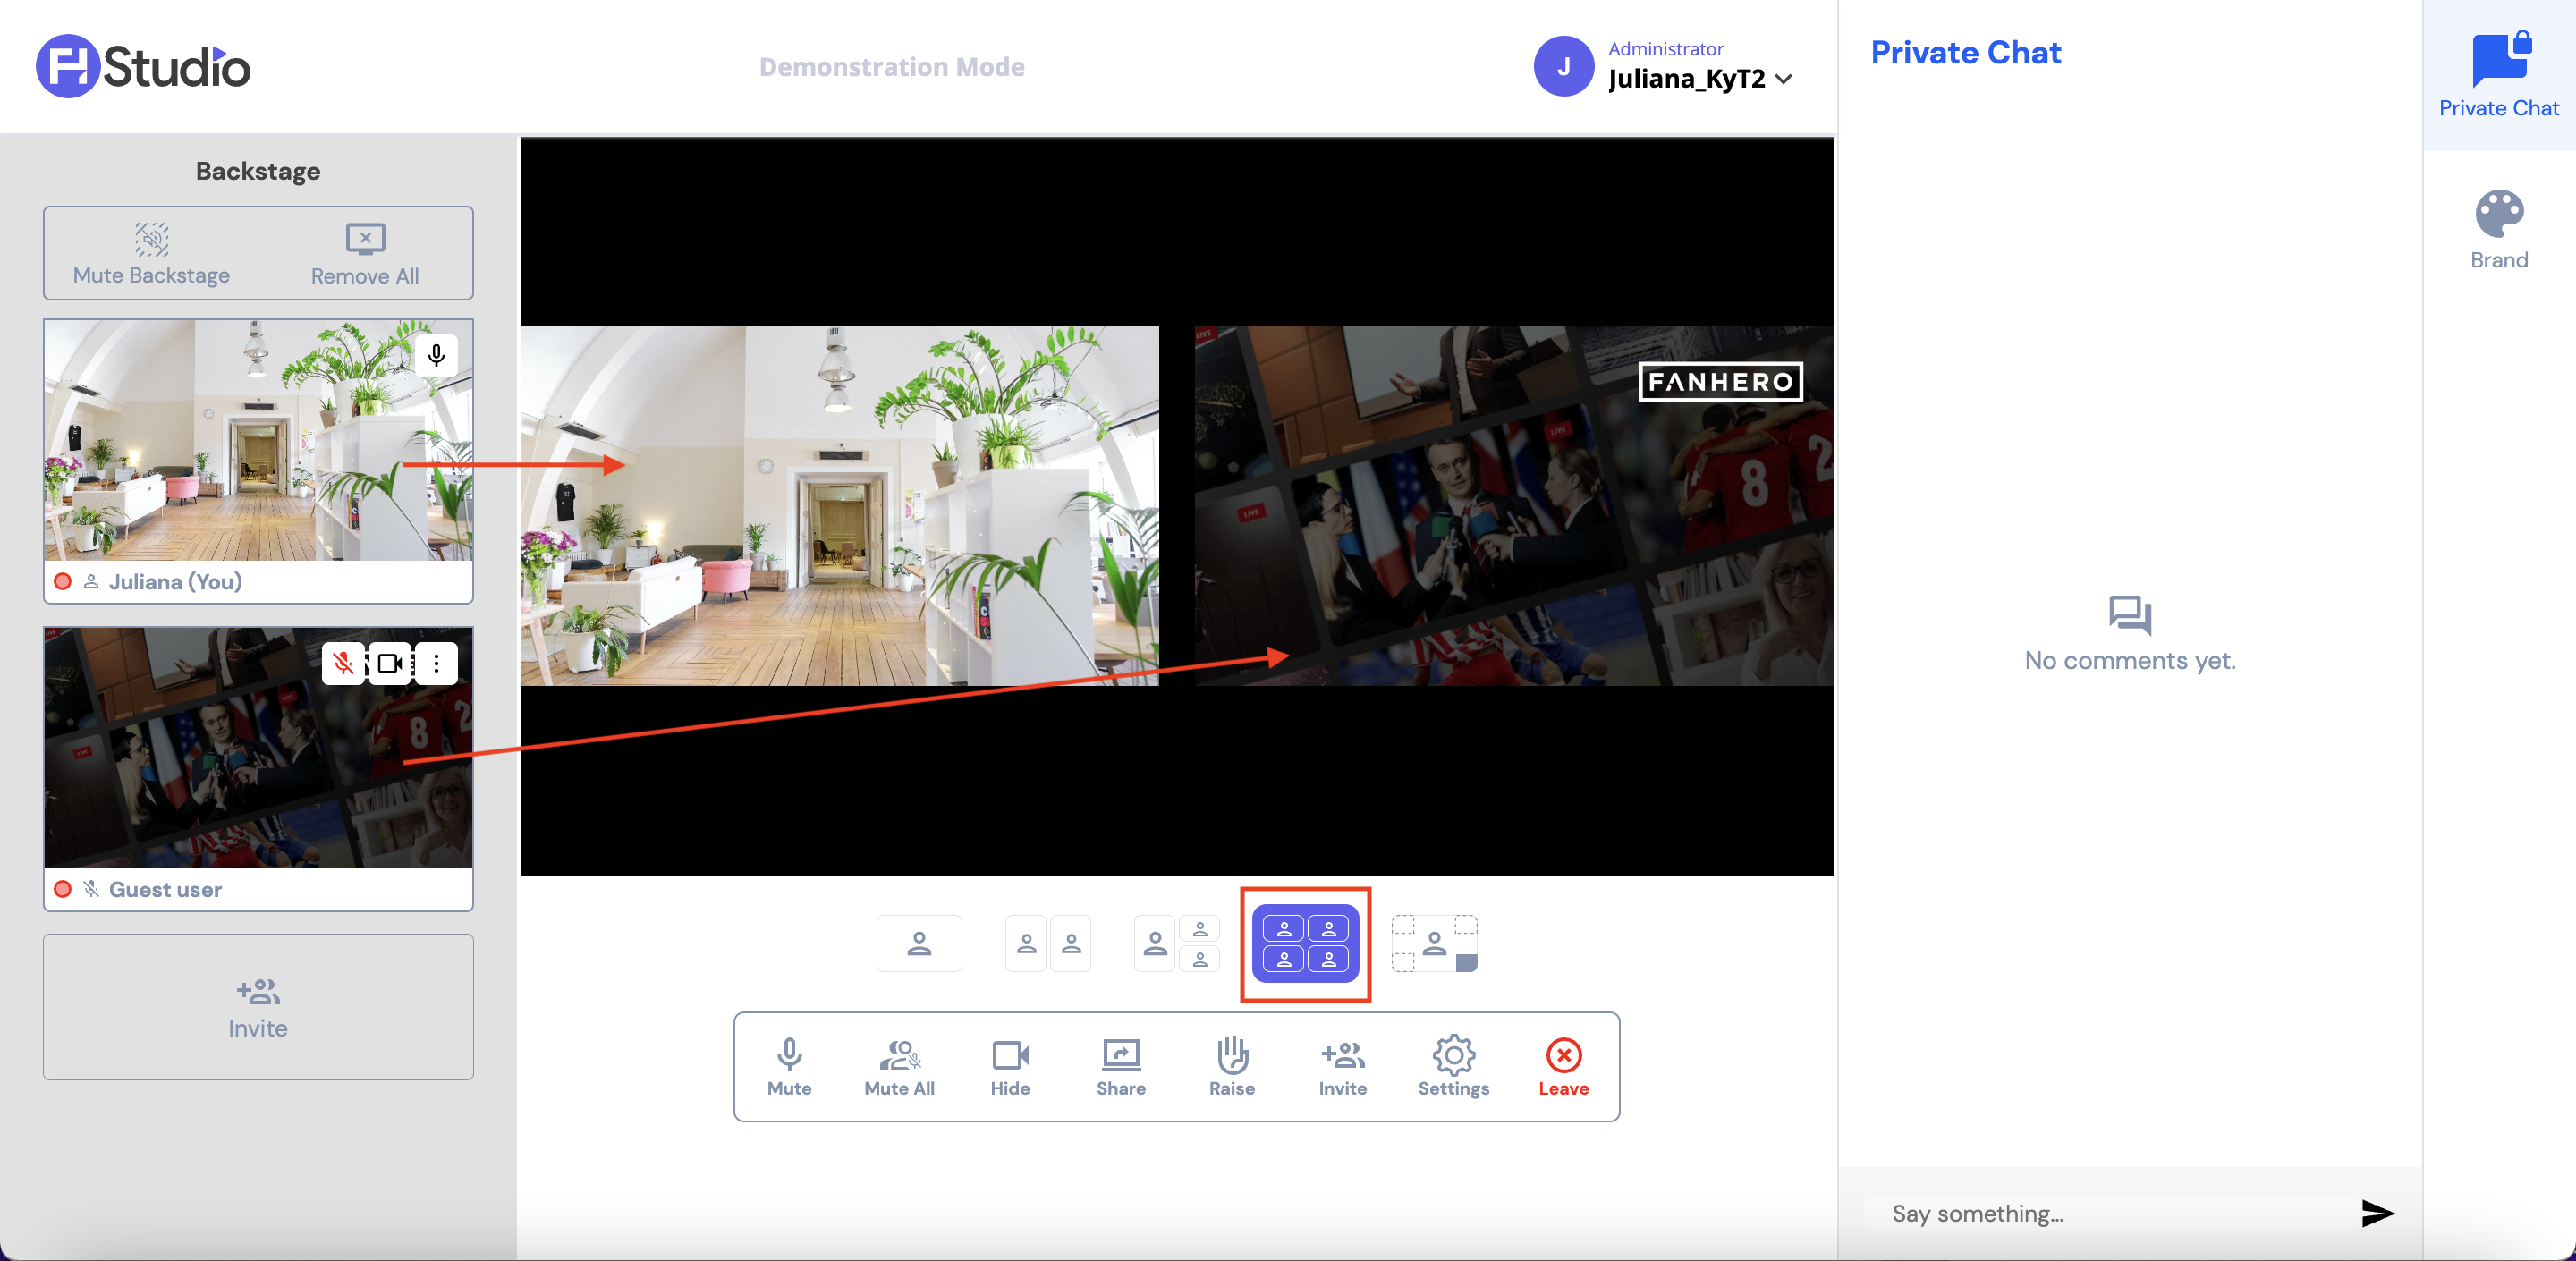
Example of a screenshare and 2 participants.
- PiP (picture-in-picture) Template: displays 2 participants, one in full screen and one in picture-in-picture, where you can choose the position (left top, left bottom, right top, right bottom).

Host Controls
- Mute: ability to mute and unmute your own mic.
- Mute All: ability to mute all participants at once, regardless of the area (backstage or stage).
- Hide: ability to show or hide your own video camera.
- Share: ability to do a screenshare. Note that the screenshare tile is associated to the user performing this action, therefore if the participant (host or guest) is removed from the stage area, the screenshare will be removed as well.
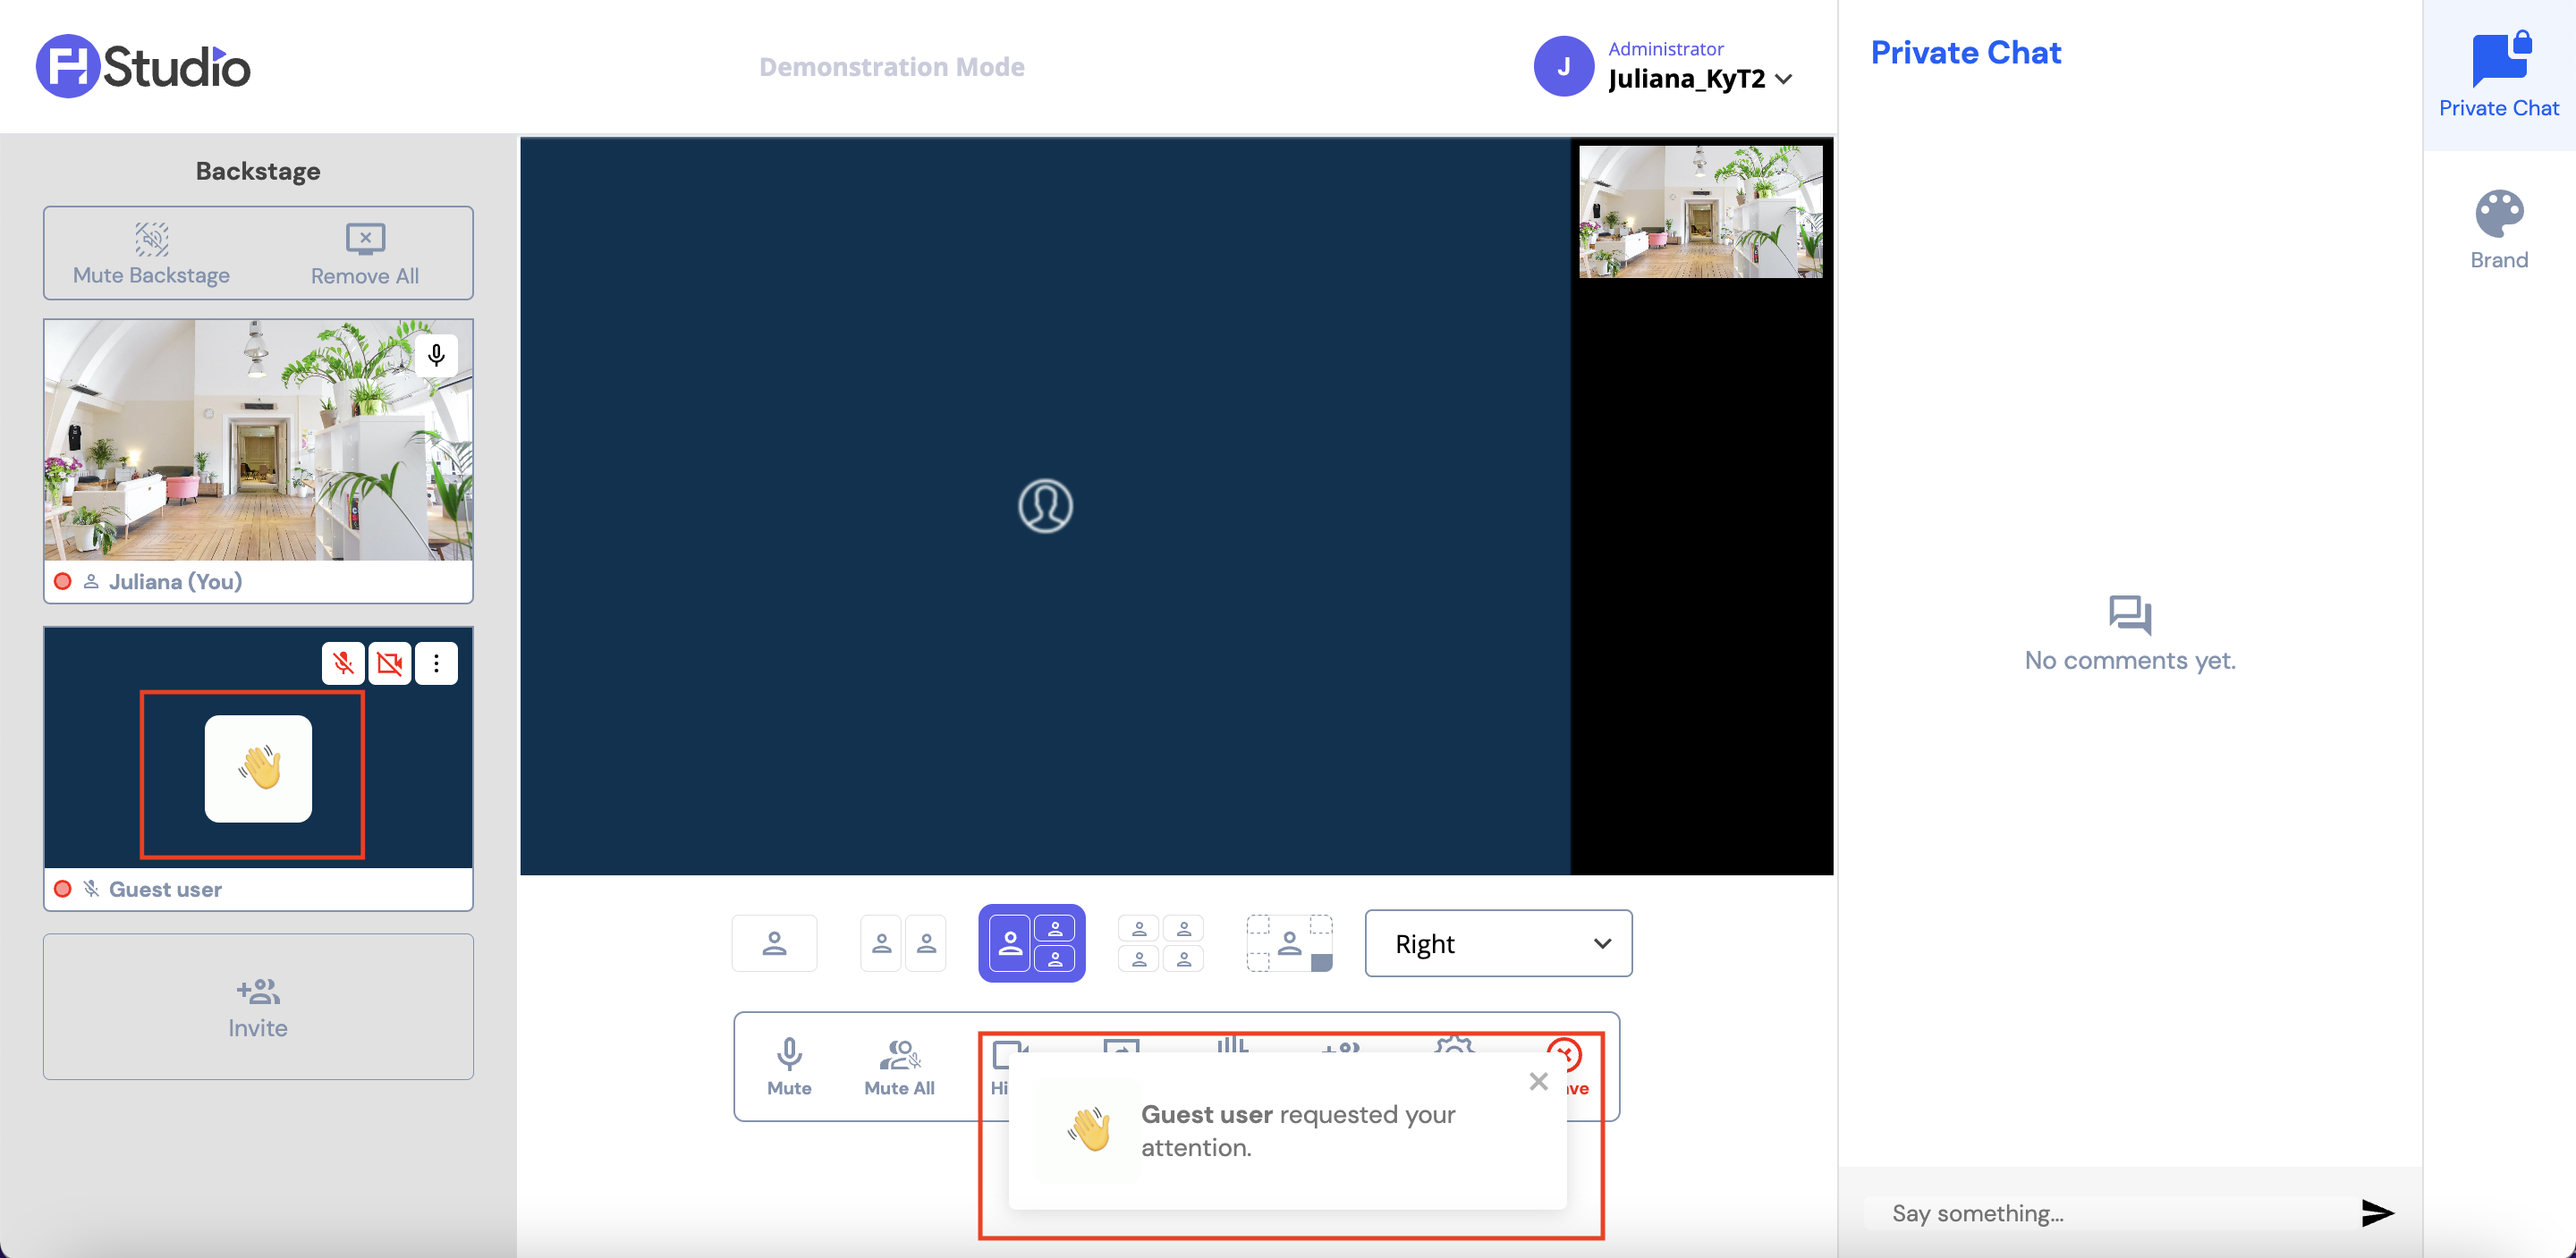
- Raise: a functionality that allows participants (hosts and guests) to virtually indicate their desire to speak or contribute during the live stream. By clicking on the "Raise" button, an emoji will be displayed over the participant that raised the hand. The button text will change to "Lower", so the user can lower the hand afterwards.
- Invite: ability to share a link to invite guests.
- Settings:
- Effects: ability to select from a range of different background effects.
- Camera: ability to view and change your video camera source.
- Audio: ability to view and change your mic and speaker sources.
- Display Name: ability to view and edit your display name.
Communication Area
This is an area where participants can communicate between themselves through the private chat feature. Users watching the live stream cannot see the messages in this chat.
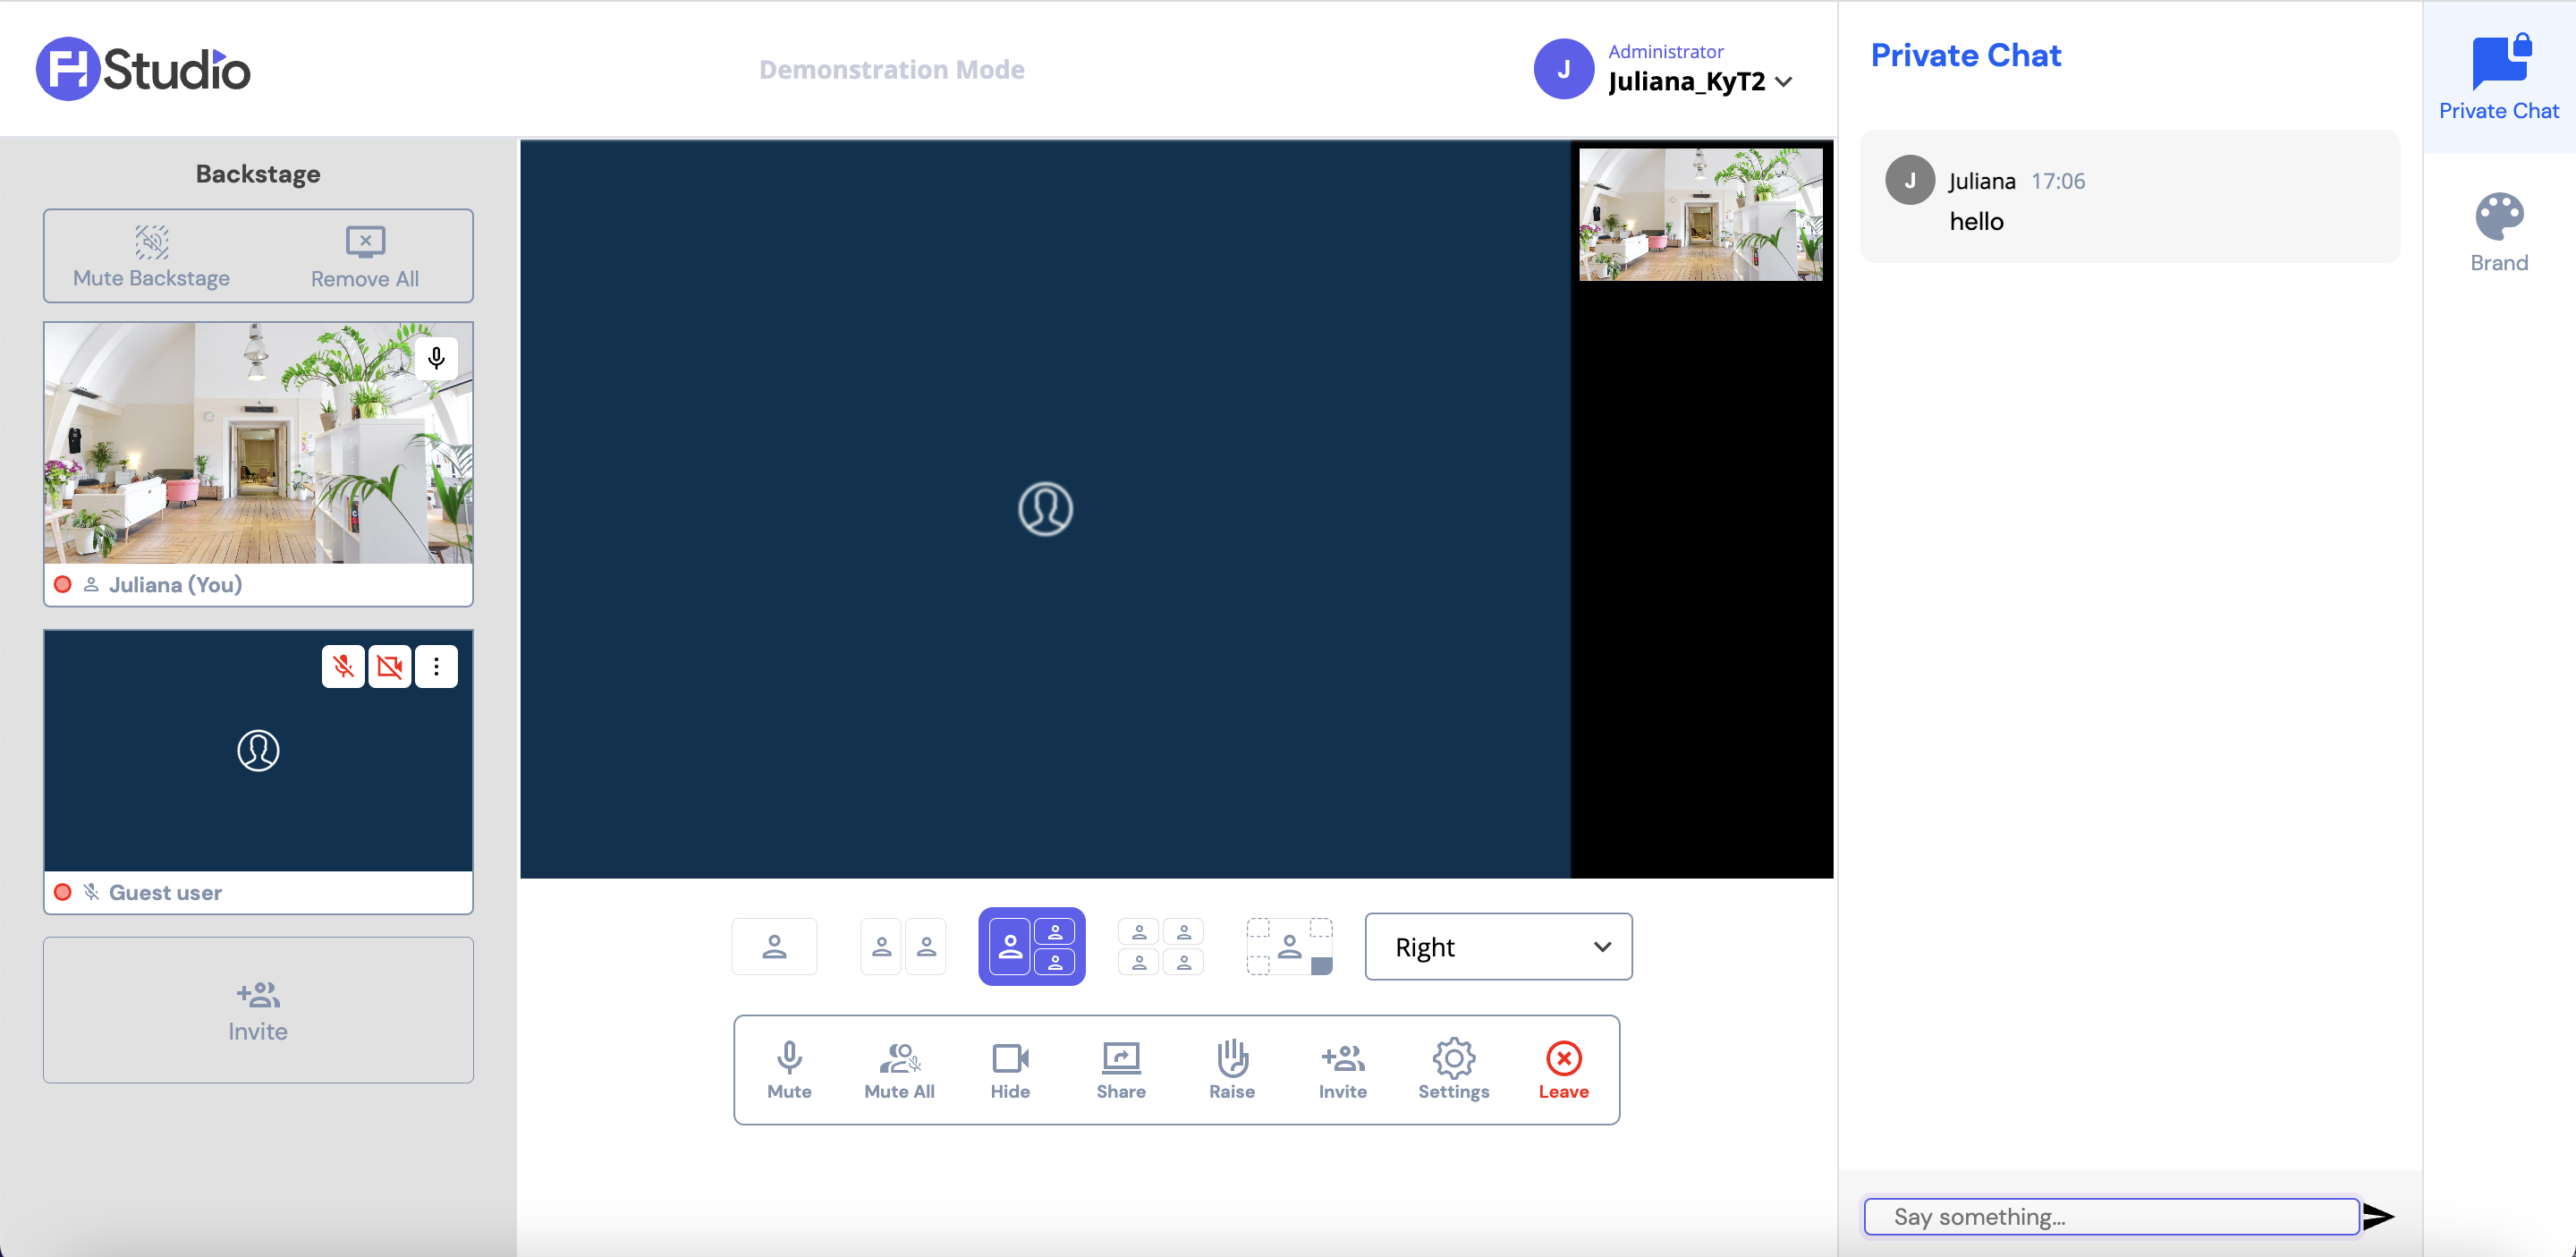
Host View
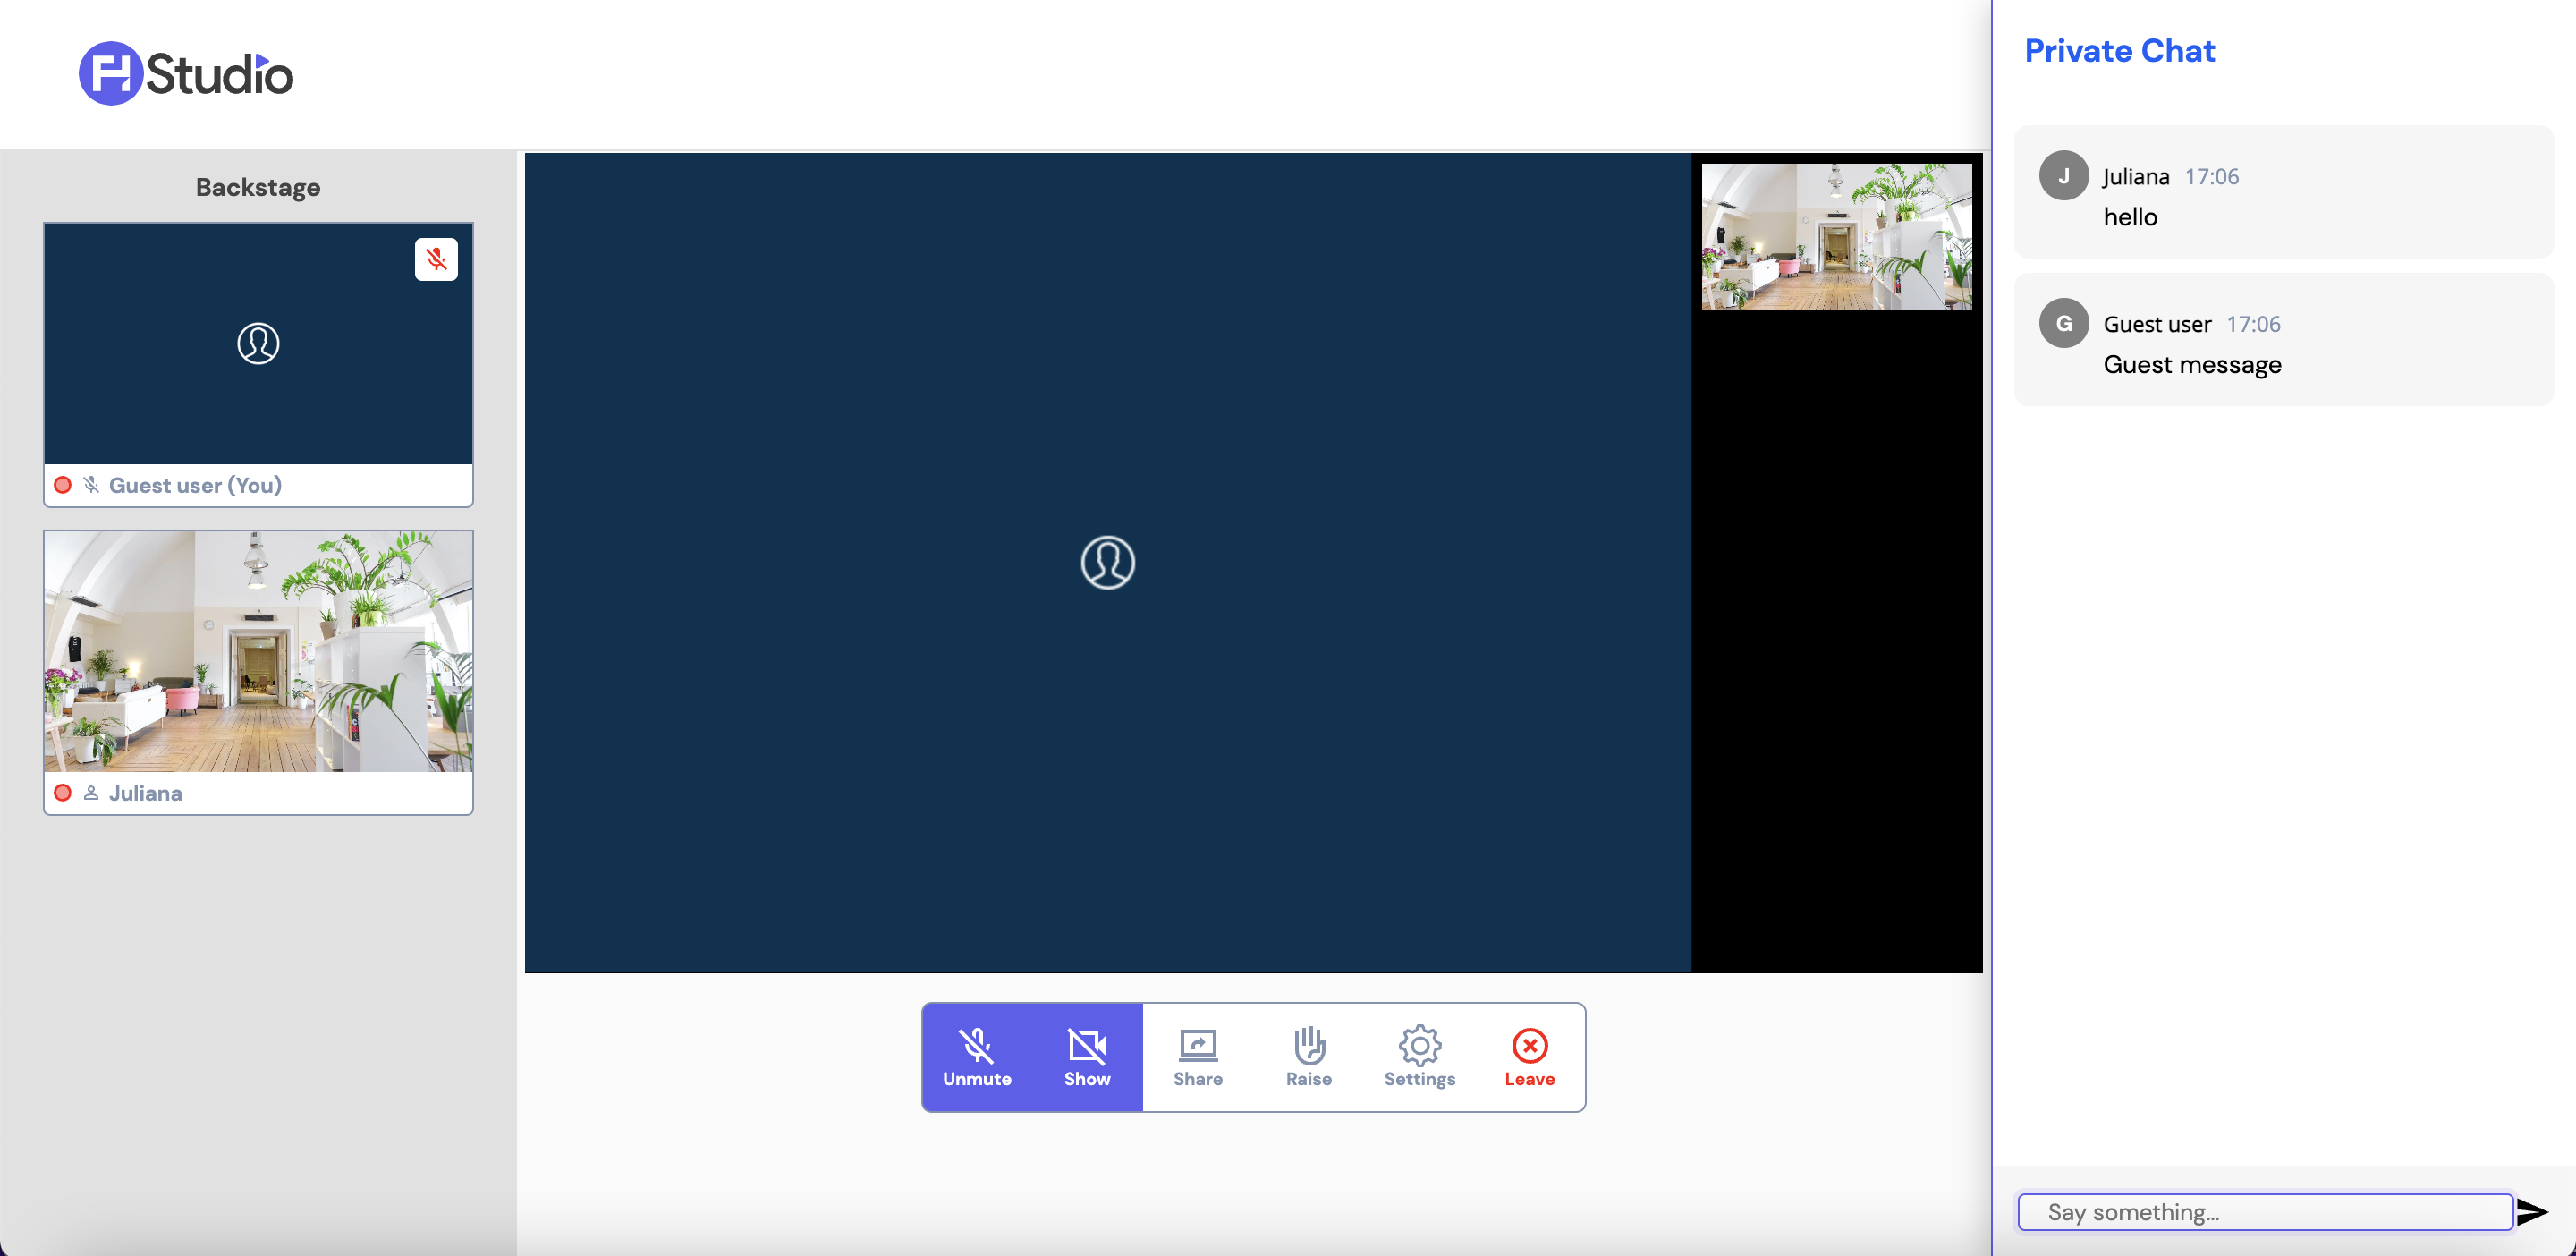
Guest View
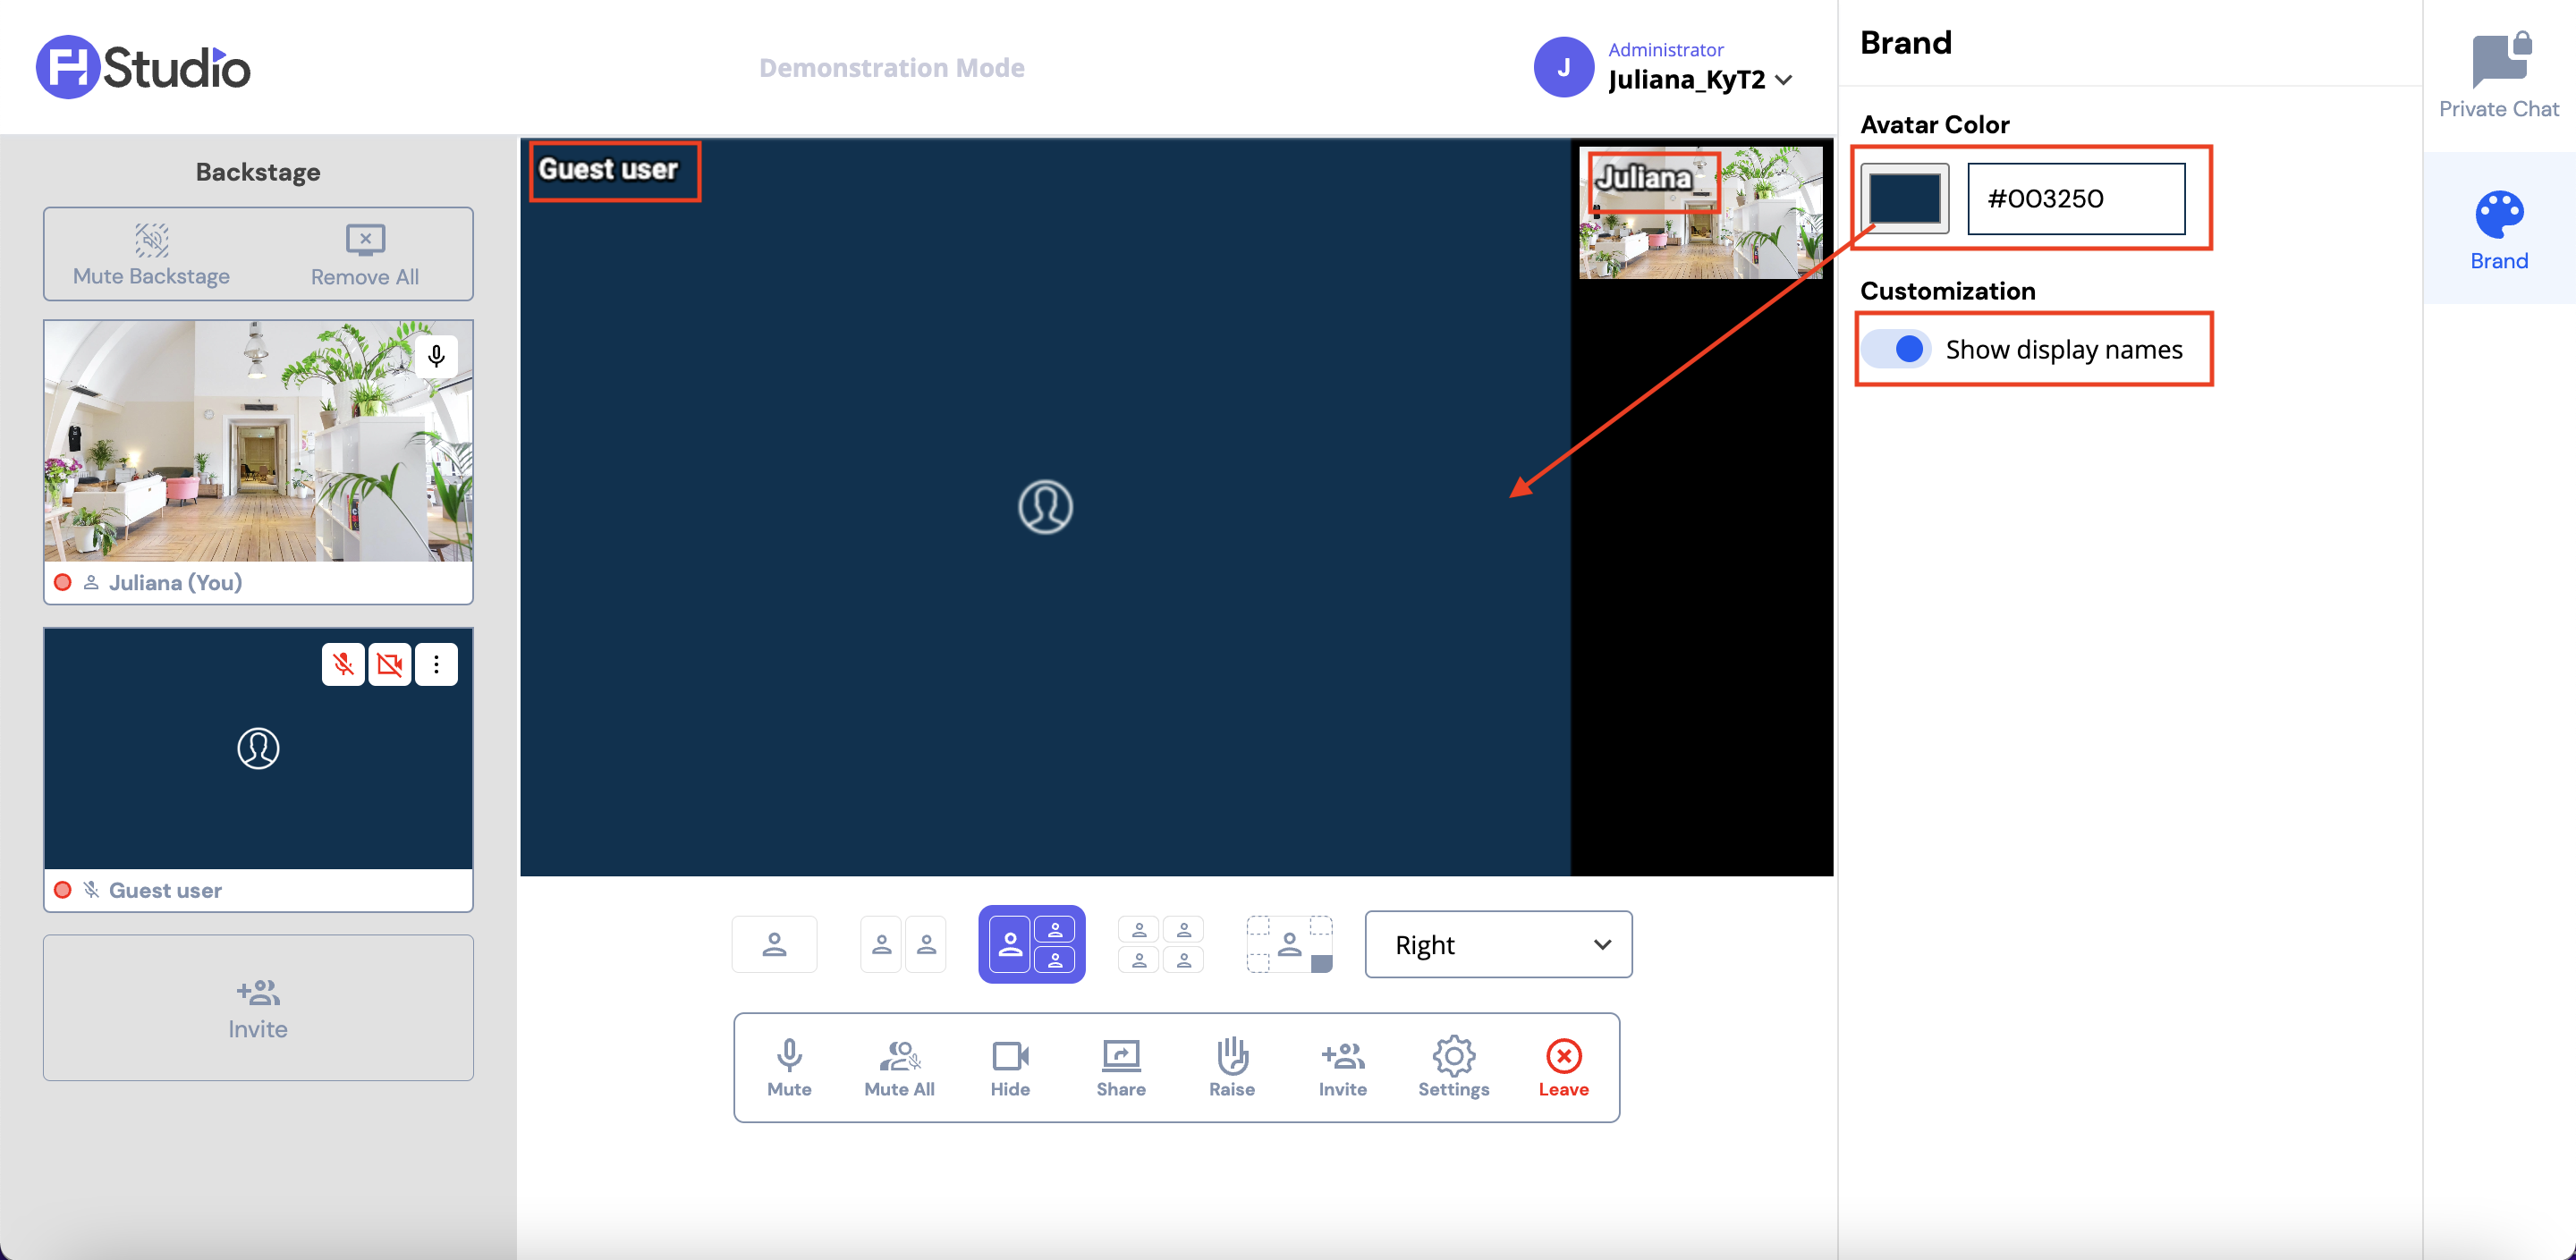
Brand
In this section, hosts can choose the avatar's background color as well as whether or not the display name is shown.
Guest Flow
The Guest flow initiates with the URL being received. Once the guest clicks on it, the Set up your Hardware screen will be displayed, with the exact same features explained in the Host flow.
After the set up process is completed, the guest is then redirected to the Studio Live.

Available Features for Guests
- Mute/unmute your mic.
- Hide/show your video camera.
- Share screen.
- Raise/lower hands.
- Settings.
- Leave Studio live.
- Private chat.
Create Live
To create a Studio Live Stream, hosts can click on the "Create Studio Live" button.
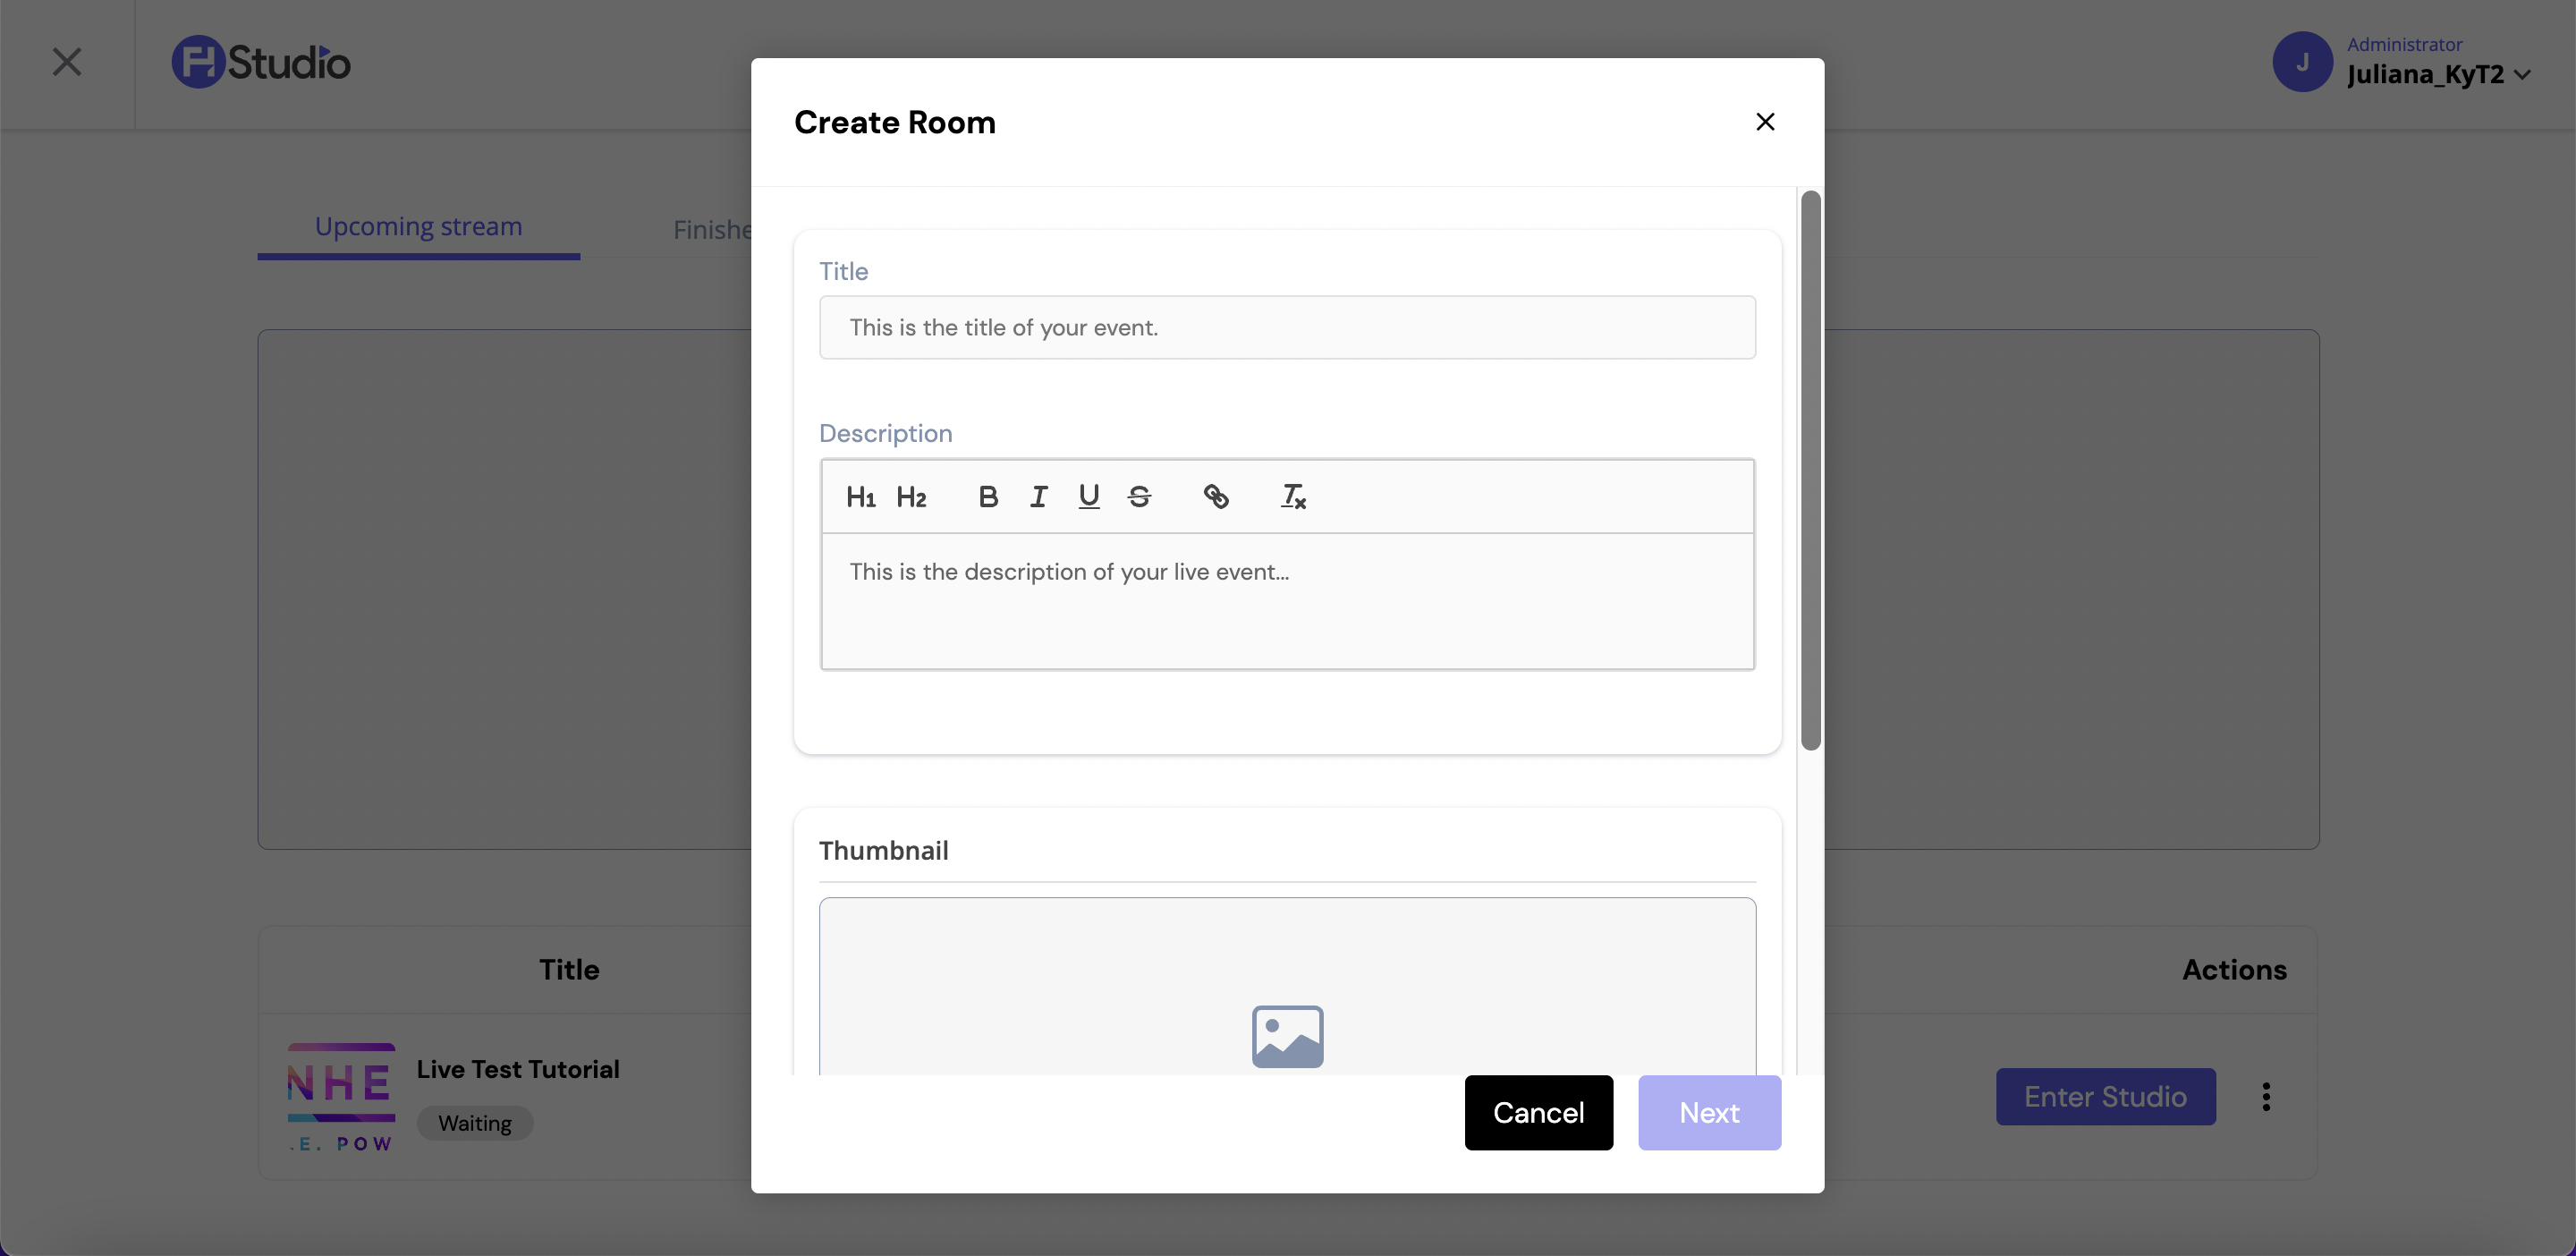
Create Demo Room Screen
- Title: the title of the live stream. It is a required field, max of 30 characters;
- Description: the description of the live stream. It is a optional field;
- Thumbnail: the thumbnail of the live stream. It is a required field. The image can be uploaded from your computer or the upload center.
Step 2 - Select Destination
In this step, hosts can select the online destination where users can watch the live stream as it happens. All destinations that have been configured previously will be displayed here.
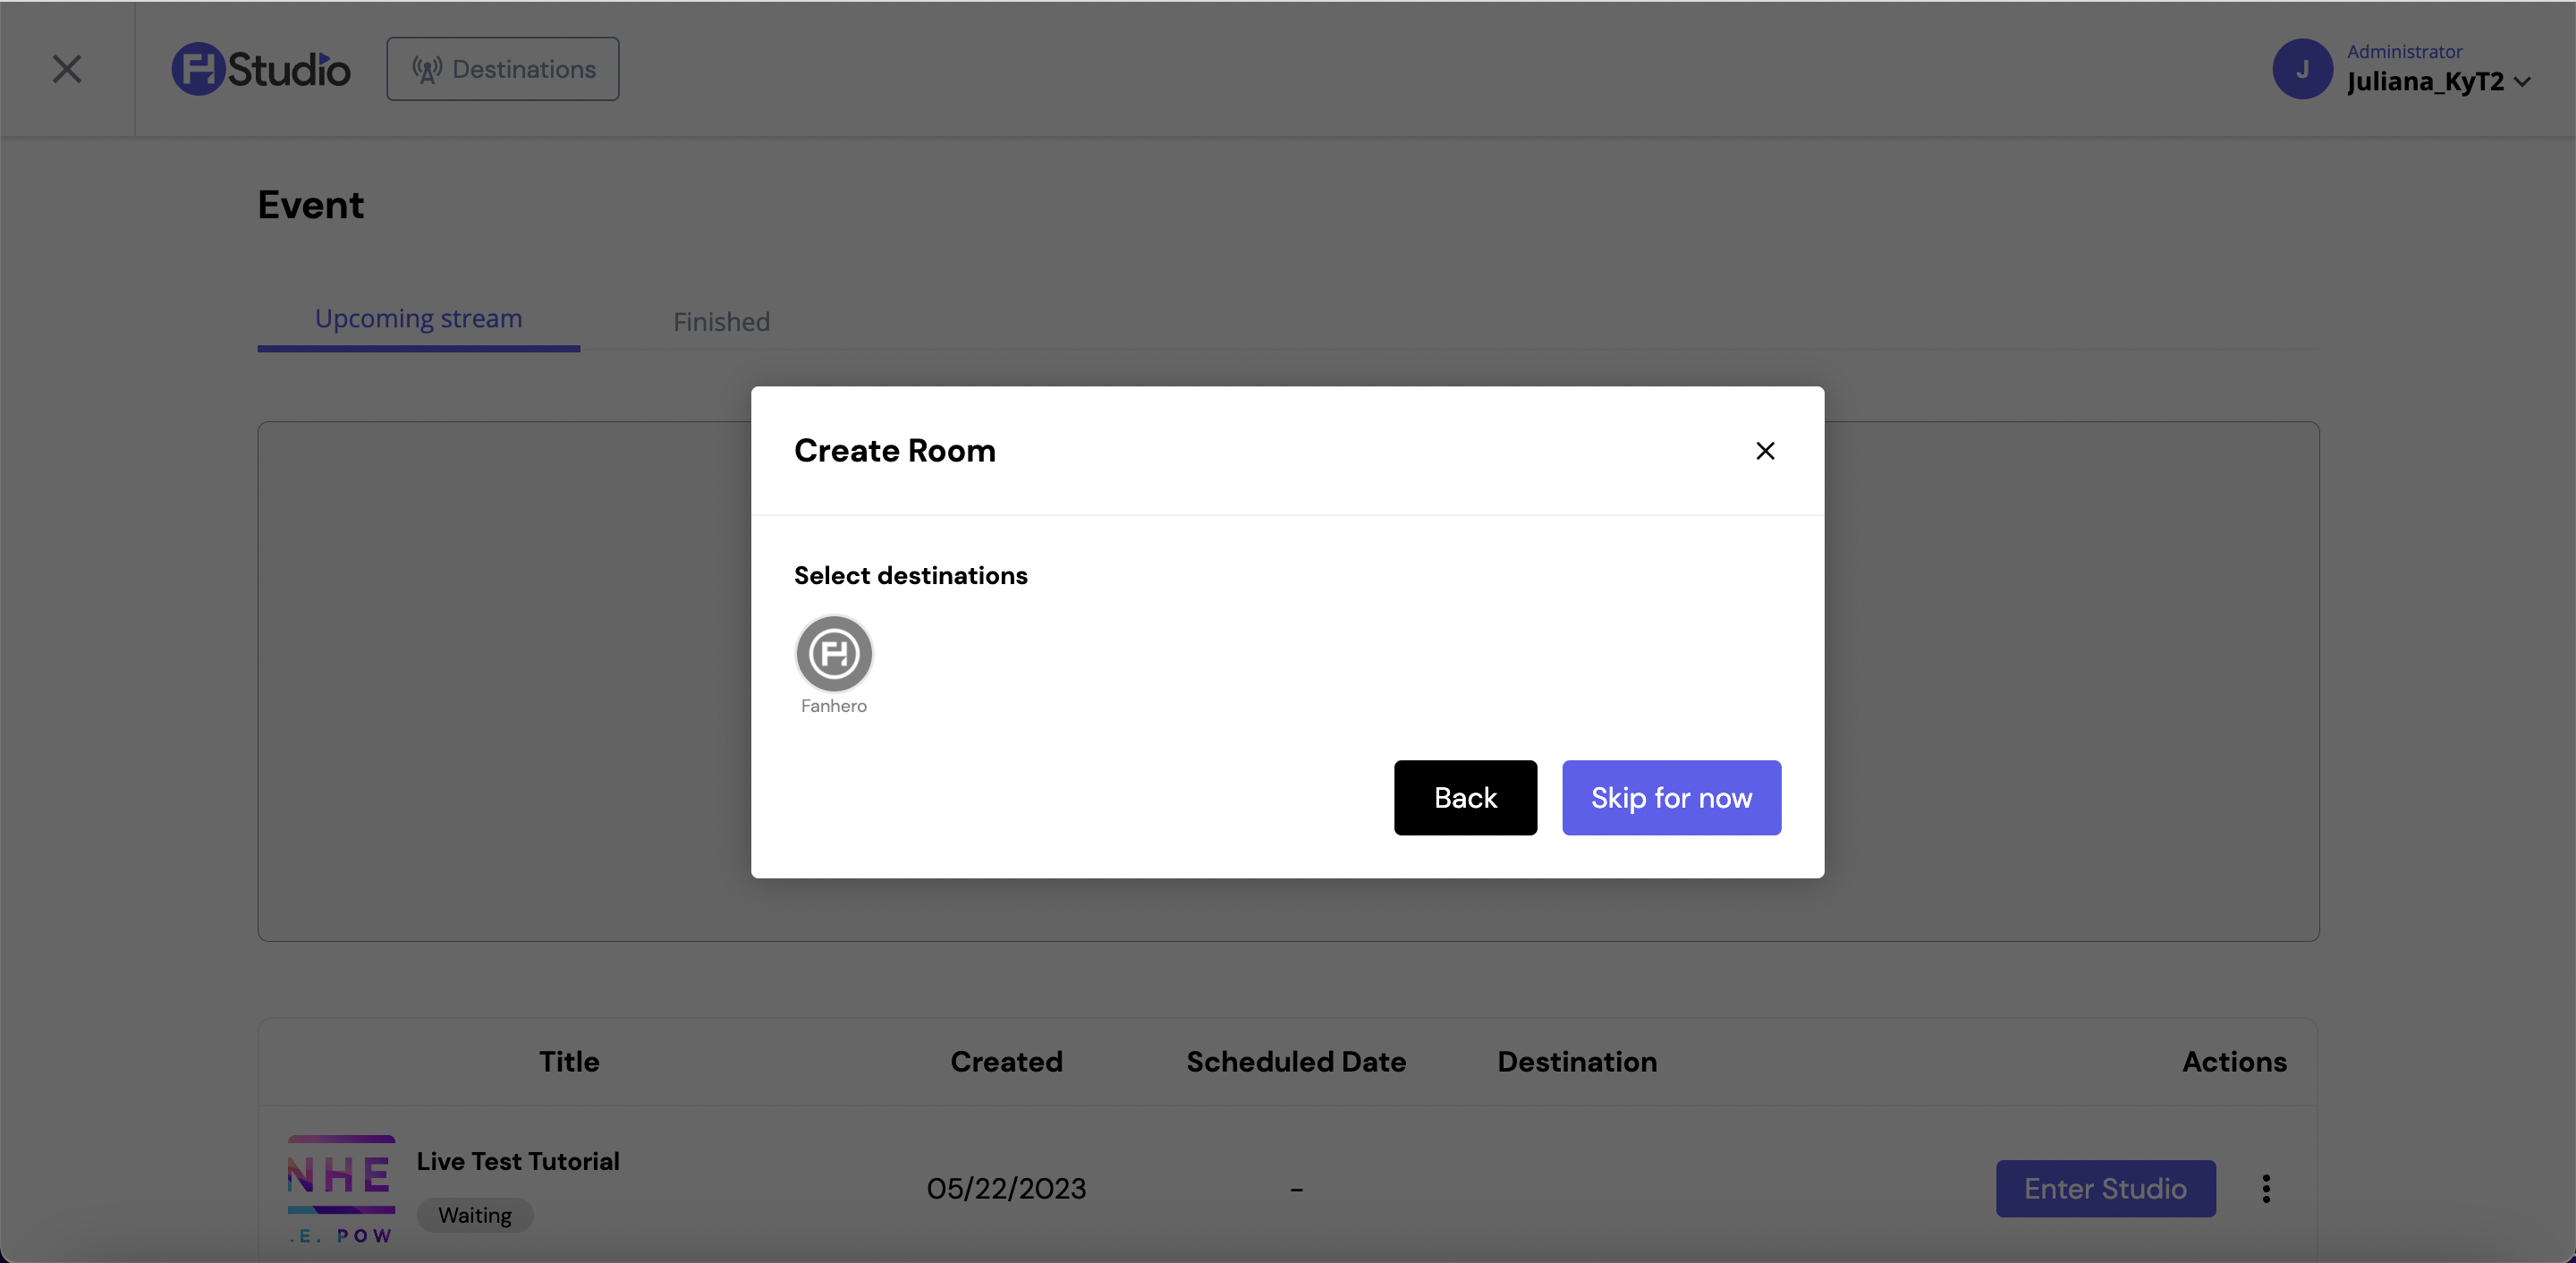
- Destinations: a list that contains all destinations previously created (See ##Destinations for more information). There is no limit on how many destinations can be selected.
- Back button: takes the host back to step 1.
- Skip for now button: no destinations are selected and the host is taken to the next step.
If FanHero is selected as a destination, then it means the live stream will be available to users in your FanHero platform, therefore more information, such as level of access, slug, etc, is required.
Advanced Settings
- Friendly Video Name for URL: the slug of the live stream. It uses the live stream title by default.
- Share and Monetization:
- Default: the live stream will inherit the same level of access of the Channel.
- Public: the live stream will be publicly available to anyone with the link.
- Login Required: an account (registration) is required to watch the live stream.
- Password Required: the live stream will be protected by a password. Users with the password can watch the live stream.
- Paywall: the live stream will be behind a paywall, associated to one or more products. Users who have purchased the product can watch the live stream.
- Live Event Setup:
- Enable Chat: ability to enable real-time chat.
- Enable Reaction: ability to enable real-time reactions.
- Enable Presence: ability to display the number of viewers in real time.
- Location: ability to add a geofence (include or exclude specific countries).
- Back button: clicking on it will take the host back to the previous step.
- Create button: if all criteria has been met, the Studio live will be created.
Step 3 - Studio Live
This screen has all the features and functionalities of the Demo Mode, with the addition of the "Go Live" feature.
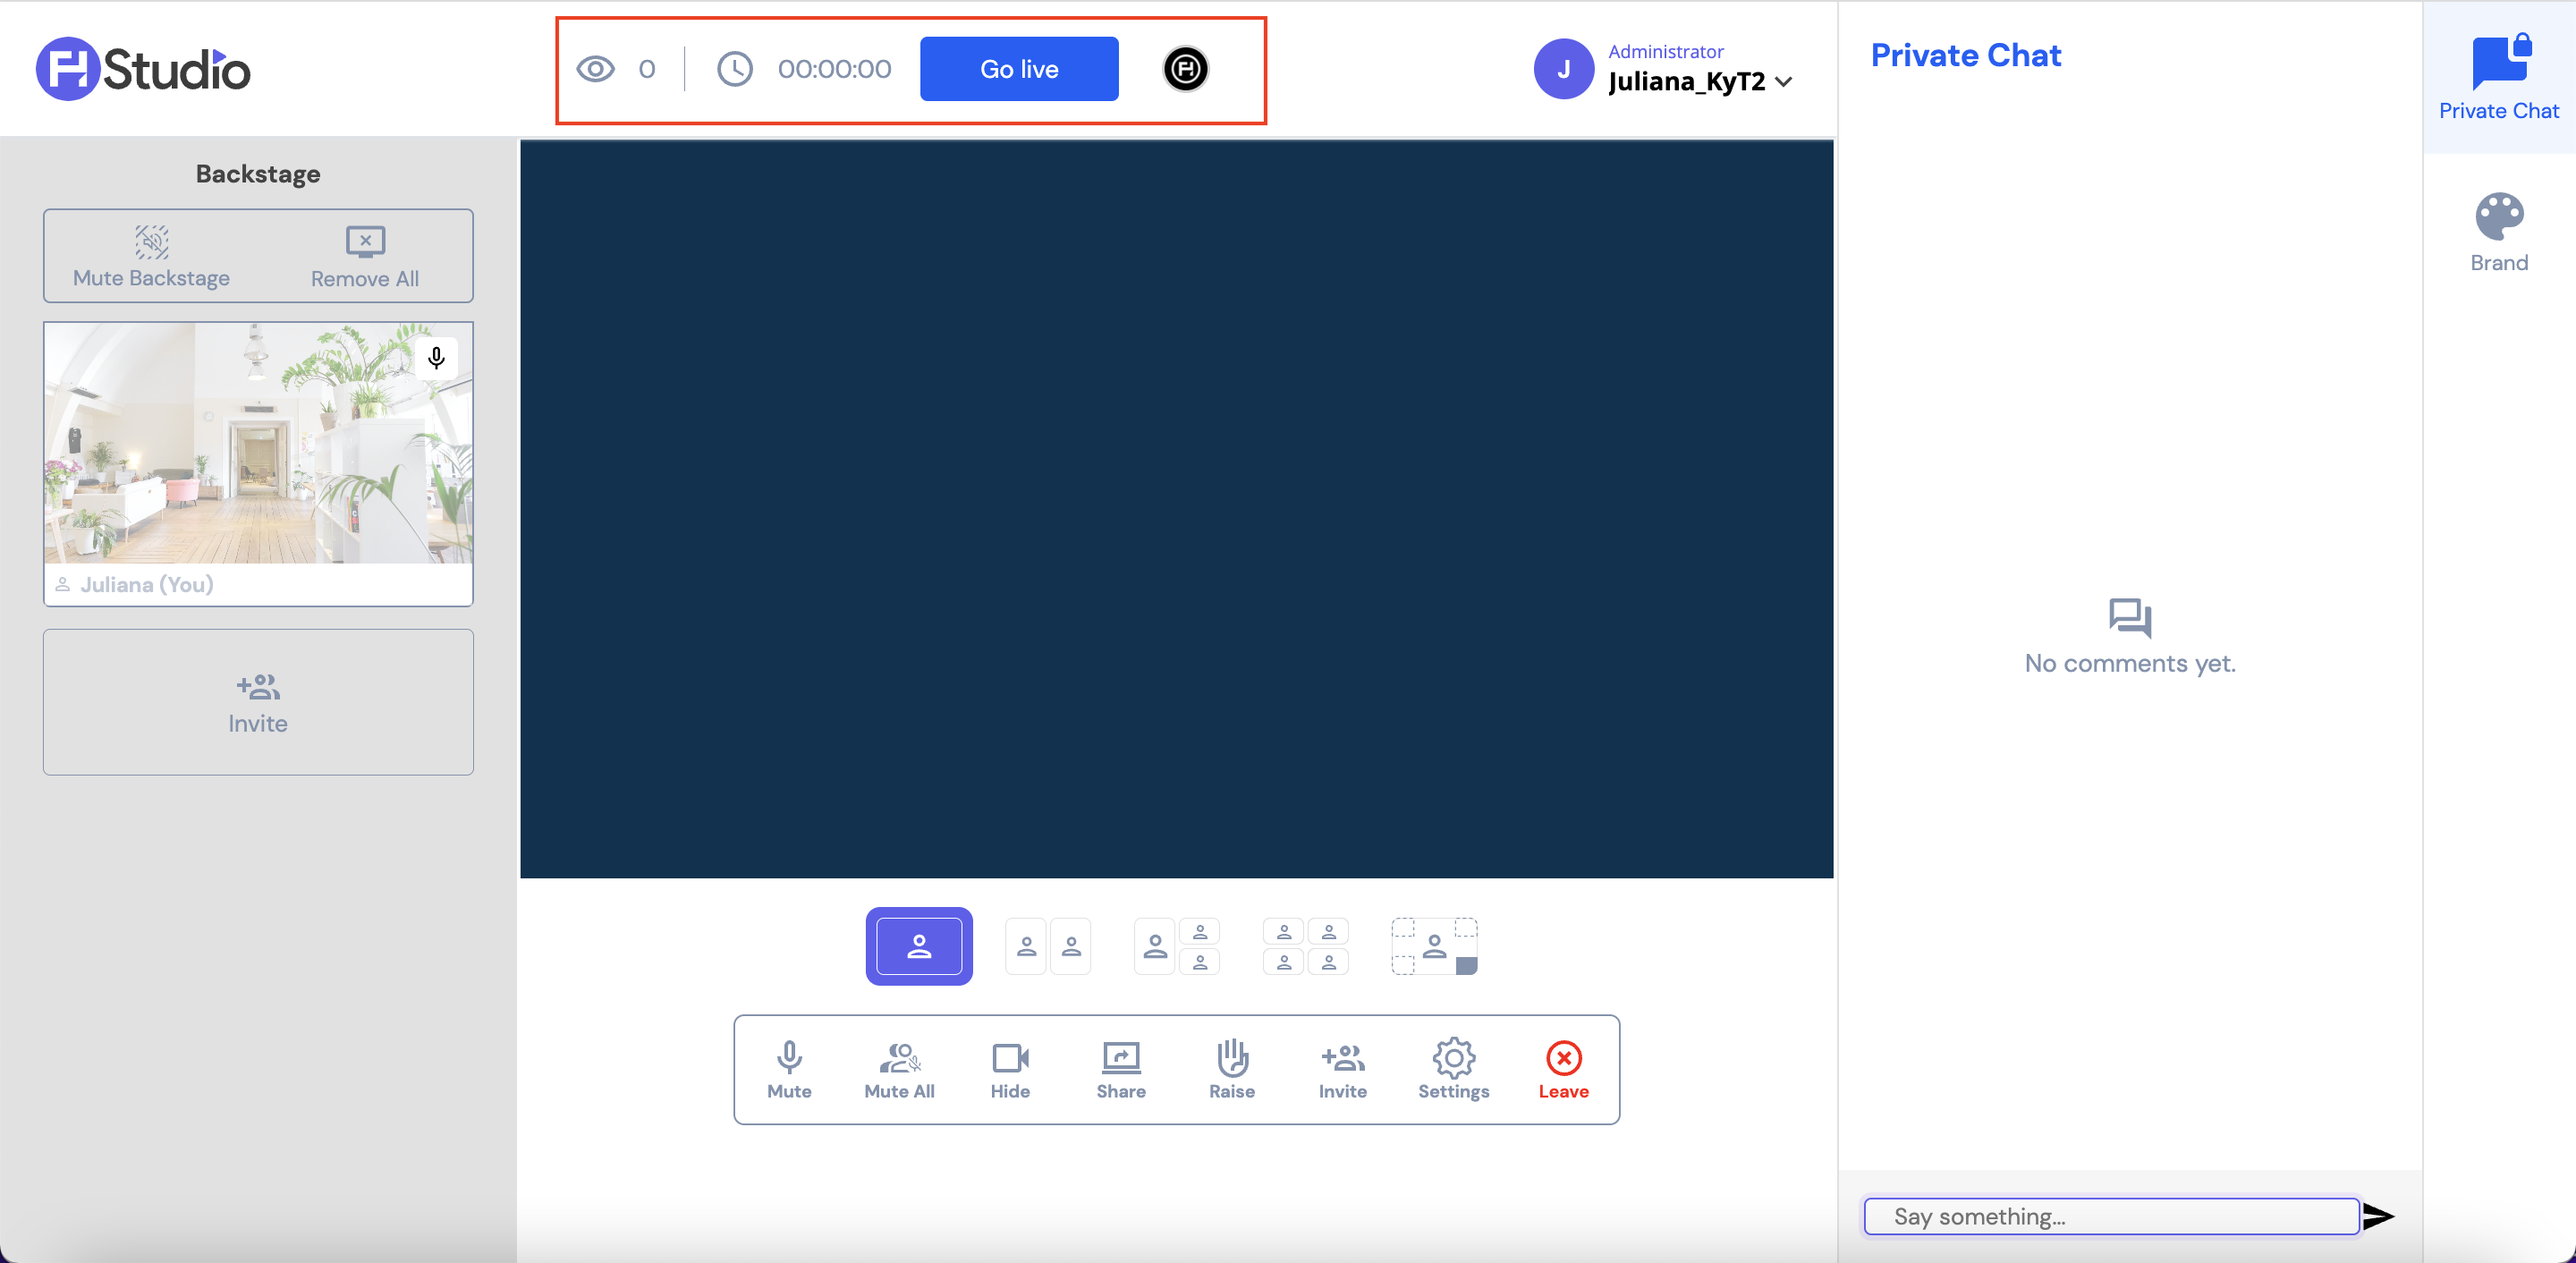
- Eye icon: displays the number of viewers watching the live stream in the FanHero platform.
- Clock icon: displays the duration of the live stream.
- Go live button: clicking on it will display a message to confirm that the host wants to start the live stream.
- Destinations icon: displays the icon of all destinations selected in step 2. Clicking on it will display the list of available destinations. The destinations can be edited at any time before going live. Once the live stream starts, the destinations cannot be changed and the destination icons will disappear from the view.
Go Live
To start a live stream, click on the Go Live button at the top. The live stream will start and the button will be changed to "End Broadcast".
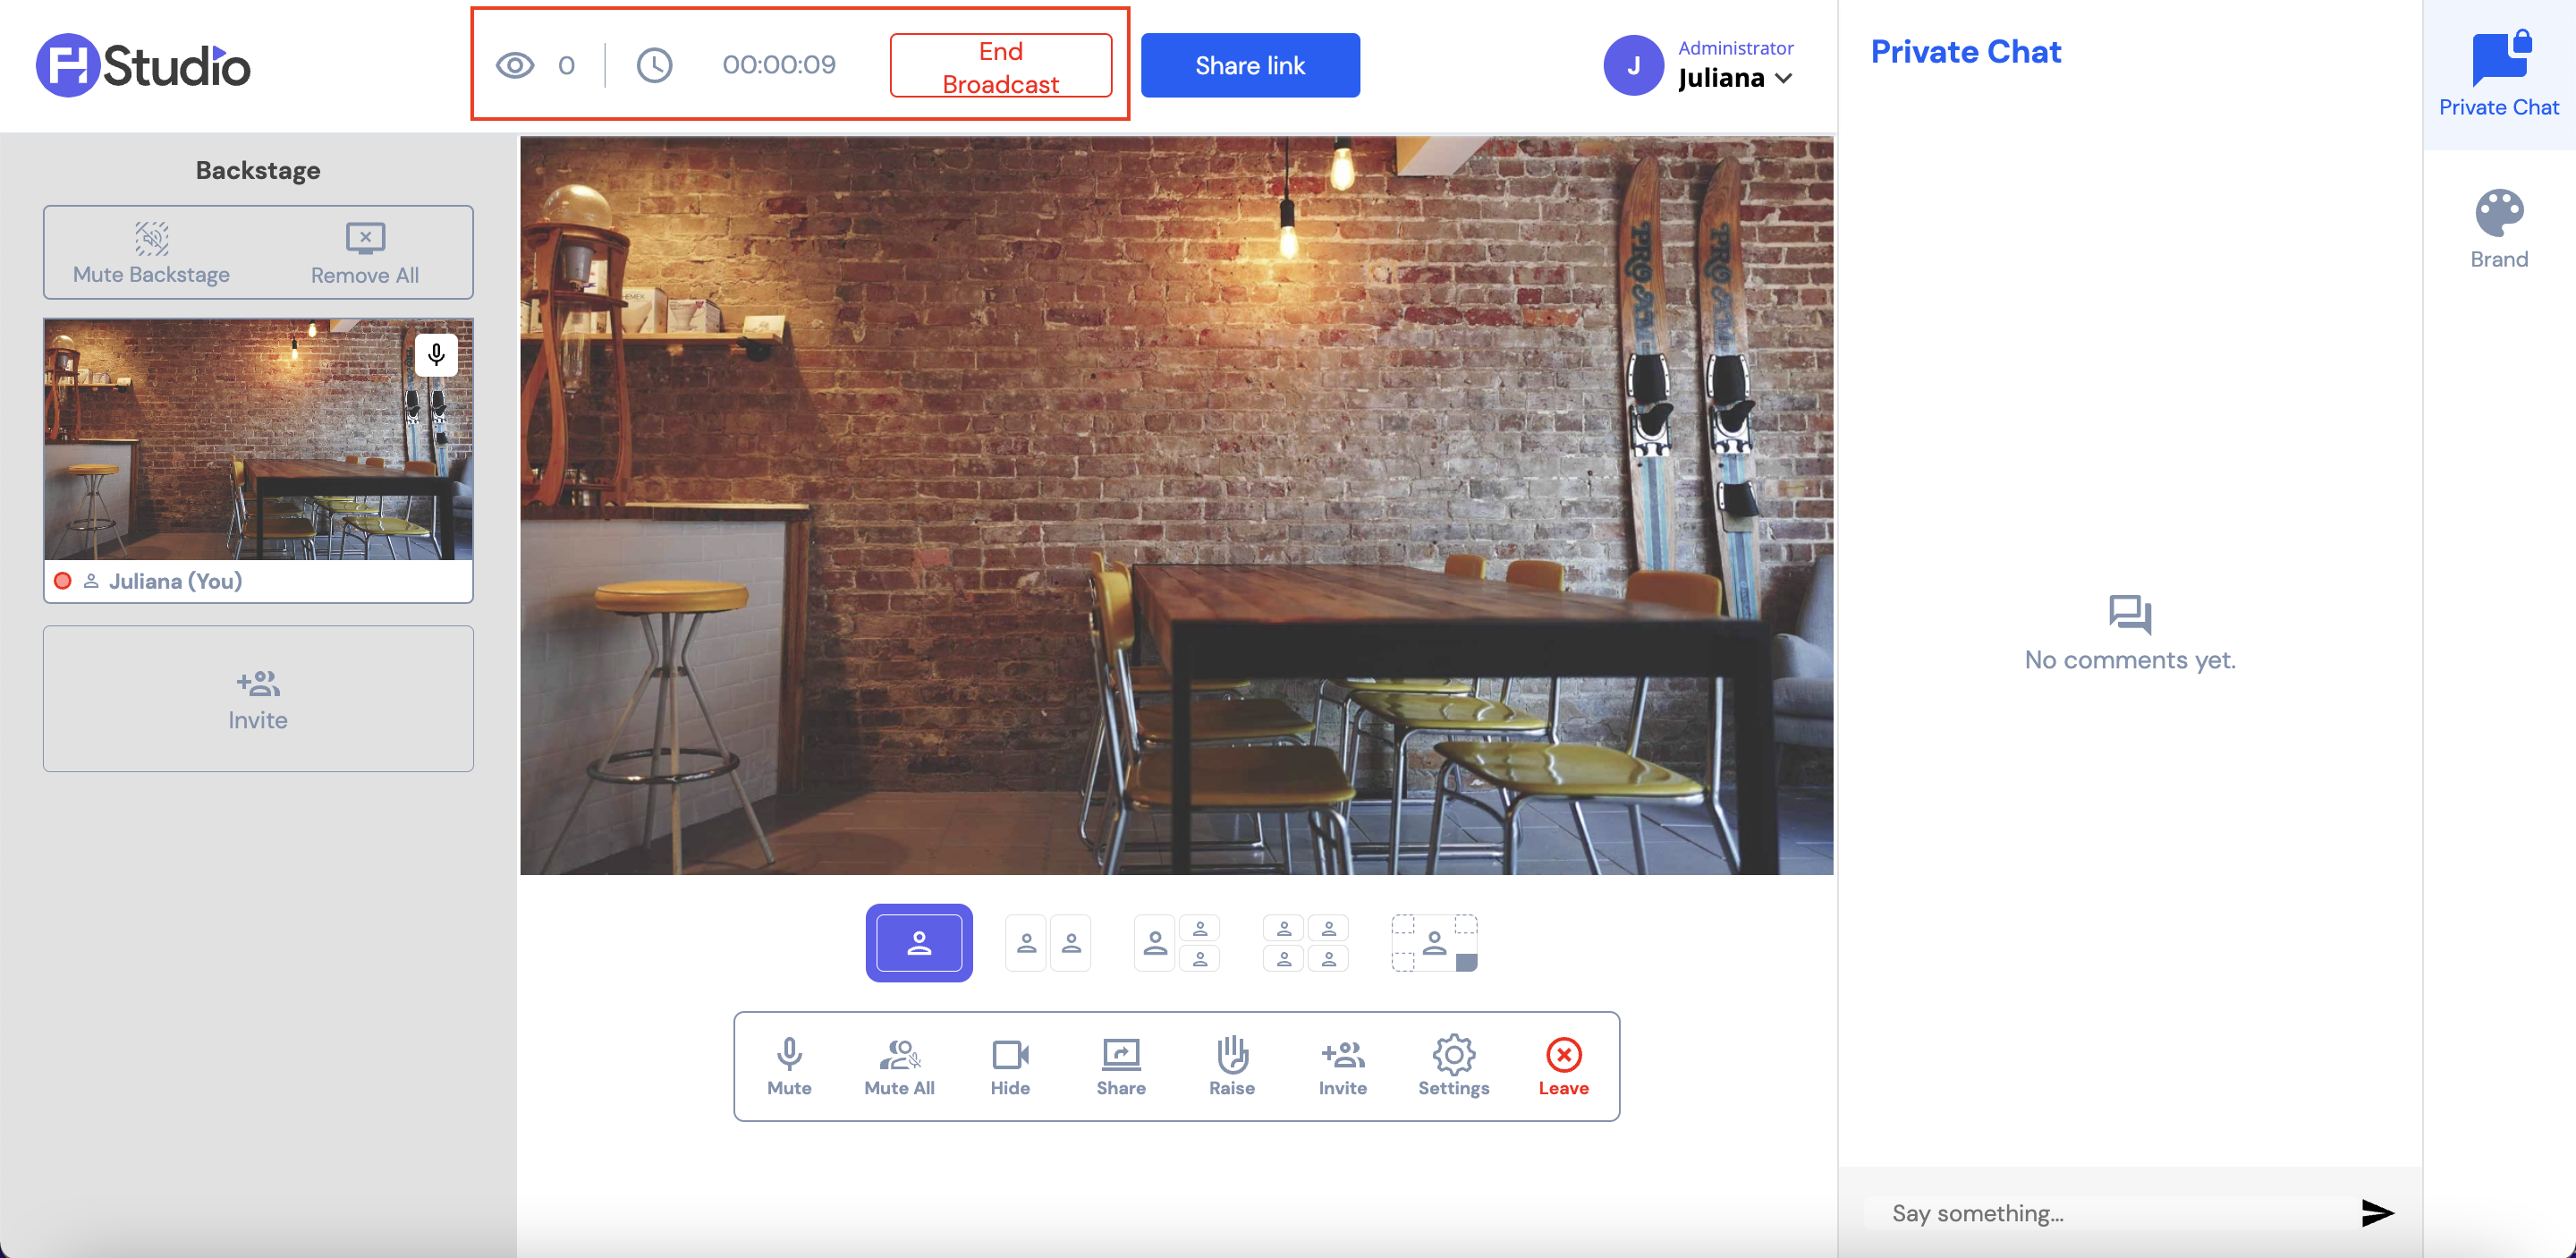
The Share Link button will be displayed if one of the destinations selected for that live stream is FanHero. Clicking on this button will copy a link of the live stream in the FanHero's web application.
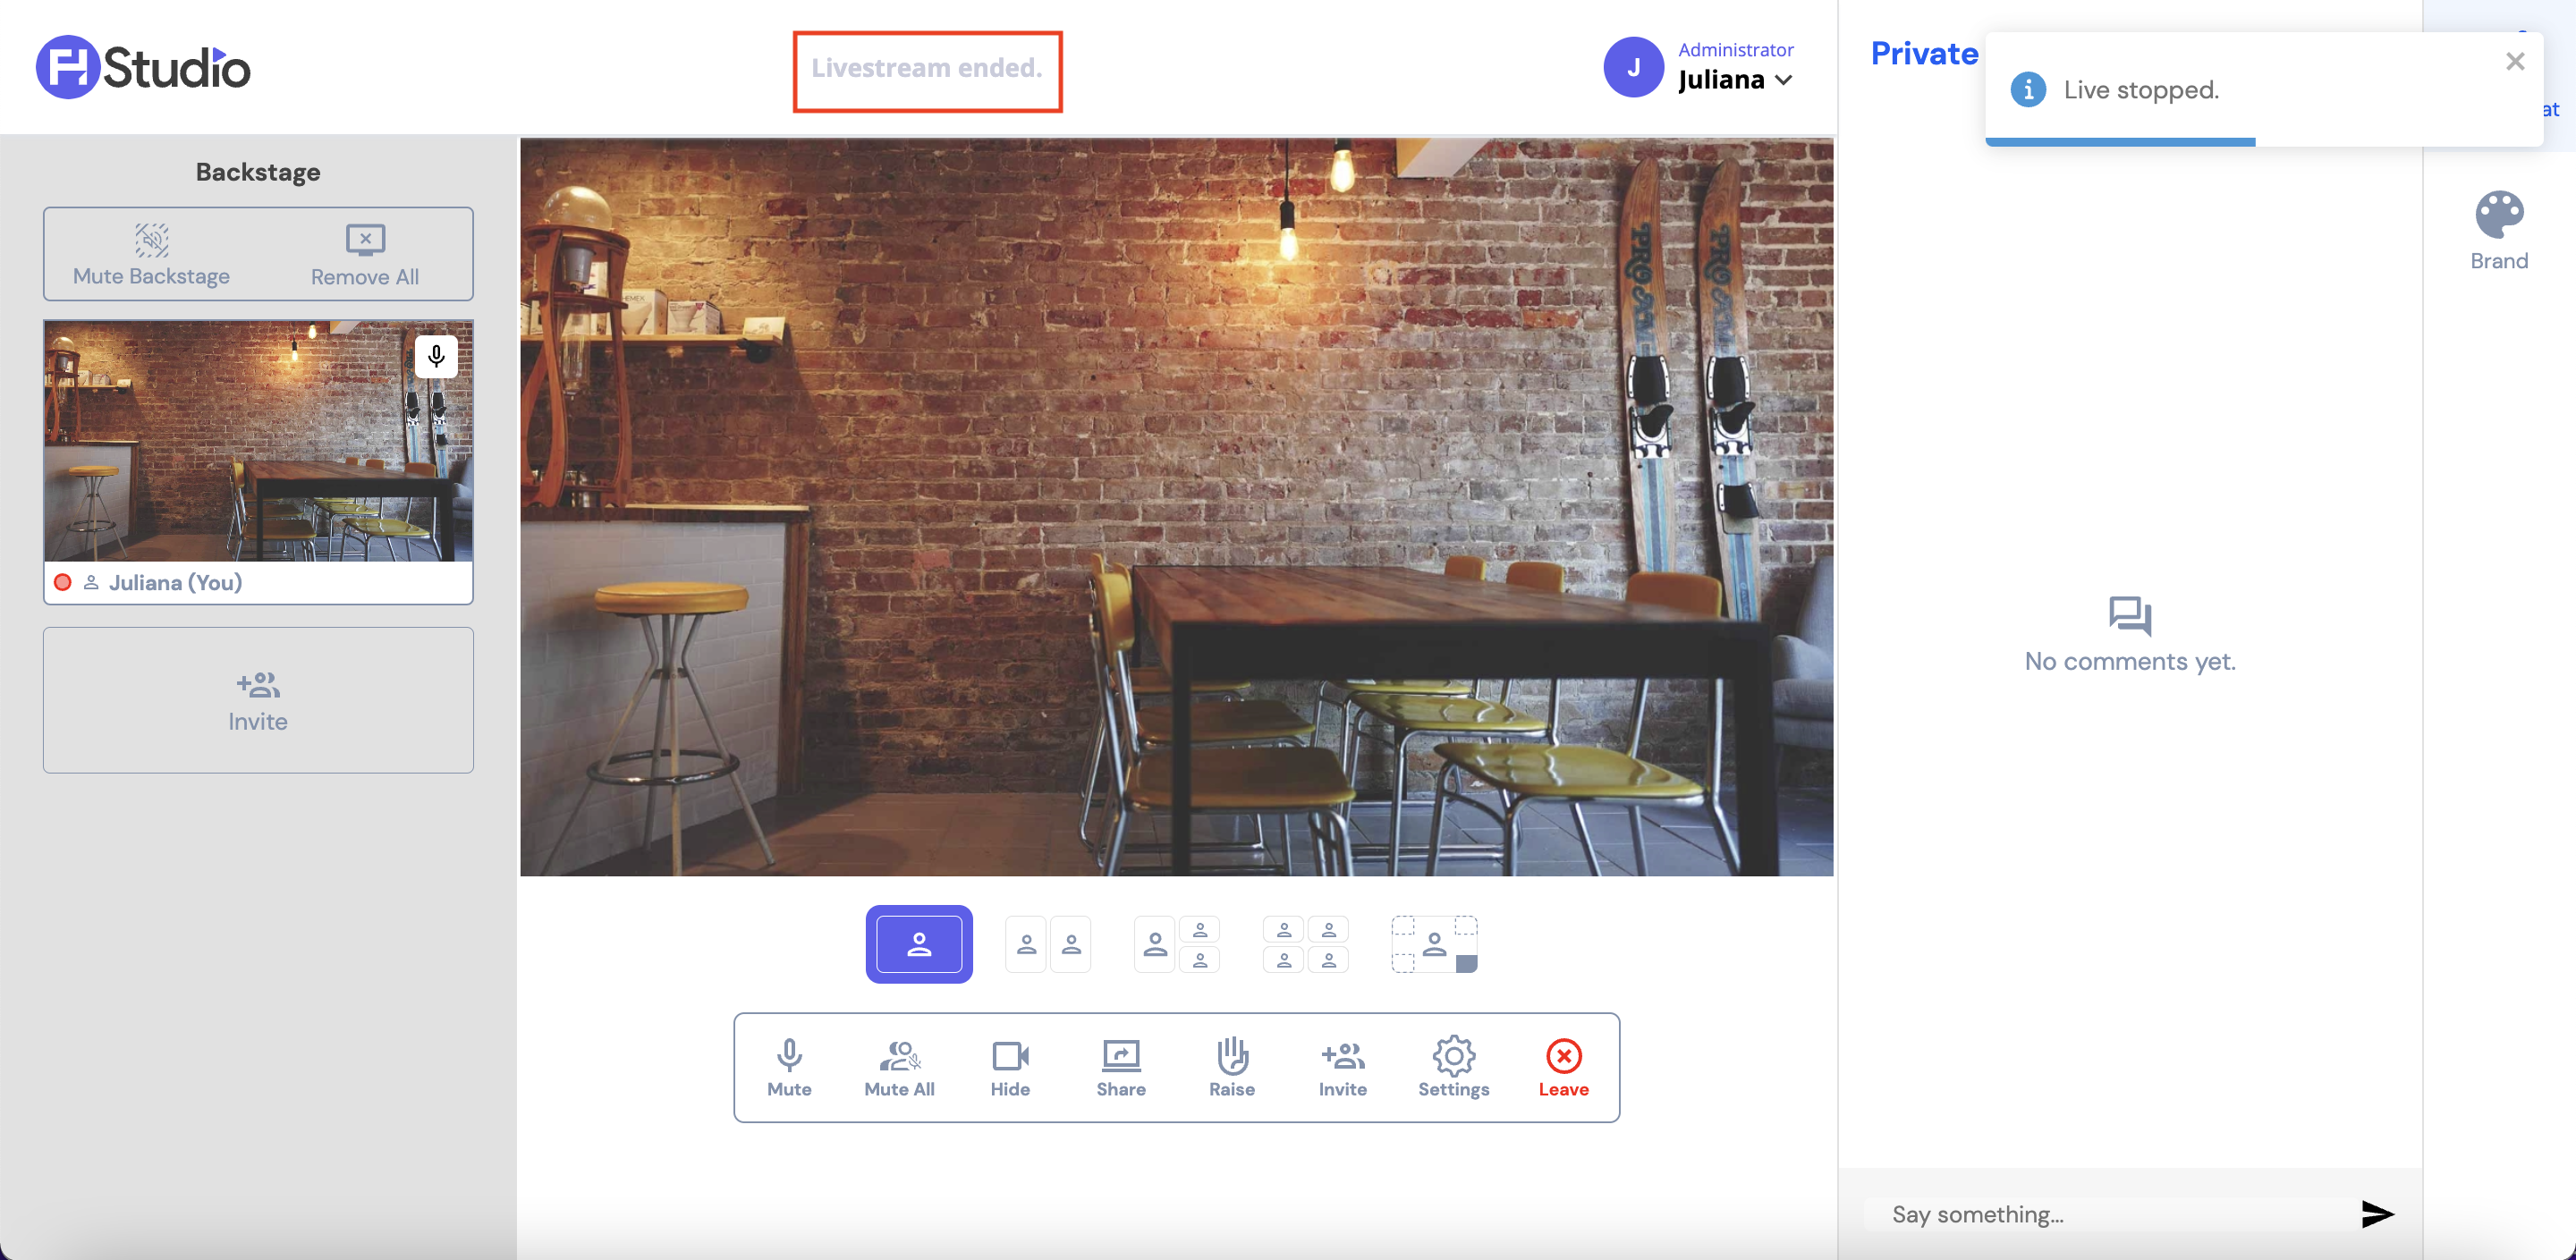
End Live Stream
To end a live stream, click on the End Broadcast button. A confirmation message will be displayed, indicating that the live stream stopped. The number of viewers and the duration of the live stream will be replaced by the text "Livestream ended".
Leave Studio Live
To leave the Studio live room where the live stream happened, click on the Leave button. A message will be displayed asking the host to confirm the action.
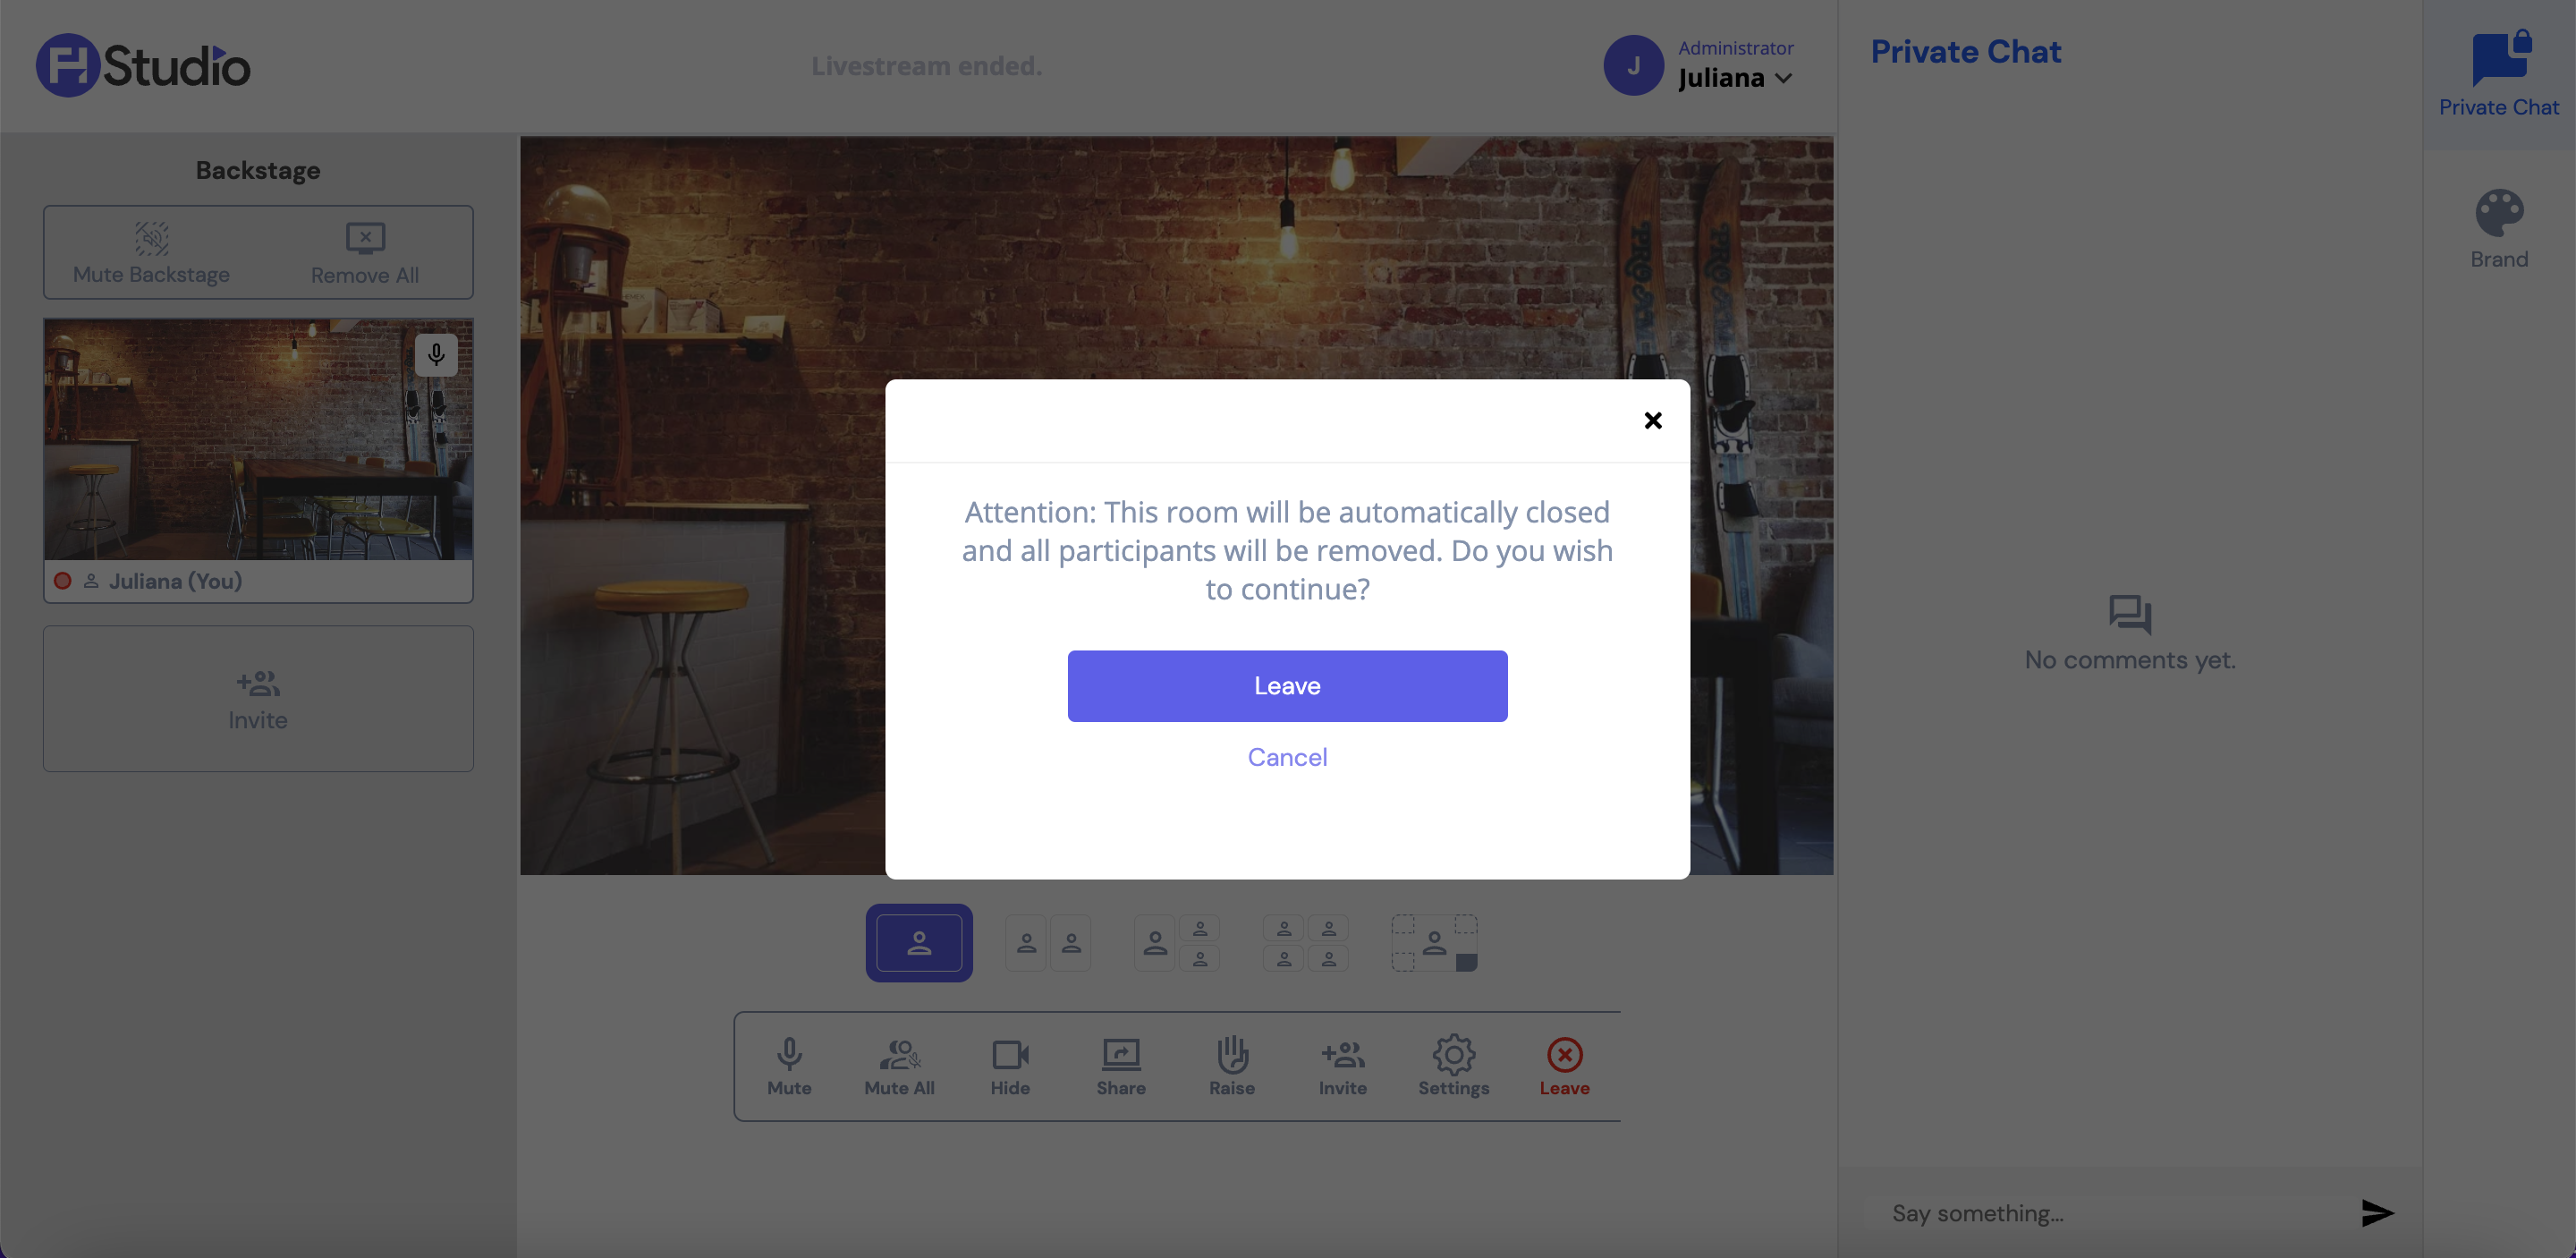
- Leave: Studio live room is closed and all participants are removed.
- Cancel: the pop up is dismissed.
Destinations
A live stream destination refers to the platform where your live video content is broadcasted and made available to viewers in real time. The destinations can be various platforms or websites that support live streaming functionality.
To manage destinations, click on the Destinations button at the top of the screen.
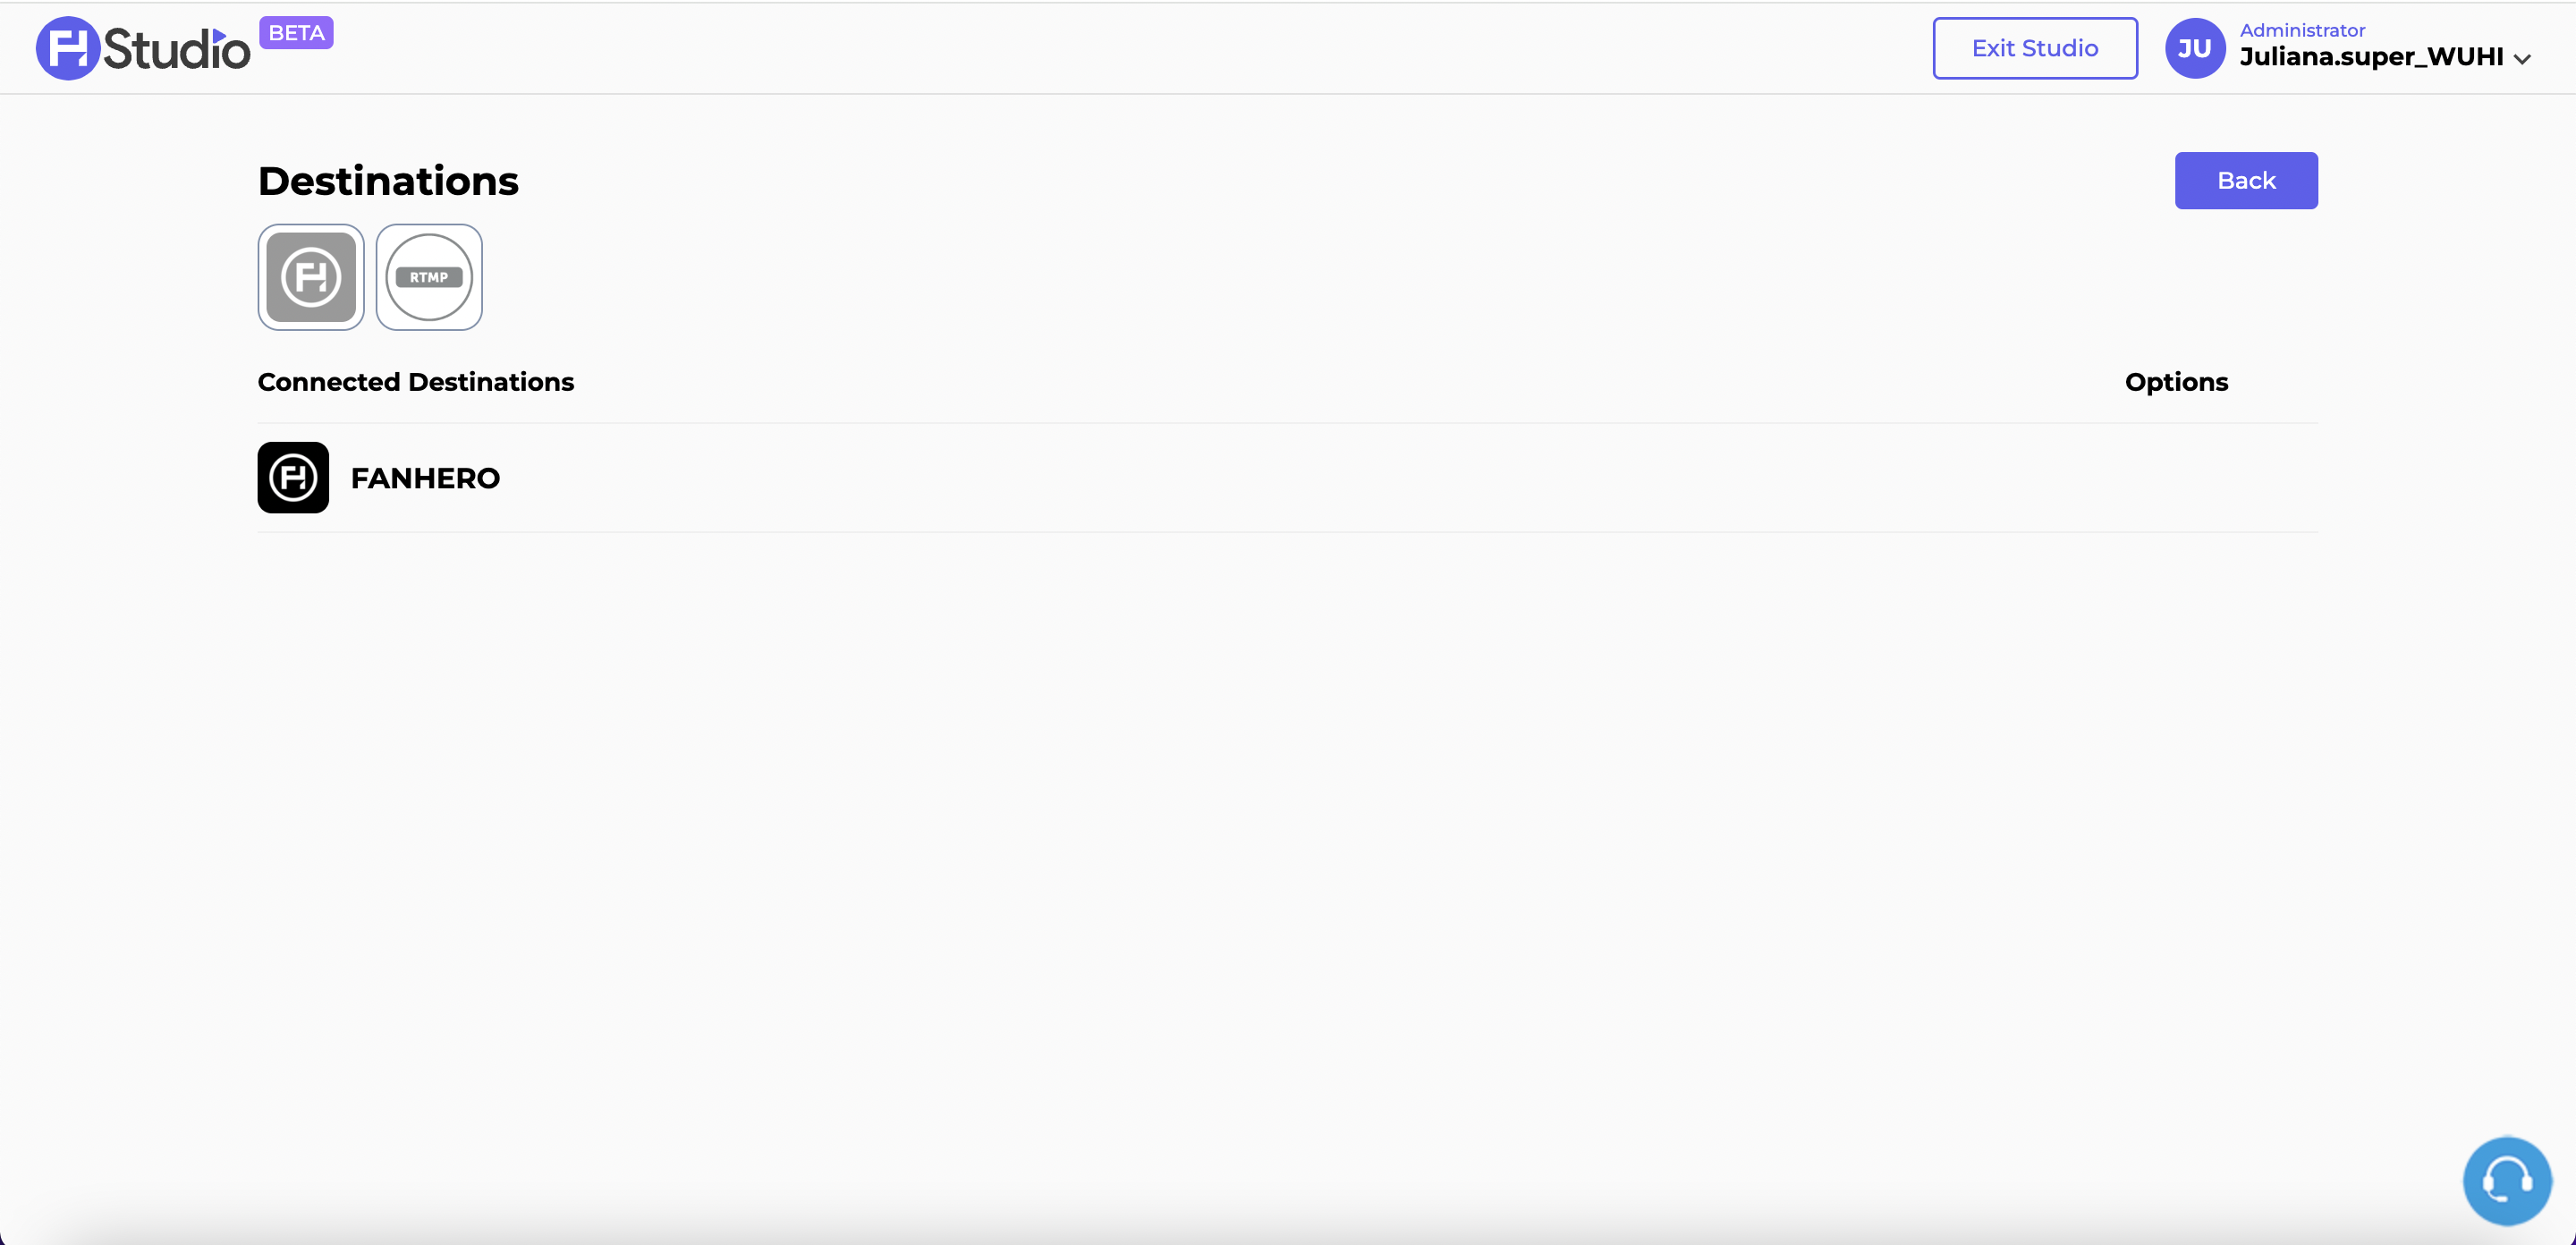
The Destinations Screen
Add Destination
To add a new destination, click on the plus icon.
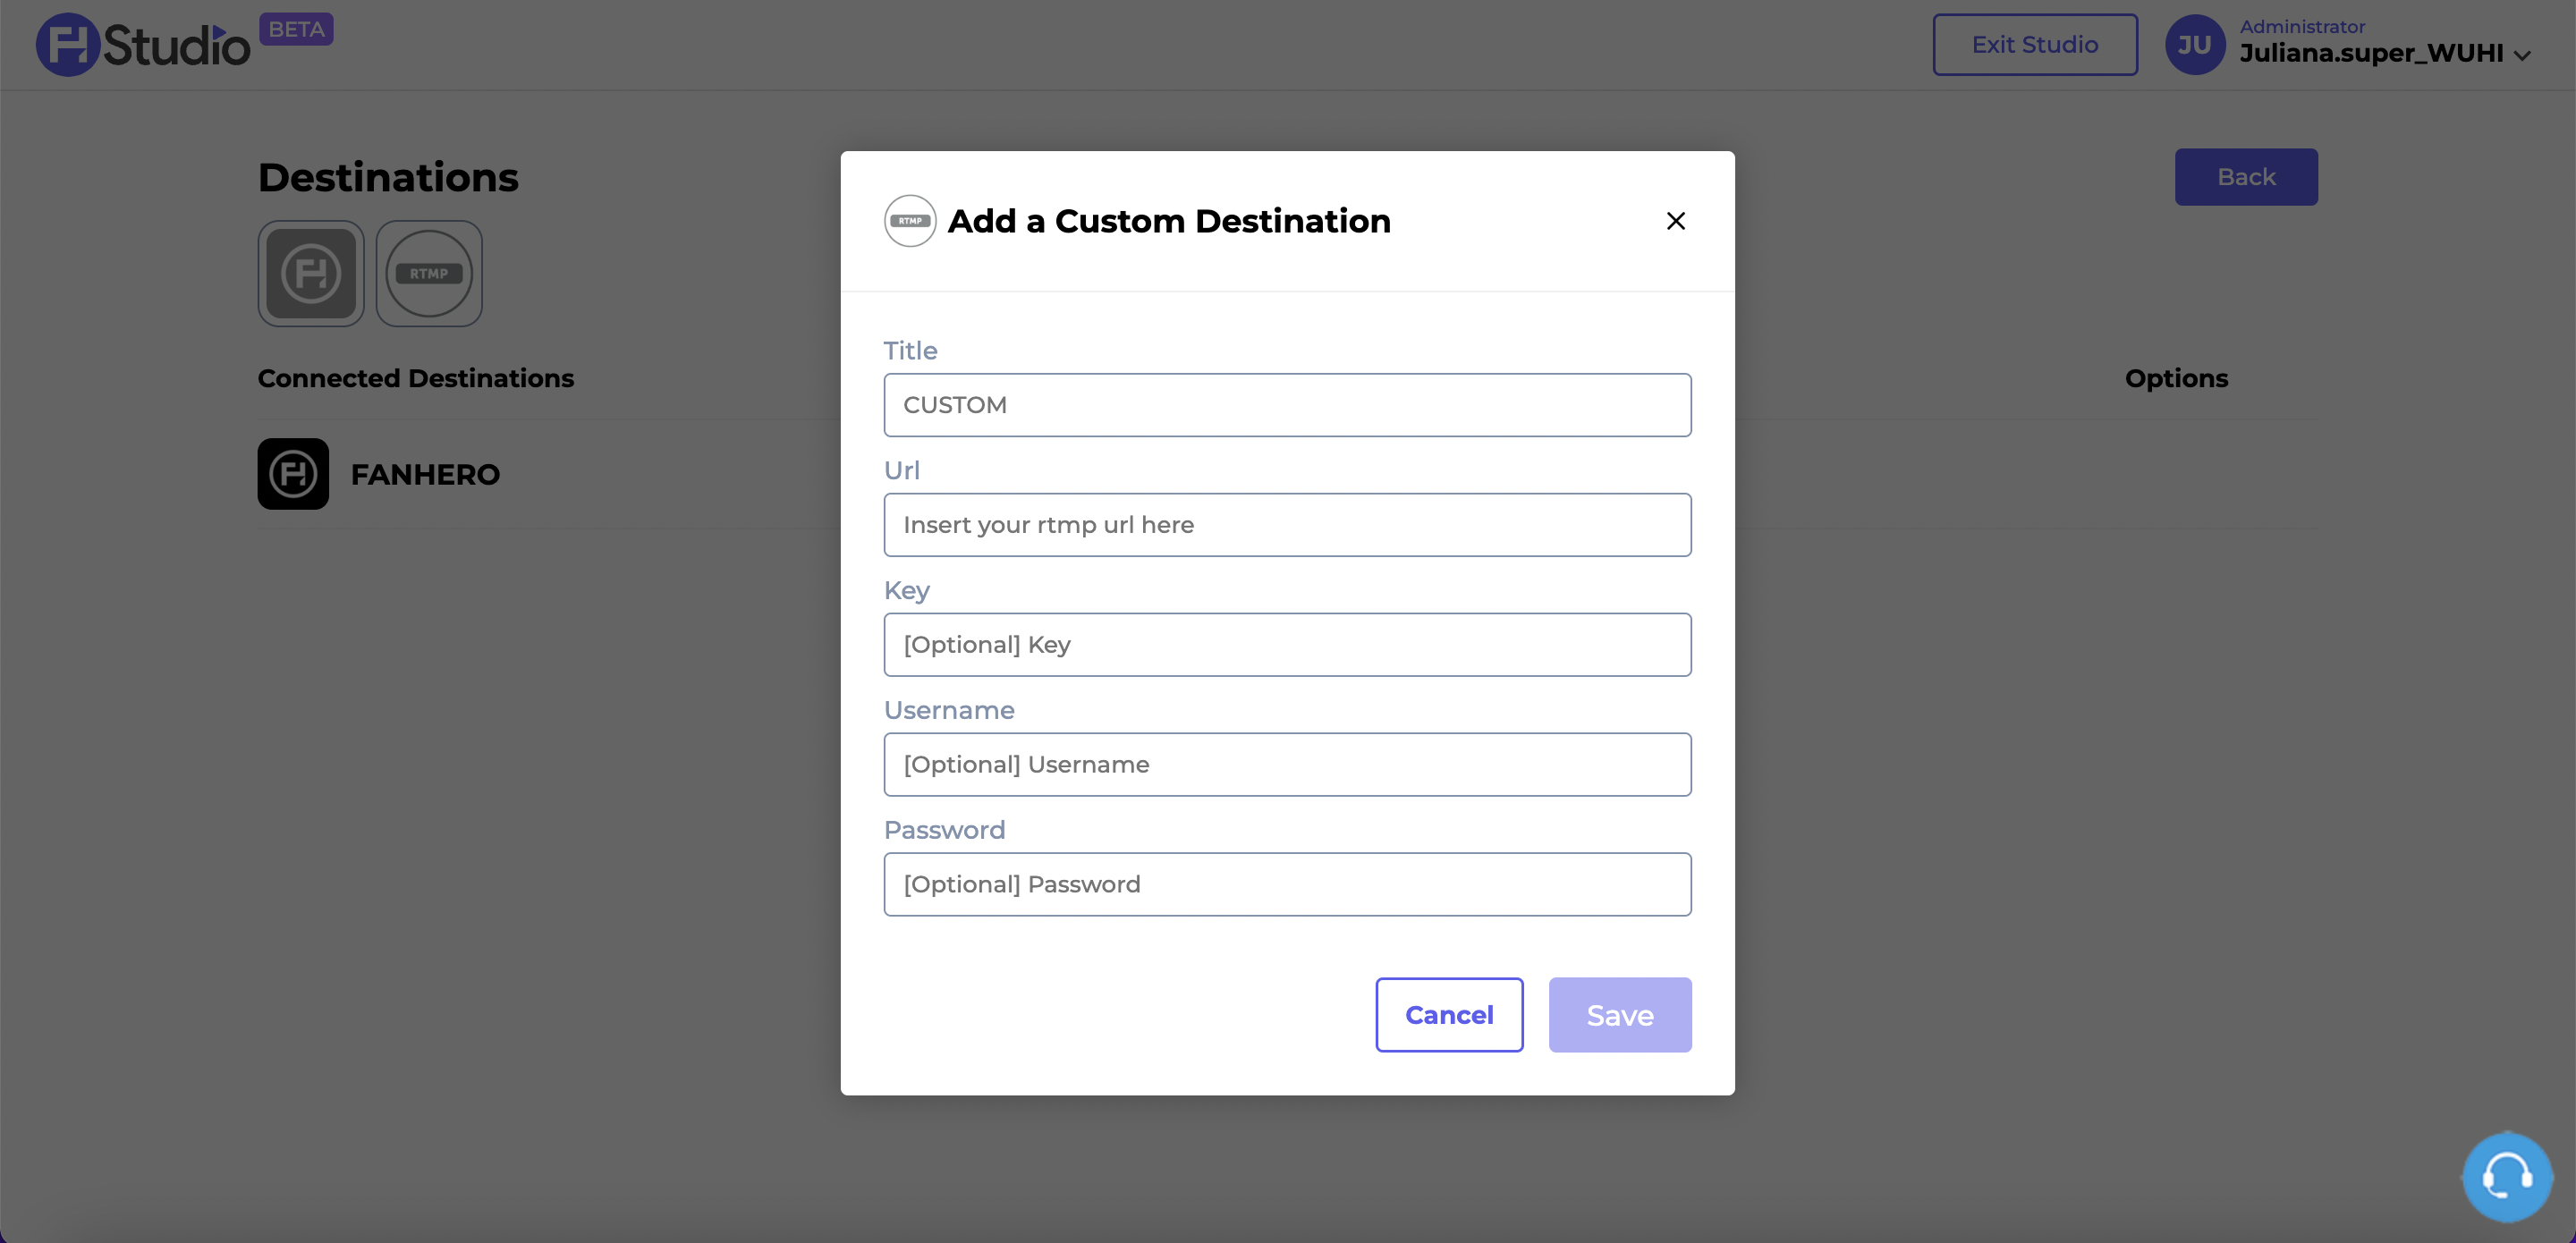
The Add a Destination Screen
- Title: the title of the new destination. It is a required field.
- URL: the URL of the new destination. It is a required field.
- Key: the key of the new destination. It is a required field.
- Username: the username of the destination. It is an optional field.
- Password: the password of the destination. It is an optional field.
- Cancel button: clicking on it will dismiss the pop up and the new destination is not created.
- Save: if all validation criteria is met, the new destination is created.
New destinations will be active by default. This means that the new destination will be available under Destinations when a Studio Live is created. An administrator has the ability to deactivate a destination at any time by disabling the "Active" toggle next to the destination. Inactive destinations will not be available under Destinations when a Studio Live is created.
Edit Destination
To edit a previously created destination, click on the 3 dots next to the destination you want to edit.

A pop up will open with the following fields:
- Title: the title of the destination. It is a required field.
- URL: the URL of the destination. It is a required field.
- Key: the key of the new destination. It is a required field.
- Username: the username of the destination. It is an optional field.
- Password: the password of the destination. It is an optional field.
- Cancel button: clicking on it will dismiss the pop up and the destination is not updated.
- Save: if all validation criteria is met, the destination is updated.
Note: the FanHero platform cannot be edited as a destination.
Delete Destination
To remove a previously created destination, click on the 3 dots icon and select "Delete". A message will be displayed asking the administrator to confirm the action.
Note: the FanHero platform cannot be removed as a destination. It can be deactivated, but not deleted.
Finished Stream
This section displays a list of finished live events. Administrators have the ability to download the live stream video file, create a post and delete the live stream.
Download
To download a finished live stream video, click on the download icon. A new tab will open from where you have the ability to download the file.
Create Post
To post a finished live stream, select the "Create Post" option. You will be redirected to the Add Video screen, with the following information already populated from the live event:
- Video
- Slug
- Title
- Description
- Thumbnail
- Level of Access
All fields can be edited. A posted live event will be displayed in the "past live event" carousel.
Delete
Administrators have the ability to delete a finished live stream by selecting on the Delete option. A pop up will be displayed asking you to confirm this action.
Updated about 1 year ago