Studio
FanHero's solution that enables you to live stream to multiple channels including YouTube, Twitch, FanHero and Custom RTMP while enabling Hosts to invite people and participate in split screen sessions of up to 5 guests and to have that Live Event broadcasted.
Home
From the Home screen, Admin users can quickly start a Webcam Stream and see information about the upcoming streams already scheduled.
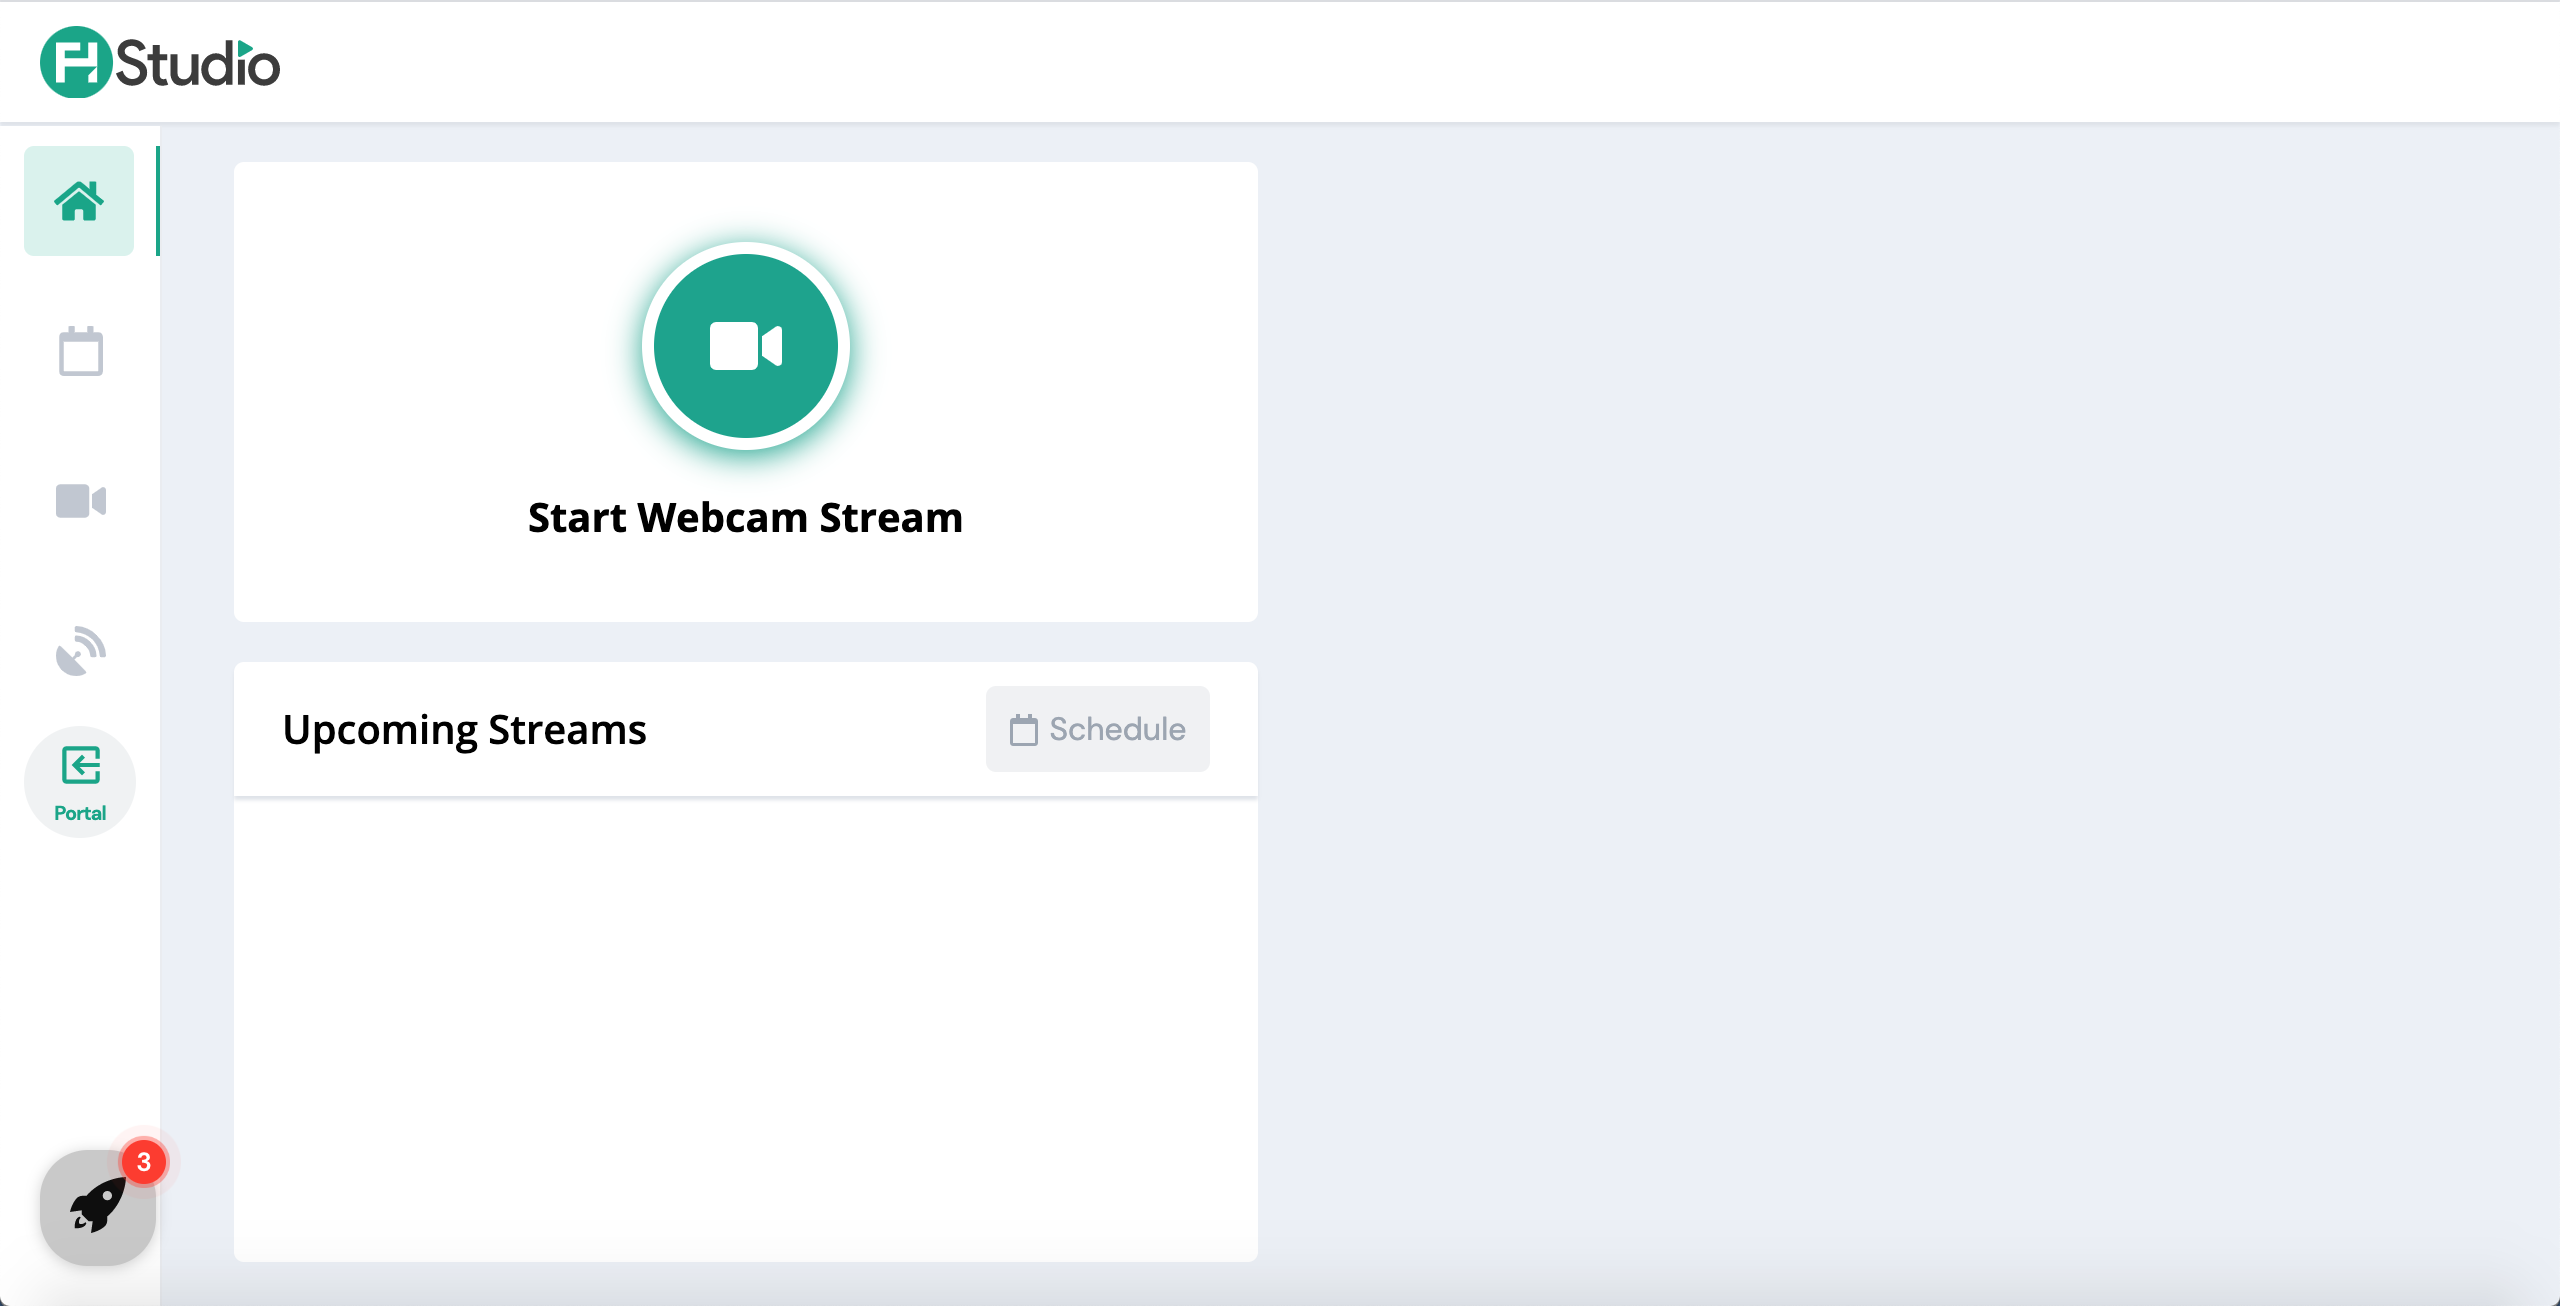
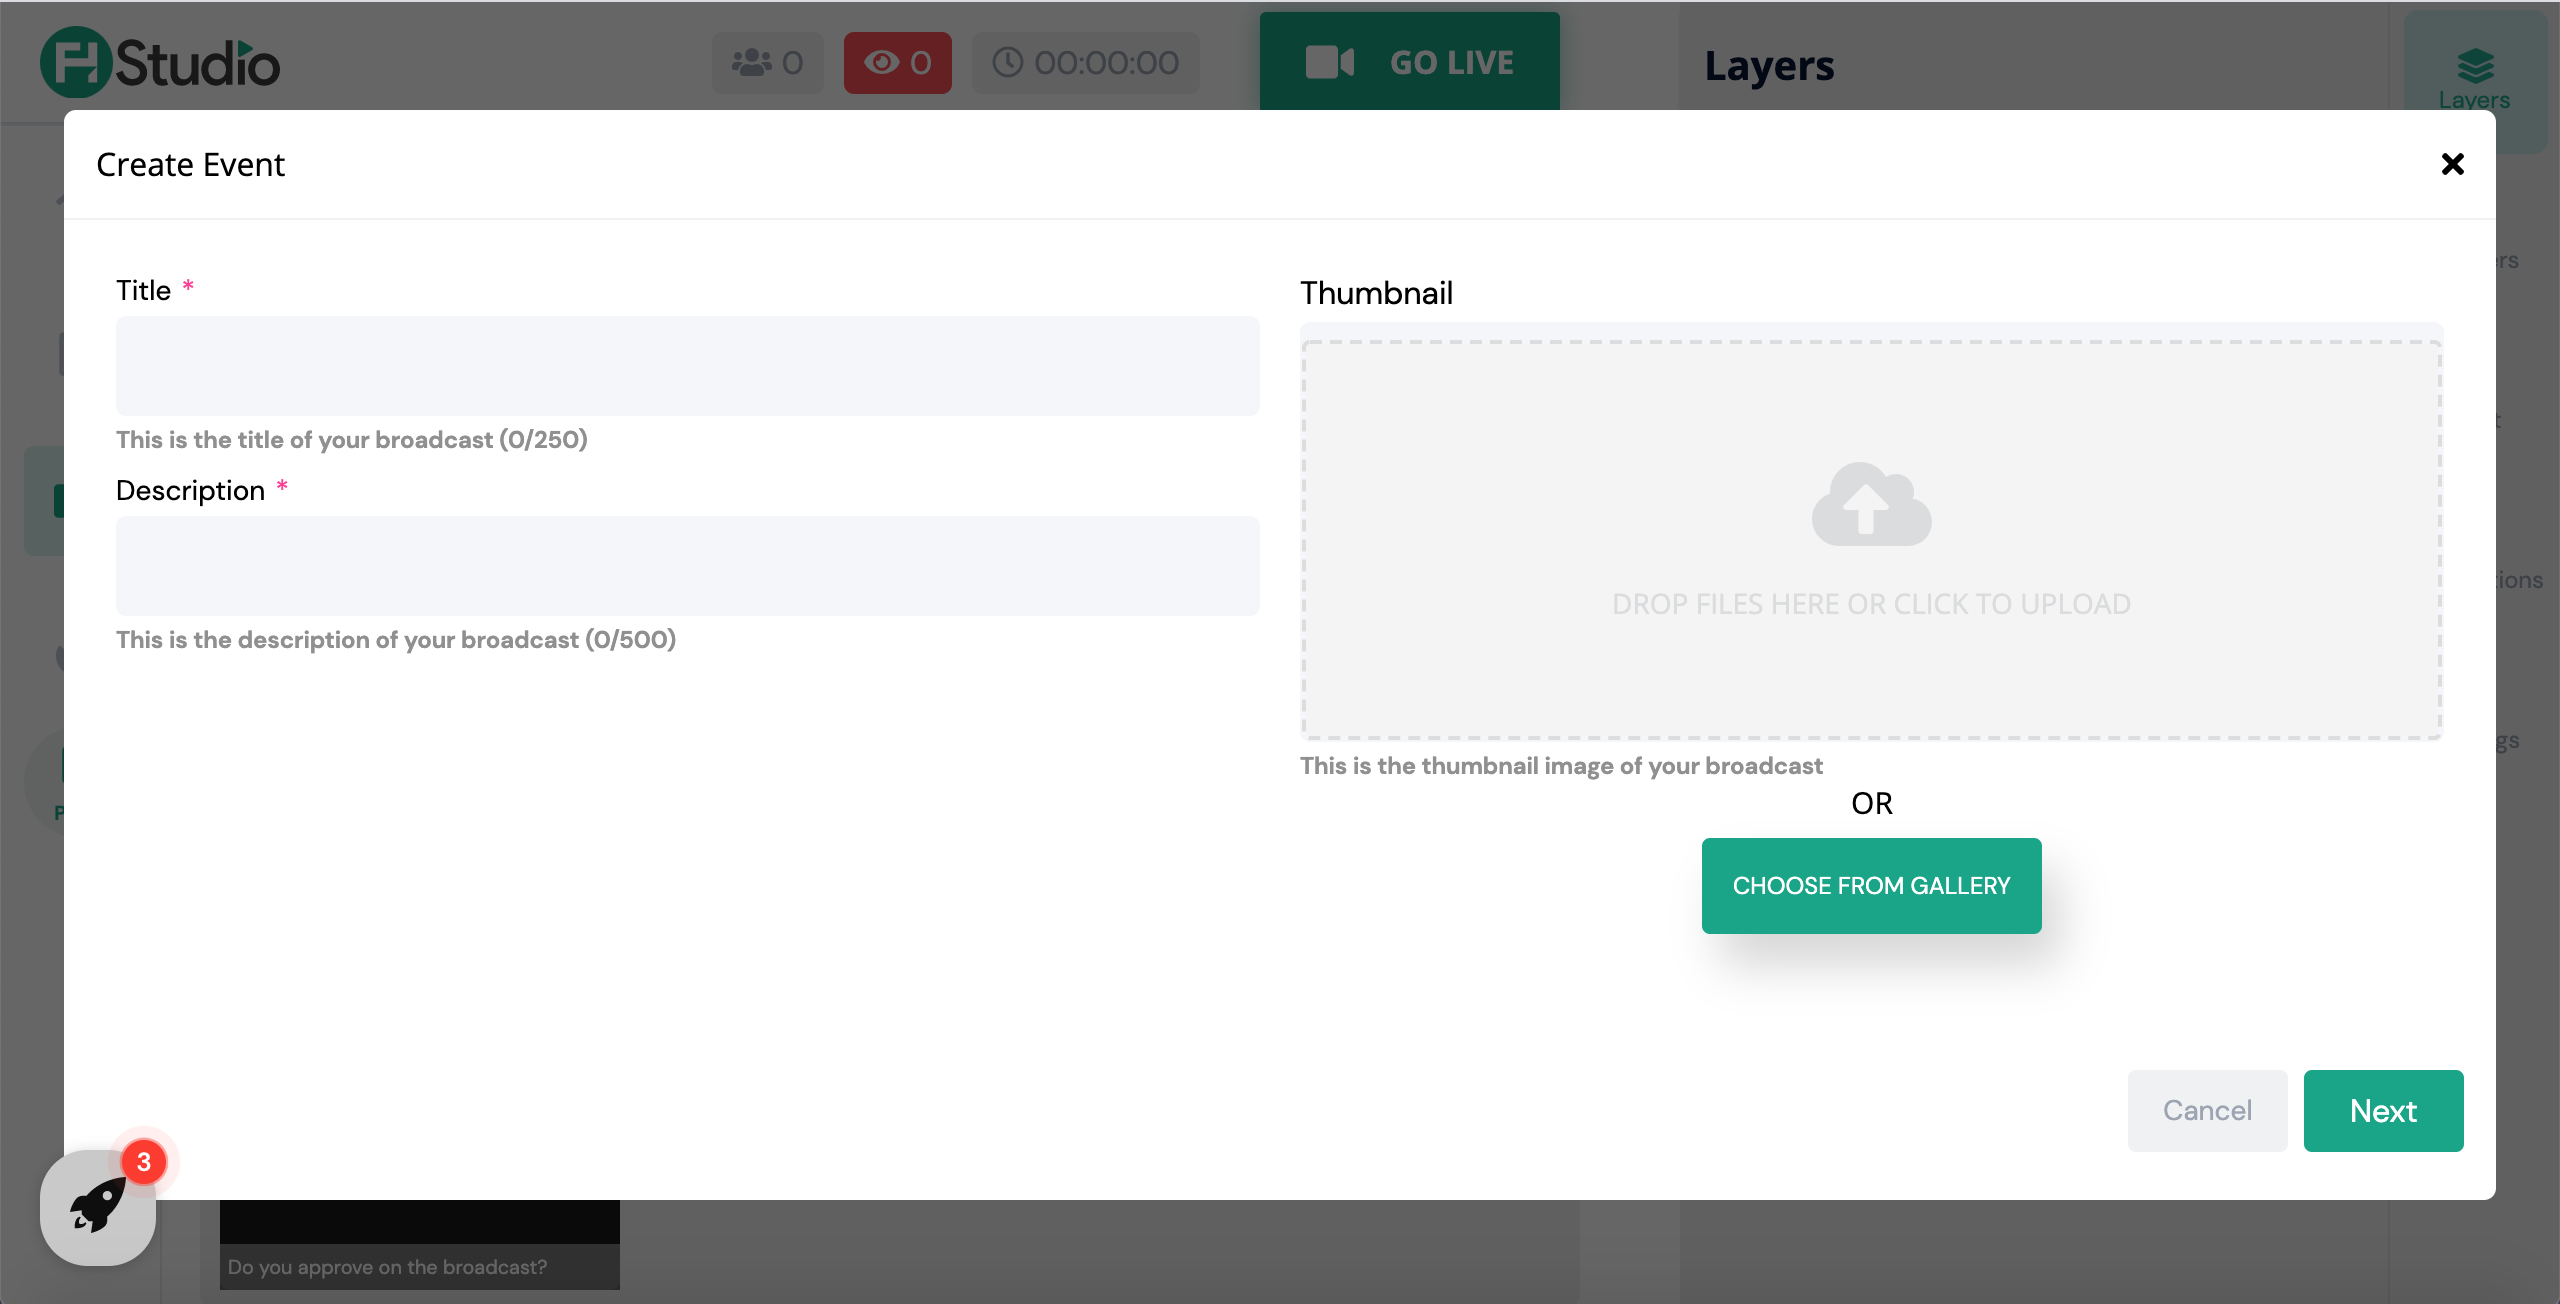
Click on Start Webcam Stream to create your new event:
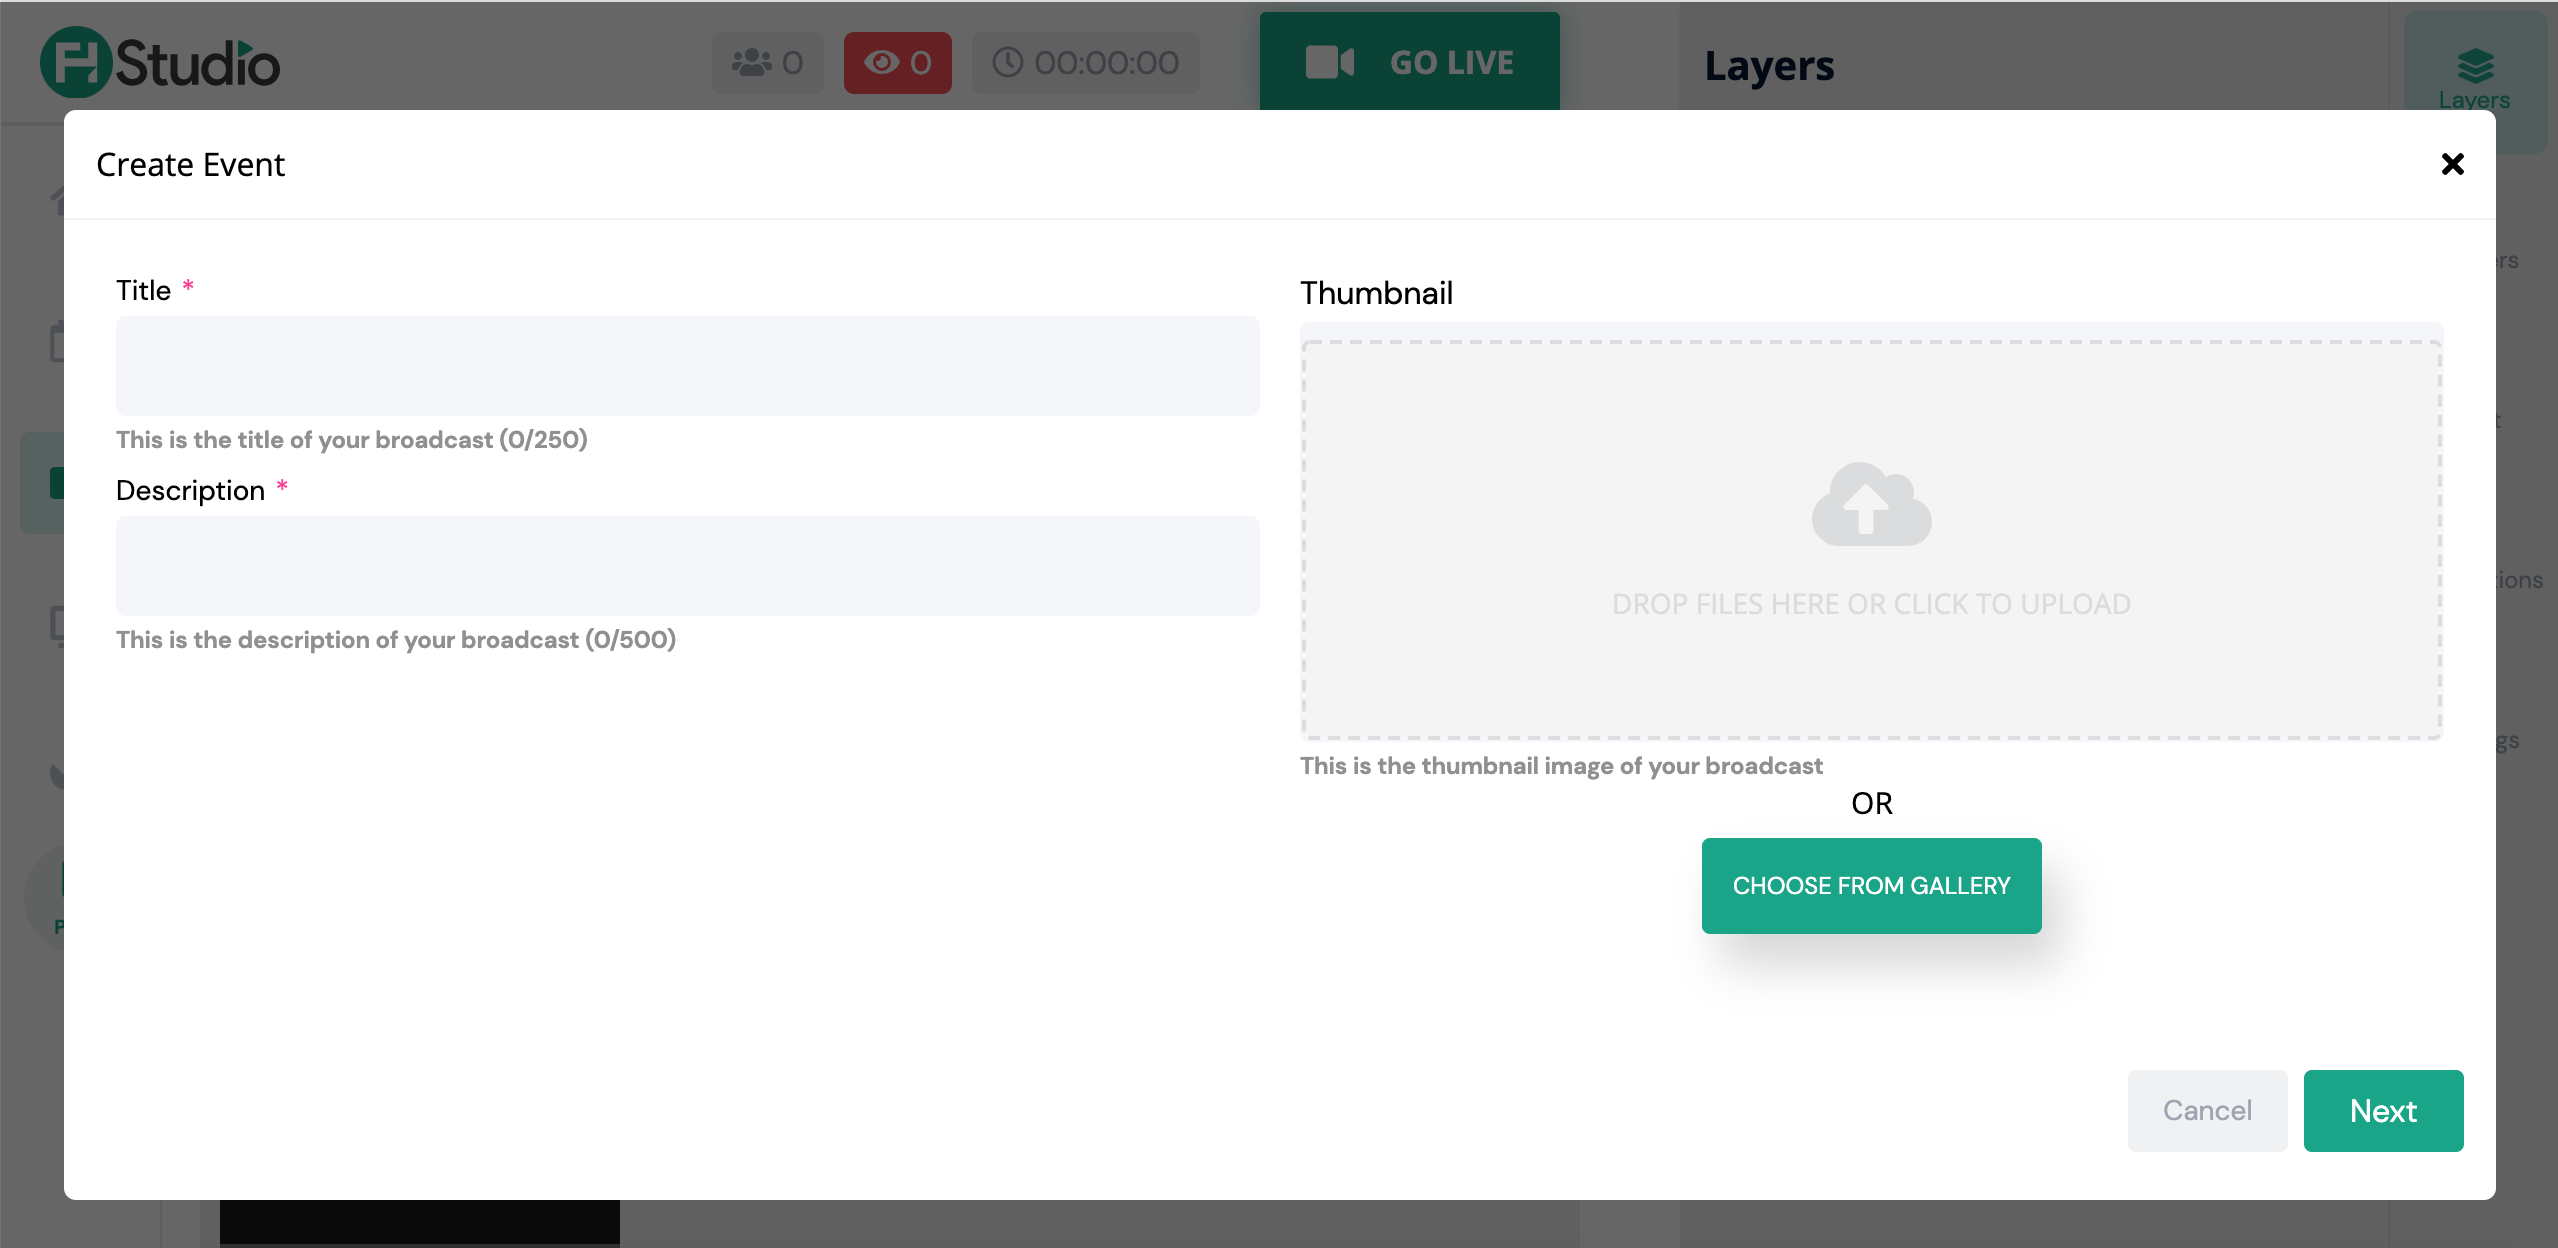
Item | Description |
|---|---|
Title | Stream title. |
Description | Stream description. |
Thumbnail | Stream thumbnail. |
After completing all the required steps, click Next. In this step, you will be able to set a destination.
Note: if you enable the "Record Only" option, then you won't be able to enable other destinations.
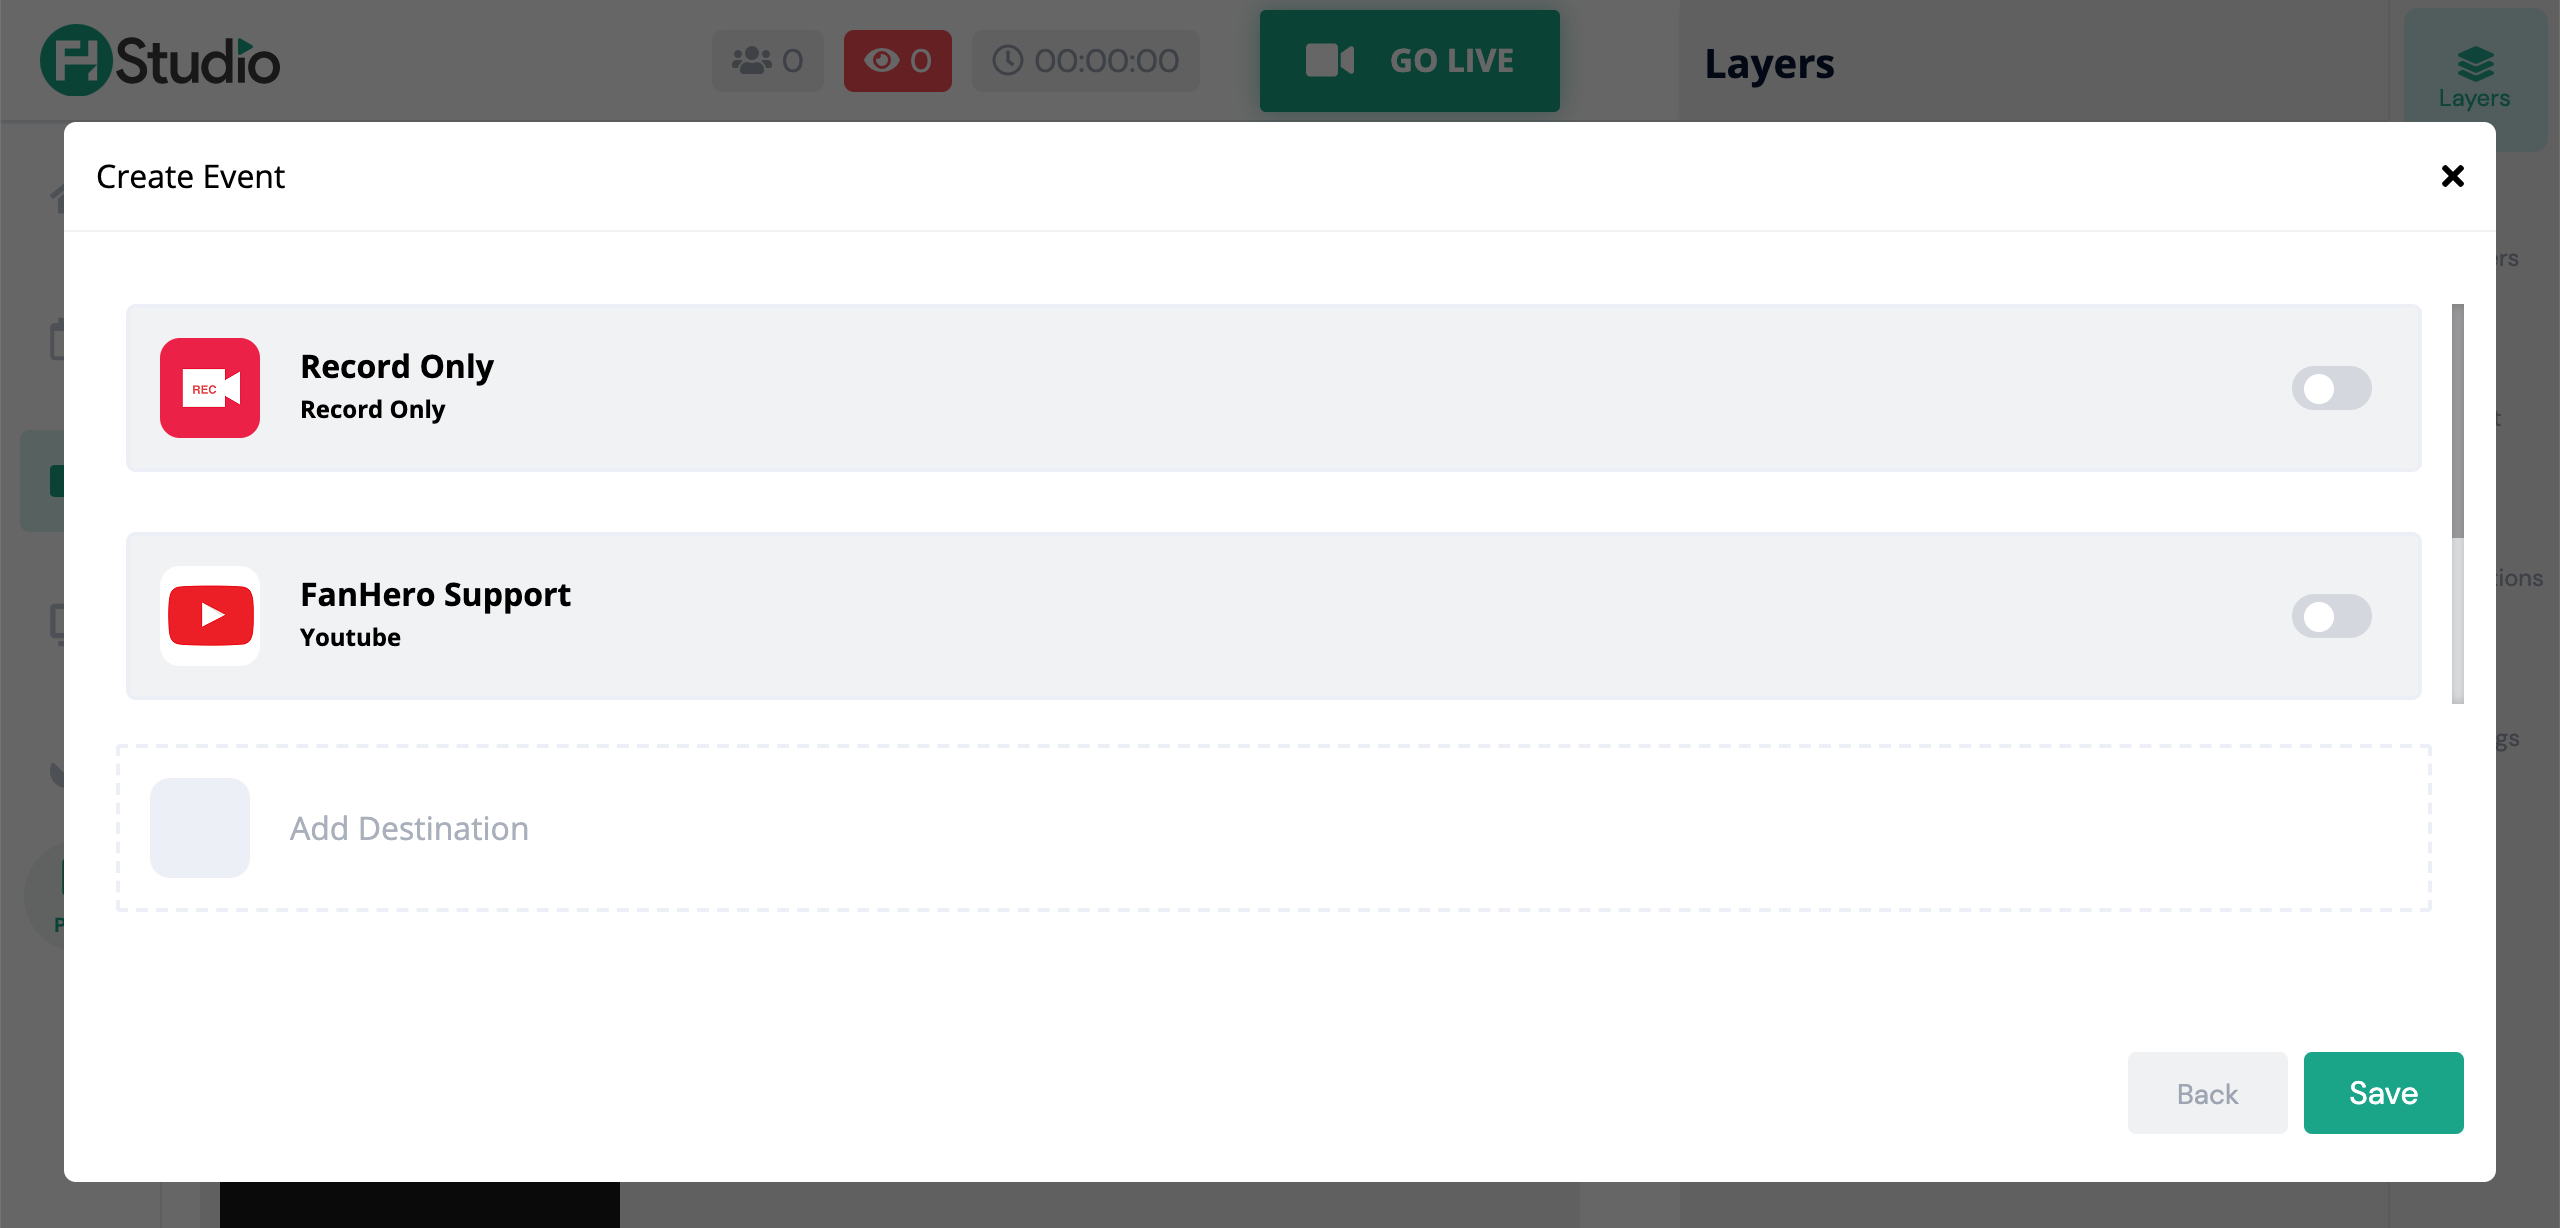
In the example above, below the Record Only option there is our YouTube Channel already set up as a destination.
Then you will see the platform channel you are at:
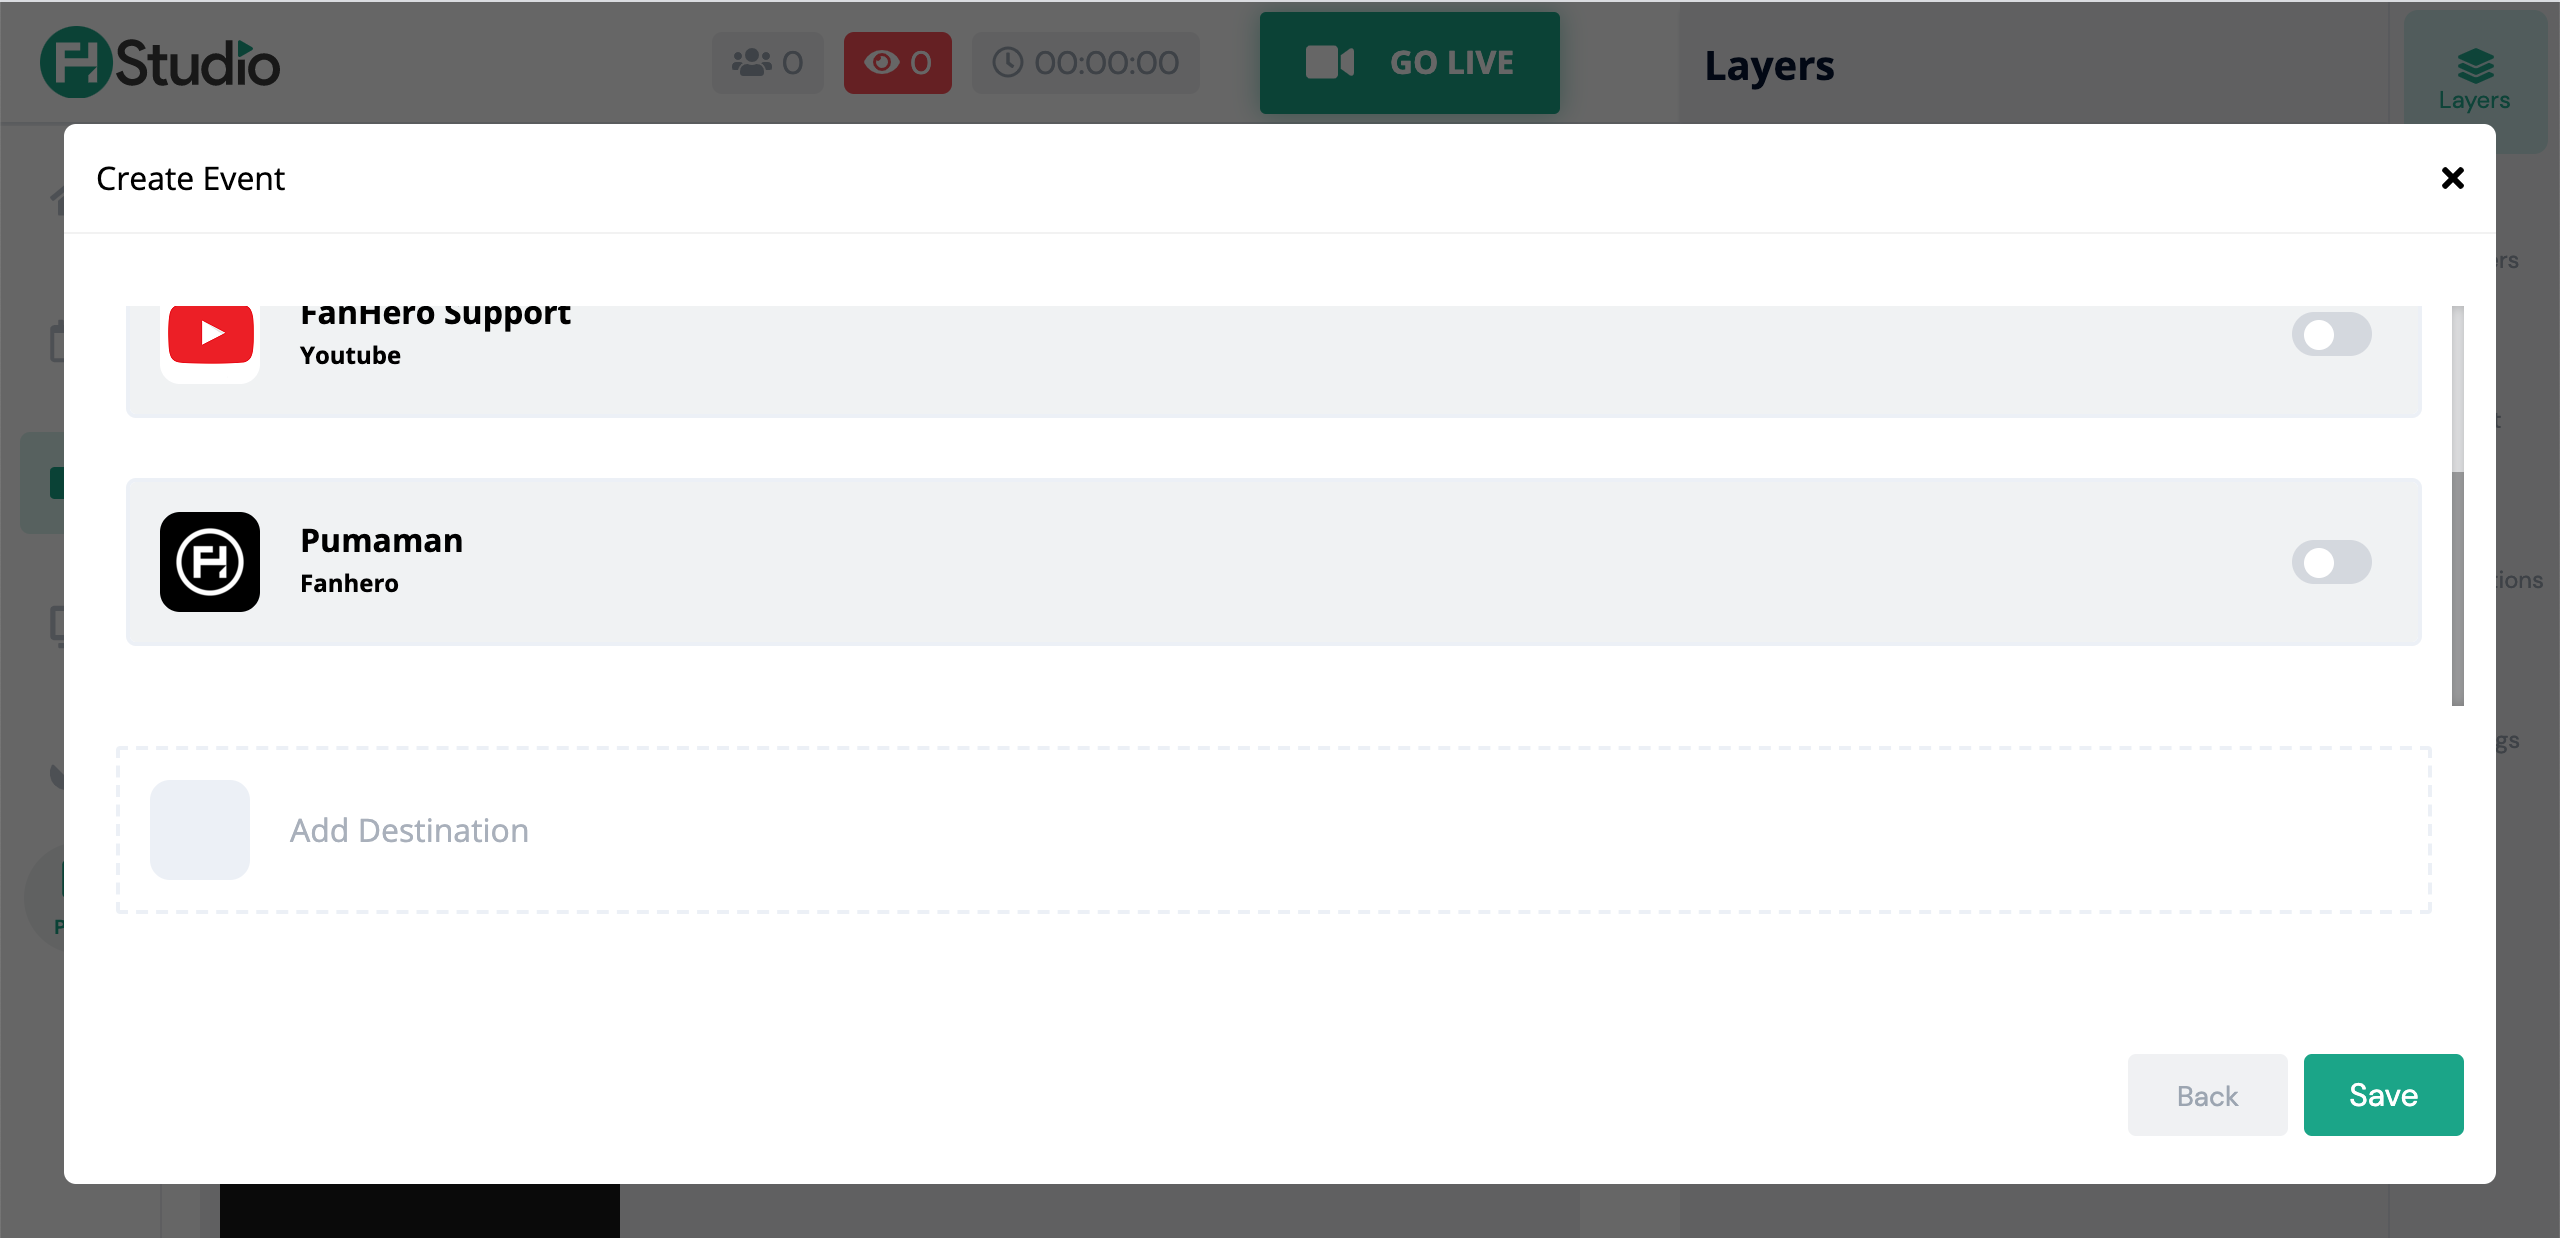
If you choose this destination, then the stream will be broadcasted to the web and mobile applications.
To add a destination, click the "Add Destination" button.
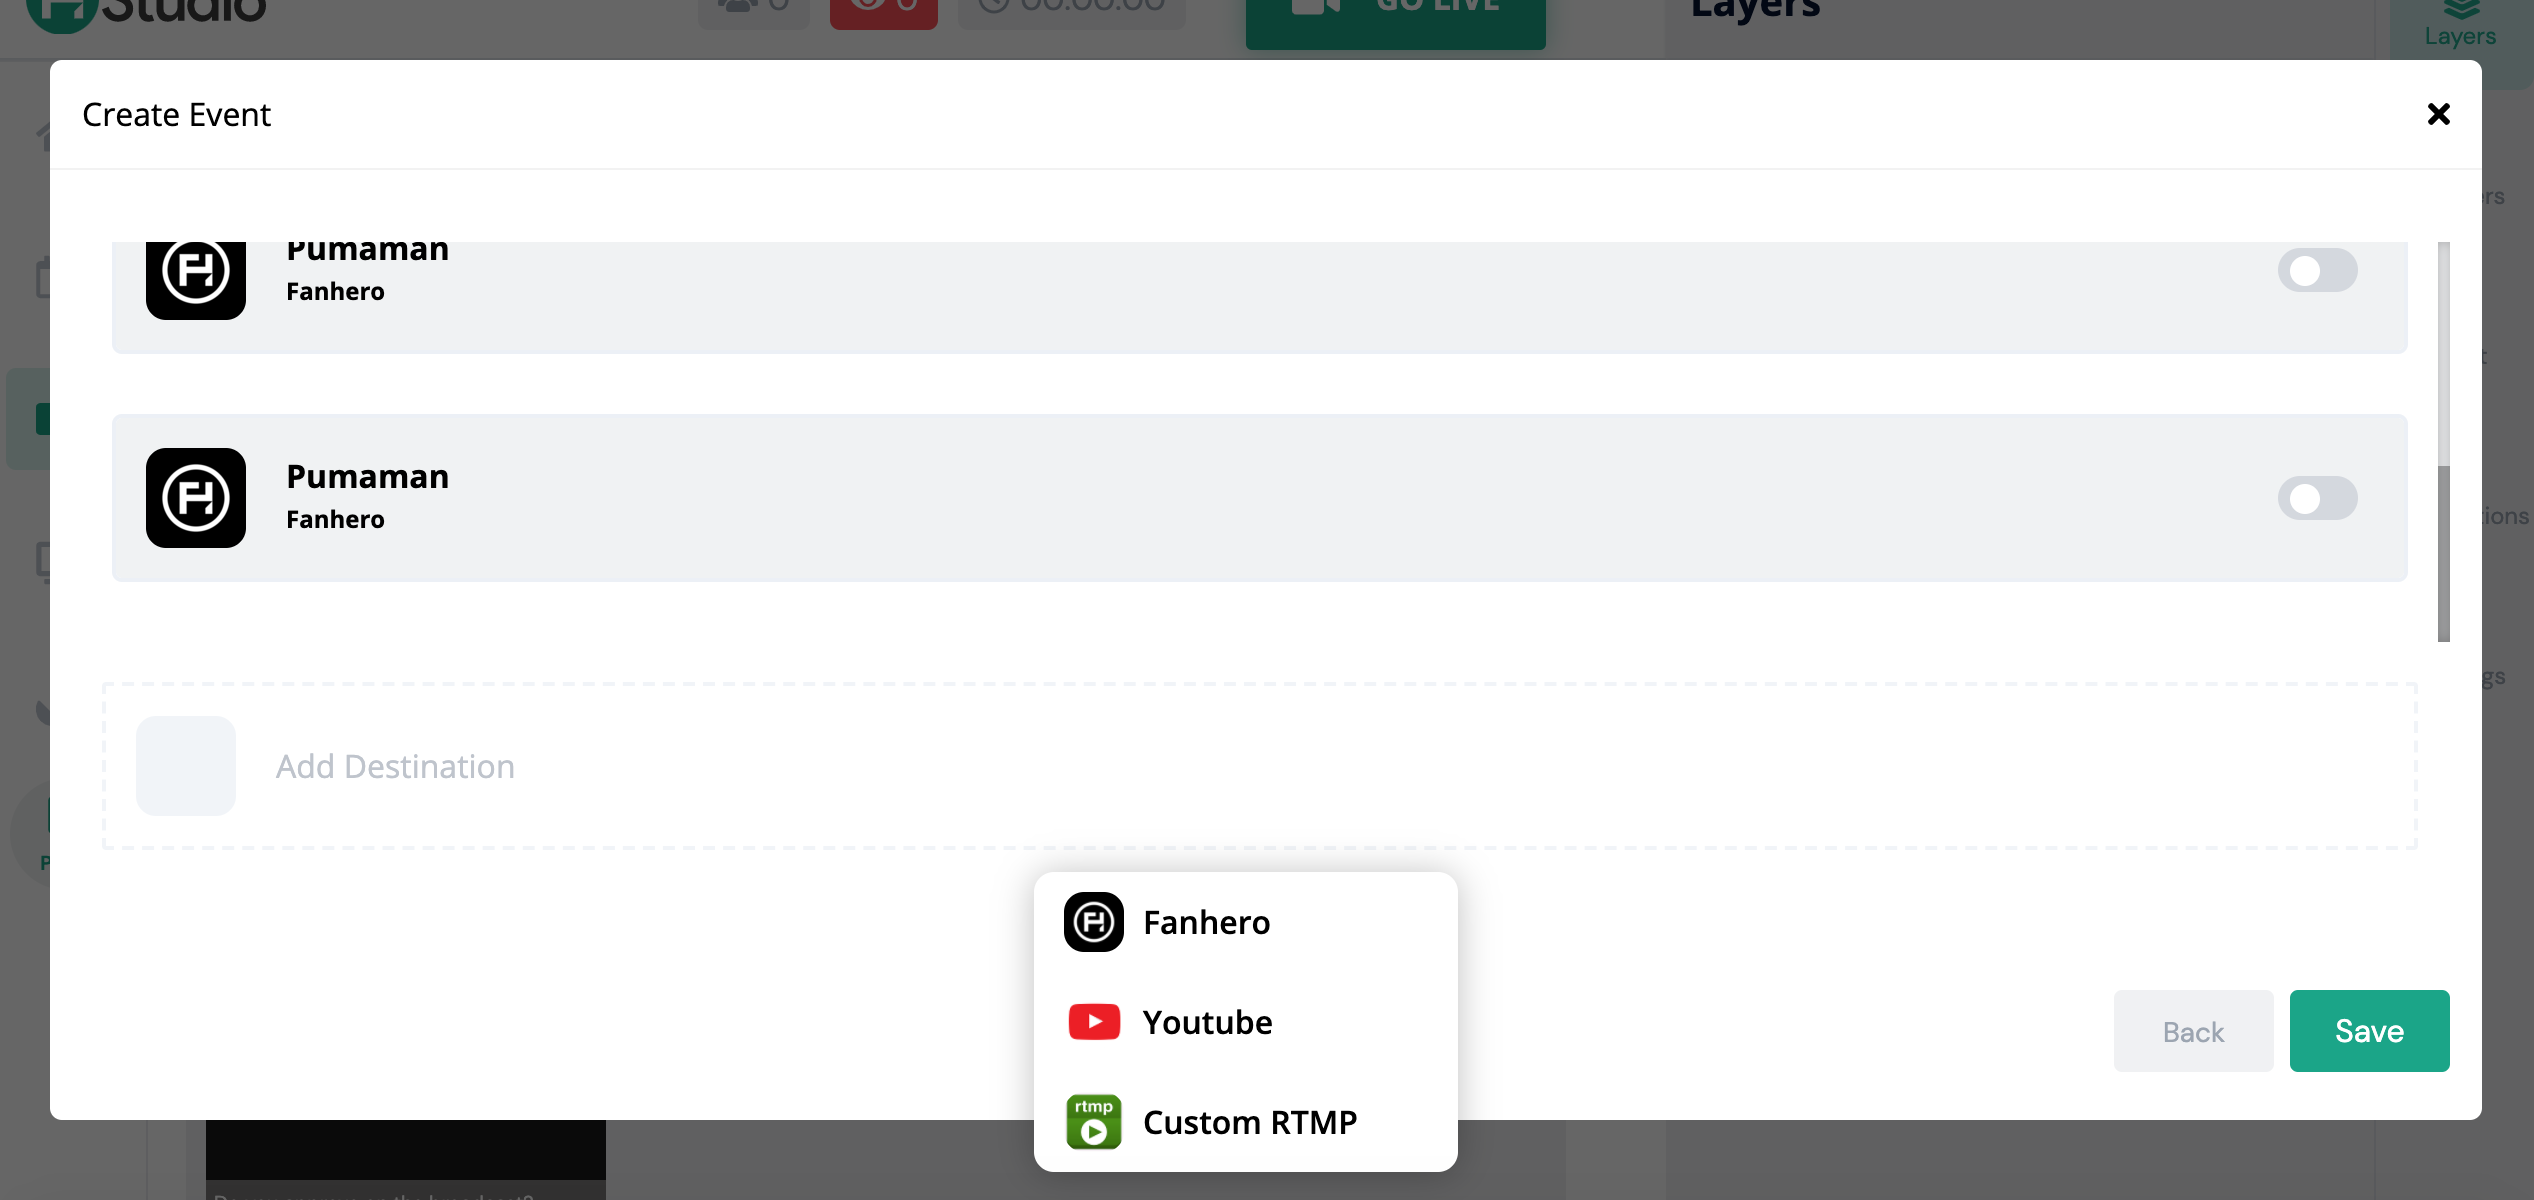
- FanHero: choosing this option will add the FanHero Channel as a destination.
- Youtube: choosing this option will open a modal where you can sign in using your Youtube account. That account will be set as a destination.
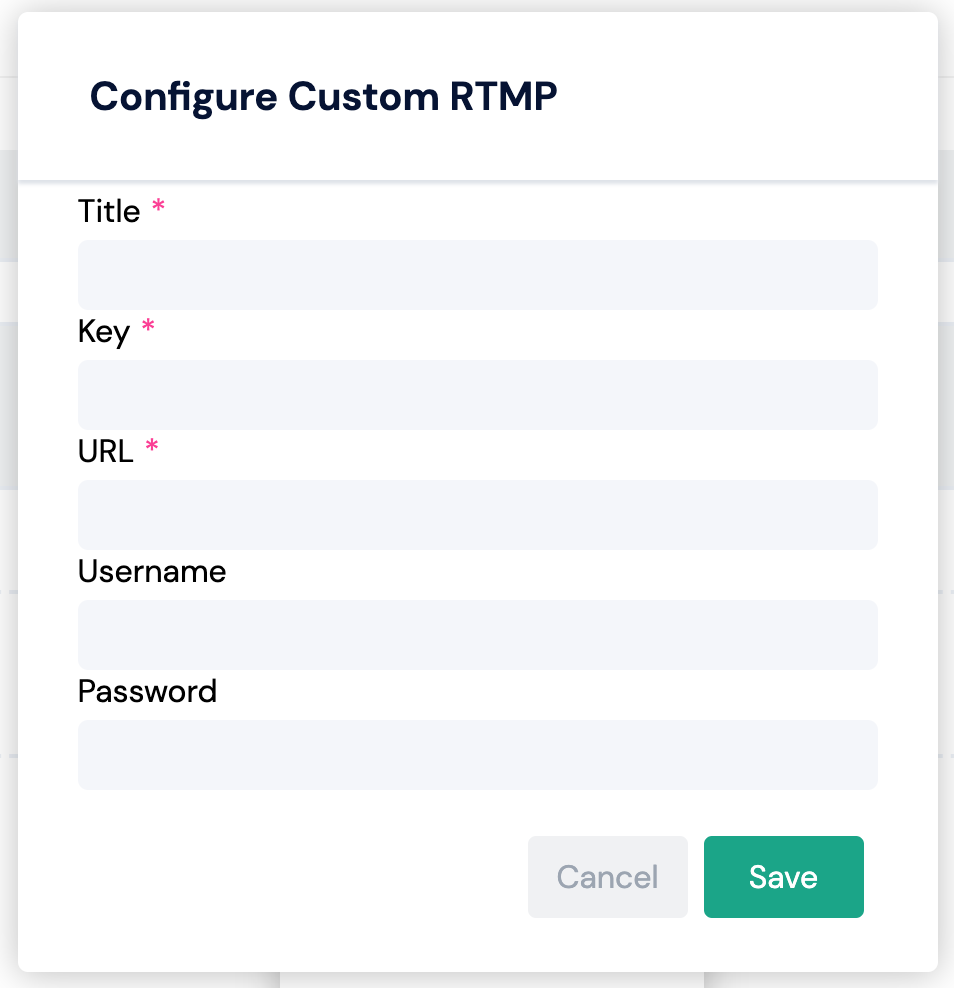
- Custom RTMP: choosing this option will display a pop up so you can fill out information such as title, key, URL, username and password.
After you choose the desired destination, click on Save. The broadcast is saved successfully.
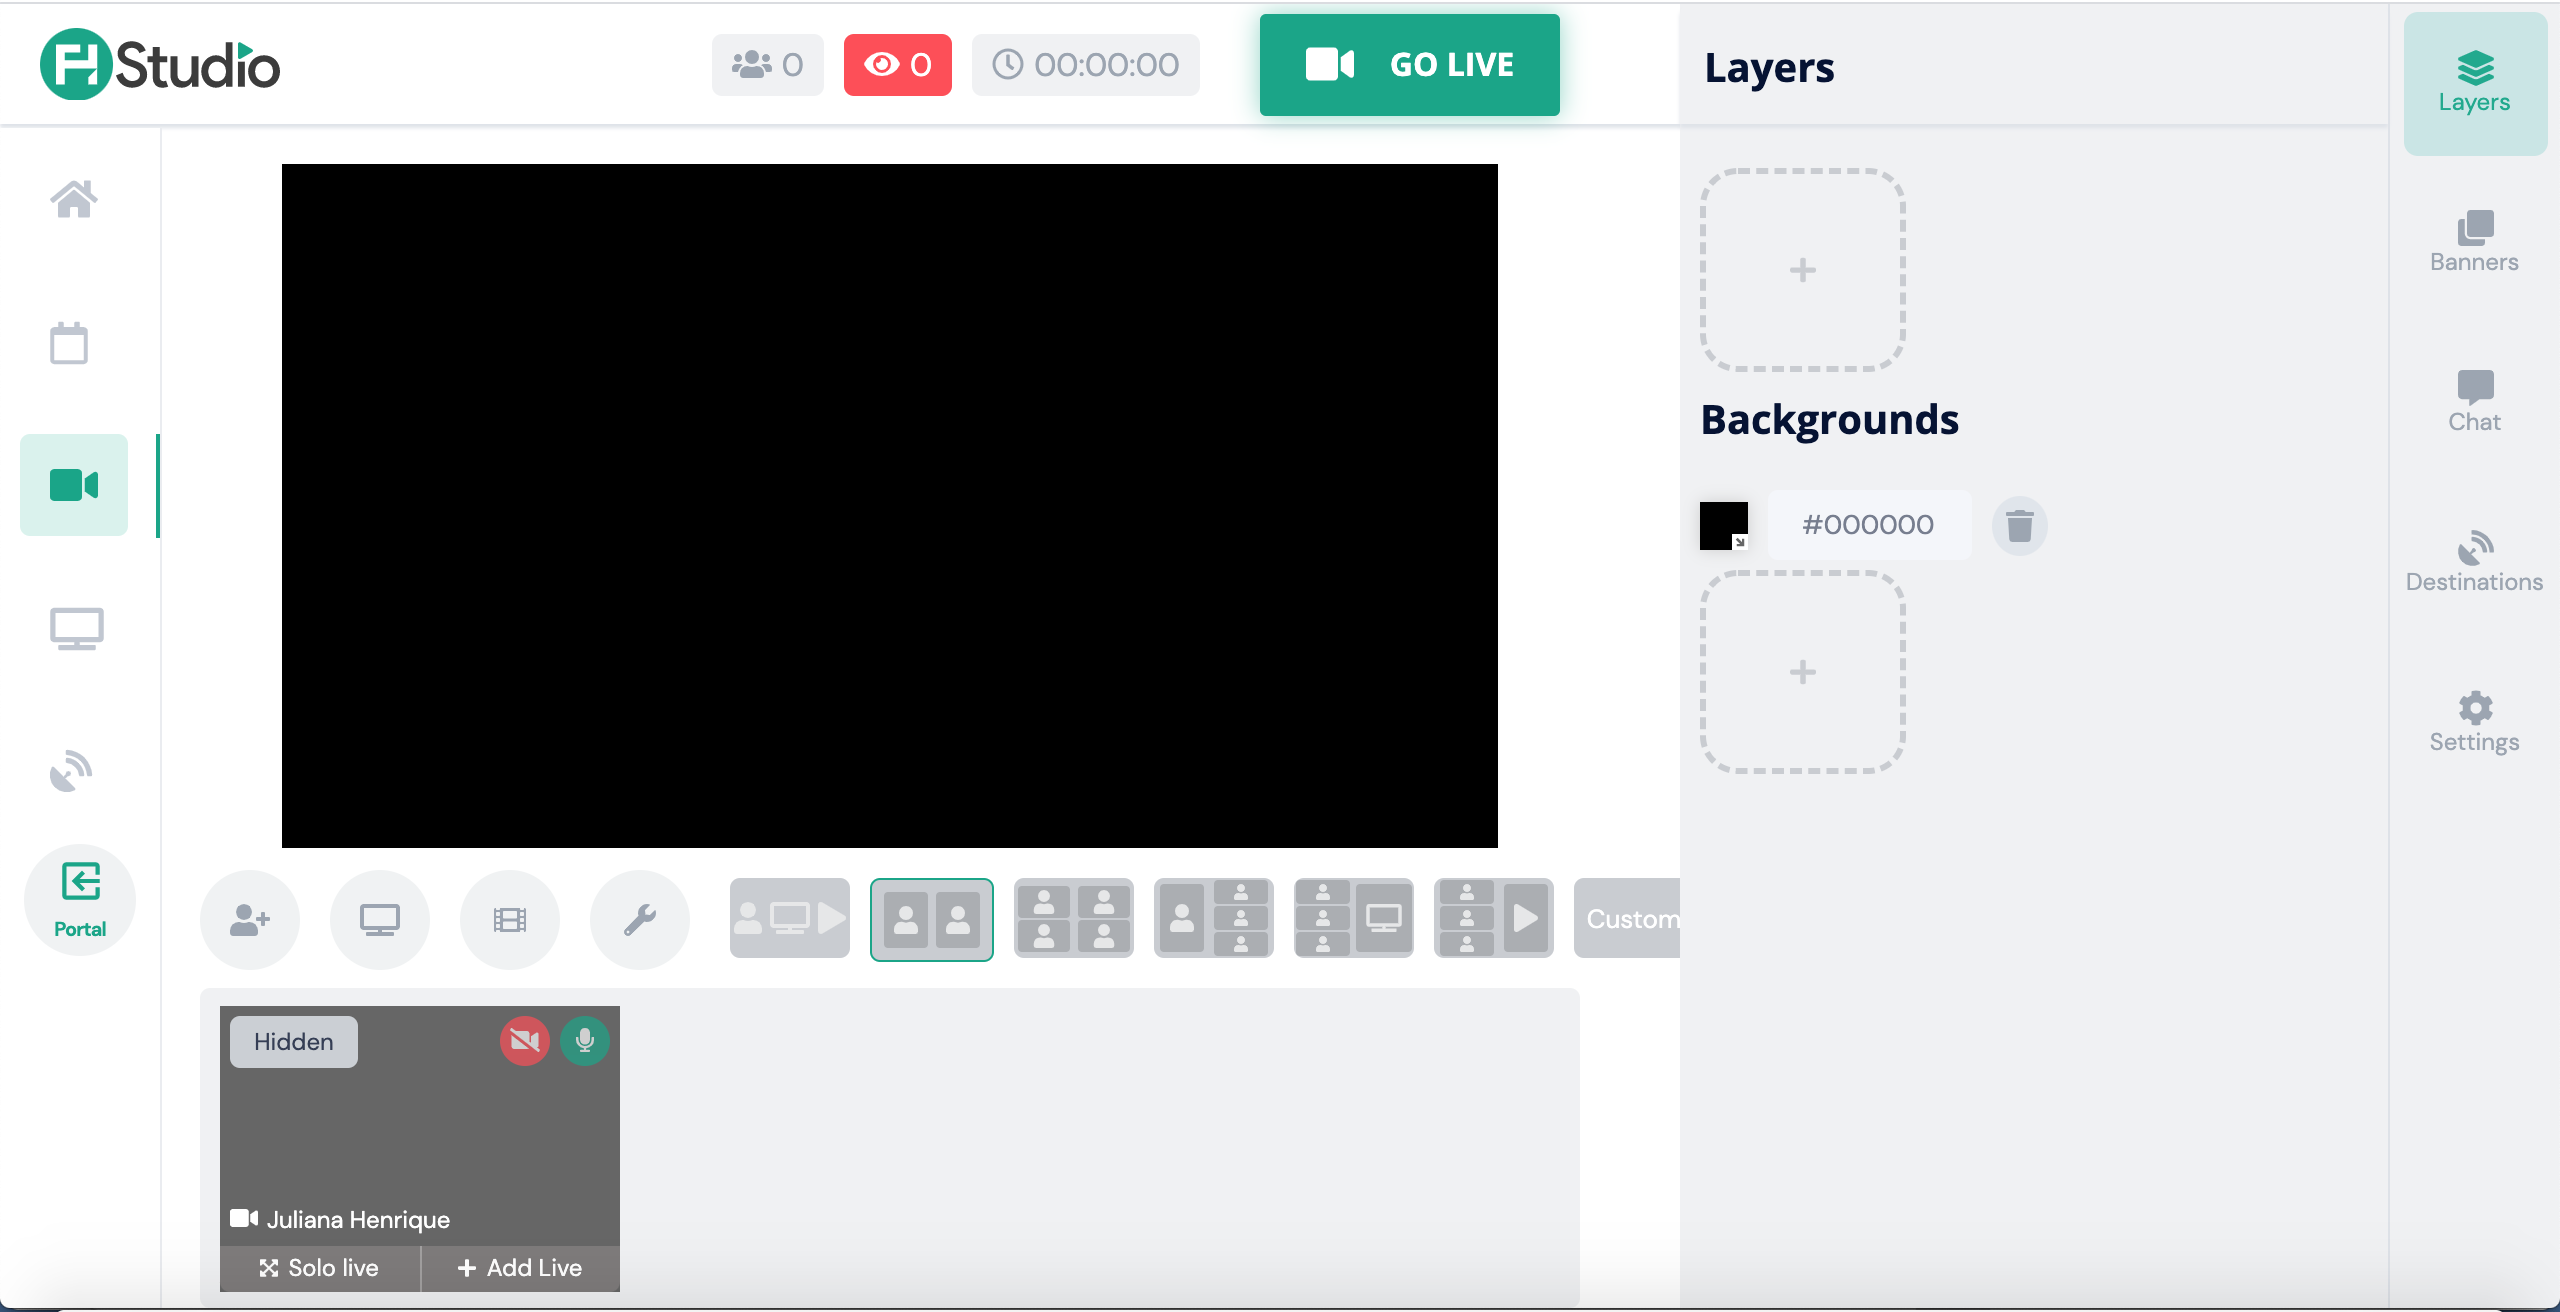
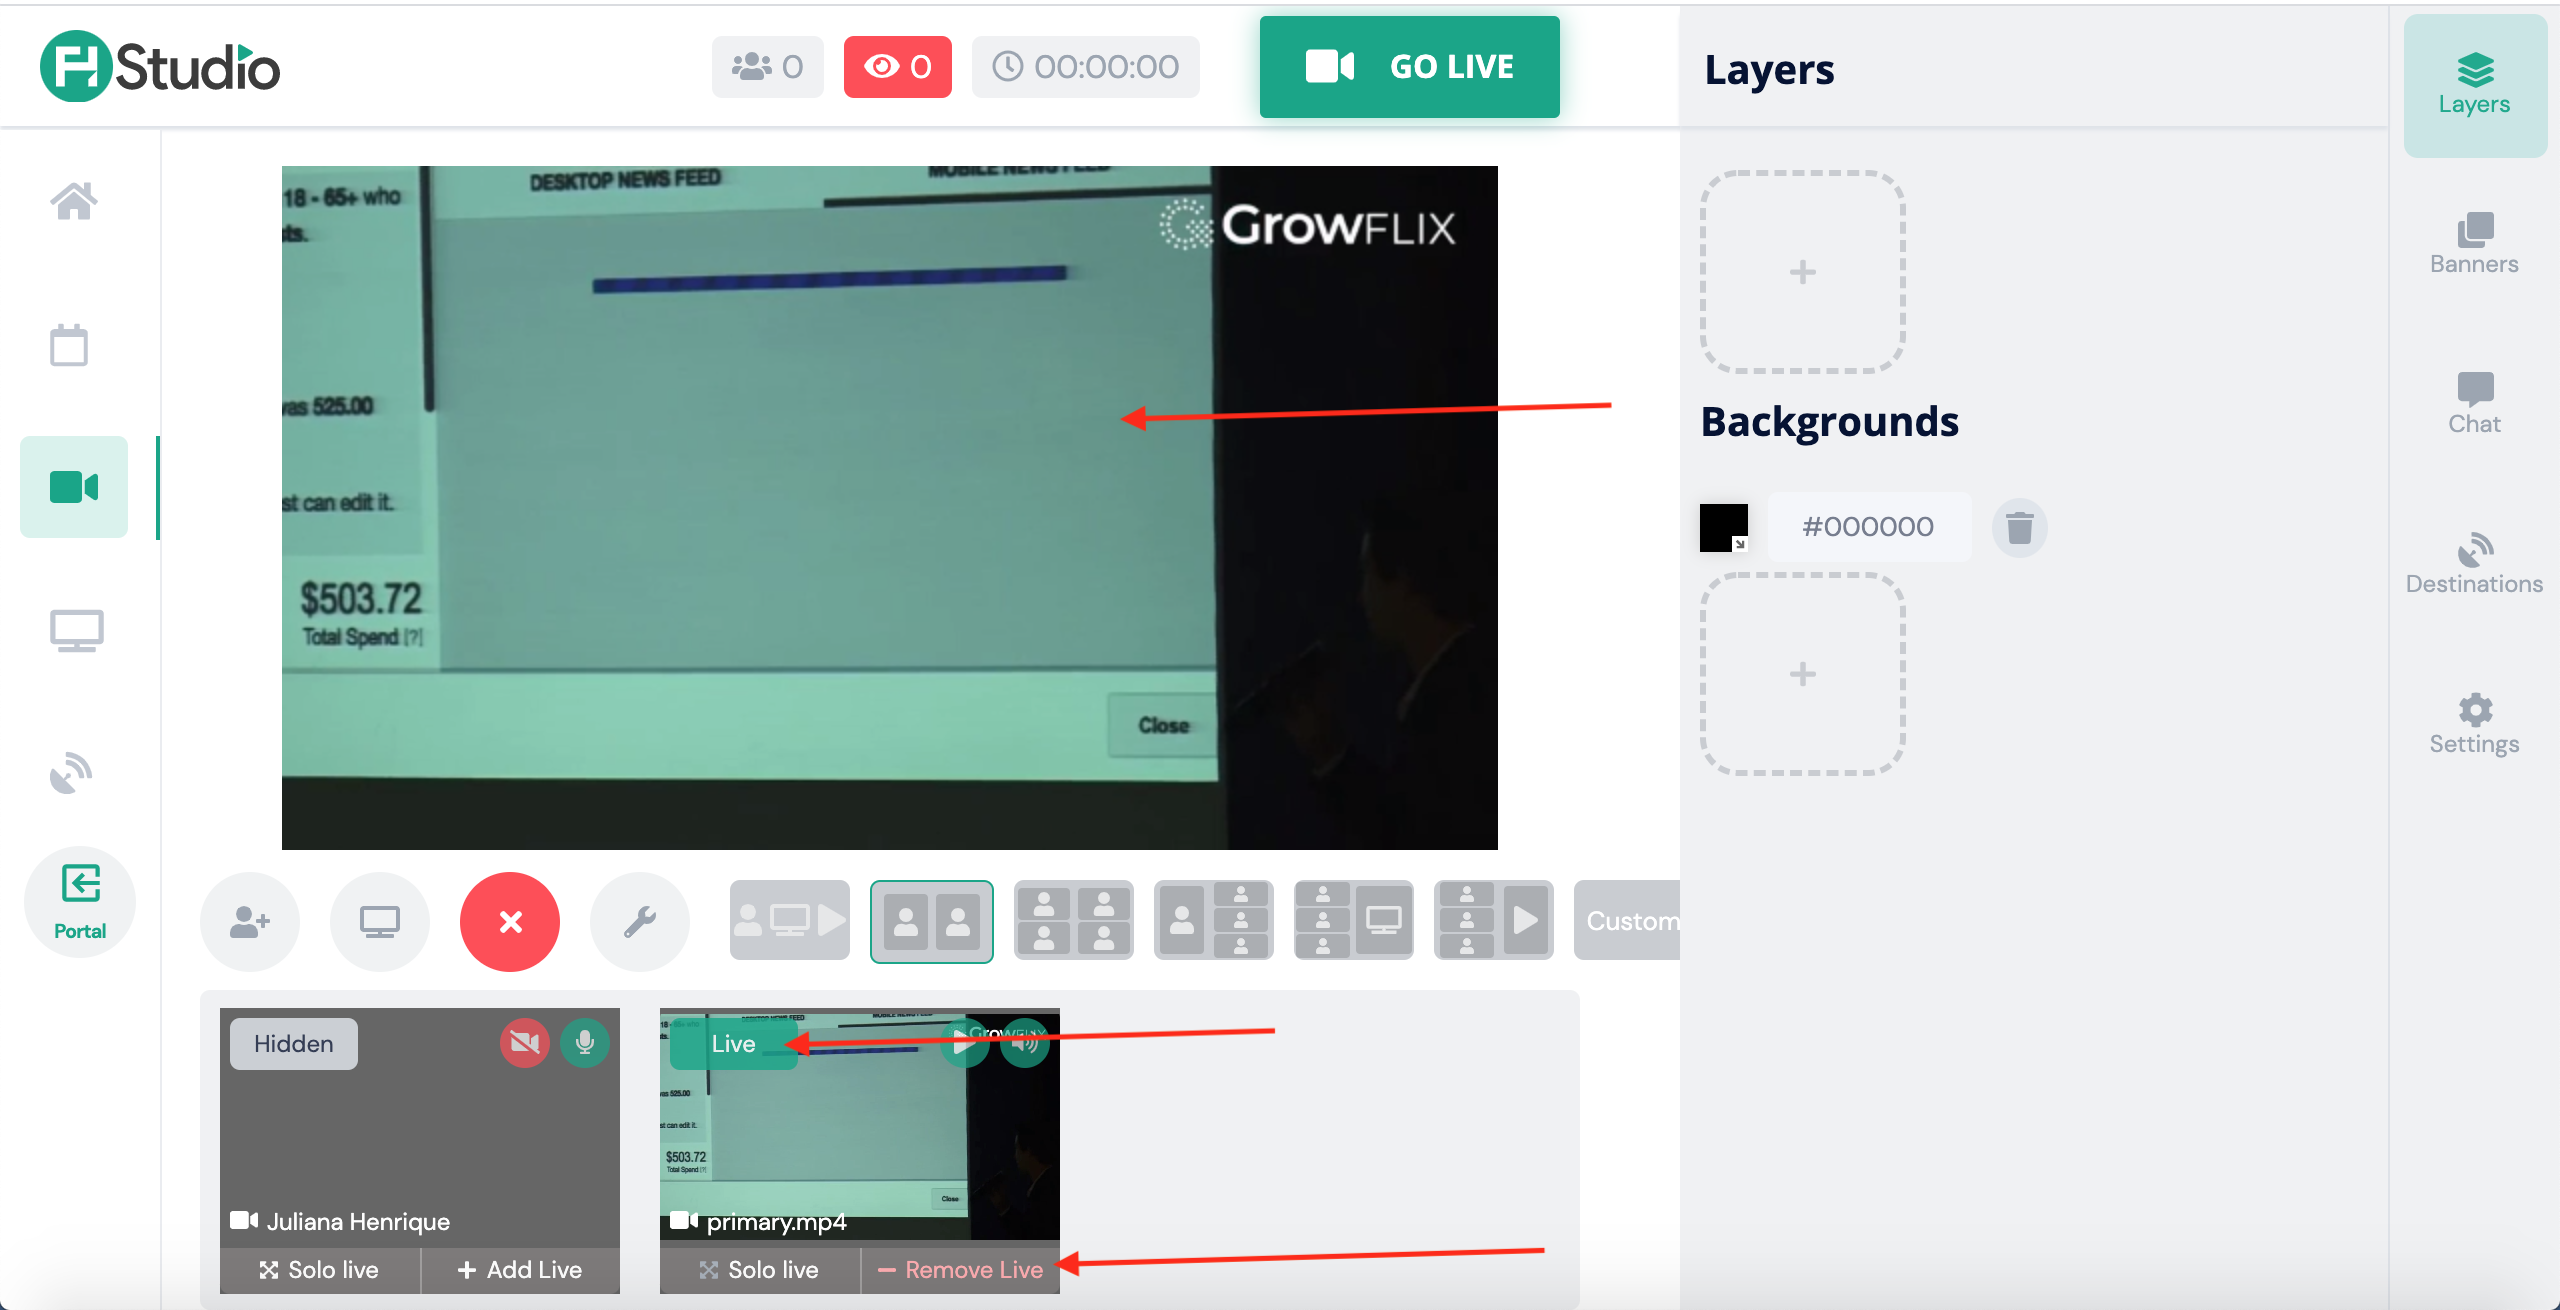
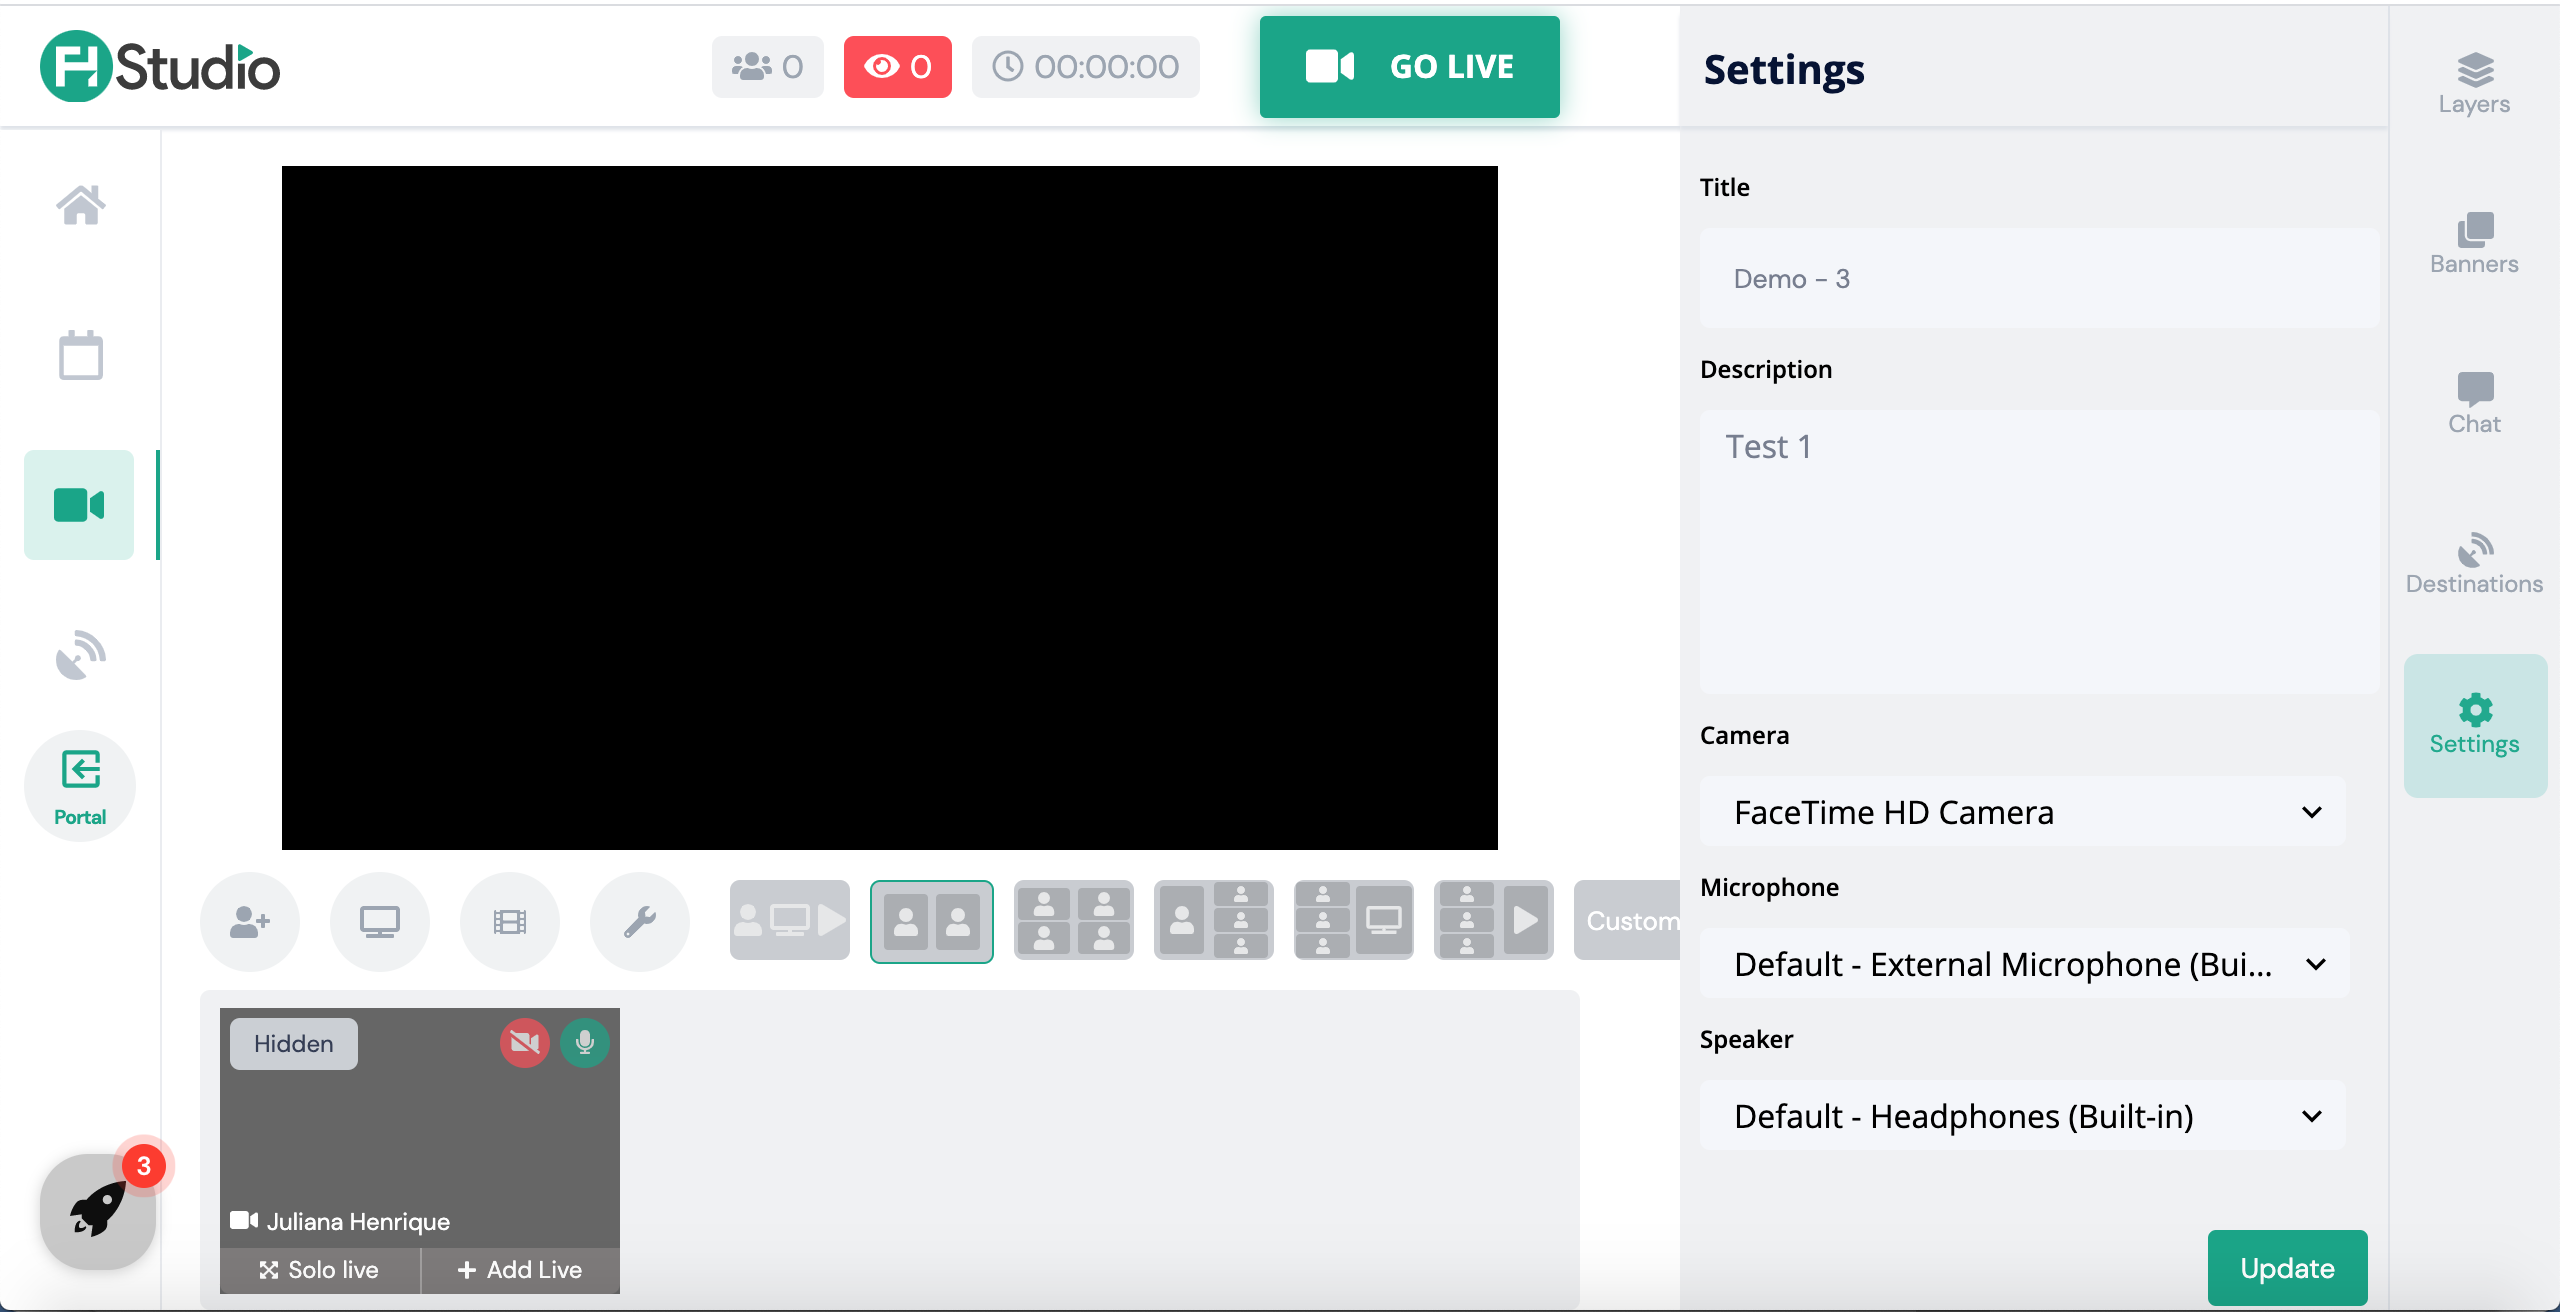
This is the screen where Admin users can make the magic happen! From layers and backgrounds to chat and destinations, you will be able to customize your stream.
As there is a lot of information in that screen, let's focus in this section first:
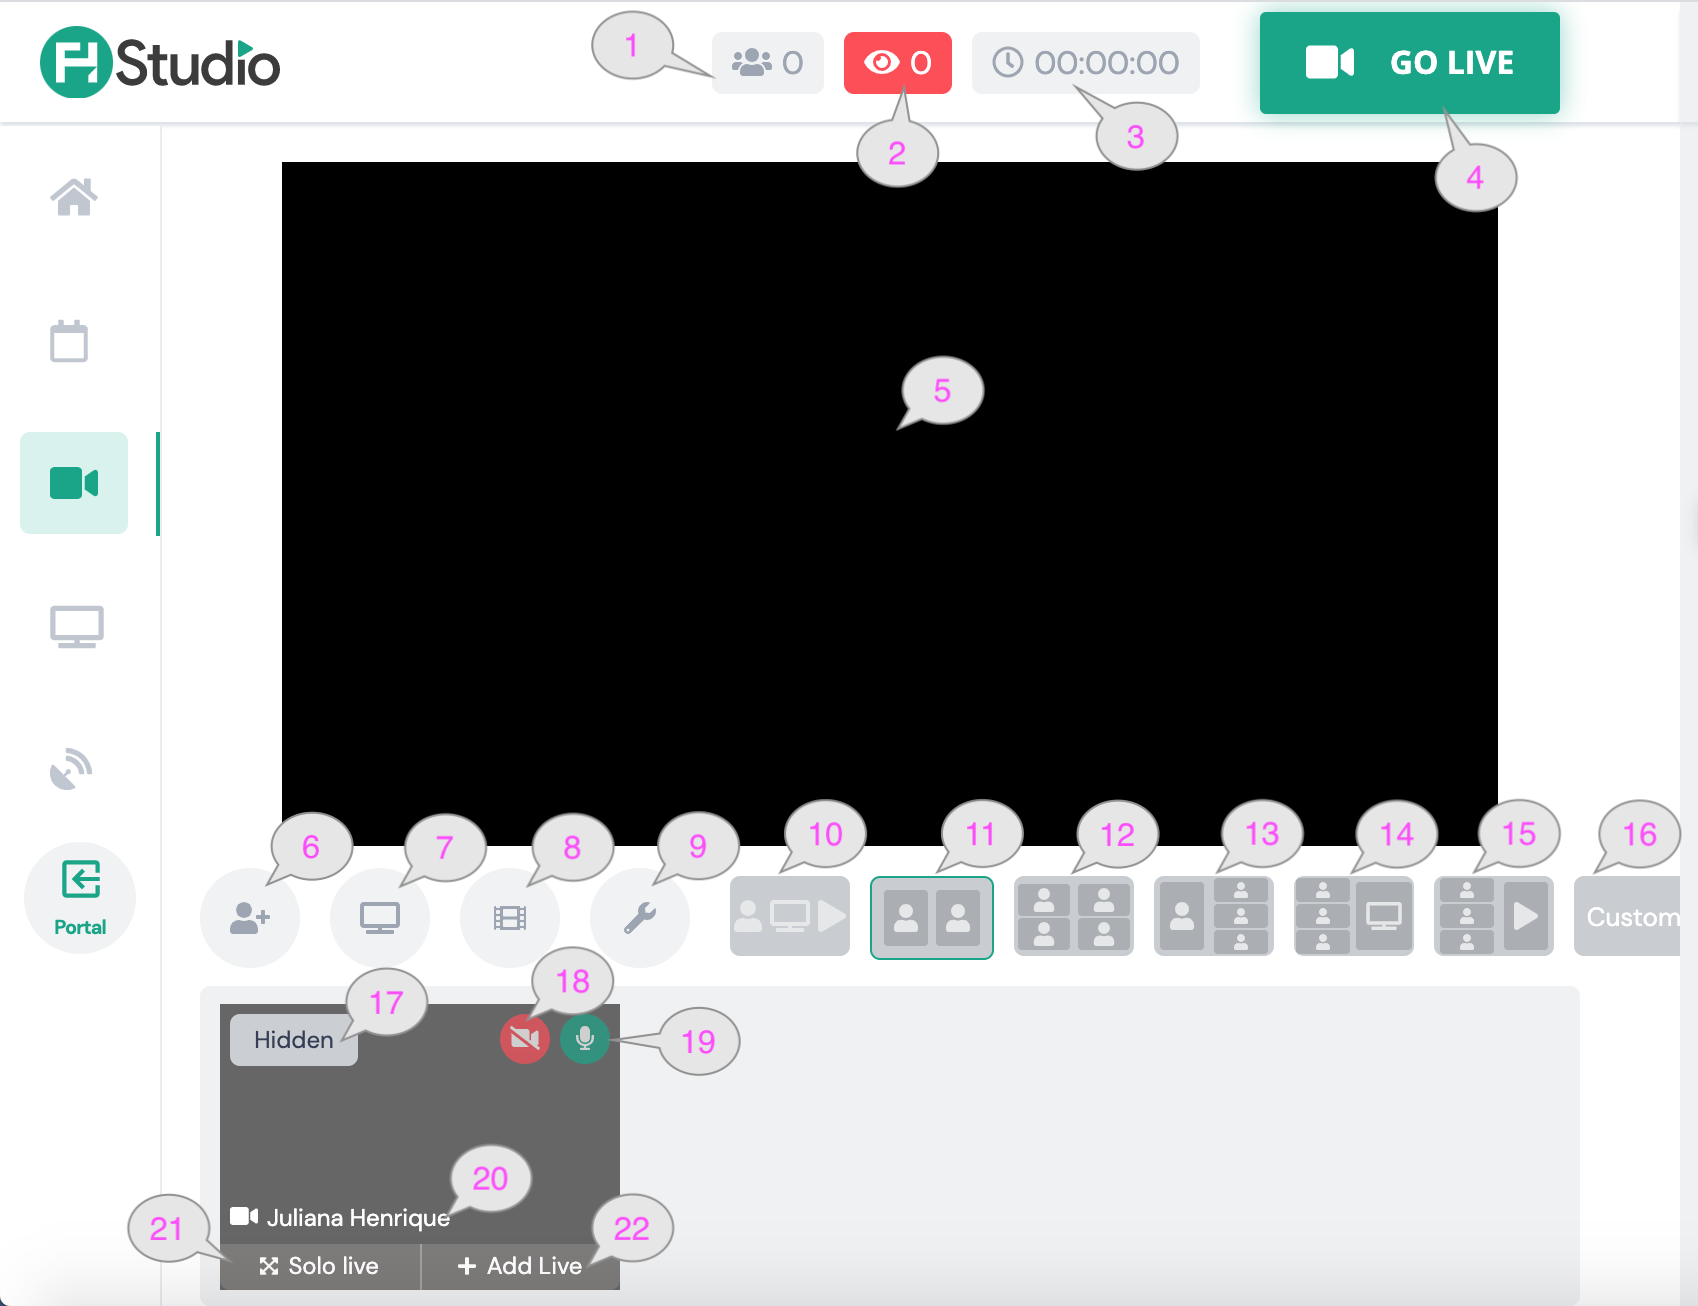
Item | Description |
|---|---|
| Displays the number of guests in the stream. |
| Displays the number of combined viewers (FanHero + Youtube, etc). |
| Displays the stream duration. |
| Once you click this button, the stream is live in the destinations you choose. If Record Only, the recording will start when you click Go Live. |
| In this preview you have the ability to view exactly what your users are seeing. |
| Ability to invite guests. |
| Ability to share your screen. |
| Ability to share a video from your device. |
| Ability to manage the layout. |
| This option may be used when you are sharing your screen or sharing a video. |
| This option may be used when only 2 guests are displayed. |
| This option may be used when more guests are available. |
| This option may be used when you want the host thumbnail in evidence. |
| This option may be used when you want to show the guests thumbnails and the screen sharing at the same time. |
| This option may be used when you want to show the guests thumbnails and the video sharing at the same time. |
| This option may be used when you want to create your own canvas. |
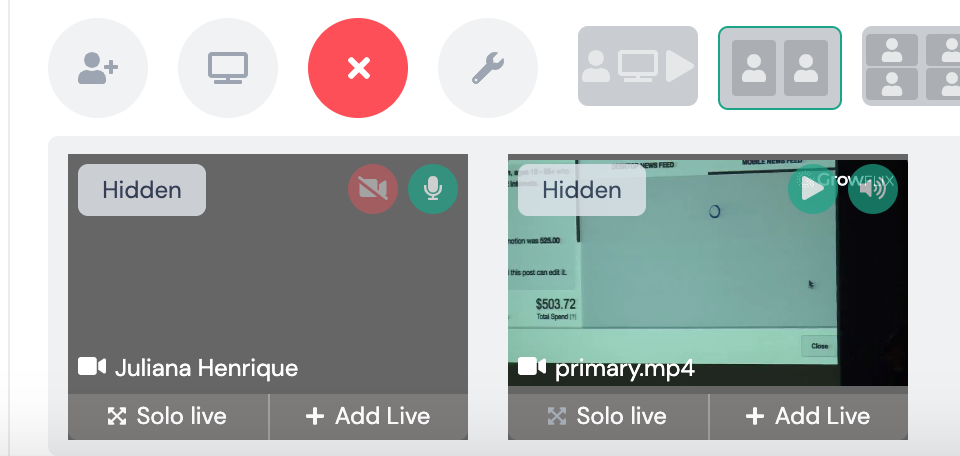
| Tags that show if the video is being displayed or not. |
| Ability to turn on and off your camera. |
| Ability to turn on and off your mic. |
| Name of the host/guest. |
| This is a shortcut to make that specific thumbnail available in the single canvas. |
| Ability to add or remove a thumbnail from the stream. |
Share Video
When a video is selected from your device, it won't be live in the stream until you click on "+ Add Live". From the video thumbnail, you have the ability to play and pause the video as well as mute and unmute.
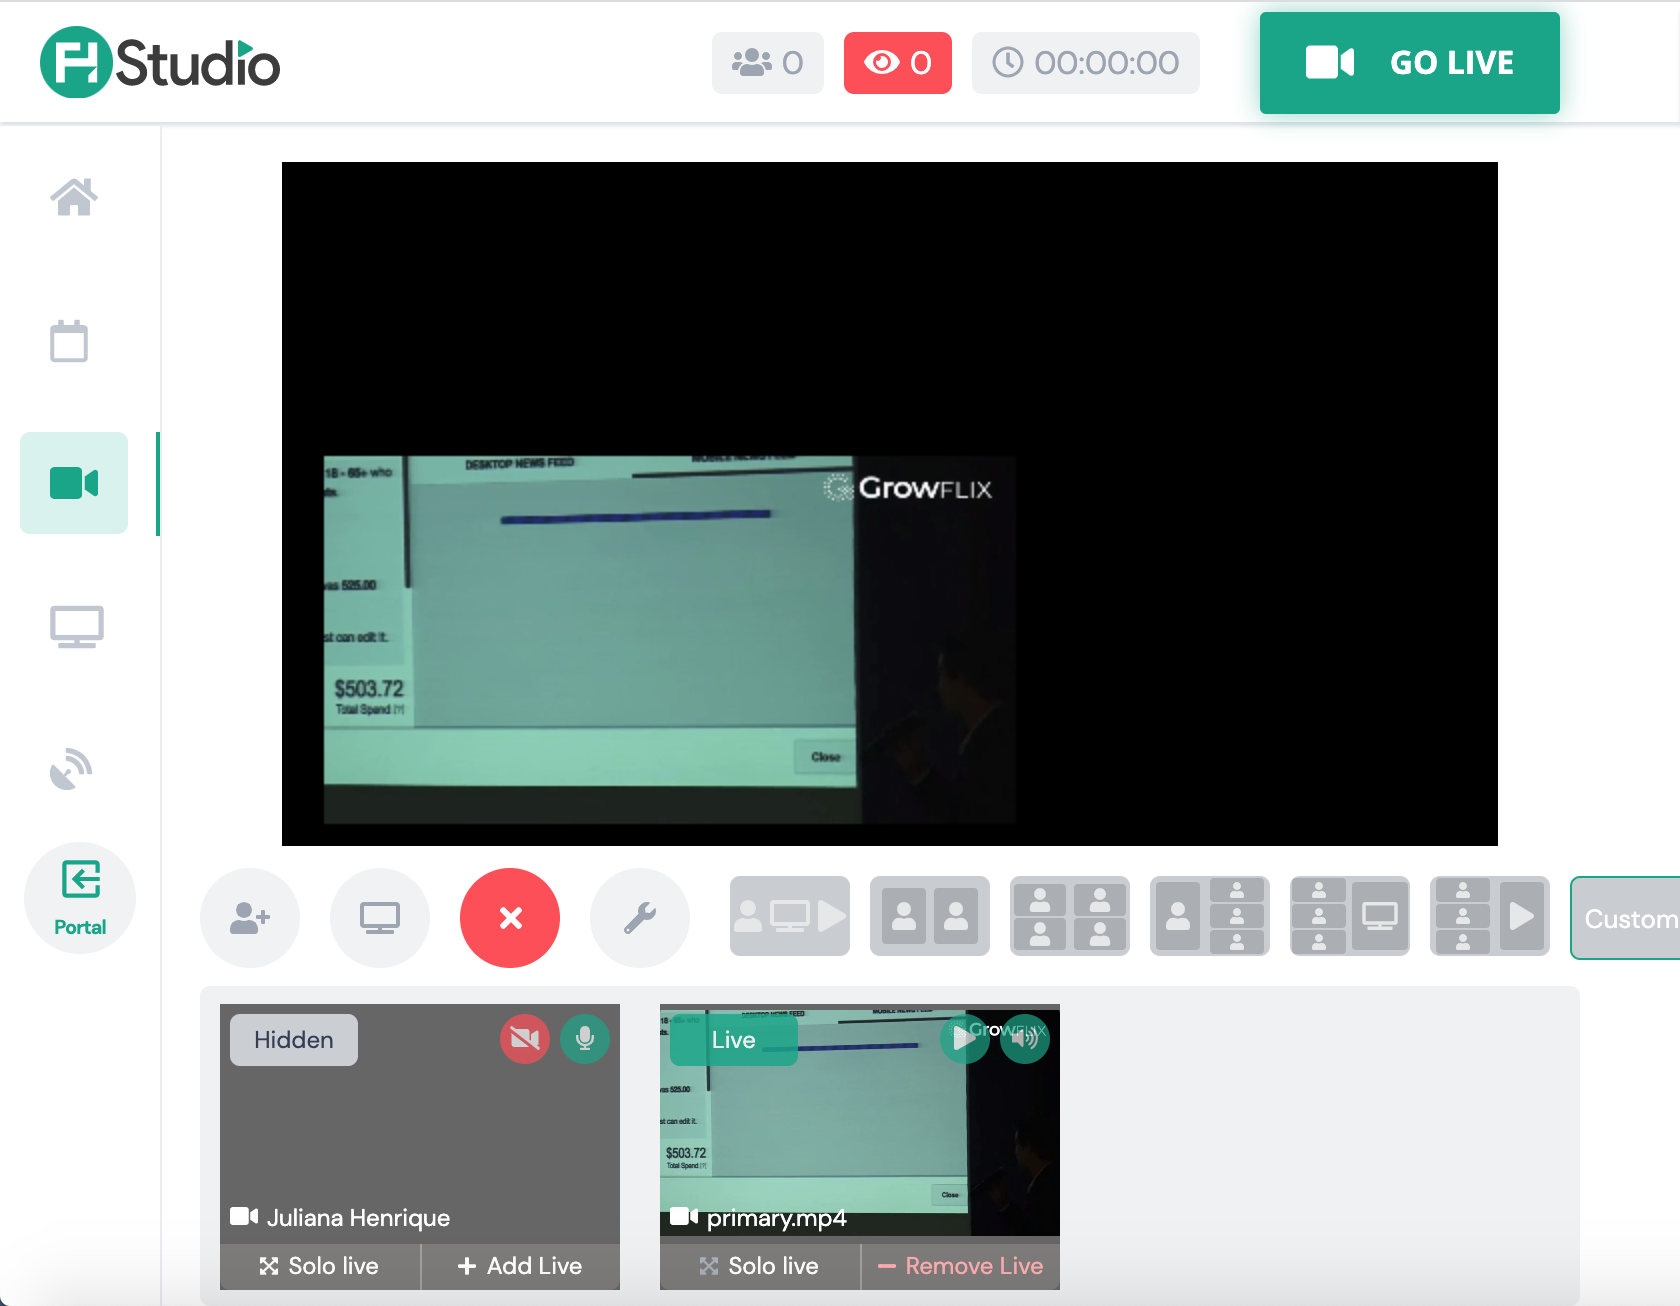
View when video sharing is live:
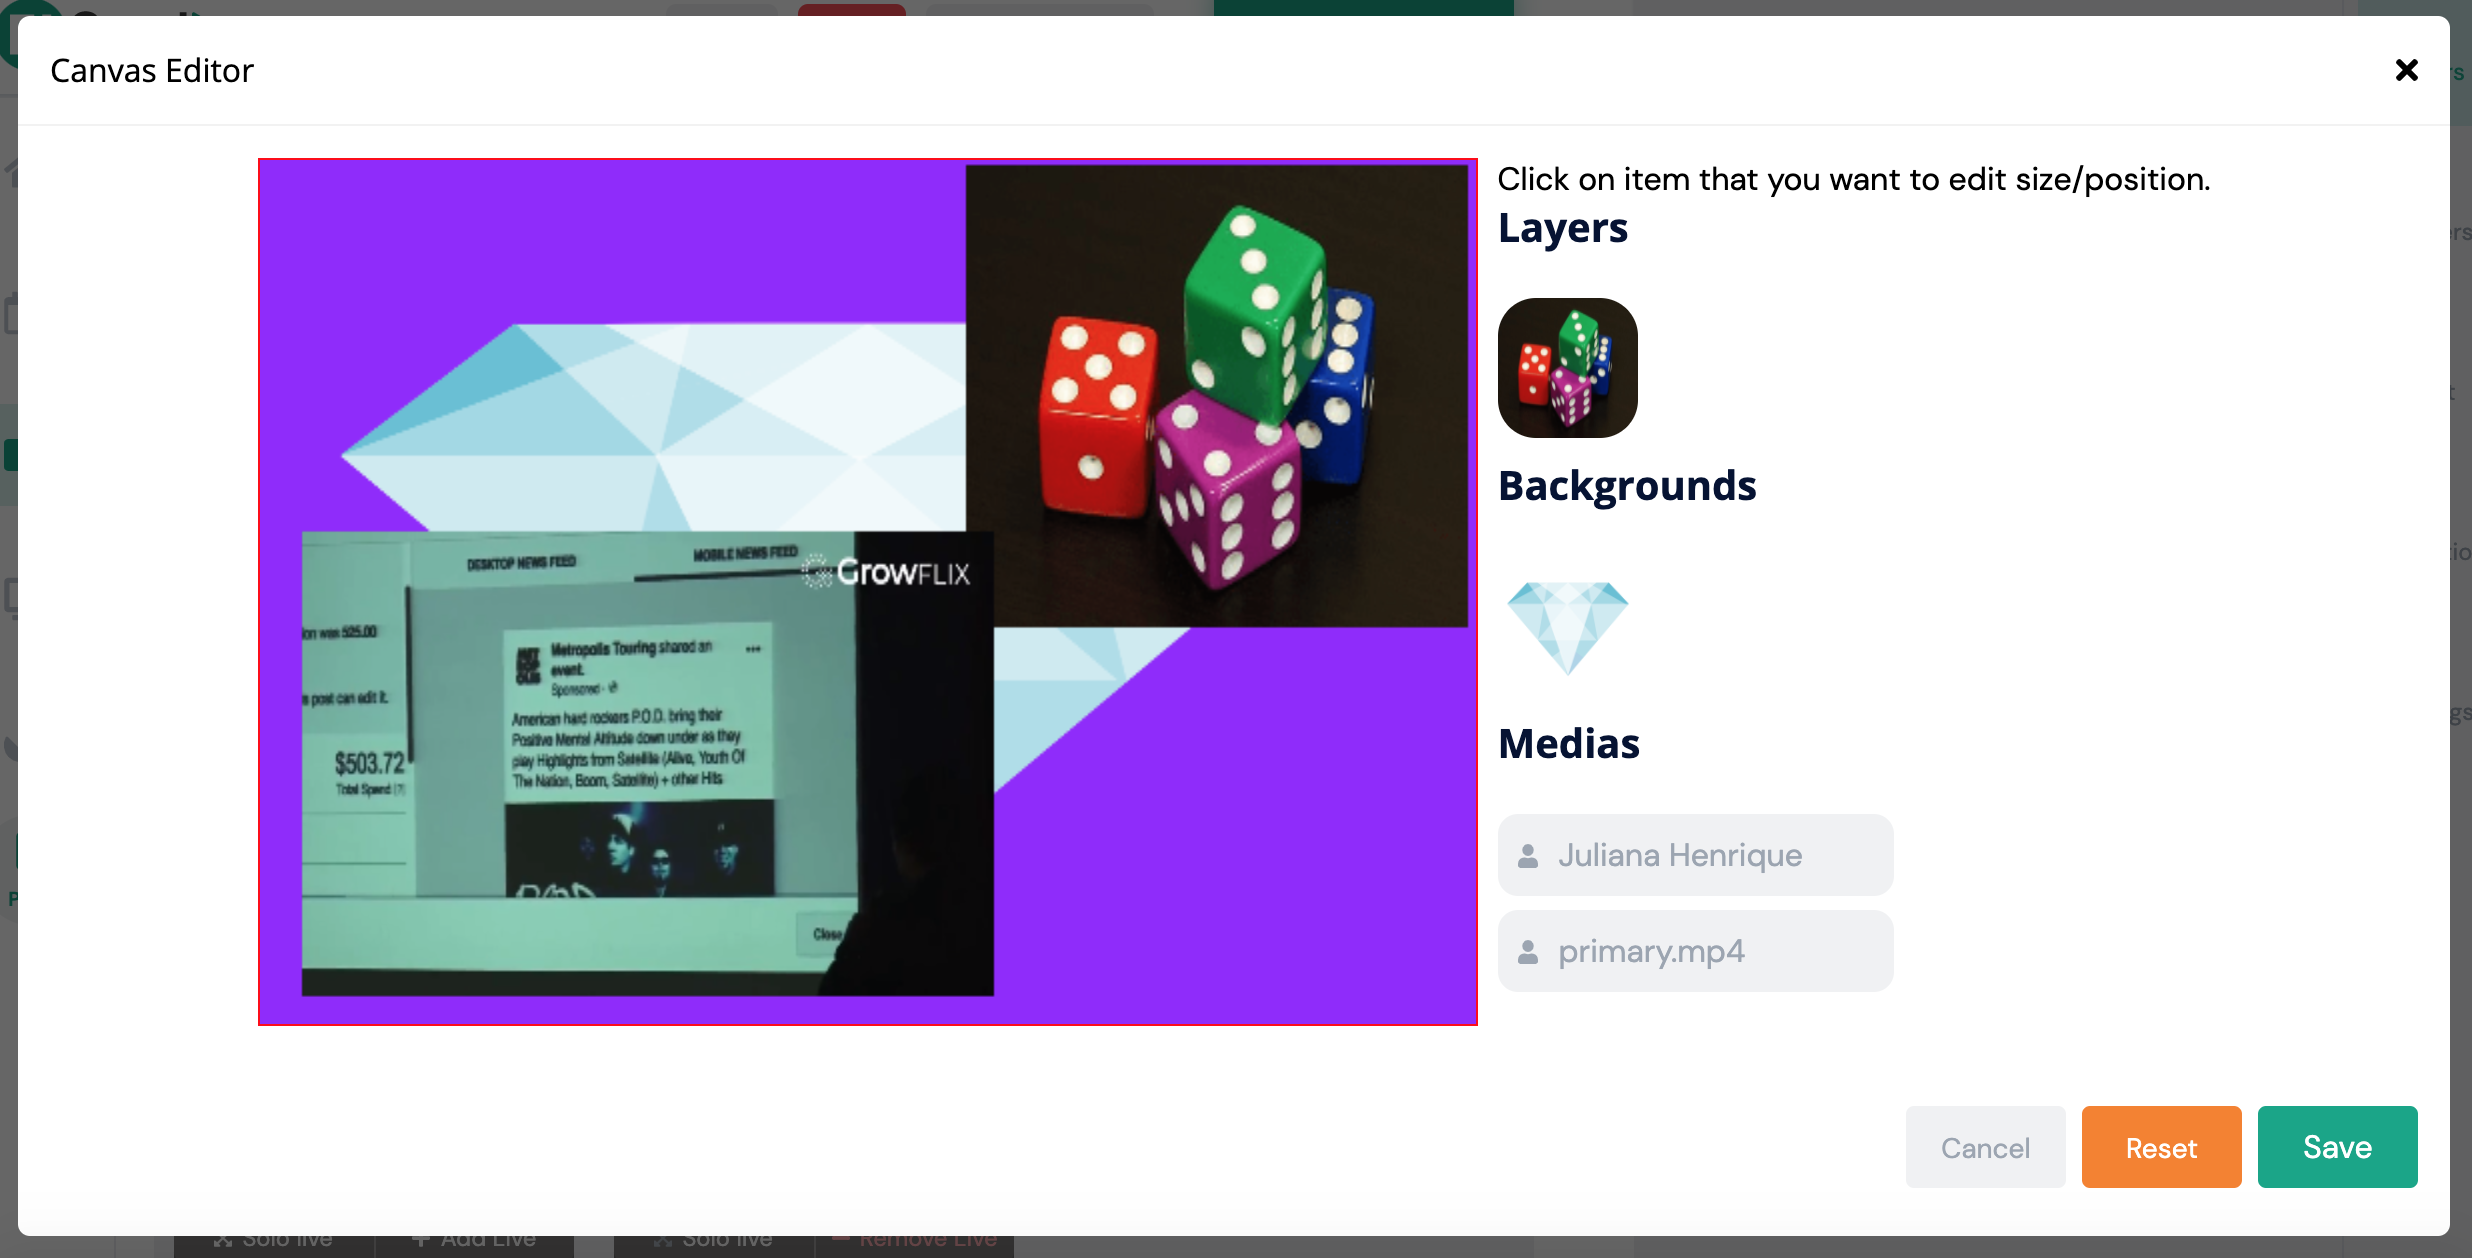
Manage Layout
In this pop up (Canvas Editor), you have the ability to customize your own canvas.

Remember that canvas work in layers. So first you must choose the item you want to edit. For example, the video (primary.mp4).
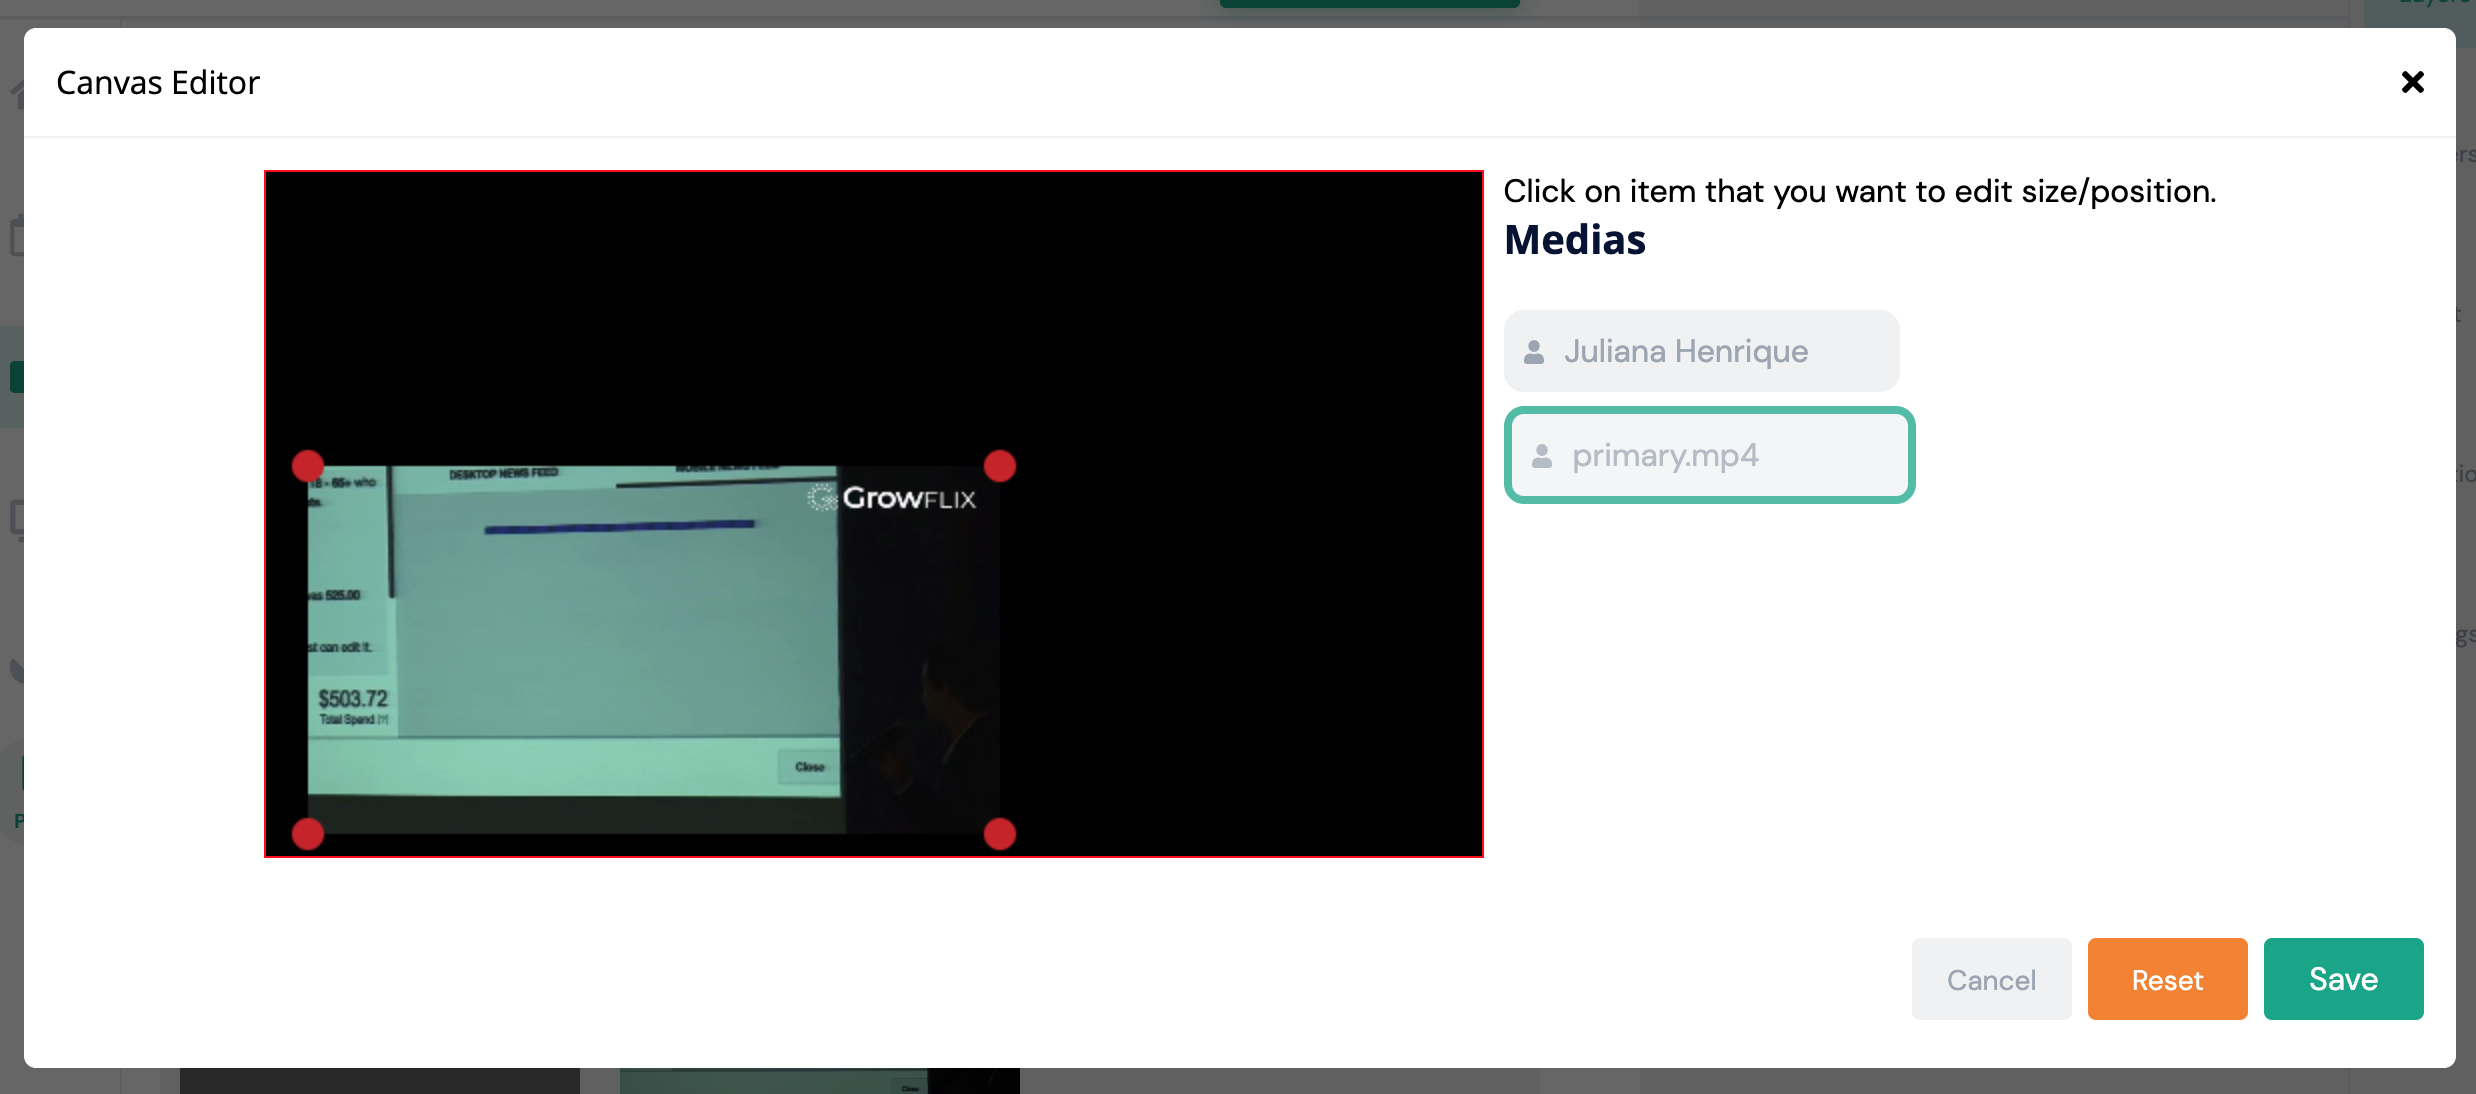
Once you select an item, it will be highlighted in green. Then you can resize and/or change its position. If you want to go back to the previous layout, simply click on Reset. If you want to Save your custom canvas, then click Save.
Your custom canvas won't be displayed in the stream until you click on the Custom button. This action means that you have a custom canvas and that you want to use it as a display.
Layers
You can customize as many layers and backgrounds as you wish.
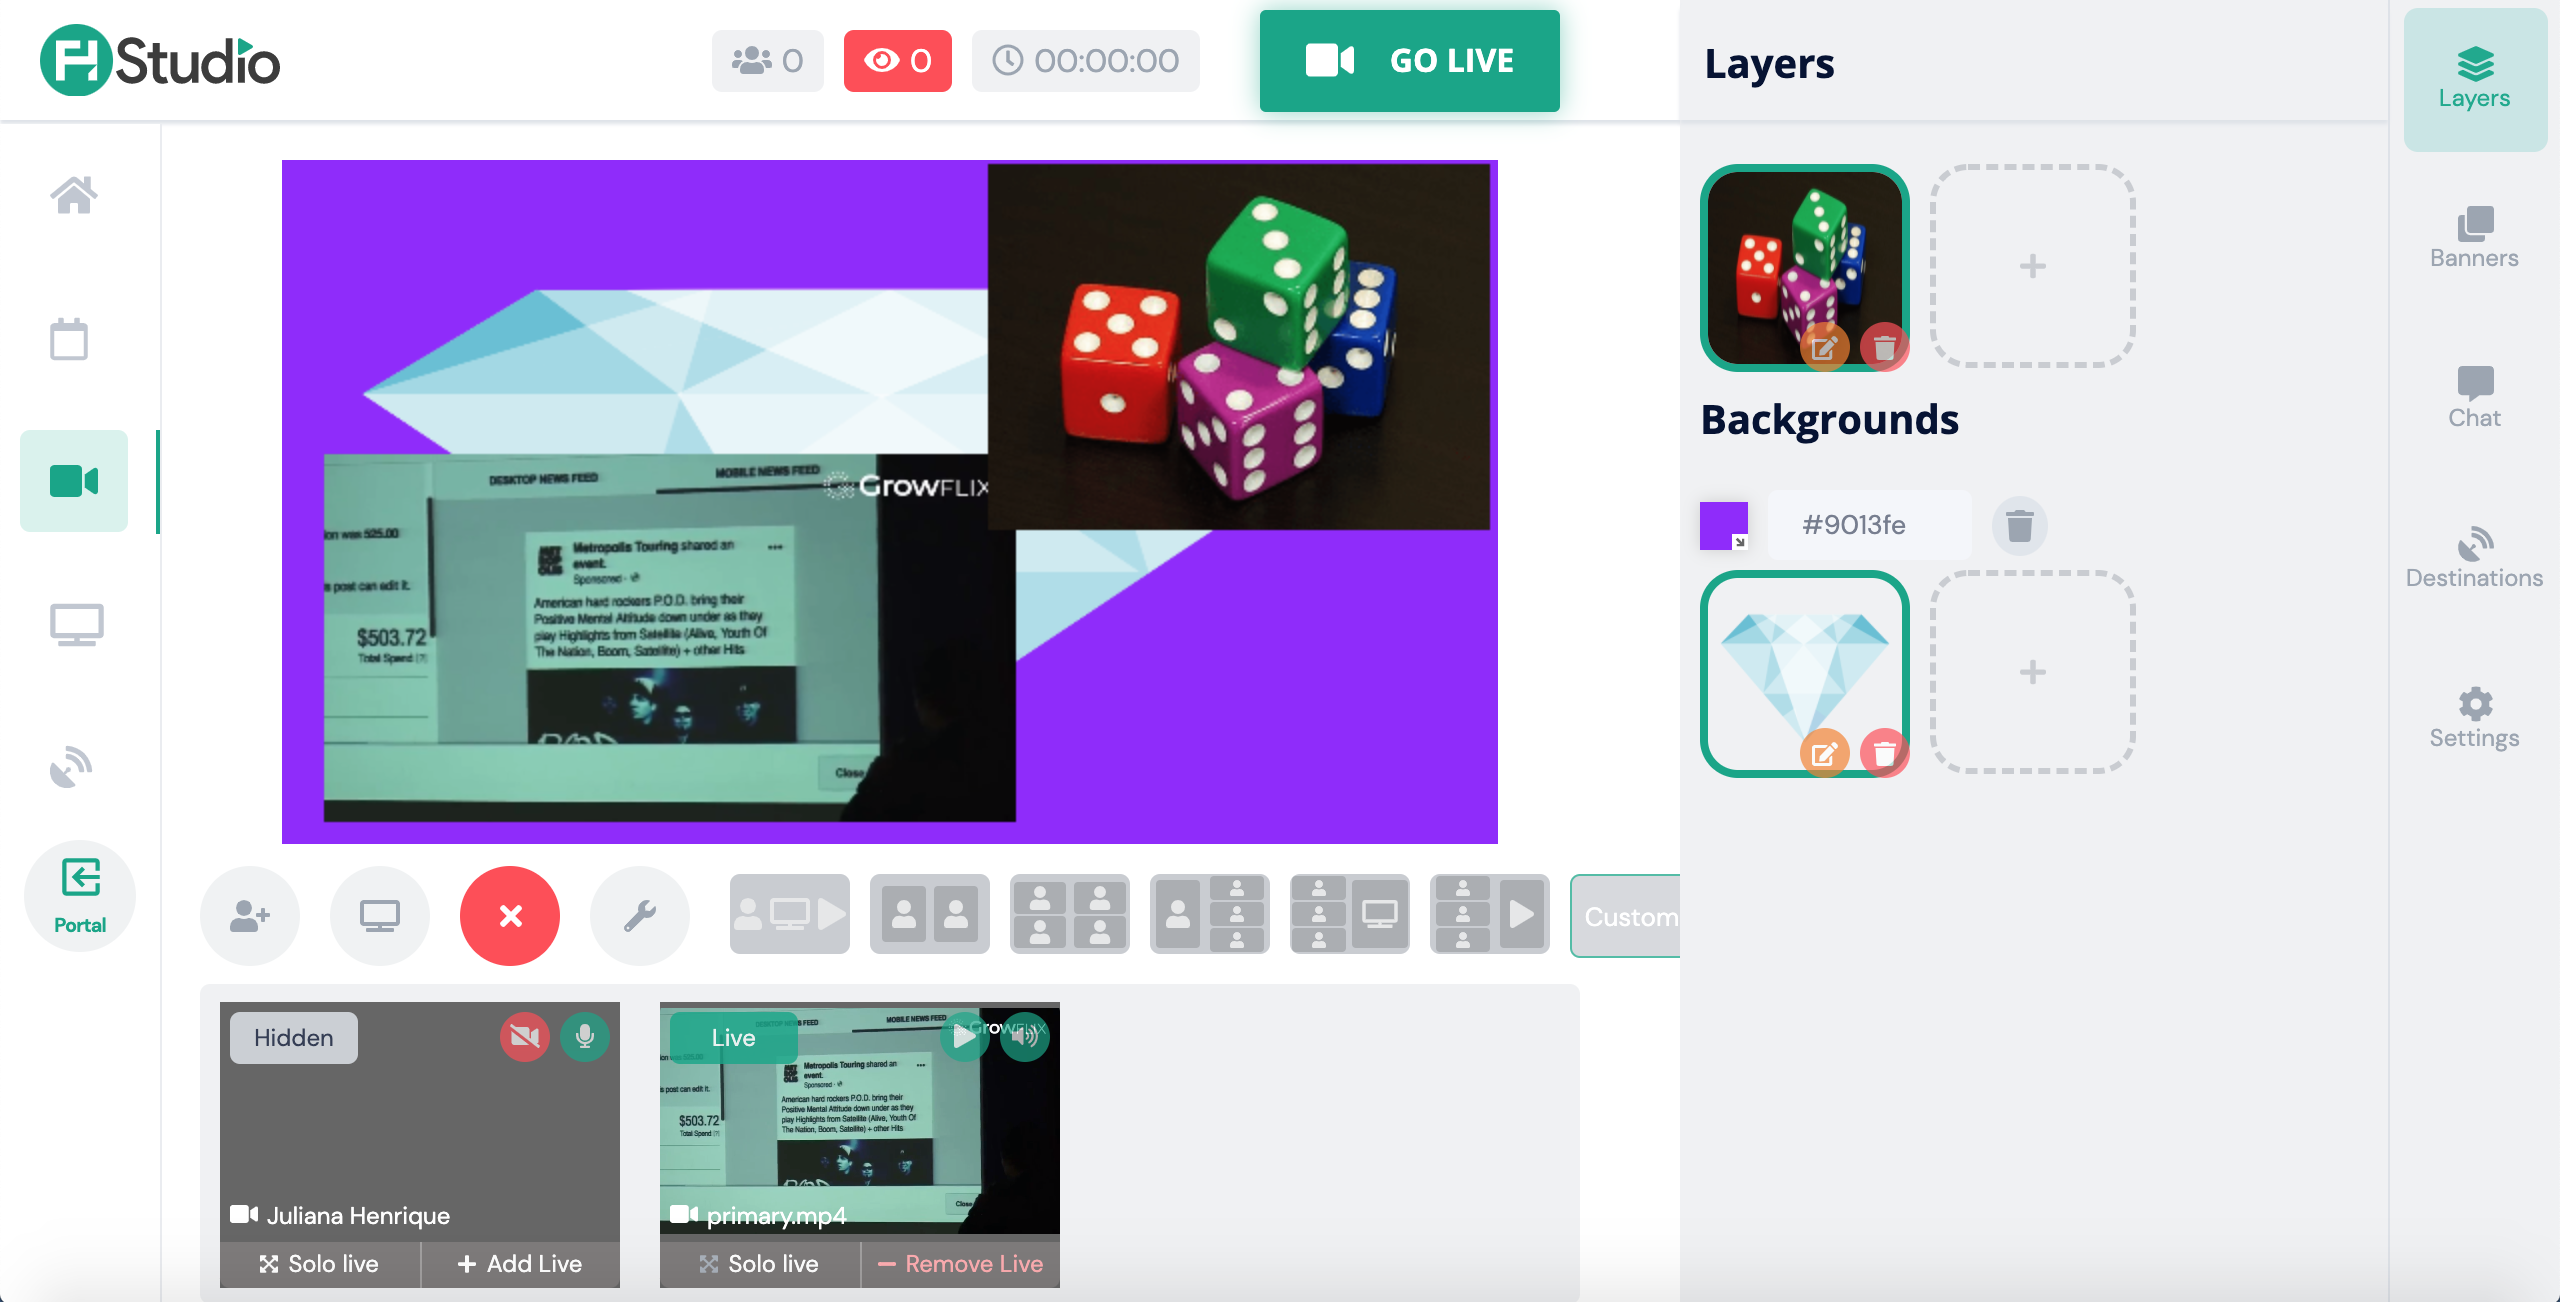
When items are selected (in green), it means that the layer/background is being displayed in the canvas. In the example above, the dice image is being used as a layer and the diamond image is being used as a background along with a solid color (purple). They are all part of the custom canvas we created above.
Our custom canvas was edited so the dice image could be at the top and the video sharing could be at the bottom.
Layers and backgrounds can be edited at any time. You can click on the pencil icon next to them. If you wish to delete an item, simply click the trash icon next to it.
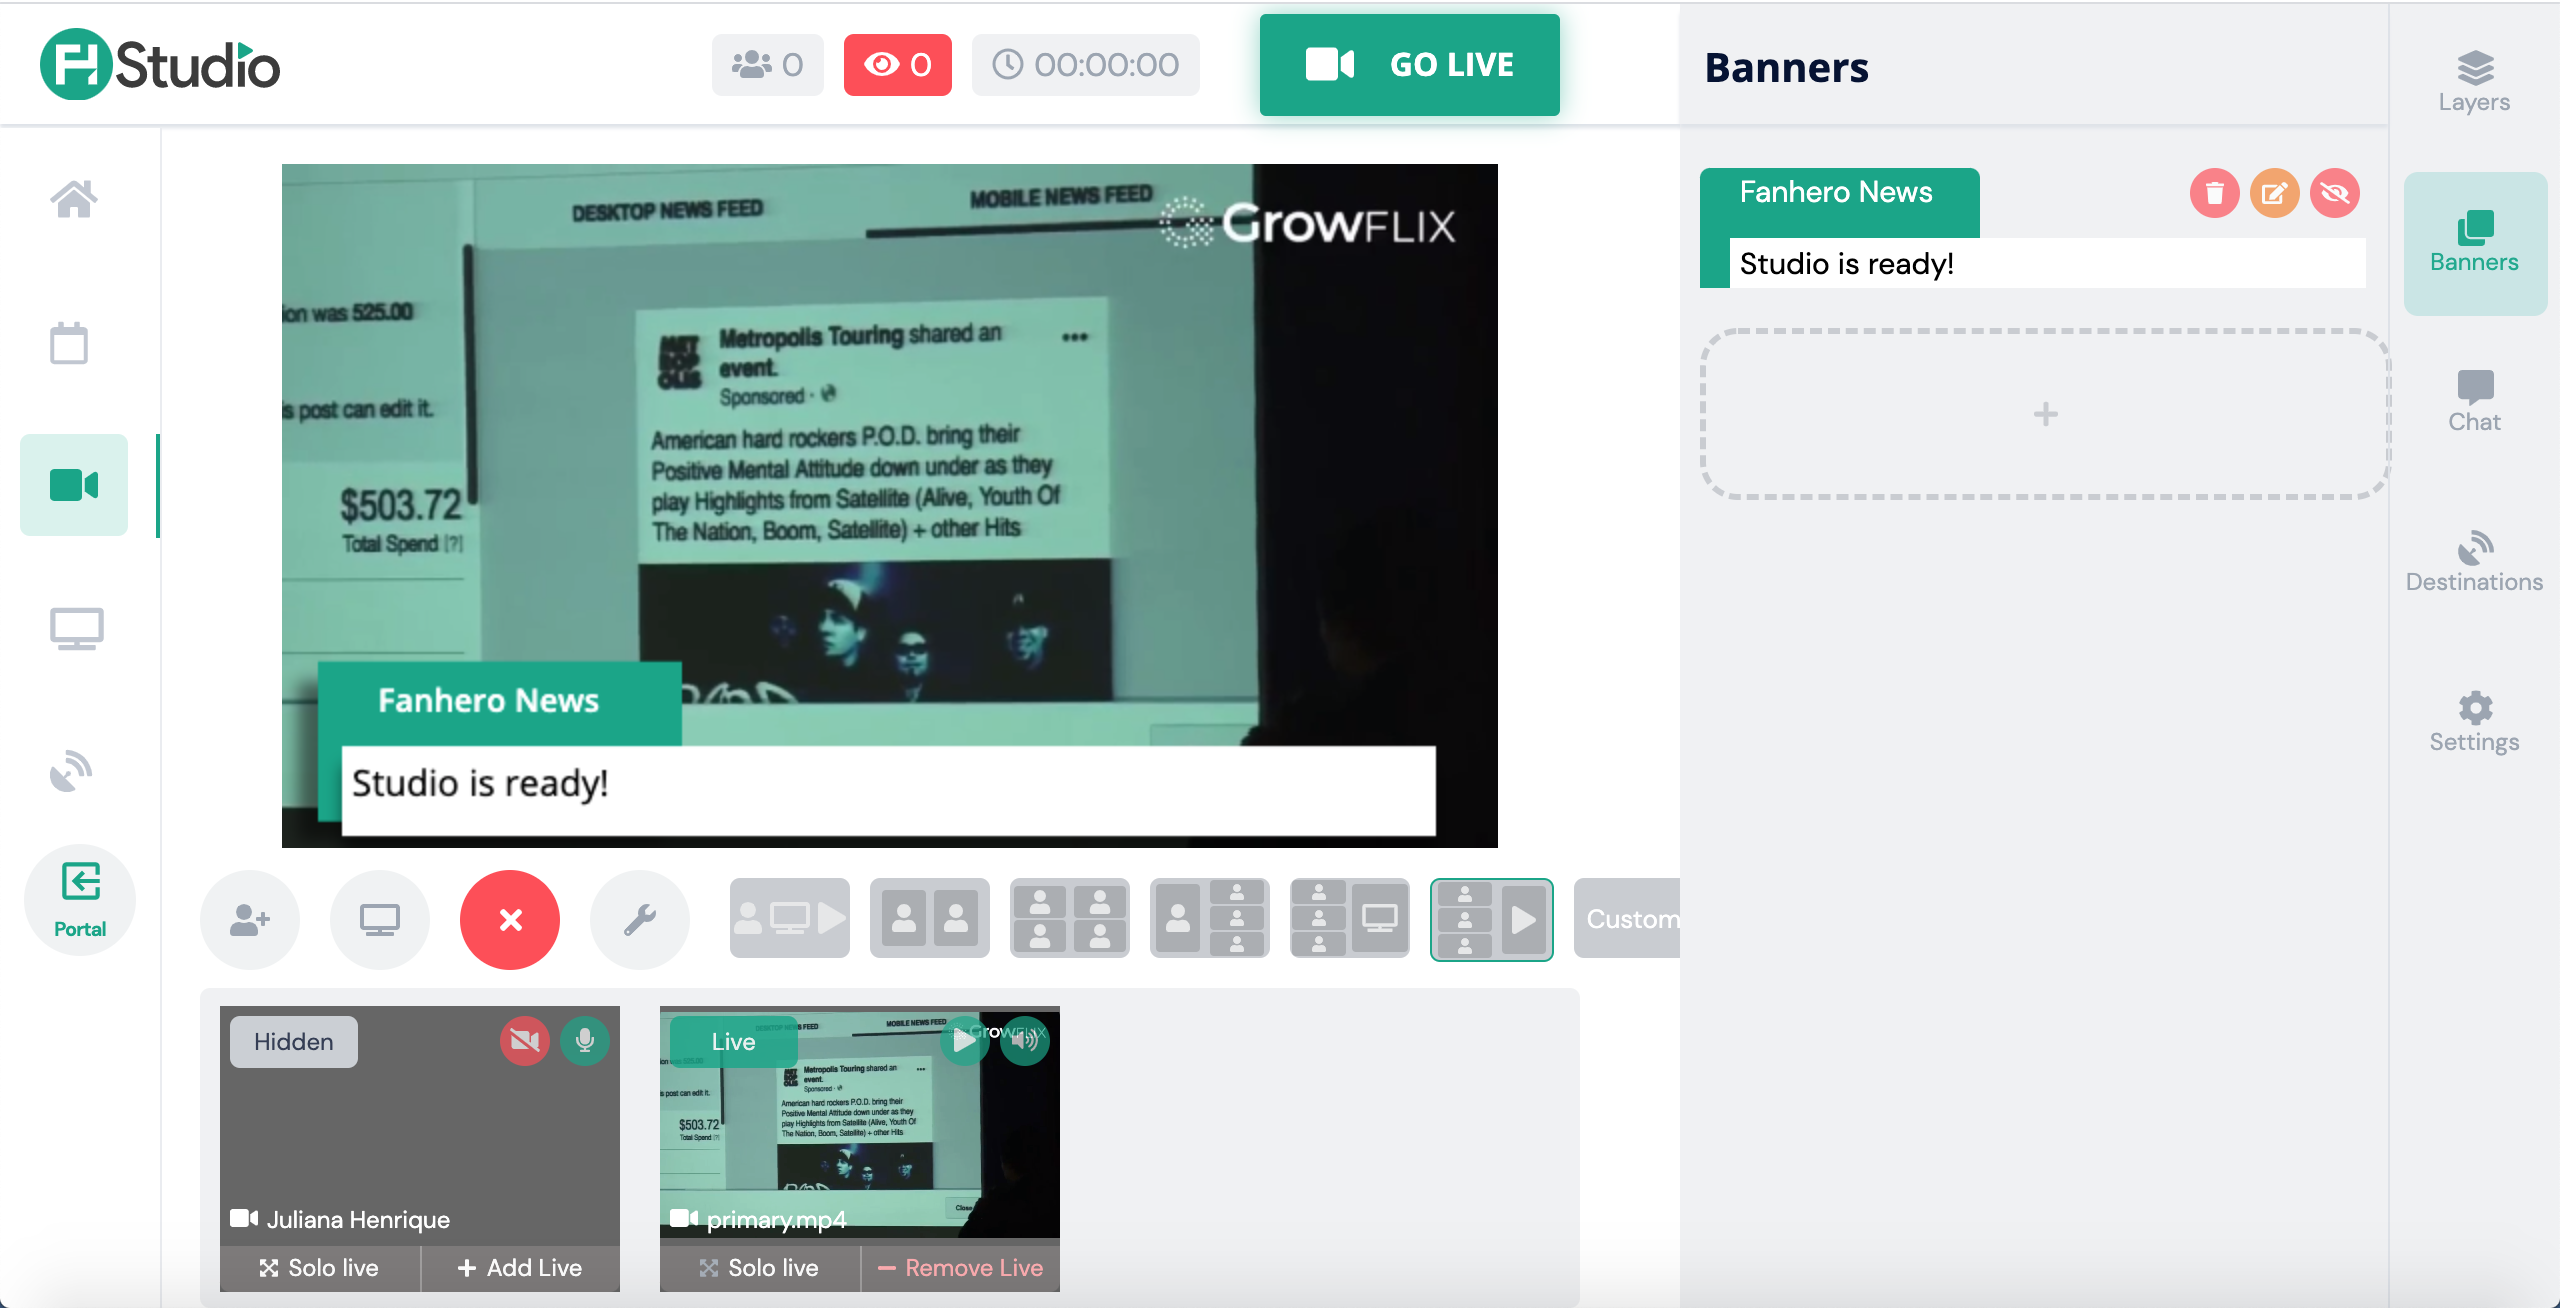
Banners
You have the ability to create and add as many banners as you need. Click on the plus icon to create a banner. It will open the Banner Editor pop up.
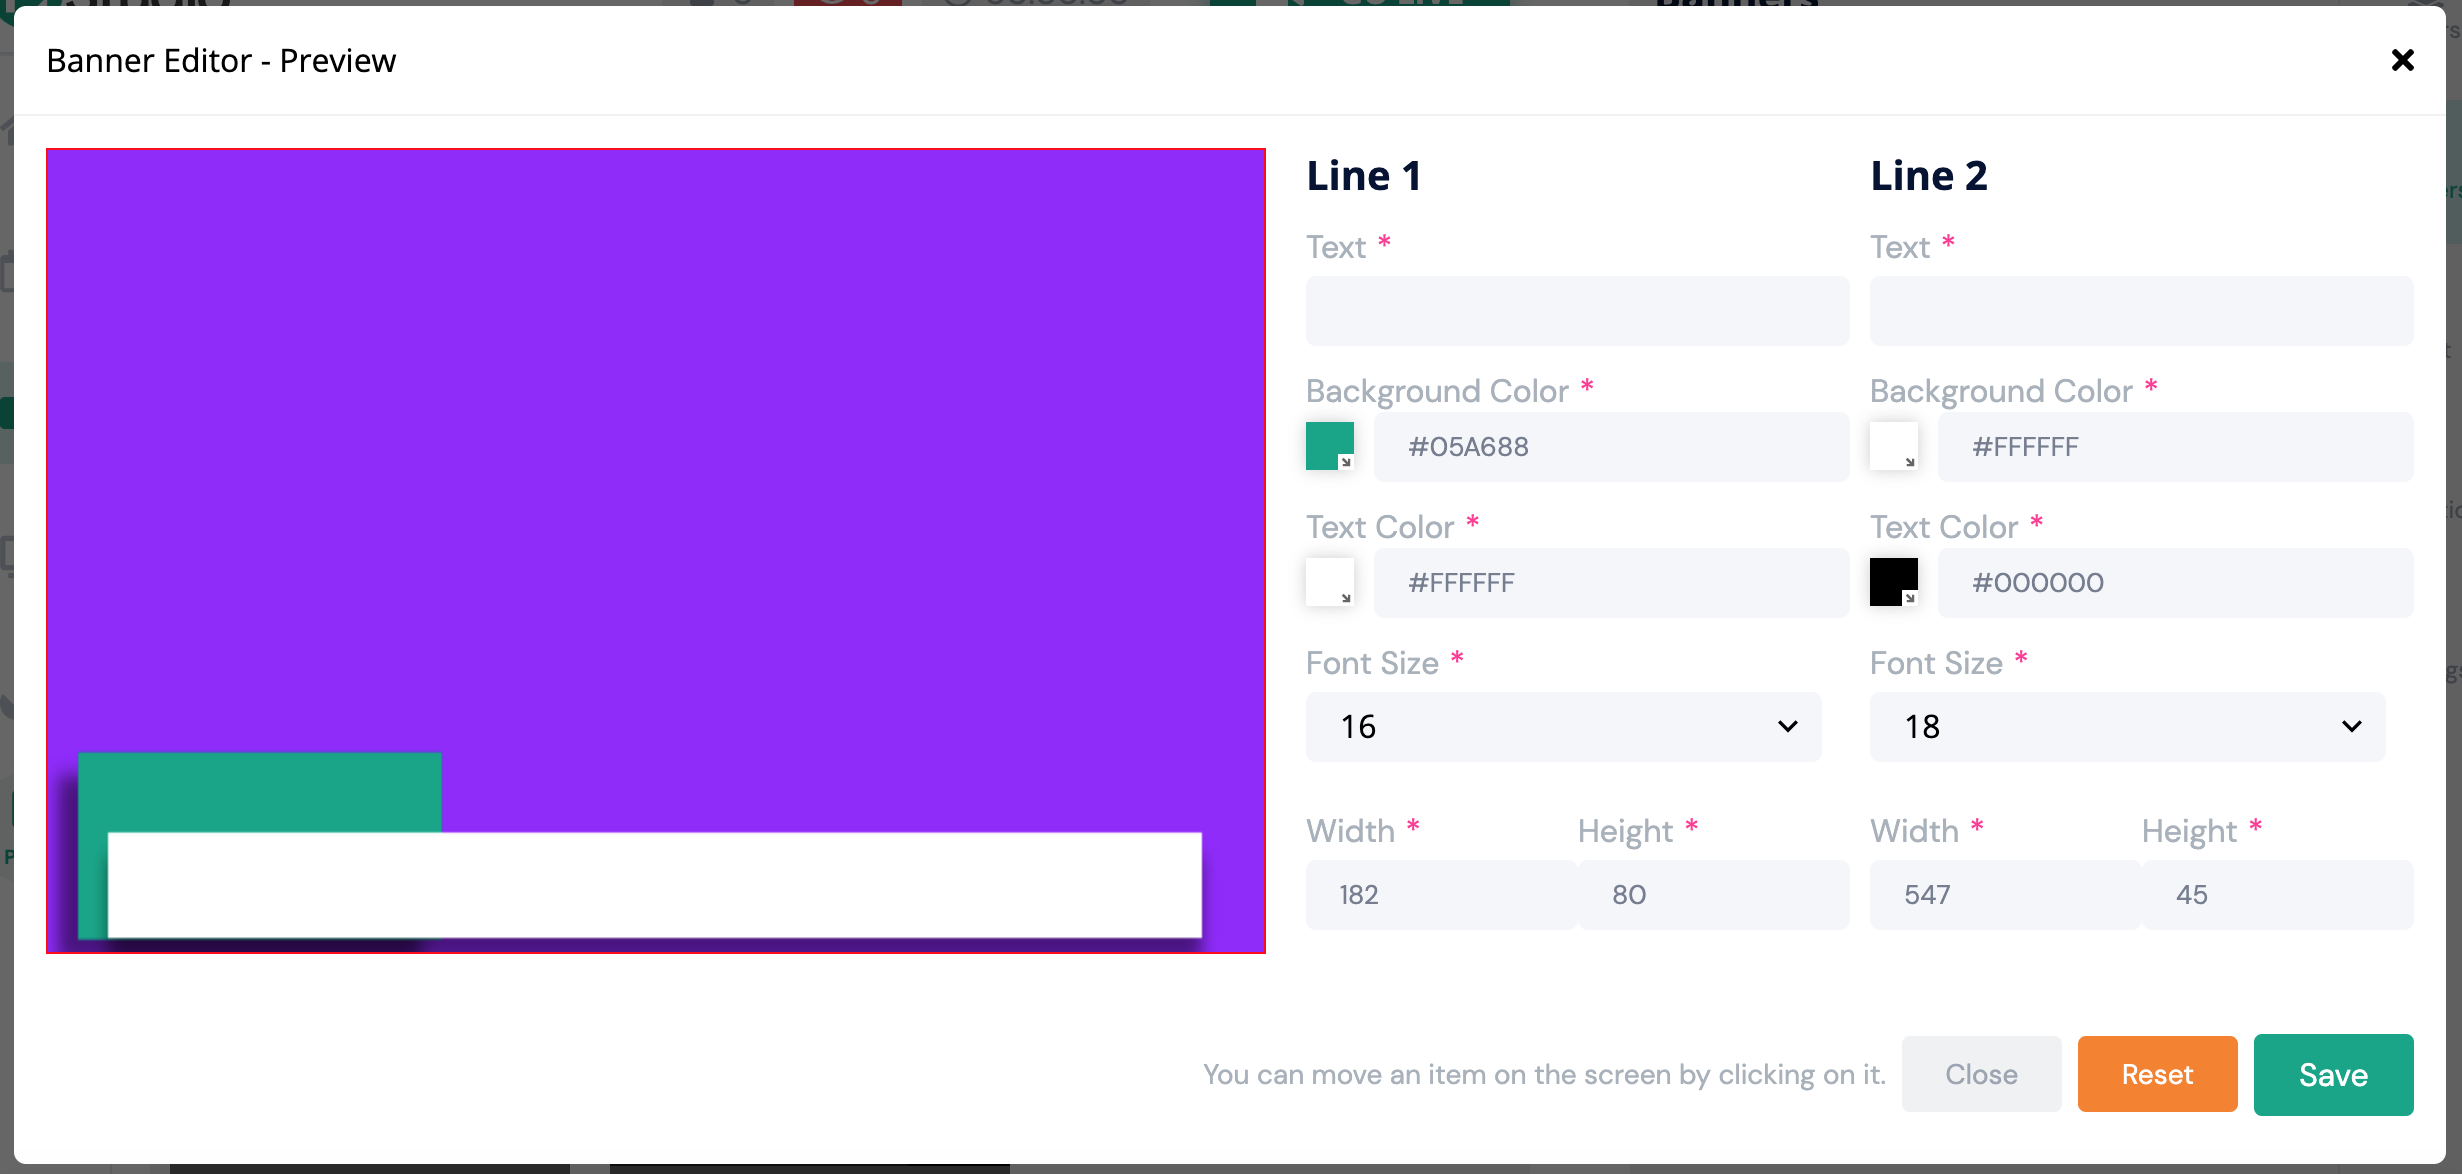
You can add text, change the background and text colors, change the font size and resize the banner (with and height). You can also move an item by clicking on it and dragging it to the new position.

Once is saved, the new banner will be available to be added to the stream.
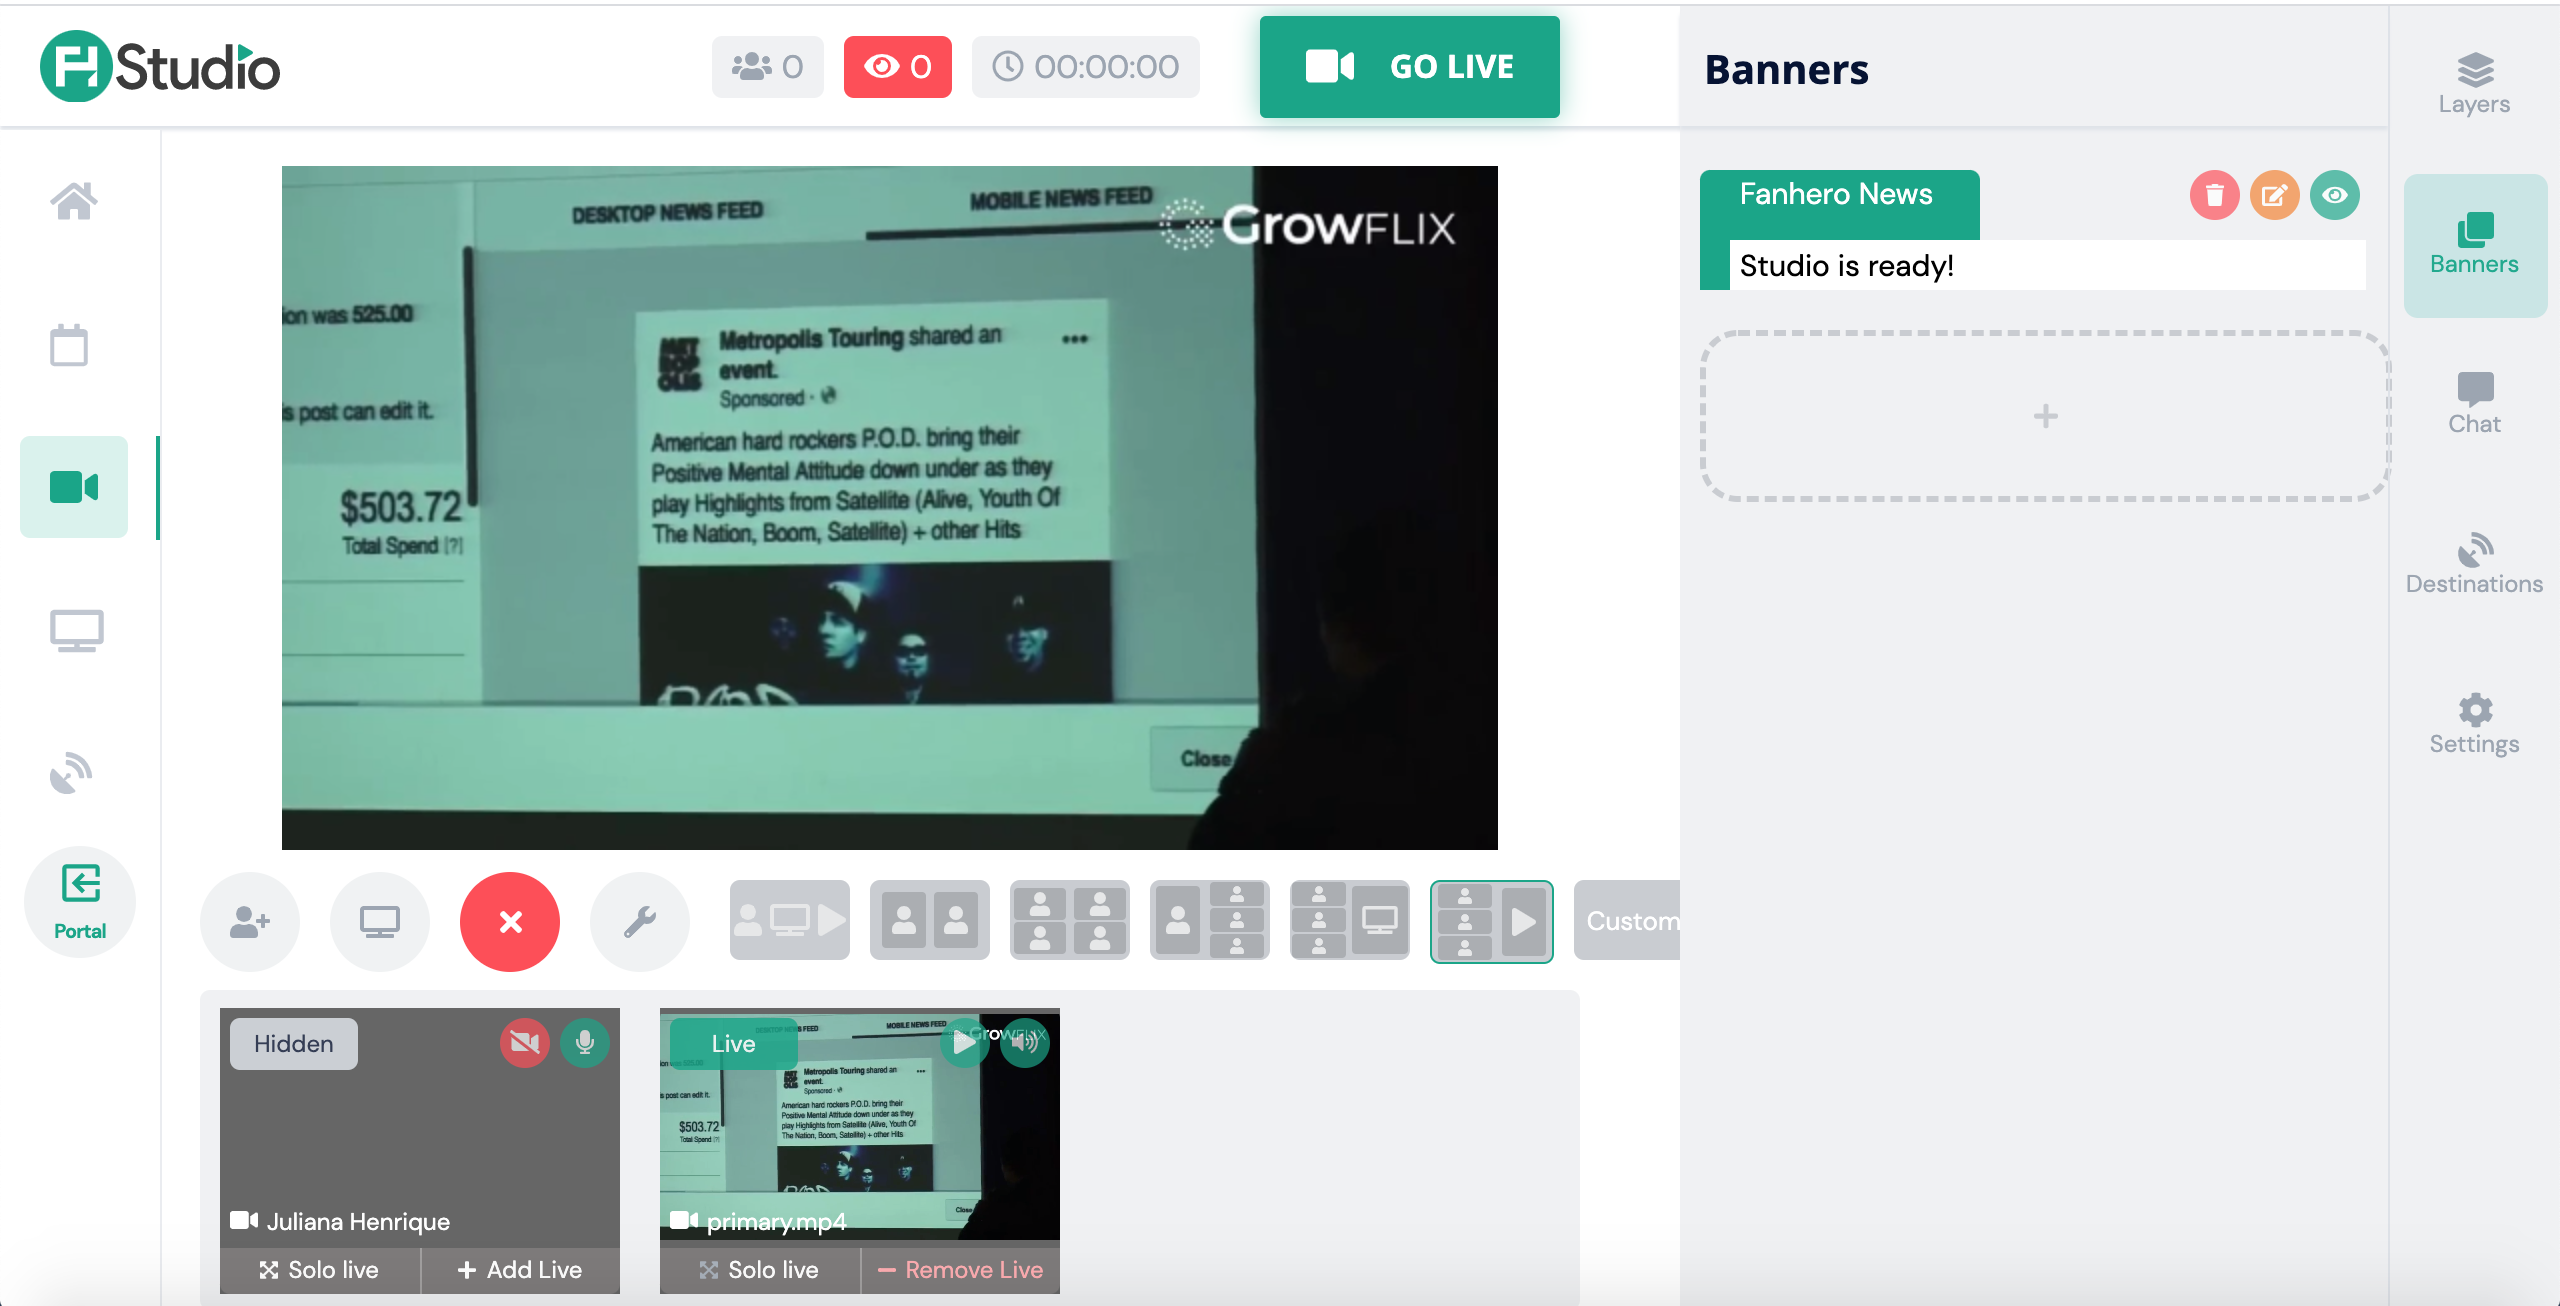
Clicking on the eye icon will add the banner to the stream. You can to edit or delete banners at any time.
Chat
During the stream, Admin users have the ability to interact and engage with users through chat.
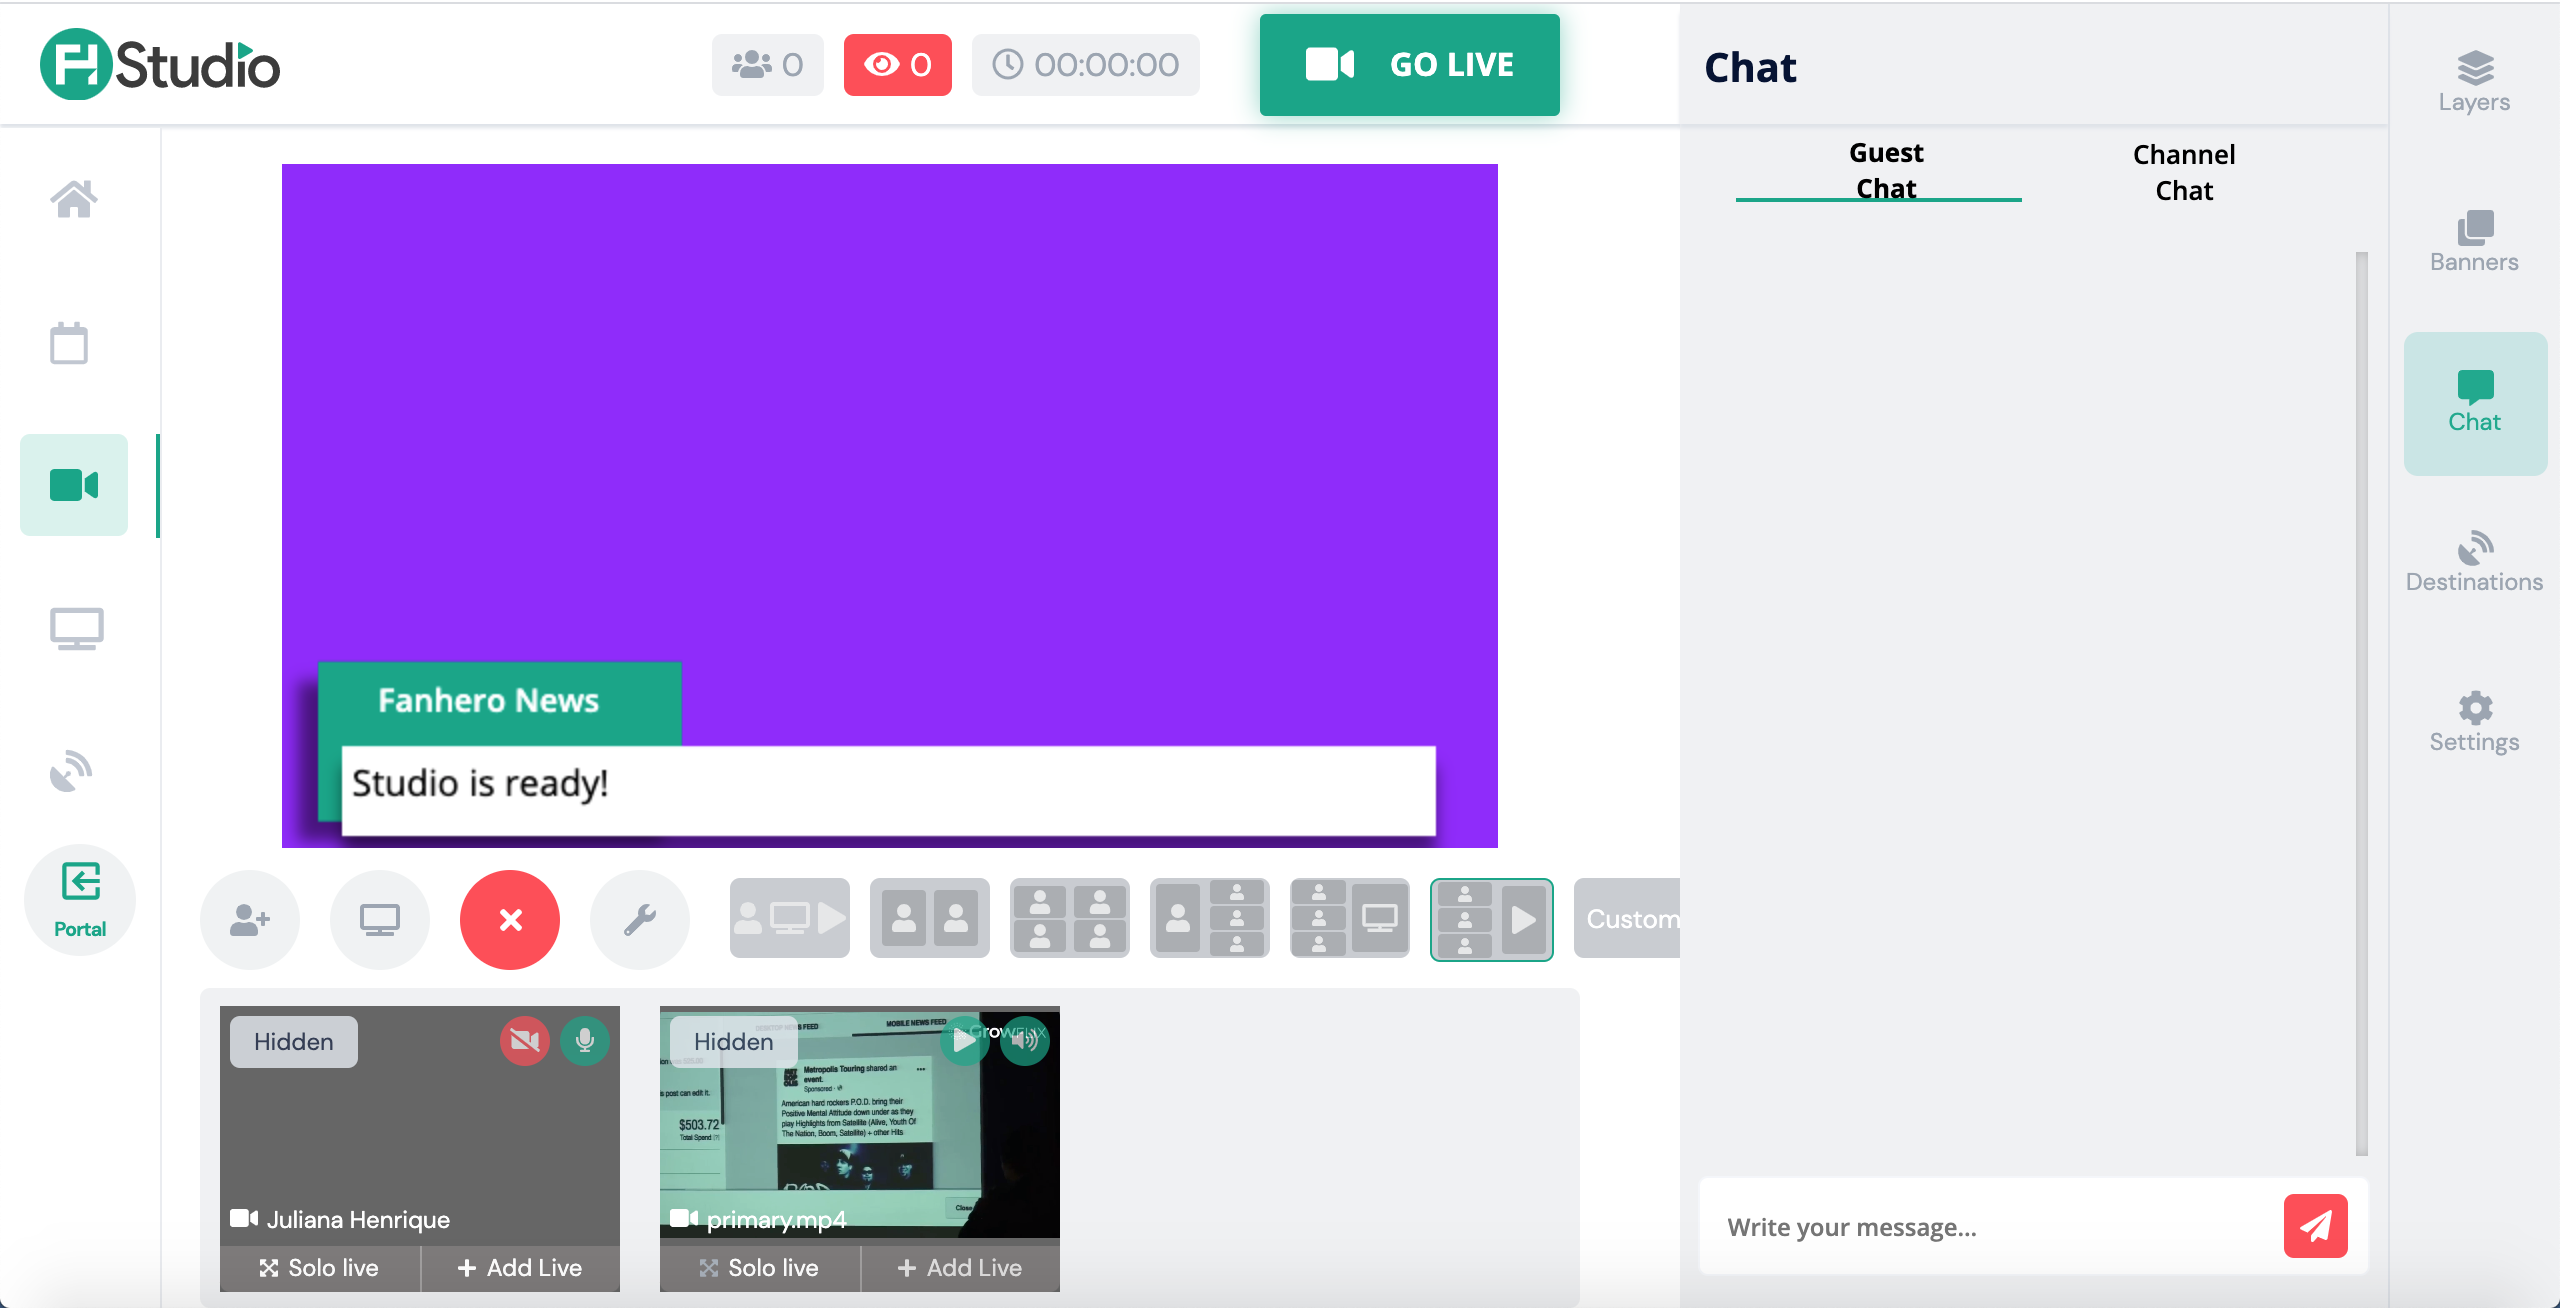
- Guess Chat: this chat is available only between the guests.
- Channel Chat: this is the chat from all the destinations you chose. You can click on the icon to see all destinations or to choose the chat from a specific destination. To send a message, you can choose to send the same message to all destinations or to a specific one.
Destinations
If your stream is not live yet, you can still add or edit destinations.
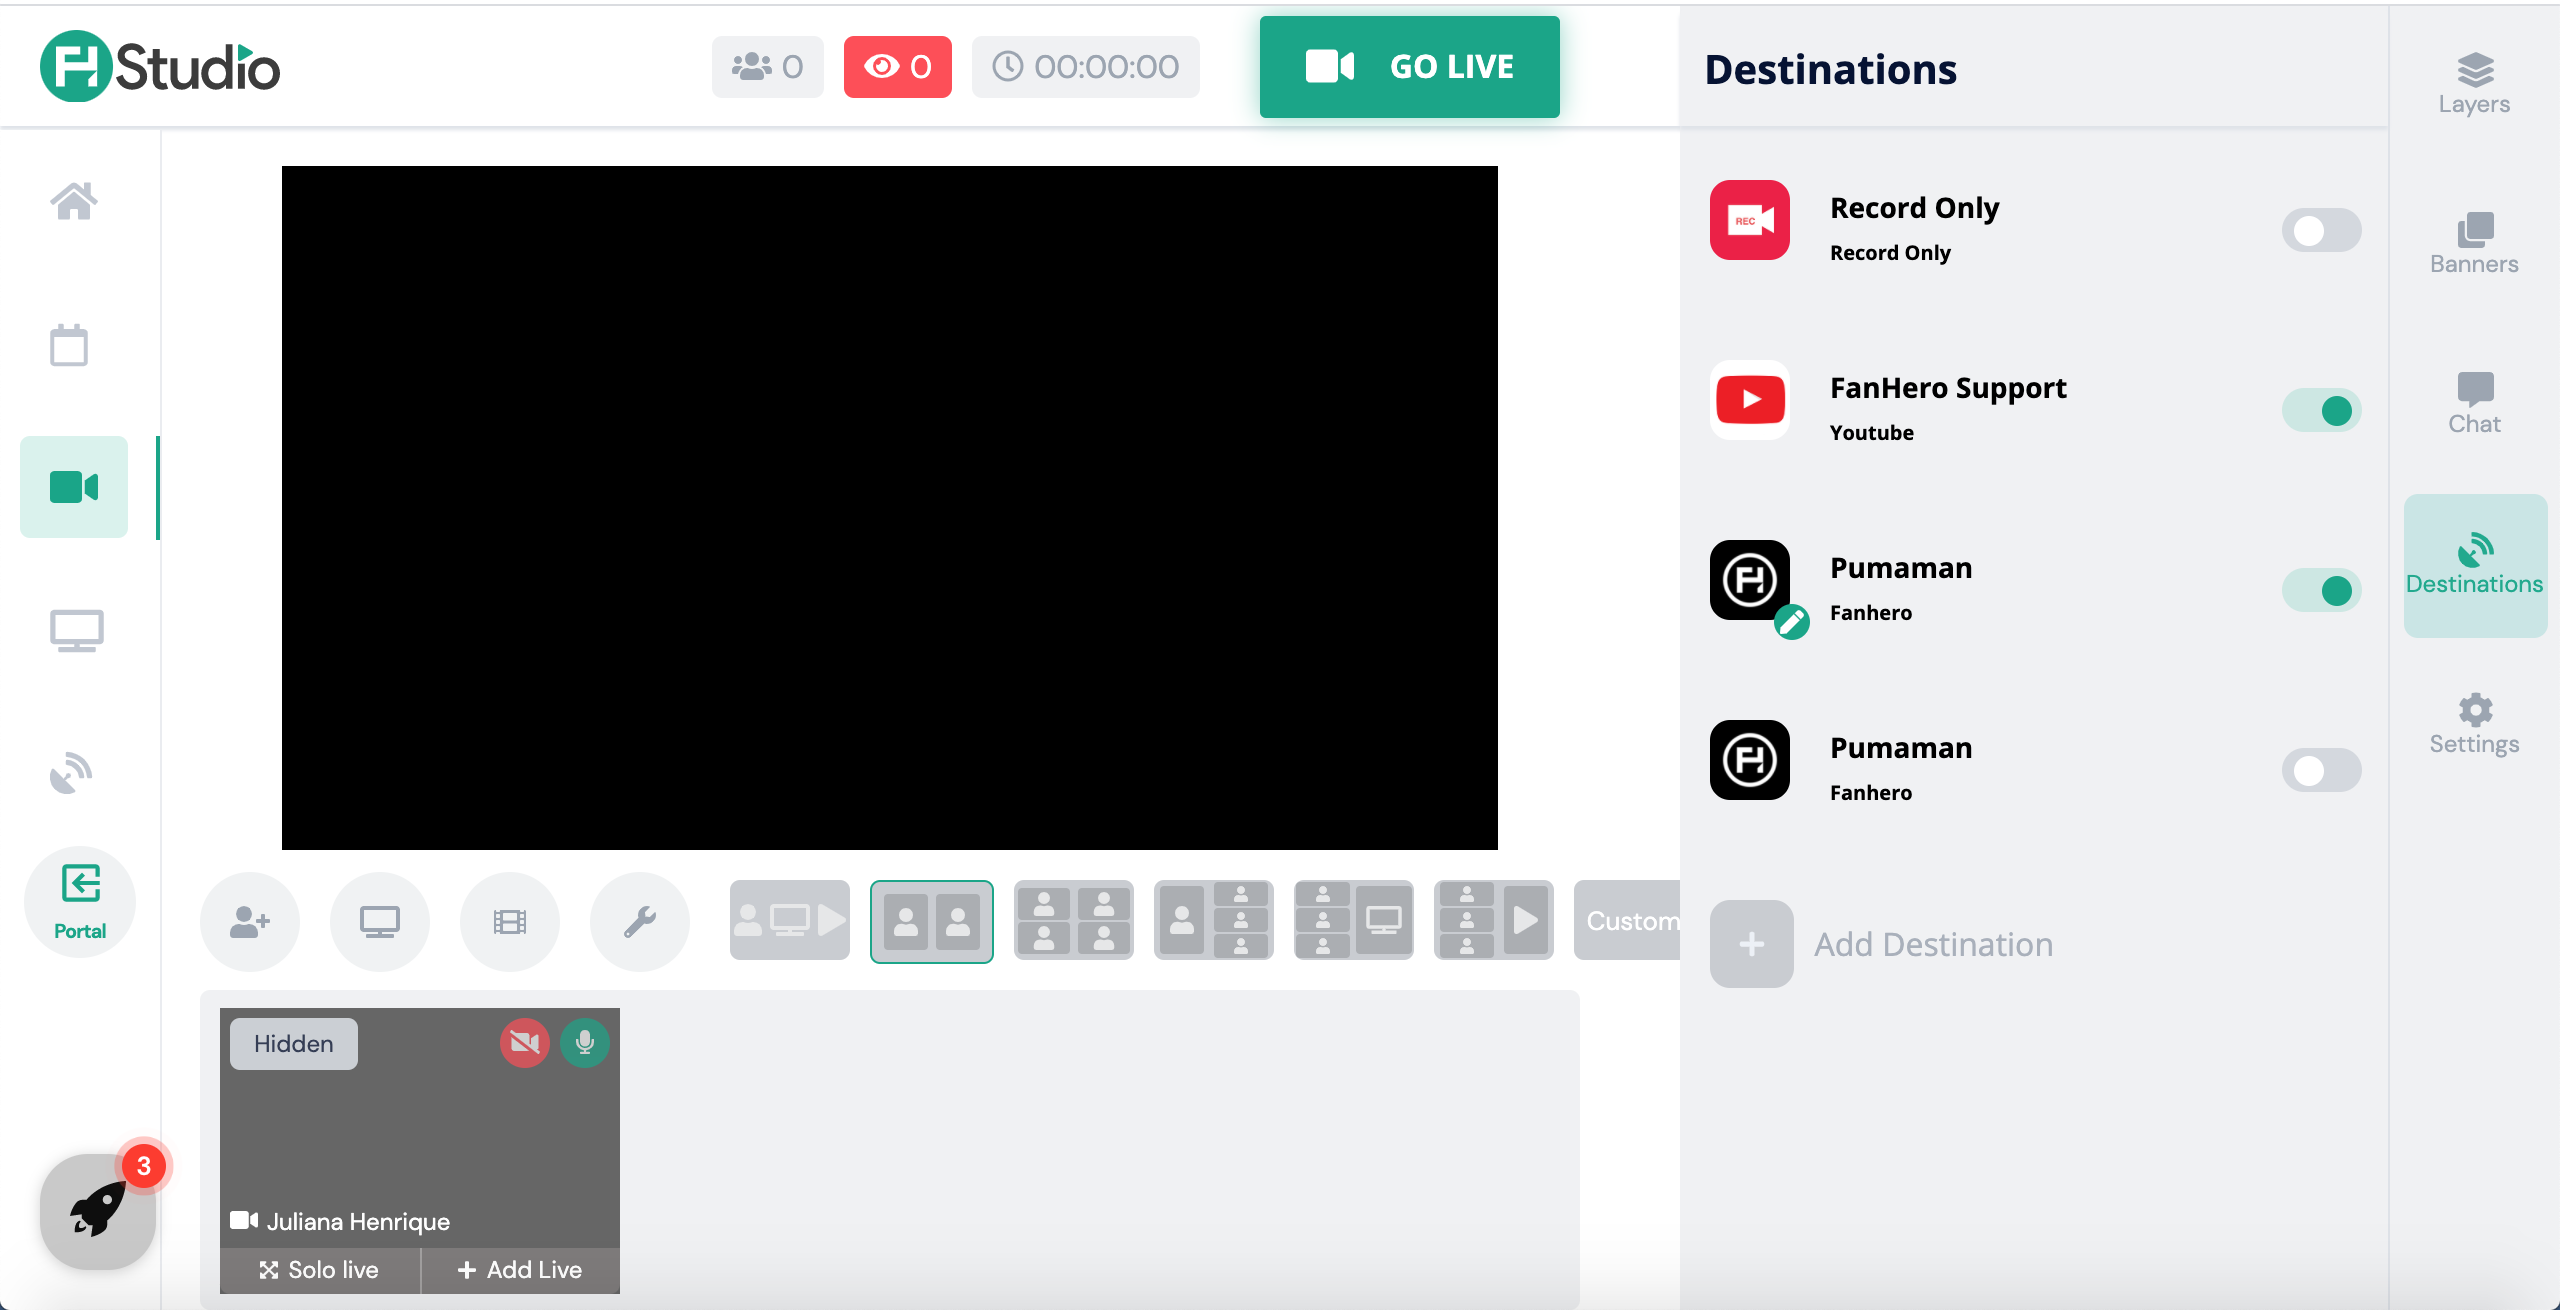
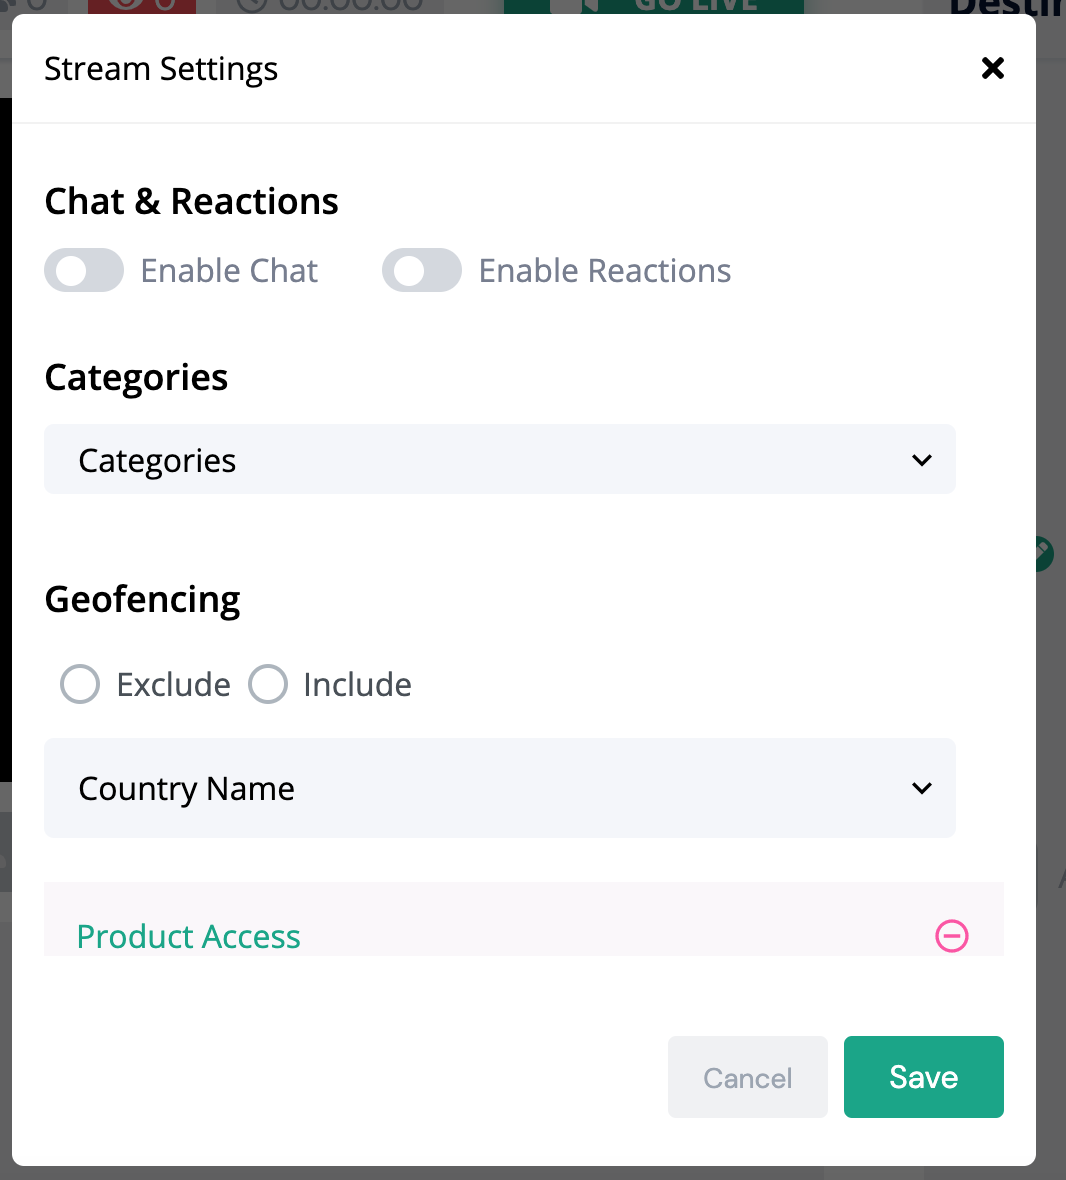
Next to your FanHero Channel icon, you will note a pencil icon. From there, you will be able to edit live stream settings, such as enabling/disabling chat and reactions, adding the stream to a Category, whitelisting/blacklisting a country and adding a Product Access.
Note: Once the stream is live, you won't be able to edit any Stream Settings in the FanHero Platform.
Settings
In this screen, Admin users have the ability to change the stream settings, such as title, description, camera, microphone and speaker.
Note: Once the stream is live, none of these items can be changed. Make sure you have the correct settings before you go live.
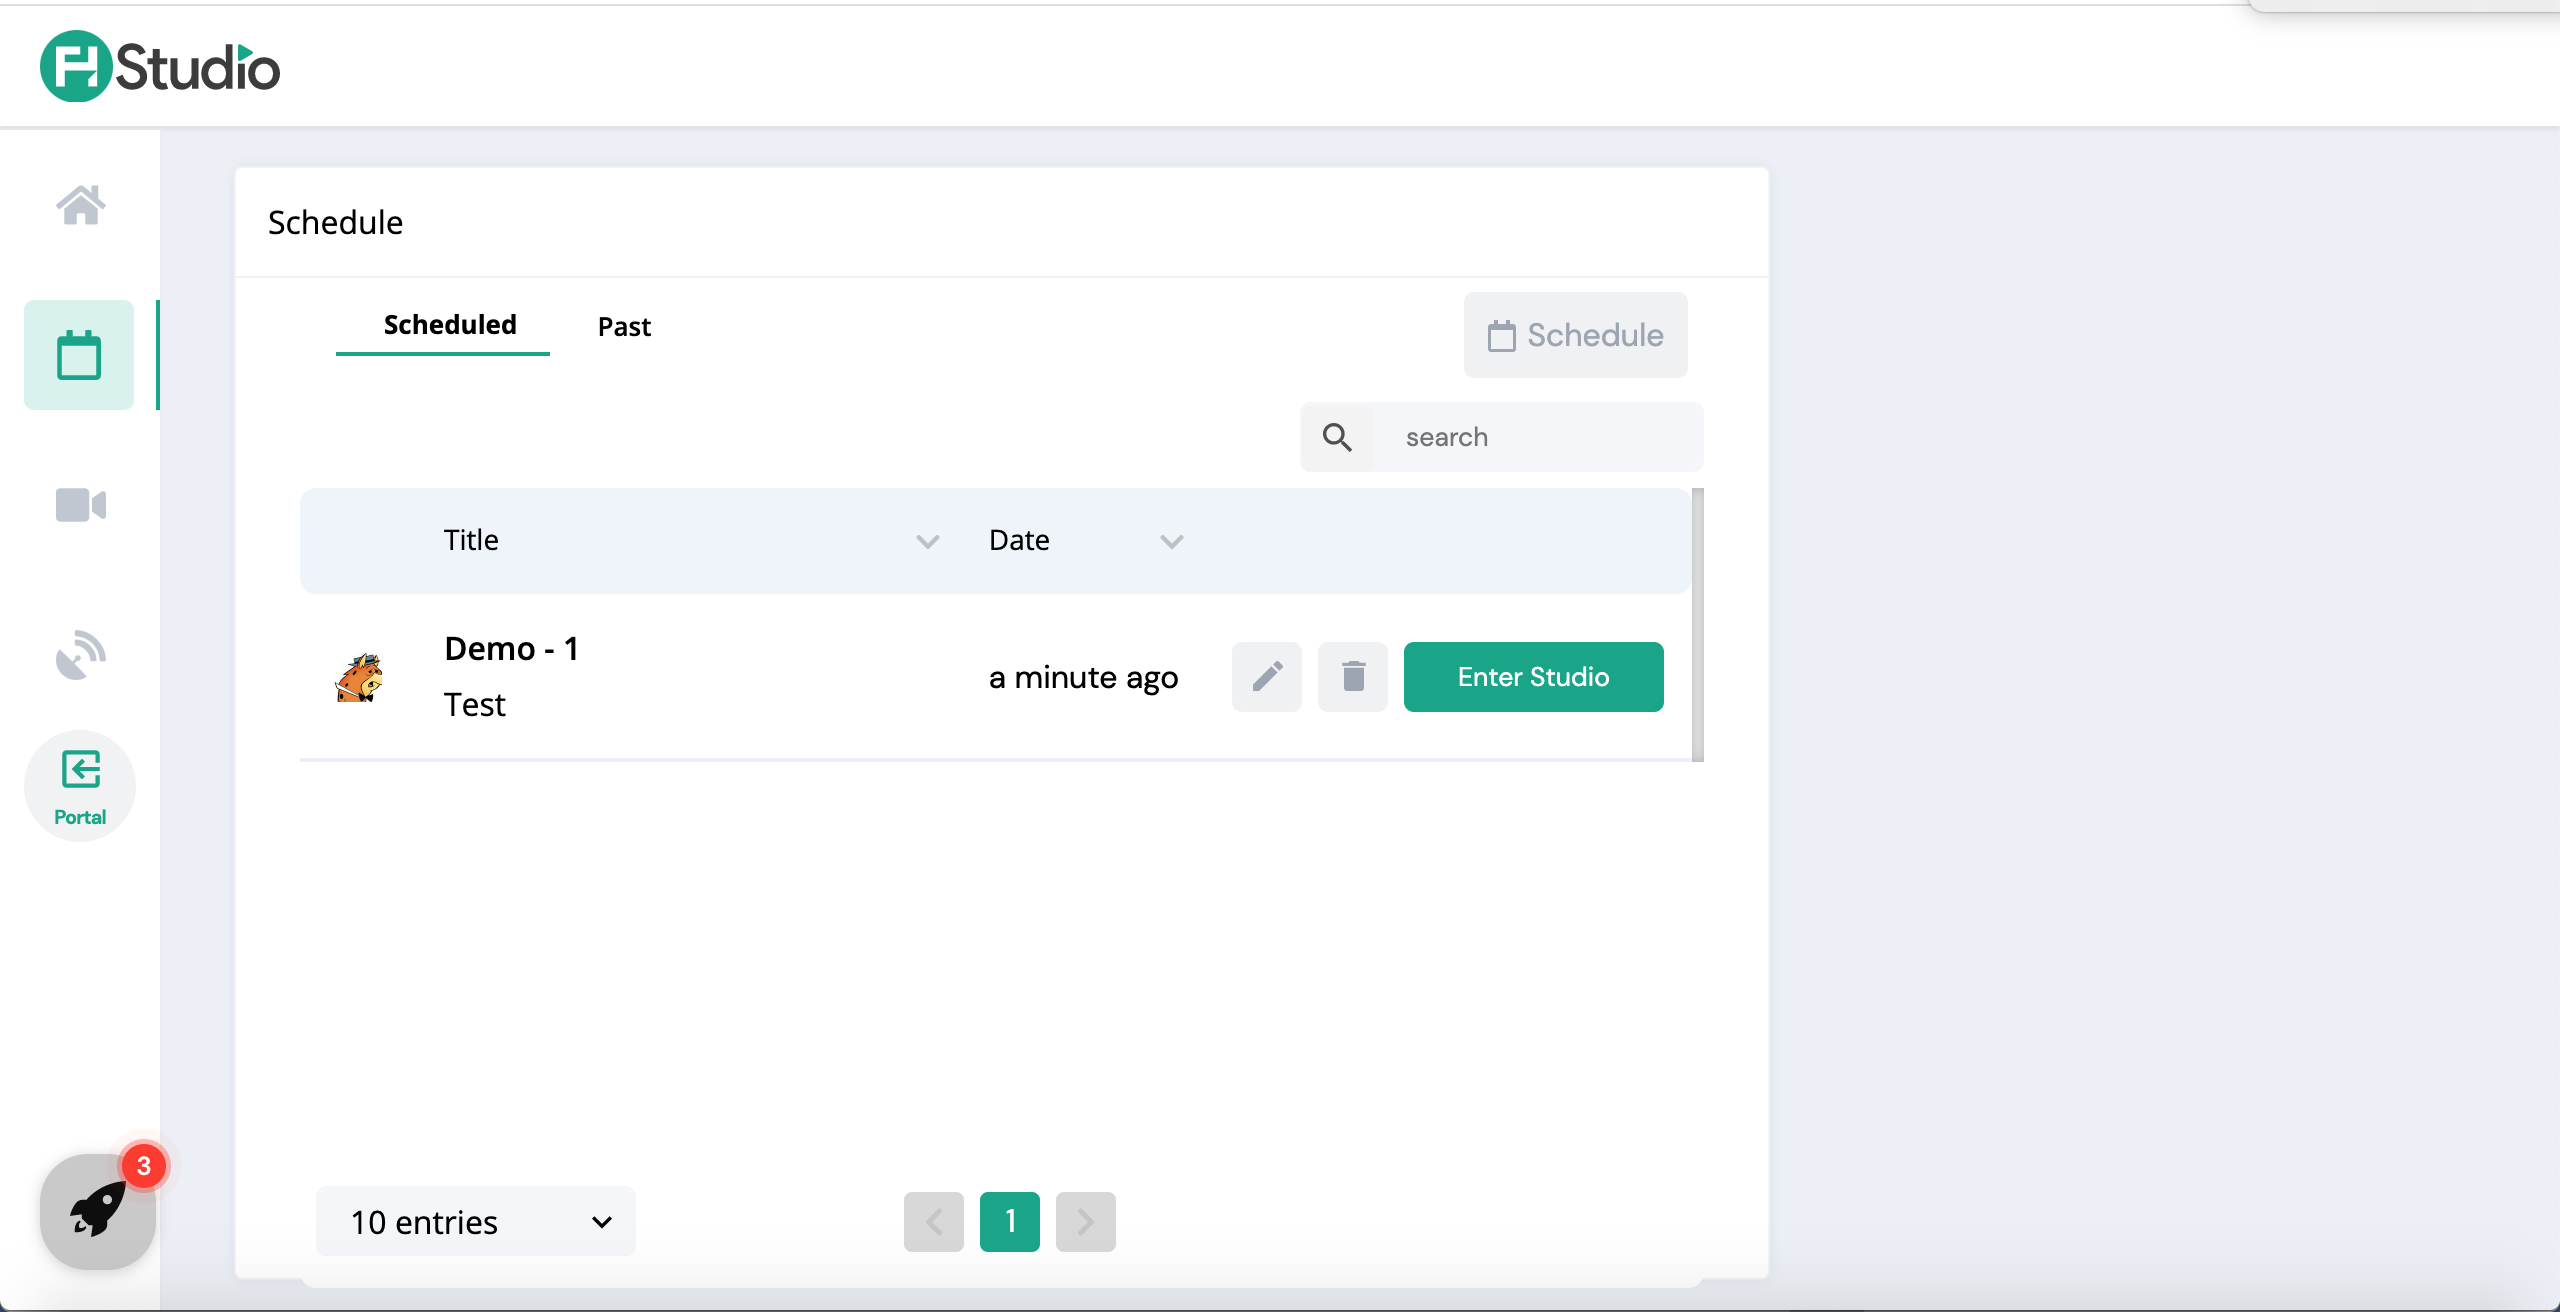
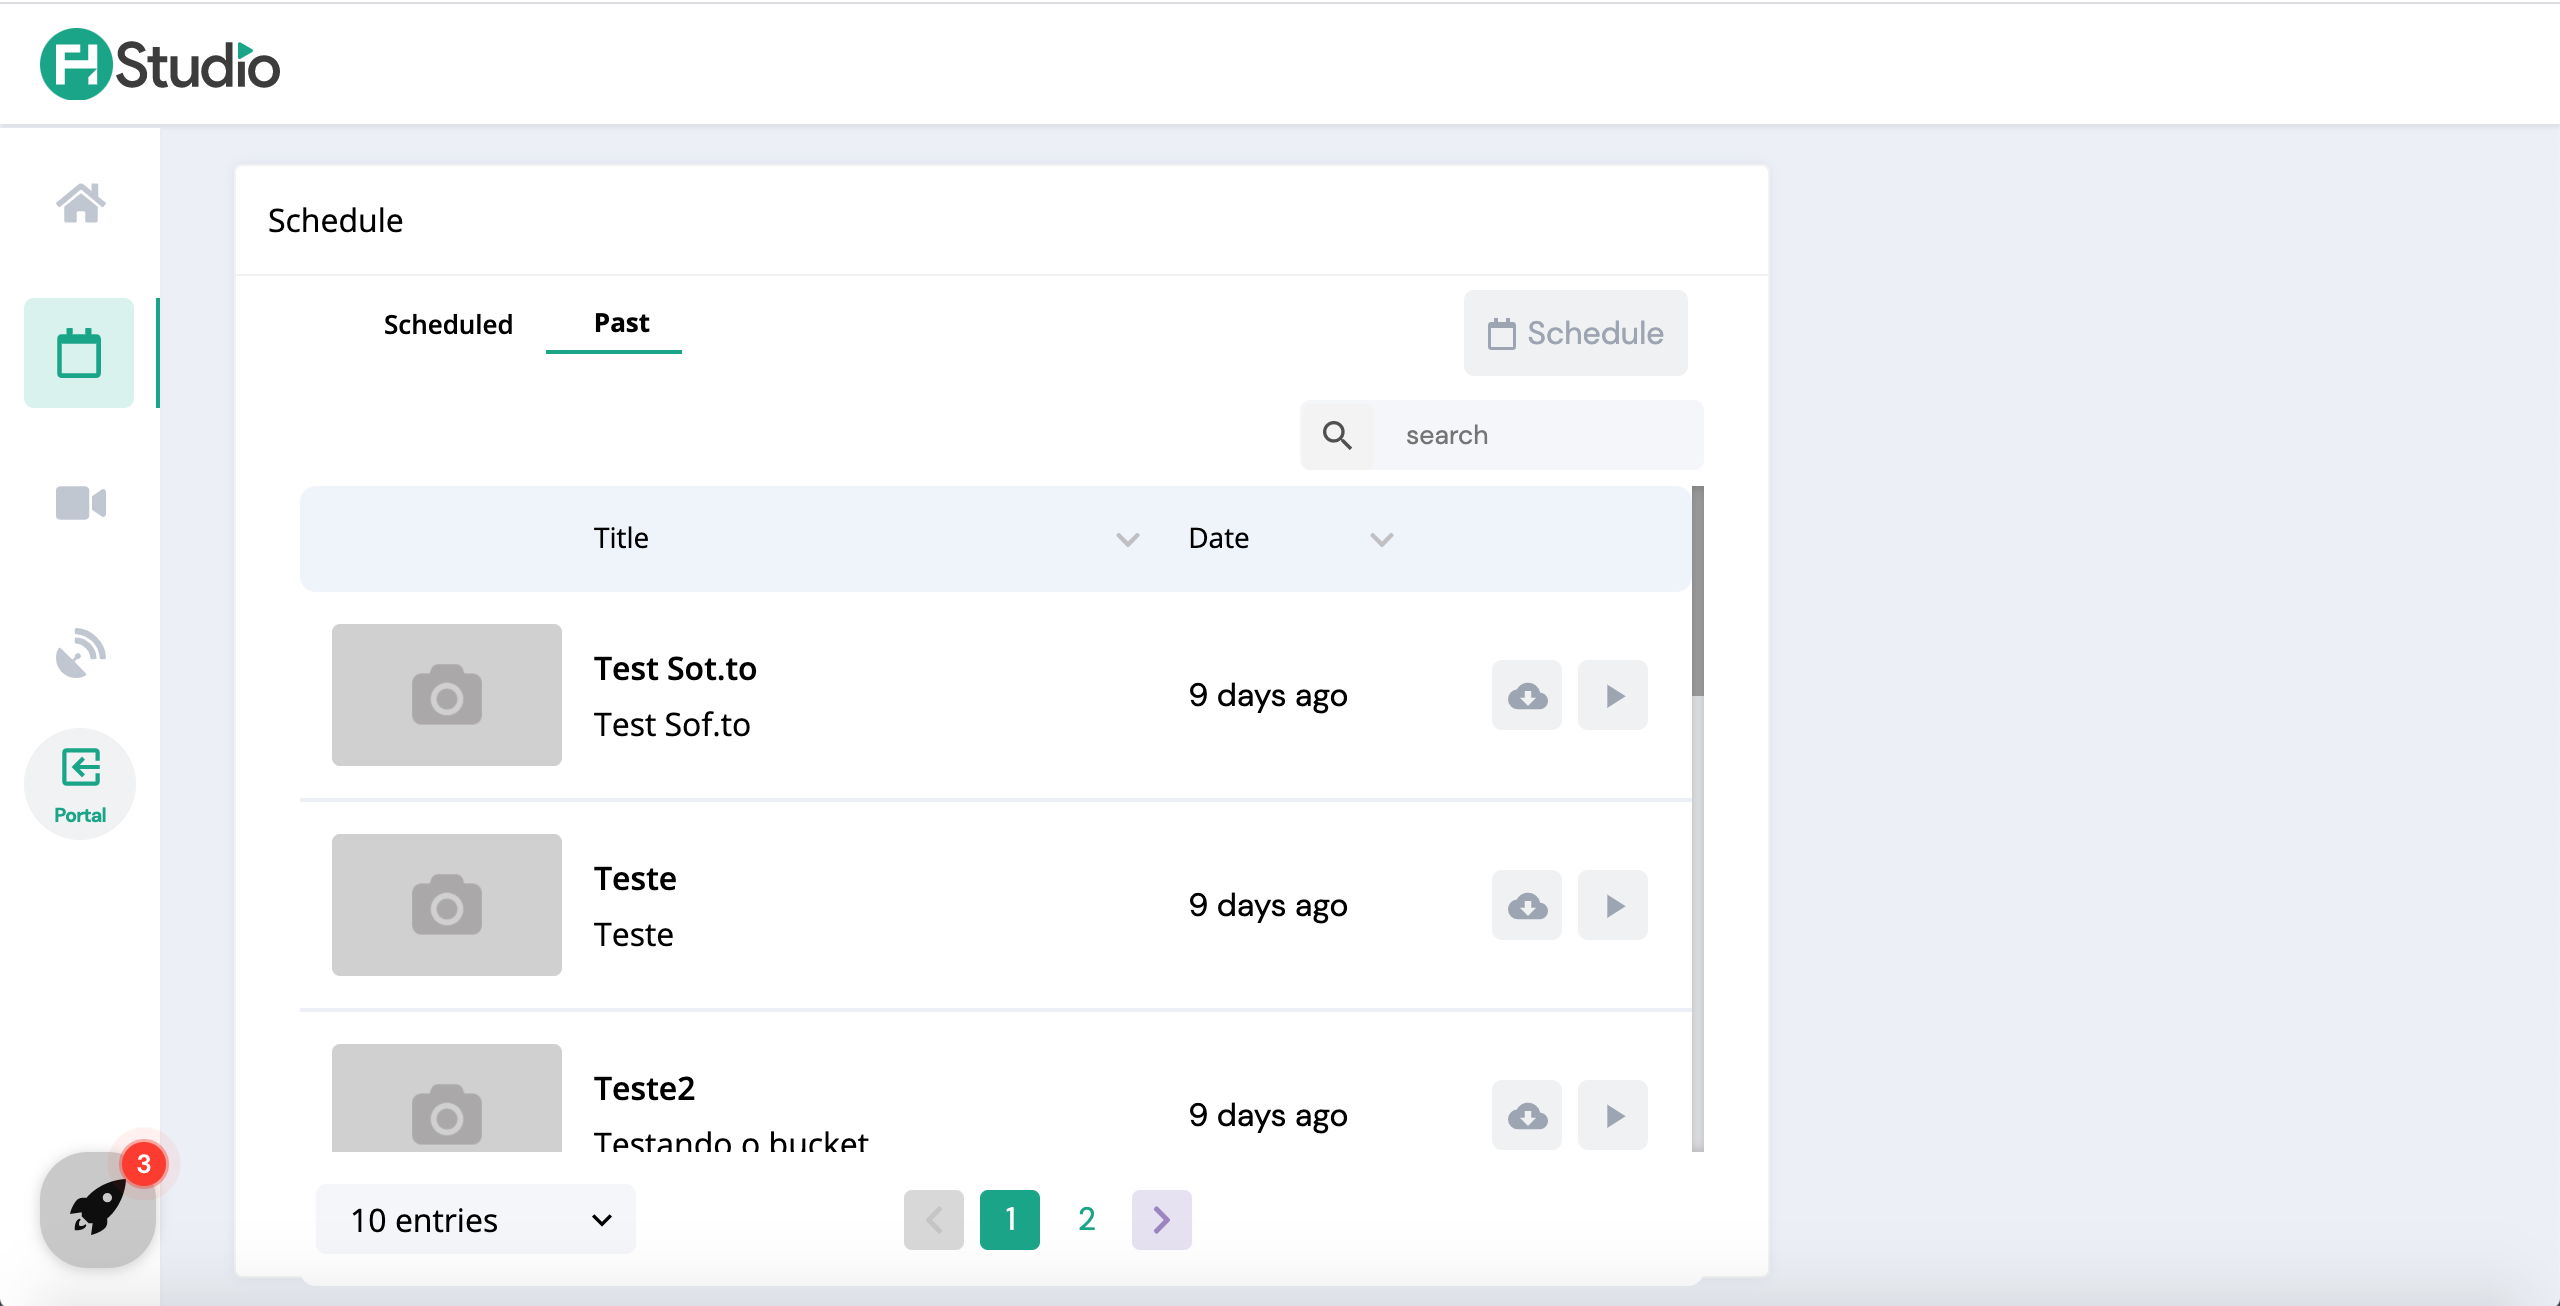
Schedule
In this section, a list of scheduled and past streams is displayed and Admin users have also the ability to make a search.
- Scheduled: displays a list of all the upcoming streams with the ability to edit, delete or enter the studio for a specific stream.
- Past: displays a list of all past streams ordered by date with the ability to download or play a specific past stream.
Admin uses can schedule a new stream from that screen by clicking the Schedule button. This action will start the create stream flow.
Webcam Stream
In this section, you can create a new webcam stream. Follow the same steps in the Home screen mentioned above.
Destinations
In this screen, Admin users can manage the destinations.
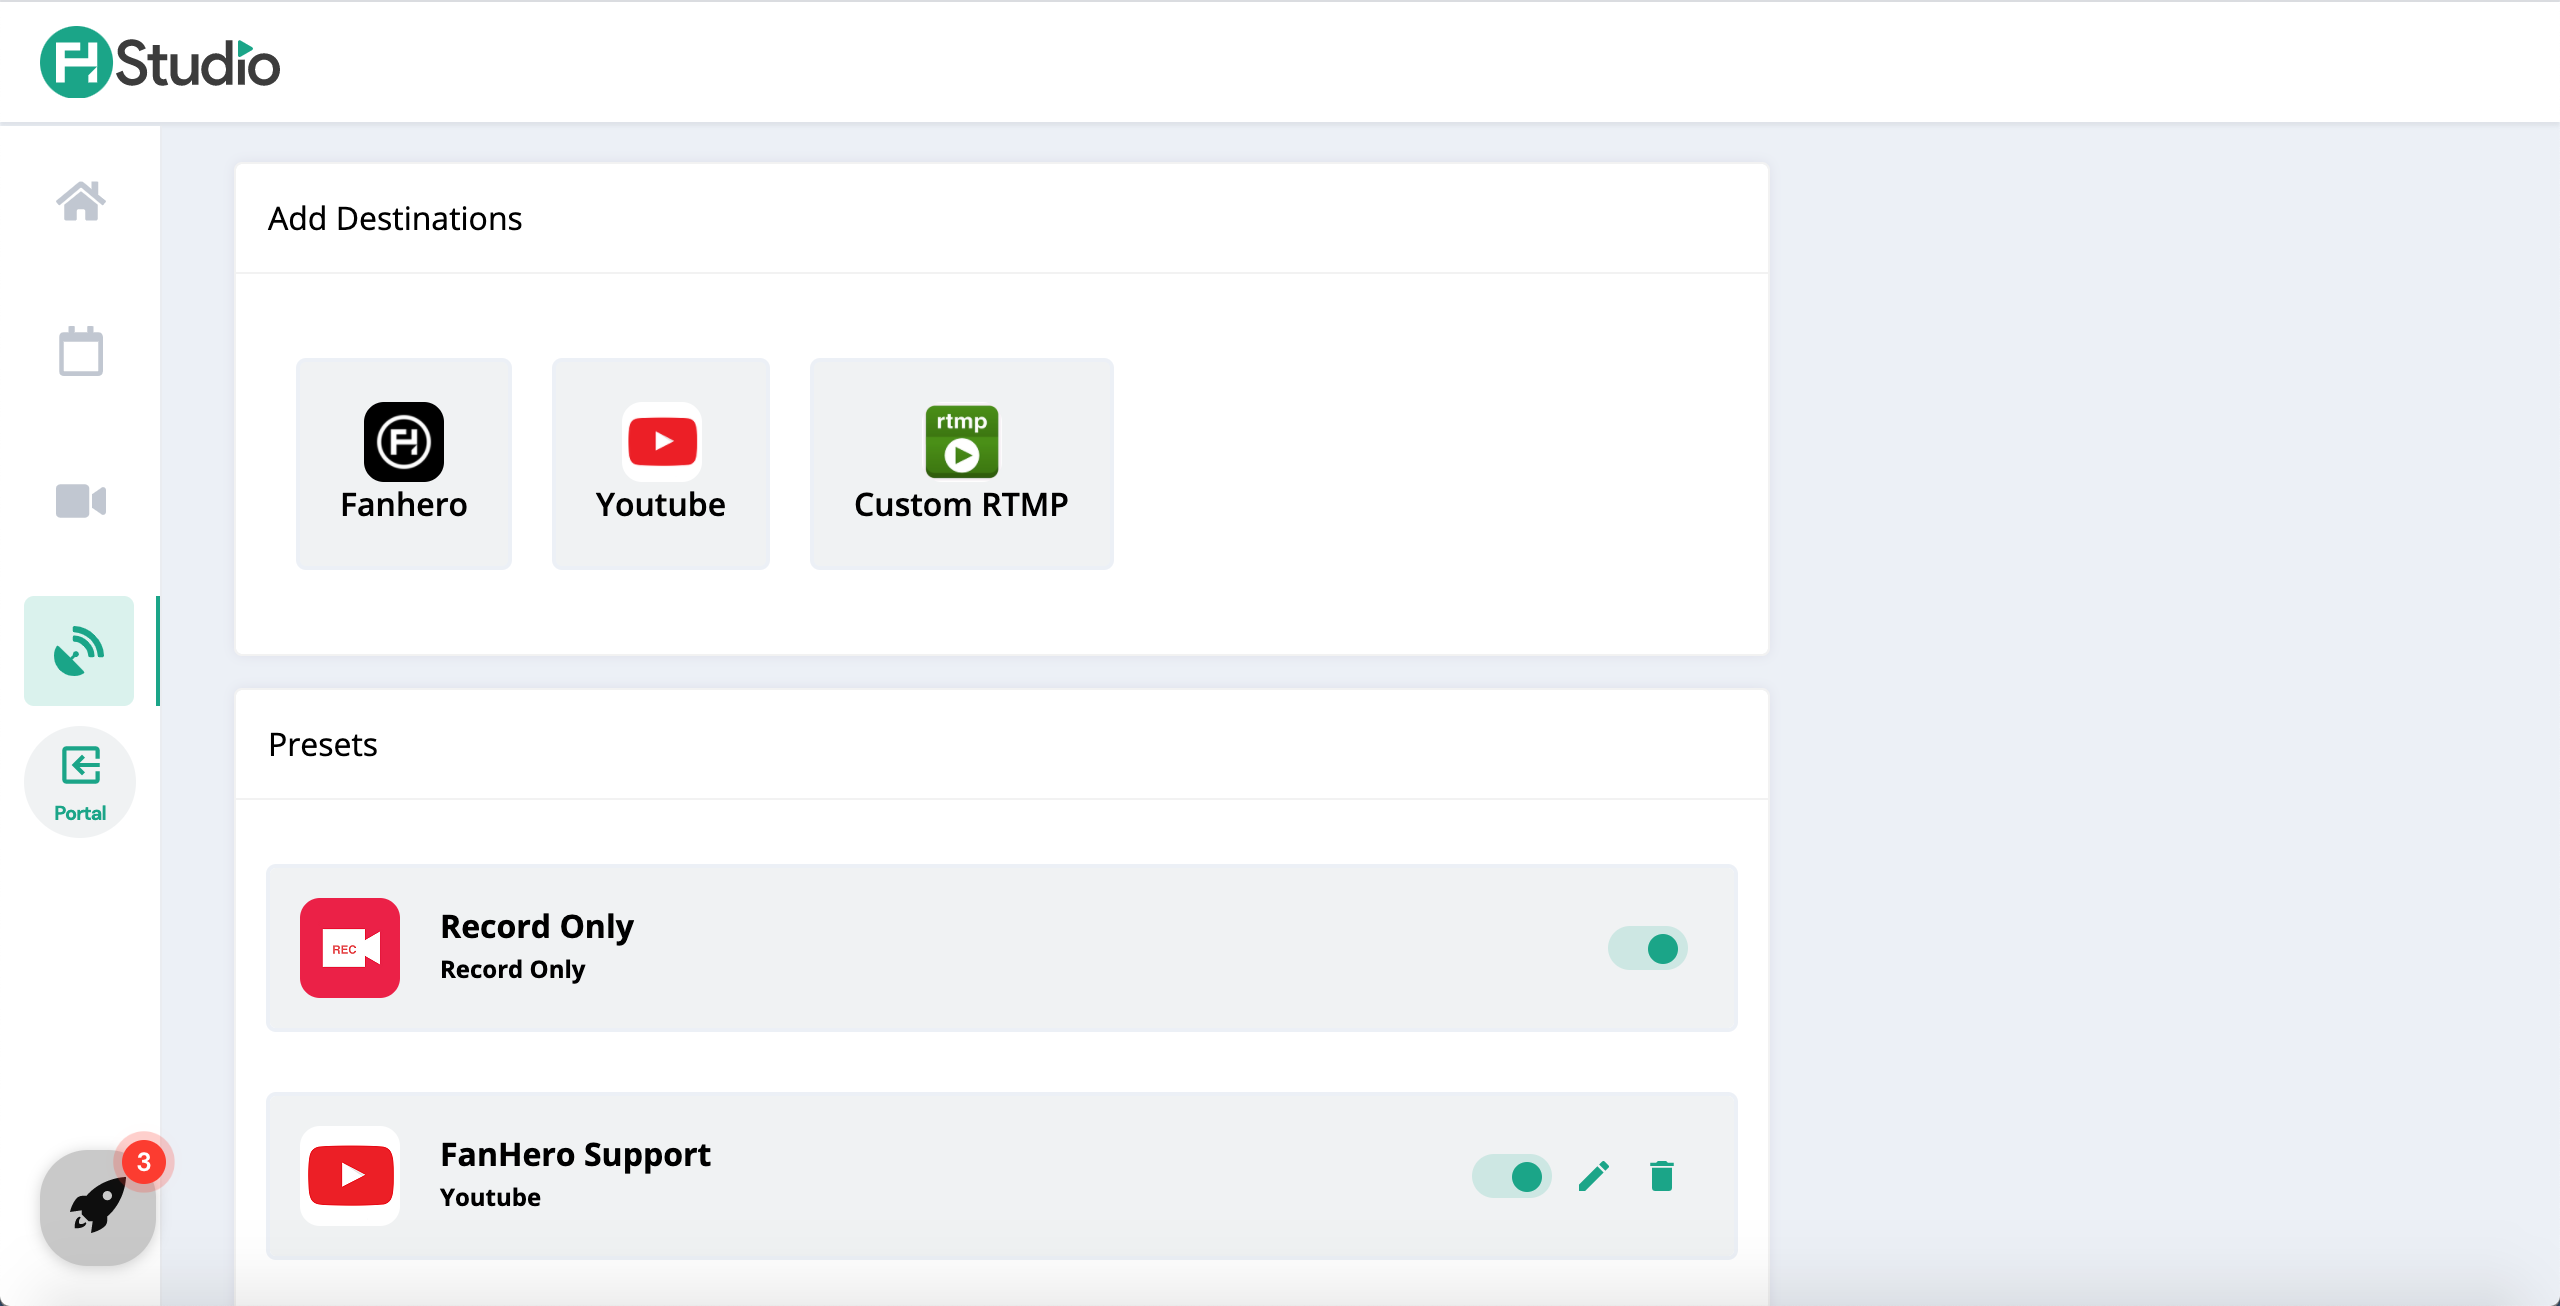
To add a new destination, choose the type of destination and follow the flow. If your FanHero Channel is already added as a destination, you won't be able to add it again.
In the list of Presets, you can edit the manage the destinations that were already added. If you disable a destination the toggle, then that destination will not be available while creating a stream.
From this screen, you can also edit the destination name or delete a destination.
Portal
Clicking on the Portal section will take you back to the Video portal platform.
Guest View
When a guest receives a link to join the stream, the first step is to add a name and then request access.
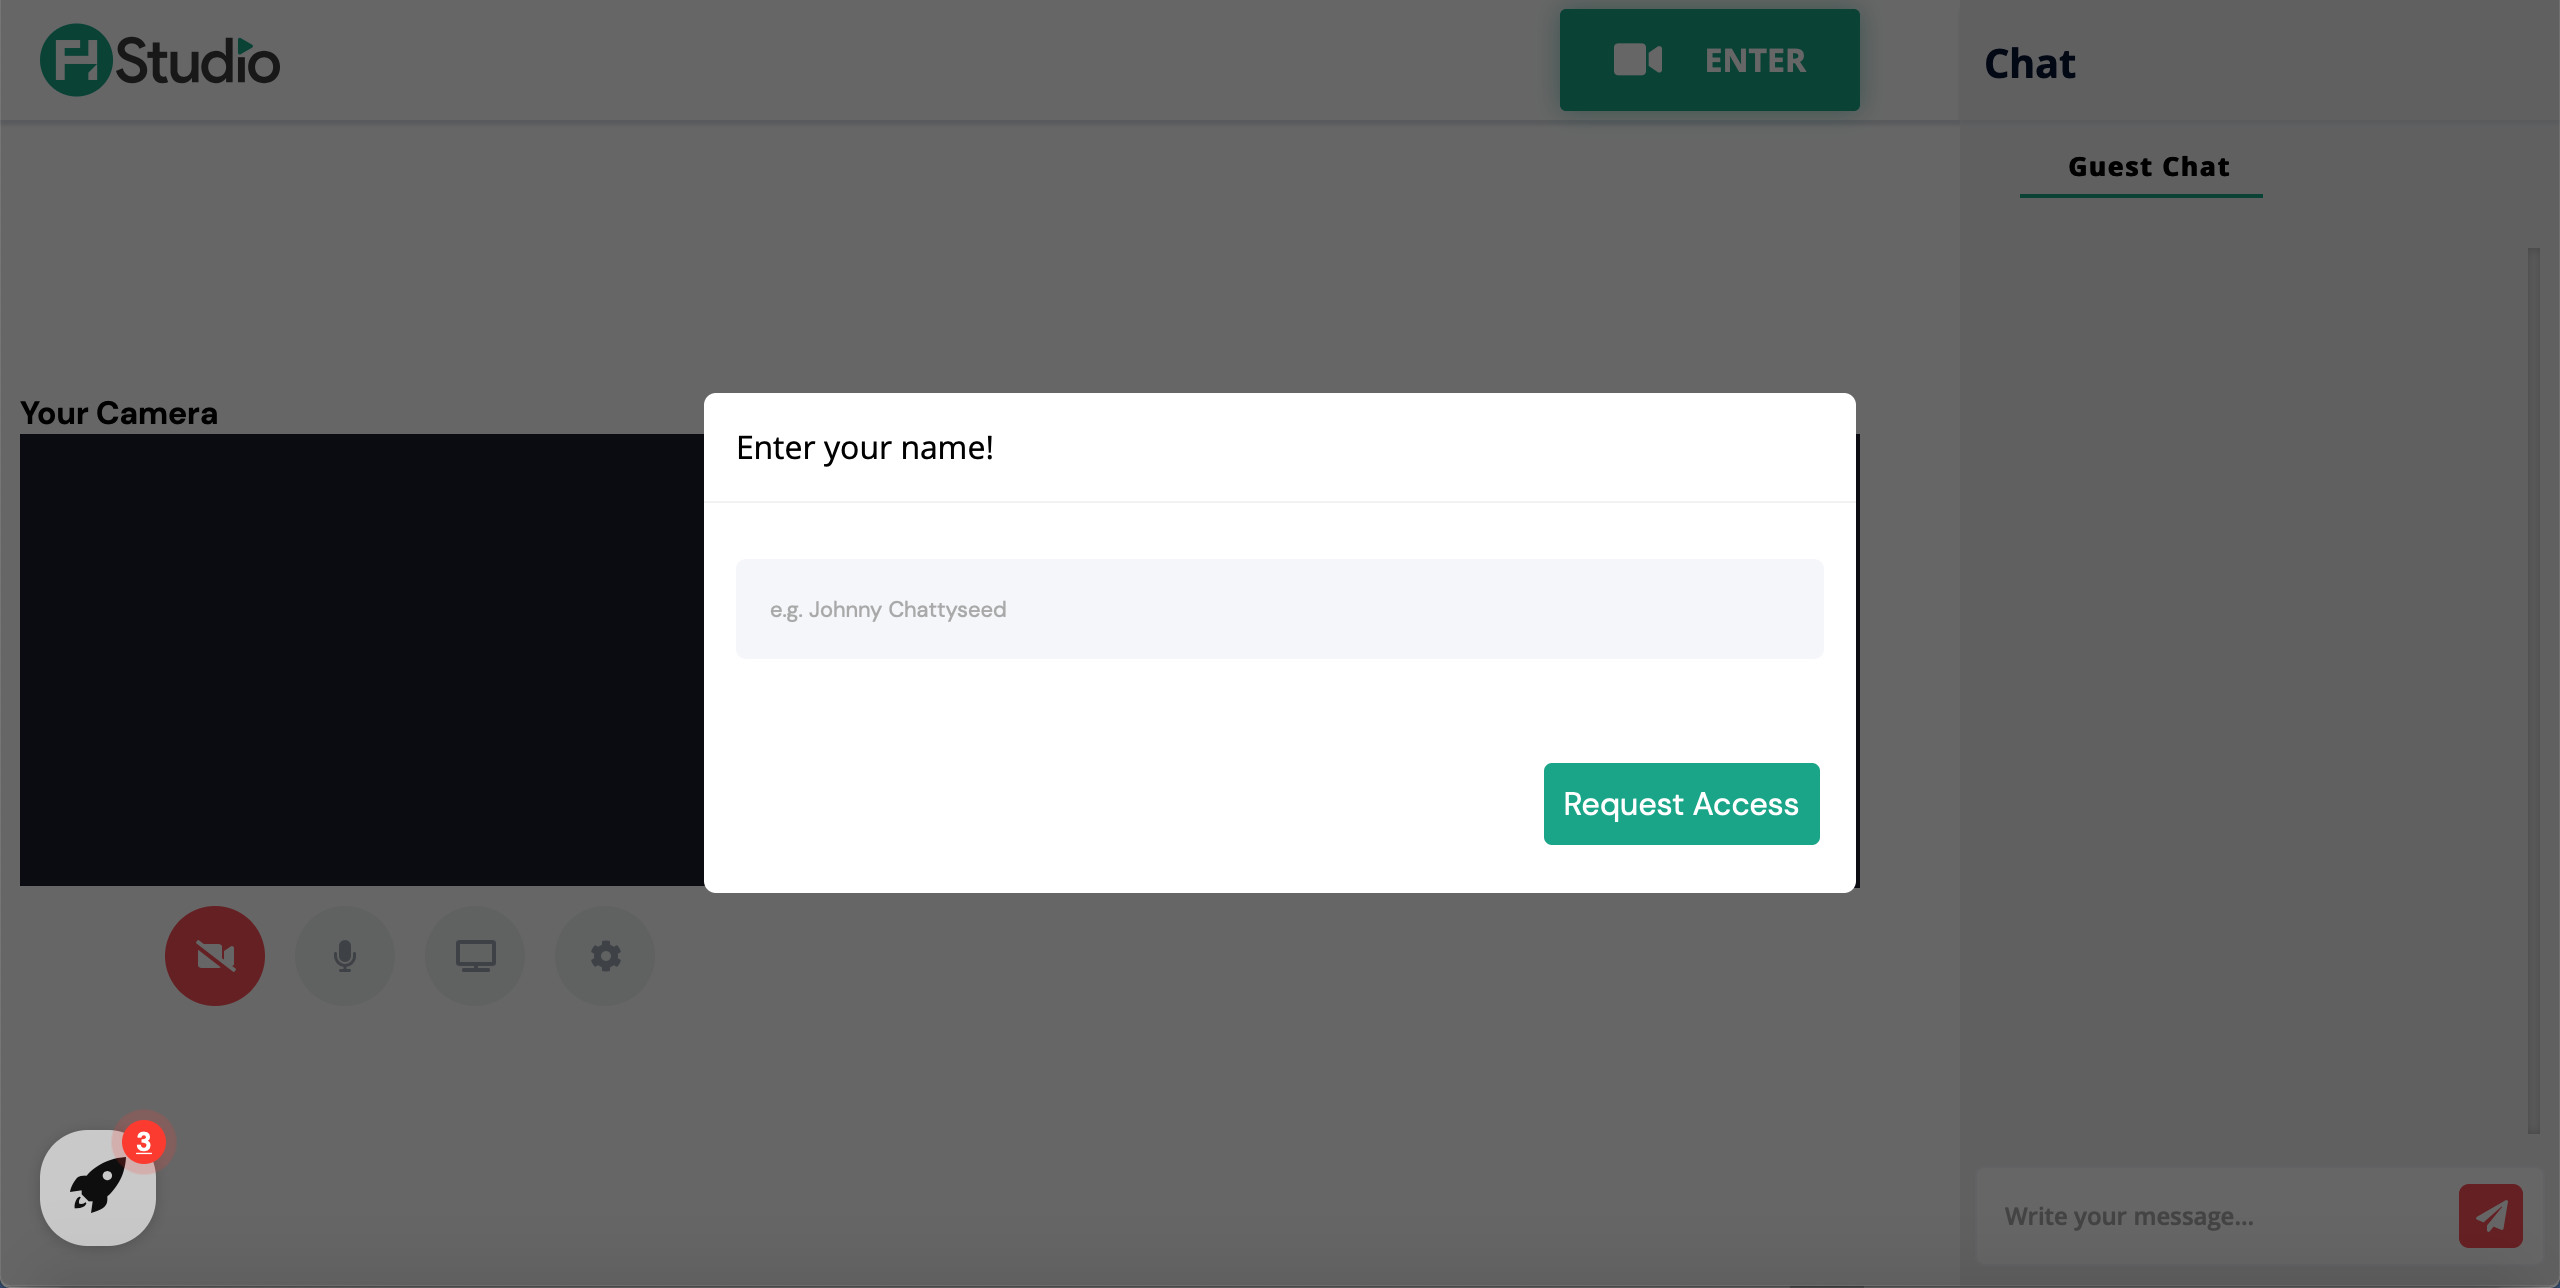
Access is granted and the guest user will join the stream. Note: at this point, your microphone will be muted.
This is the screen Guest users see during the stream.
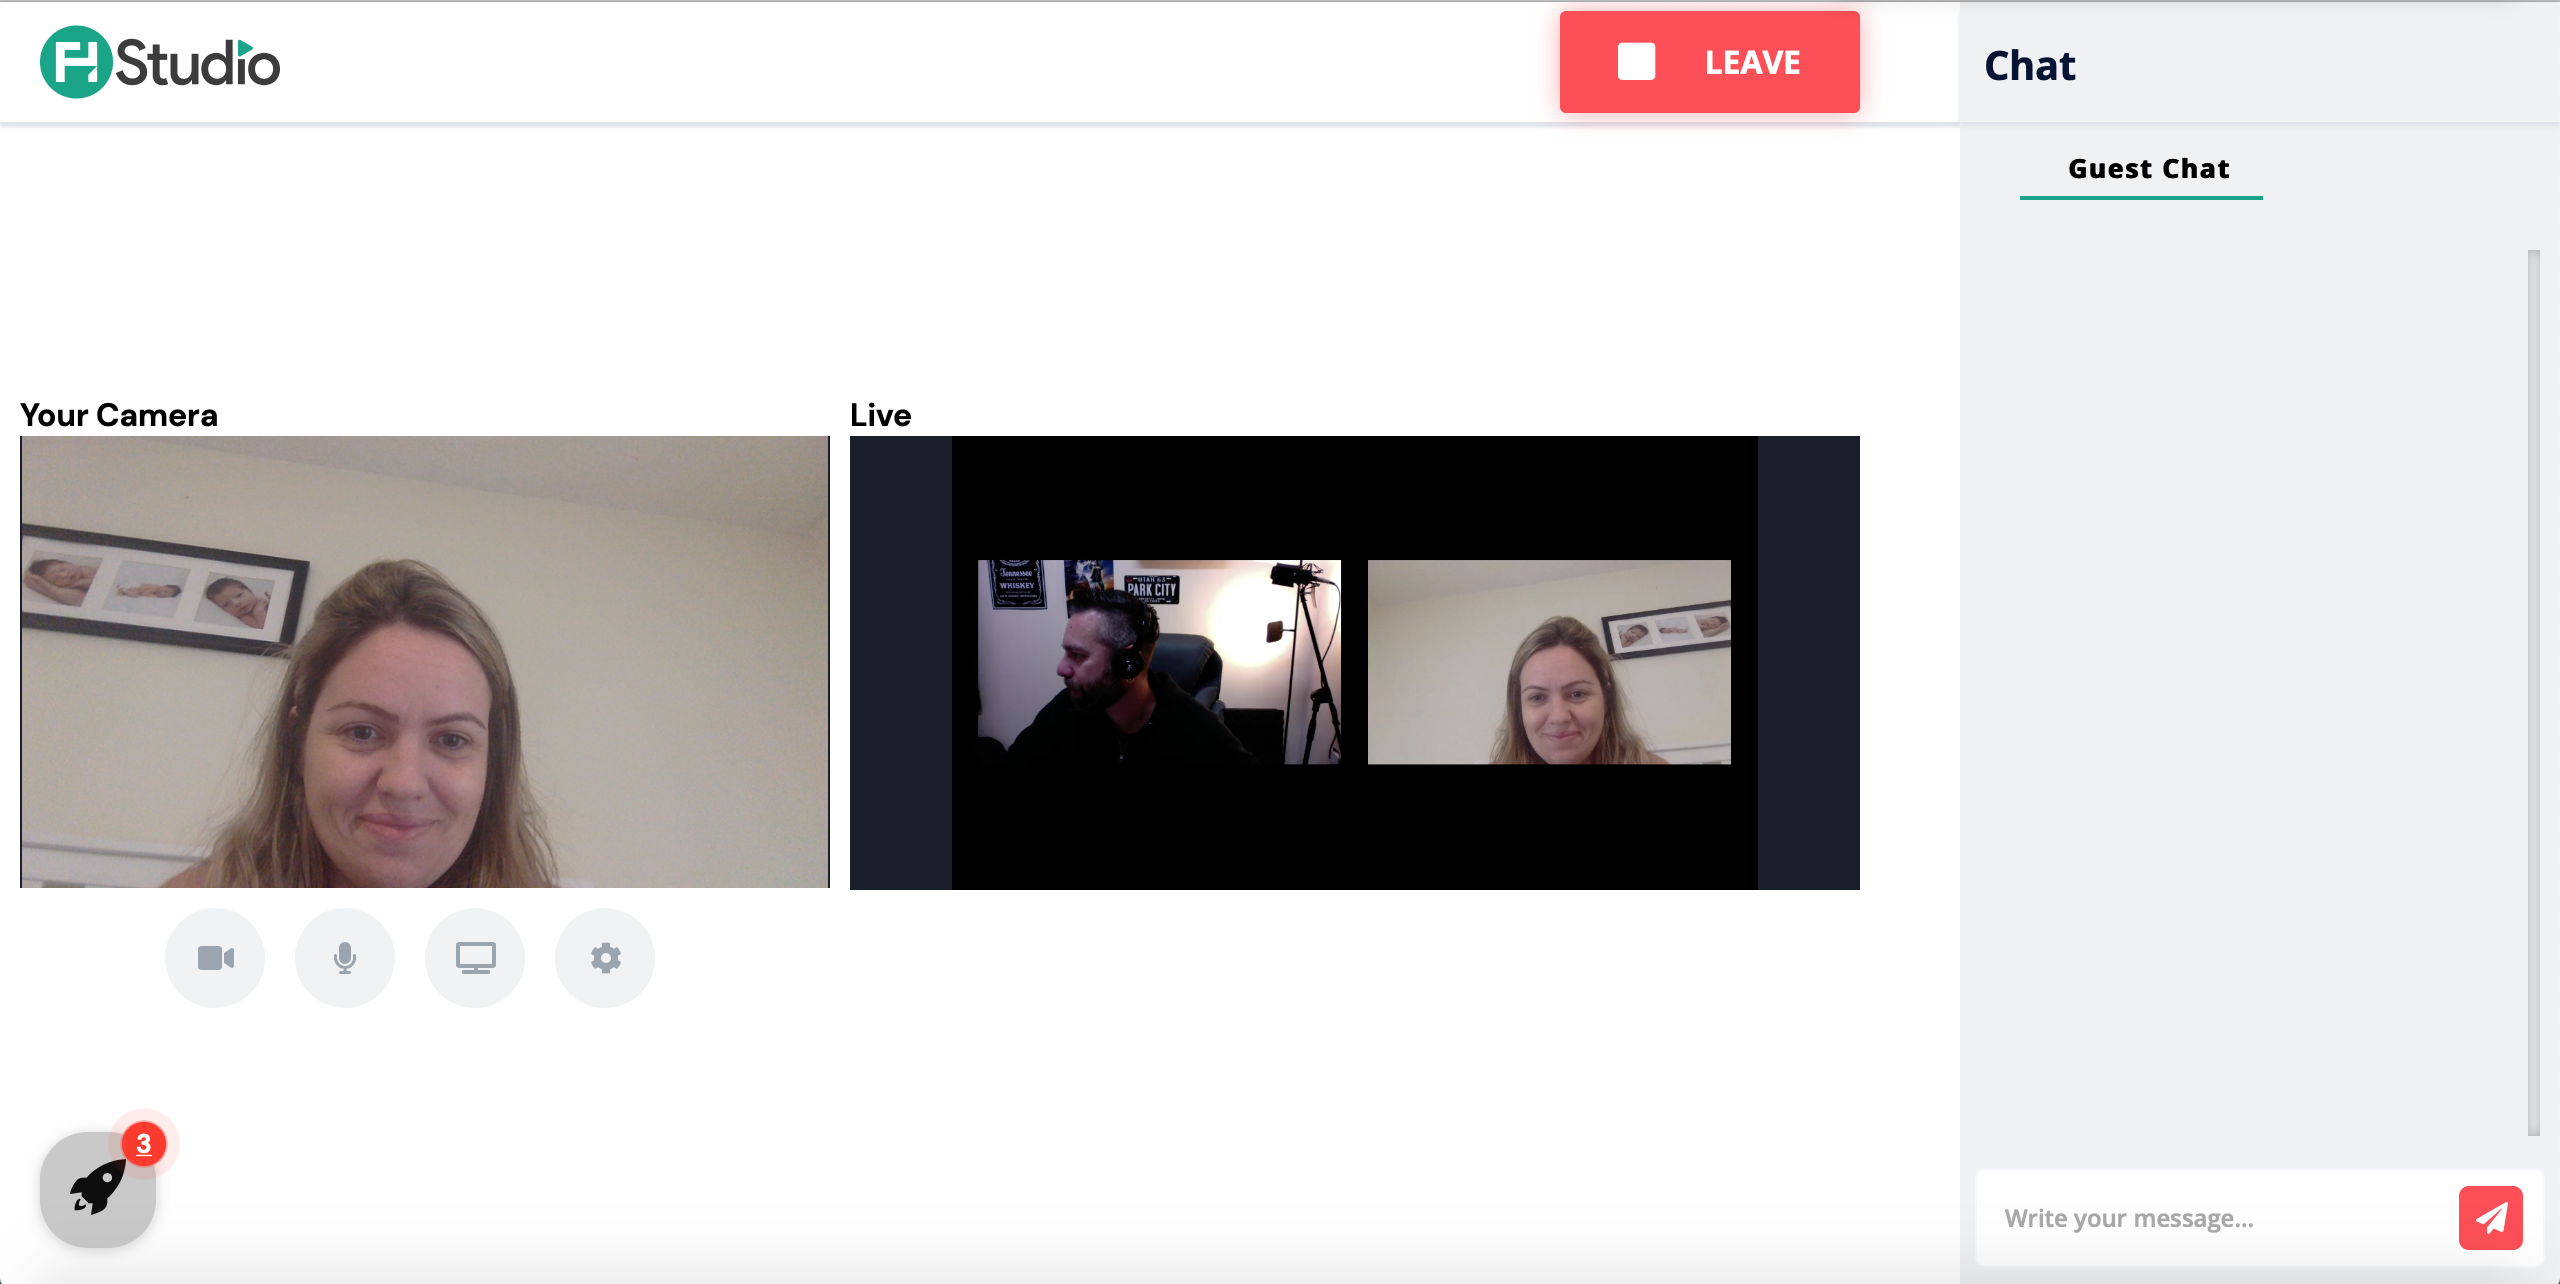
- Your Camera: this is your camera view.
- Live: this is what is actually being displayed in the live stream. In the example above, a canvas with a host and a guest is being displayed.
Controls
- Camera: ability to enable and disable your camera.
- Microphone: ability to enable and disable your mic.
- Screen share: ability to share your screen. A request will be sent to the host.
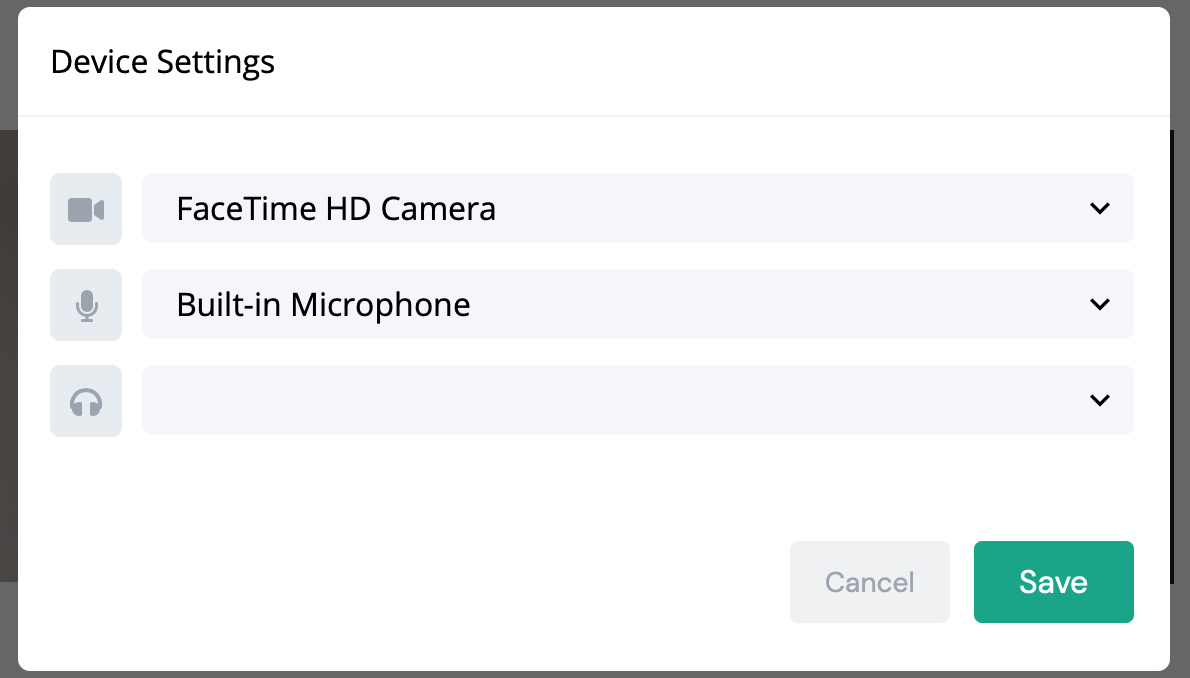
- Settings: ability to change your device settings such as camera, microphone and audio sources.
Guest users have the ability to engage with other guests using the Chat feature. This is a chat between guest users only. Users in other destinations are not able to see those messages.
Clicking Leave at the top will make the guest user leave the stream.
Updated 10 months ago